When you click on links to various merchants on this site and make a purchase, this can result in this site earning a commission. Affiliate programs and affiliations include, but are not limited to, the eBay Partner Network.
Hi 72,
WELL!!!!!
You must have your big boy panties on!!!!
It takes some serious courage to get to the point your photos show!
Regards,
Alan
Always things to learn�.
hinges/doors on before exterior paint
blackout paint under VIN plate
is there a date stamp (month/year) on the interior side of the hinge pillar?
If there is I can't make out anything. Oh & I just noticed that that joint is completely separated & someone in the past sprayed some kind of adhesive foam or something into it to hold it together.....WOW
& haha yes I agree this level of resto definitely takes guts..but I'm more determined to see this project through to the end than anything I've ever done. I believe I'm making good progress on it to only be about 4 months into the resto; if I can complete this project before or by the time I'm 25 I will be pleased. But anyway here's a pic of that area you asked about, check out that foam crap....it's the yellowish/orange color.
Hi 72,
That's really something.
As I said earlier� always something to see�.
The first photo (and it's a beauty!) shows the ground connection for the dash harness!!! The location for that ground gets asked about a lot!!!!
Regards,
Alan
Hi 72,
That's really something.
As I said earlier� always something to see�.
The first photo (and it's a beauty!) shows the ground connection for the dash harness!!! The location for that ground gets asked about a lot!!!!
Regards,
Alan
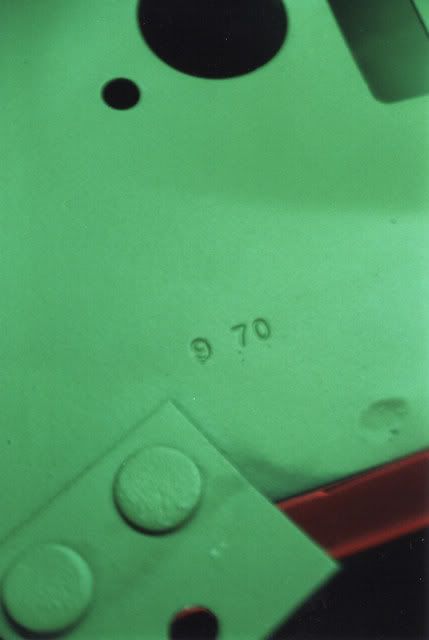
might this help find it
I see it now, I was looking a little too high up. It reads
"8 71" cool!
Question to Alan & 69vett
If you were in my situation & had one of two choices:
1. Replace portions of birdcage
2. Buy used complete birdcage & swap panels
Which would you do? i know the amount of work I'm talking, but this birdcage sure is tempting. I think you've already seen it Alan, I believe I asked you if it would work for my 72 since it says it's for a 70-71. Its already been media blasted & repaired & primed in the green zinc.
Last edited by 72Shark_VAL; Apr 25, 2017 at 07:20 PM.
That birdcage is pretty expensive.
I'm doing this on my 72.
Bought the pictured (here) part for Much Less.
And I got to choose the one I wanted from more than one he has.
That birdcage is pretty expensive.
I'm doing this on my 72.
Bought the pictured (here) part for Much Less.
And I got to choose the one I wanted from more than one he has.
Looks good! I remember you commenting on my other thread I need to give Randy a call. Mine is rusted in the rear overhead too behind where you sit, does he cut them for each customer or? How much did you give for that partial birdcage? If you don't mind me asking
Last edited by 72Shark_VAL; Apr 26, 2017 at 01:55 AM.
Goes to show what you can find underneath. I'm looking at the other parts that look fine. Scary when you go buy a C3 and think it's clean!!! Excellent pictures!!!
I used to be in the metal restoration business for antique and classic vehicles and tackled many projects like yours but today at my age I see that and get tired just looking at it. Stick with it though and you will have something worth the trouble when it is completed.


 But anyway here's a pic of that area you asked about, check out that foam crap....it's the yellowish/orange color.


 good luck you can do it.


