When you click on links to various merchants on this site and make a purchase, this can result in this site earning a commission. Affiliate programs and affiliations include, but are not limited to, the eBay Partner Network.
The dash is going to look great. You must be one of Santa's favorites to get all those goodies this soon.
Thanks, we shall see!
Right now it looks like a.d.d. but what I am really doing is just refinishing things as I pick them out of the boxes that they came in. It all has to get done anyway...
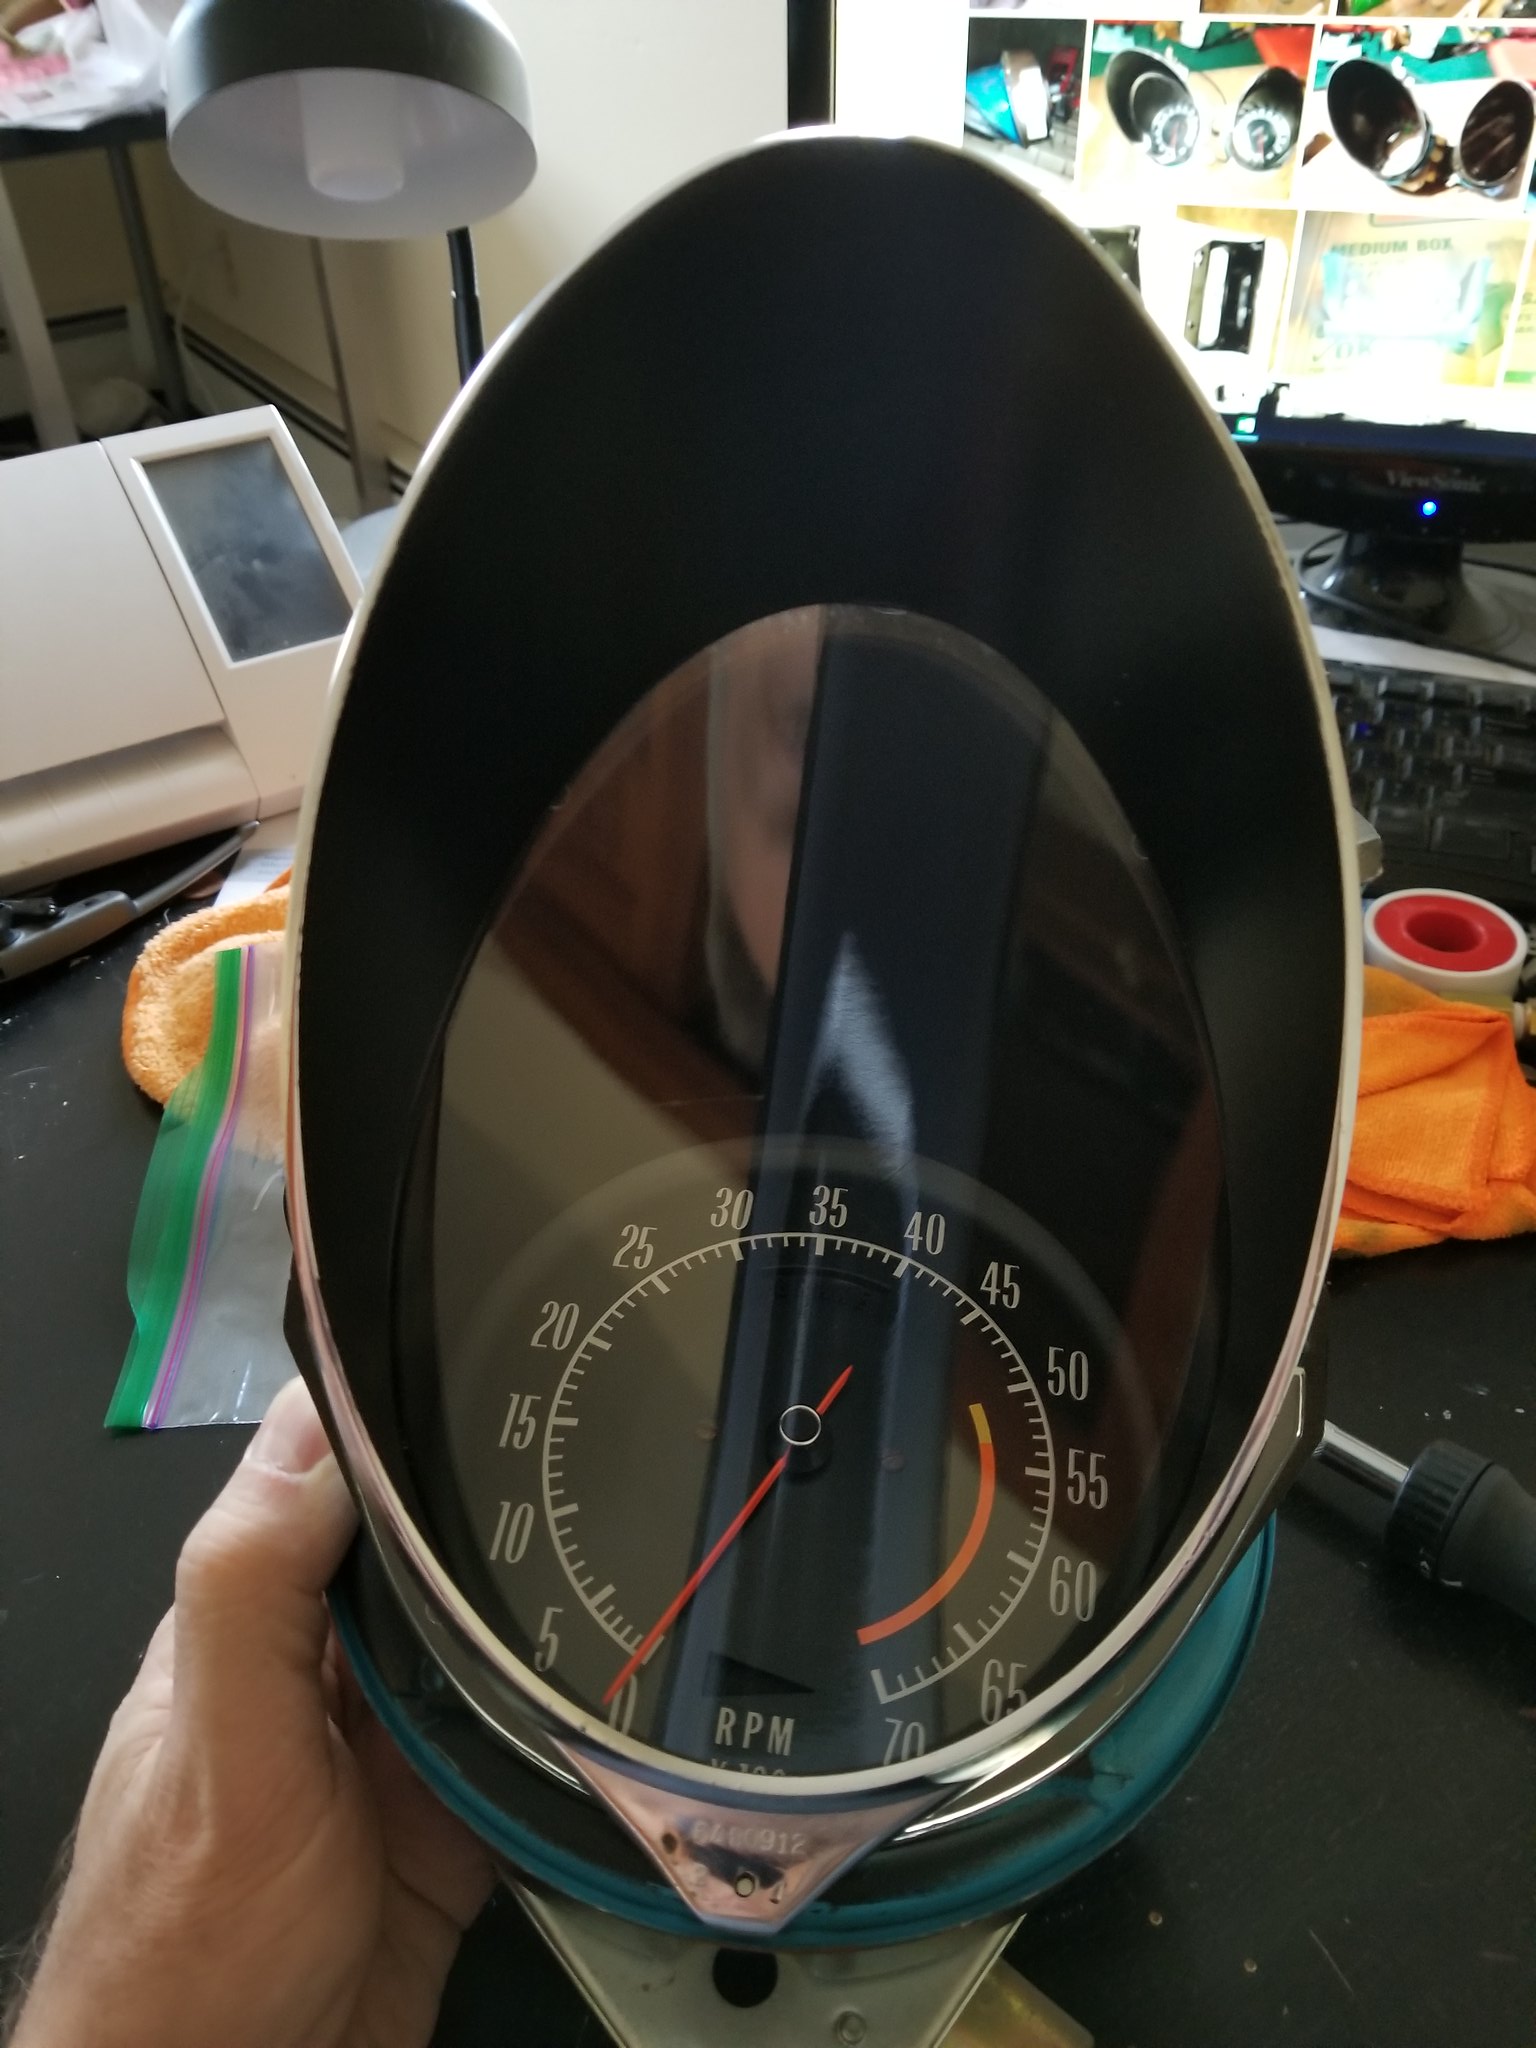
I finished the tach and speedo this morning. Significantly better than what they started like, wouldn't you agree?
I have some errands to run now but more will come this evening.
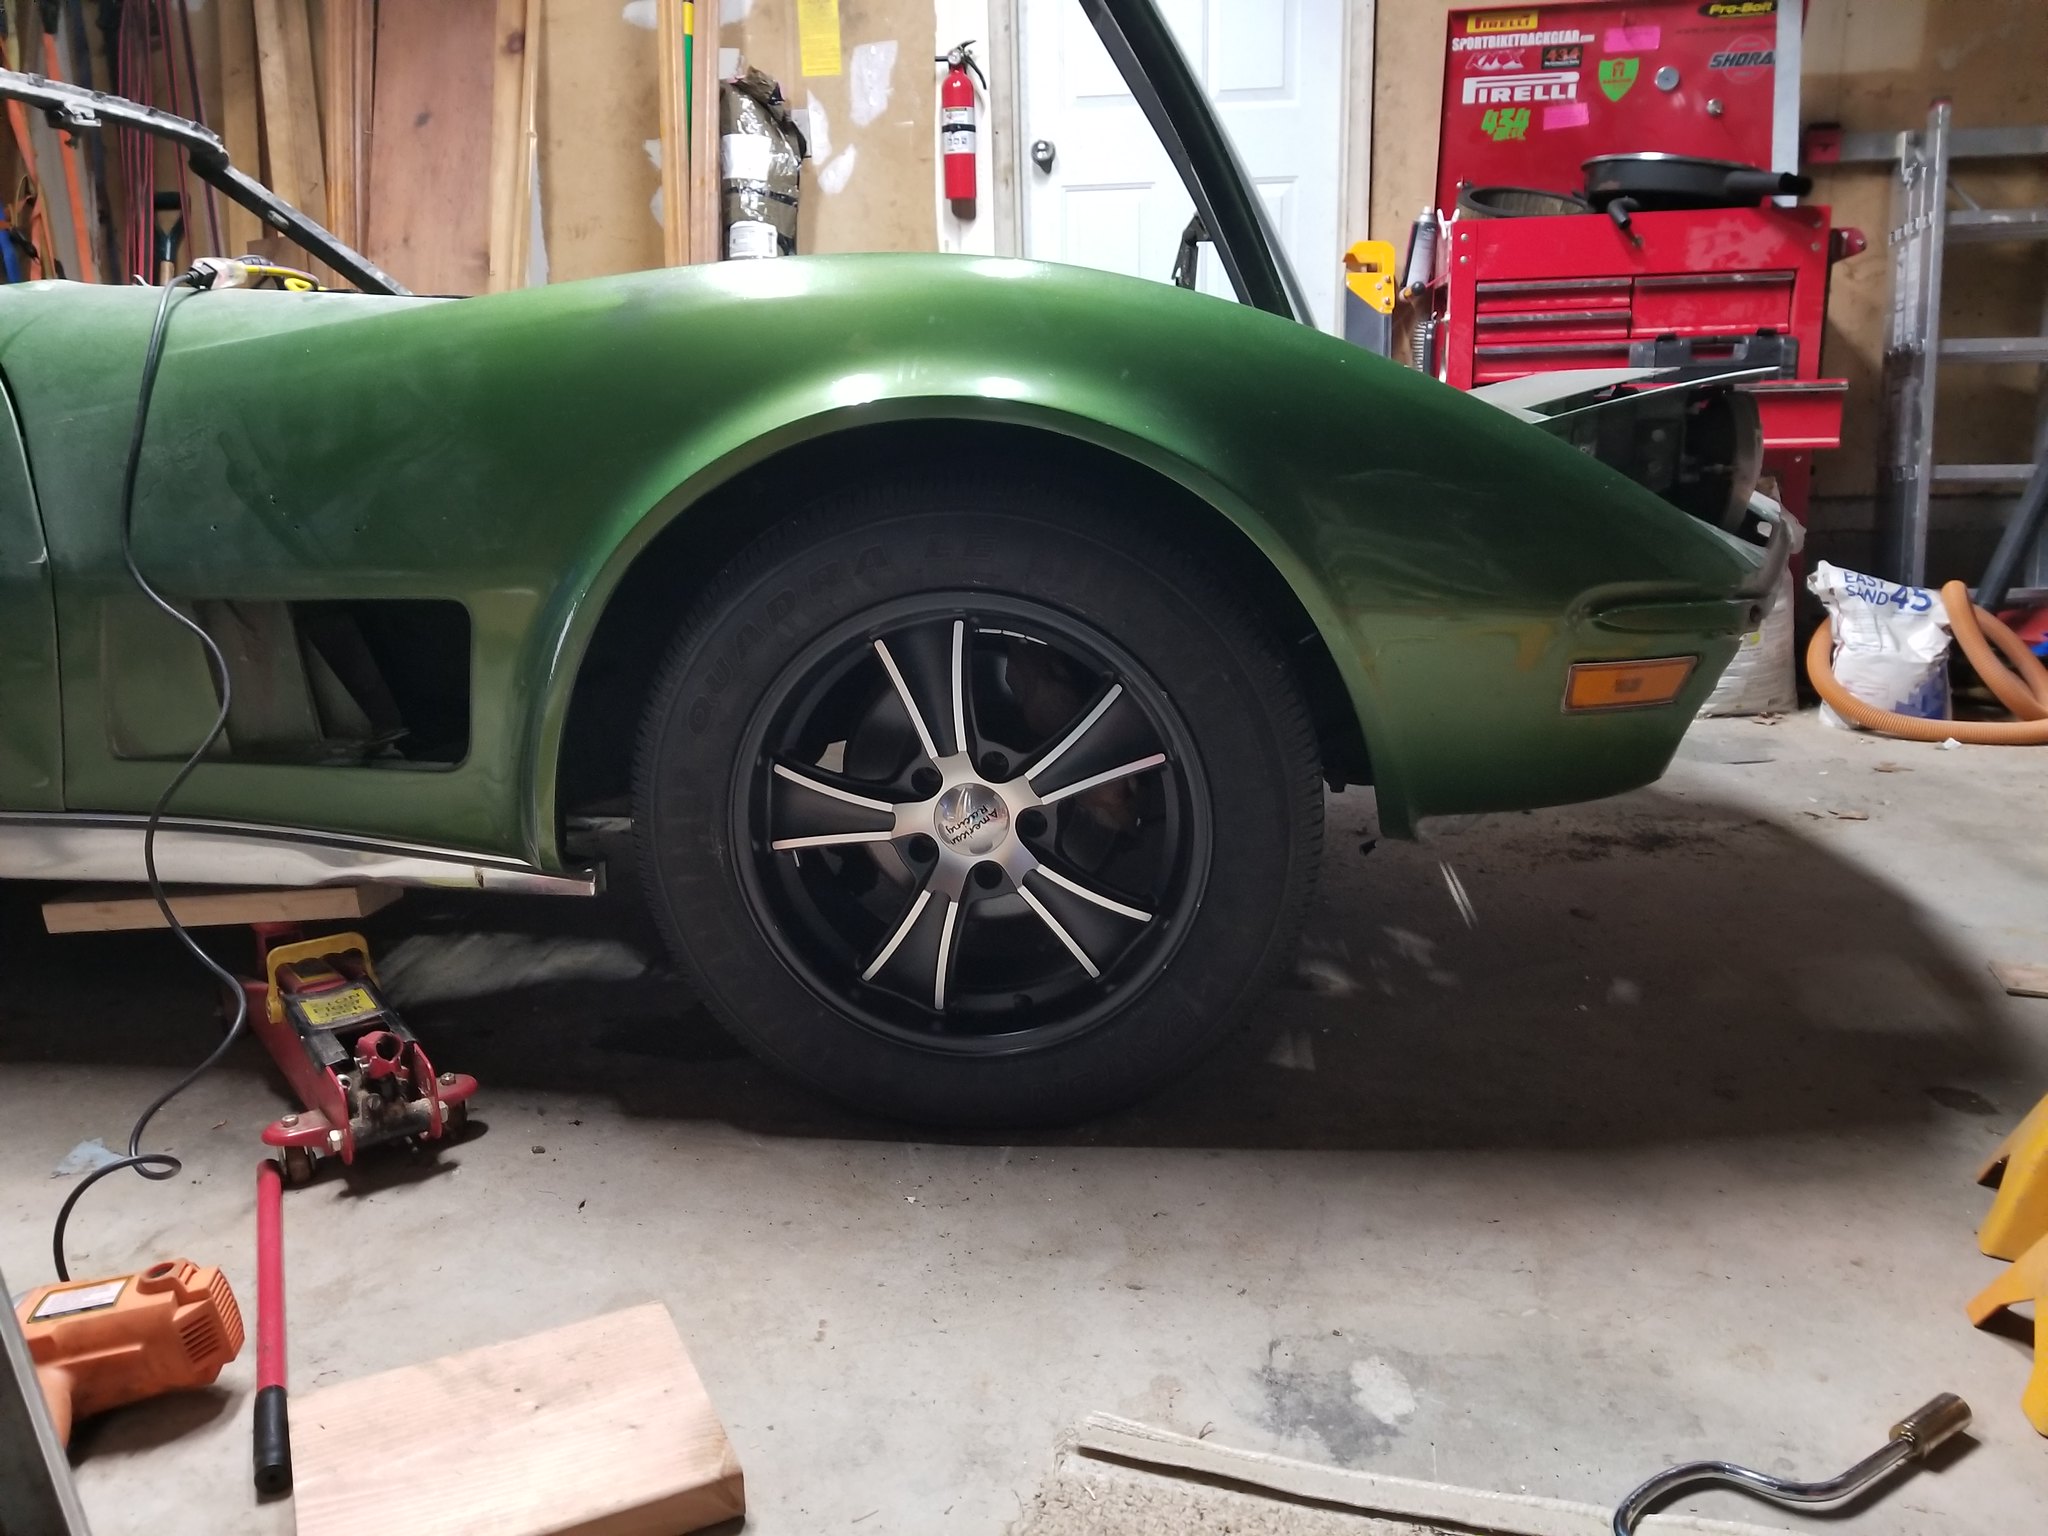
I haven't had much time to sneak out to the garage with all the pending holiday madness but I was able to get an hour or two tonight. The goal was to test fit the wheels that I bought and then to remove the calipers and rotors for reconditioning.
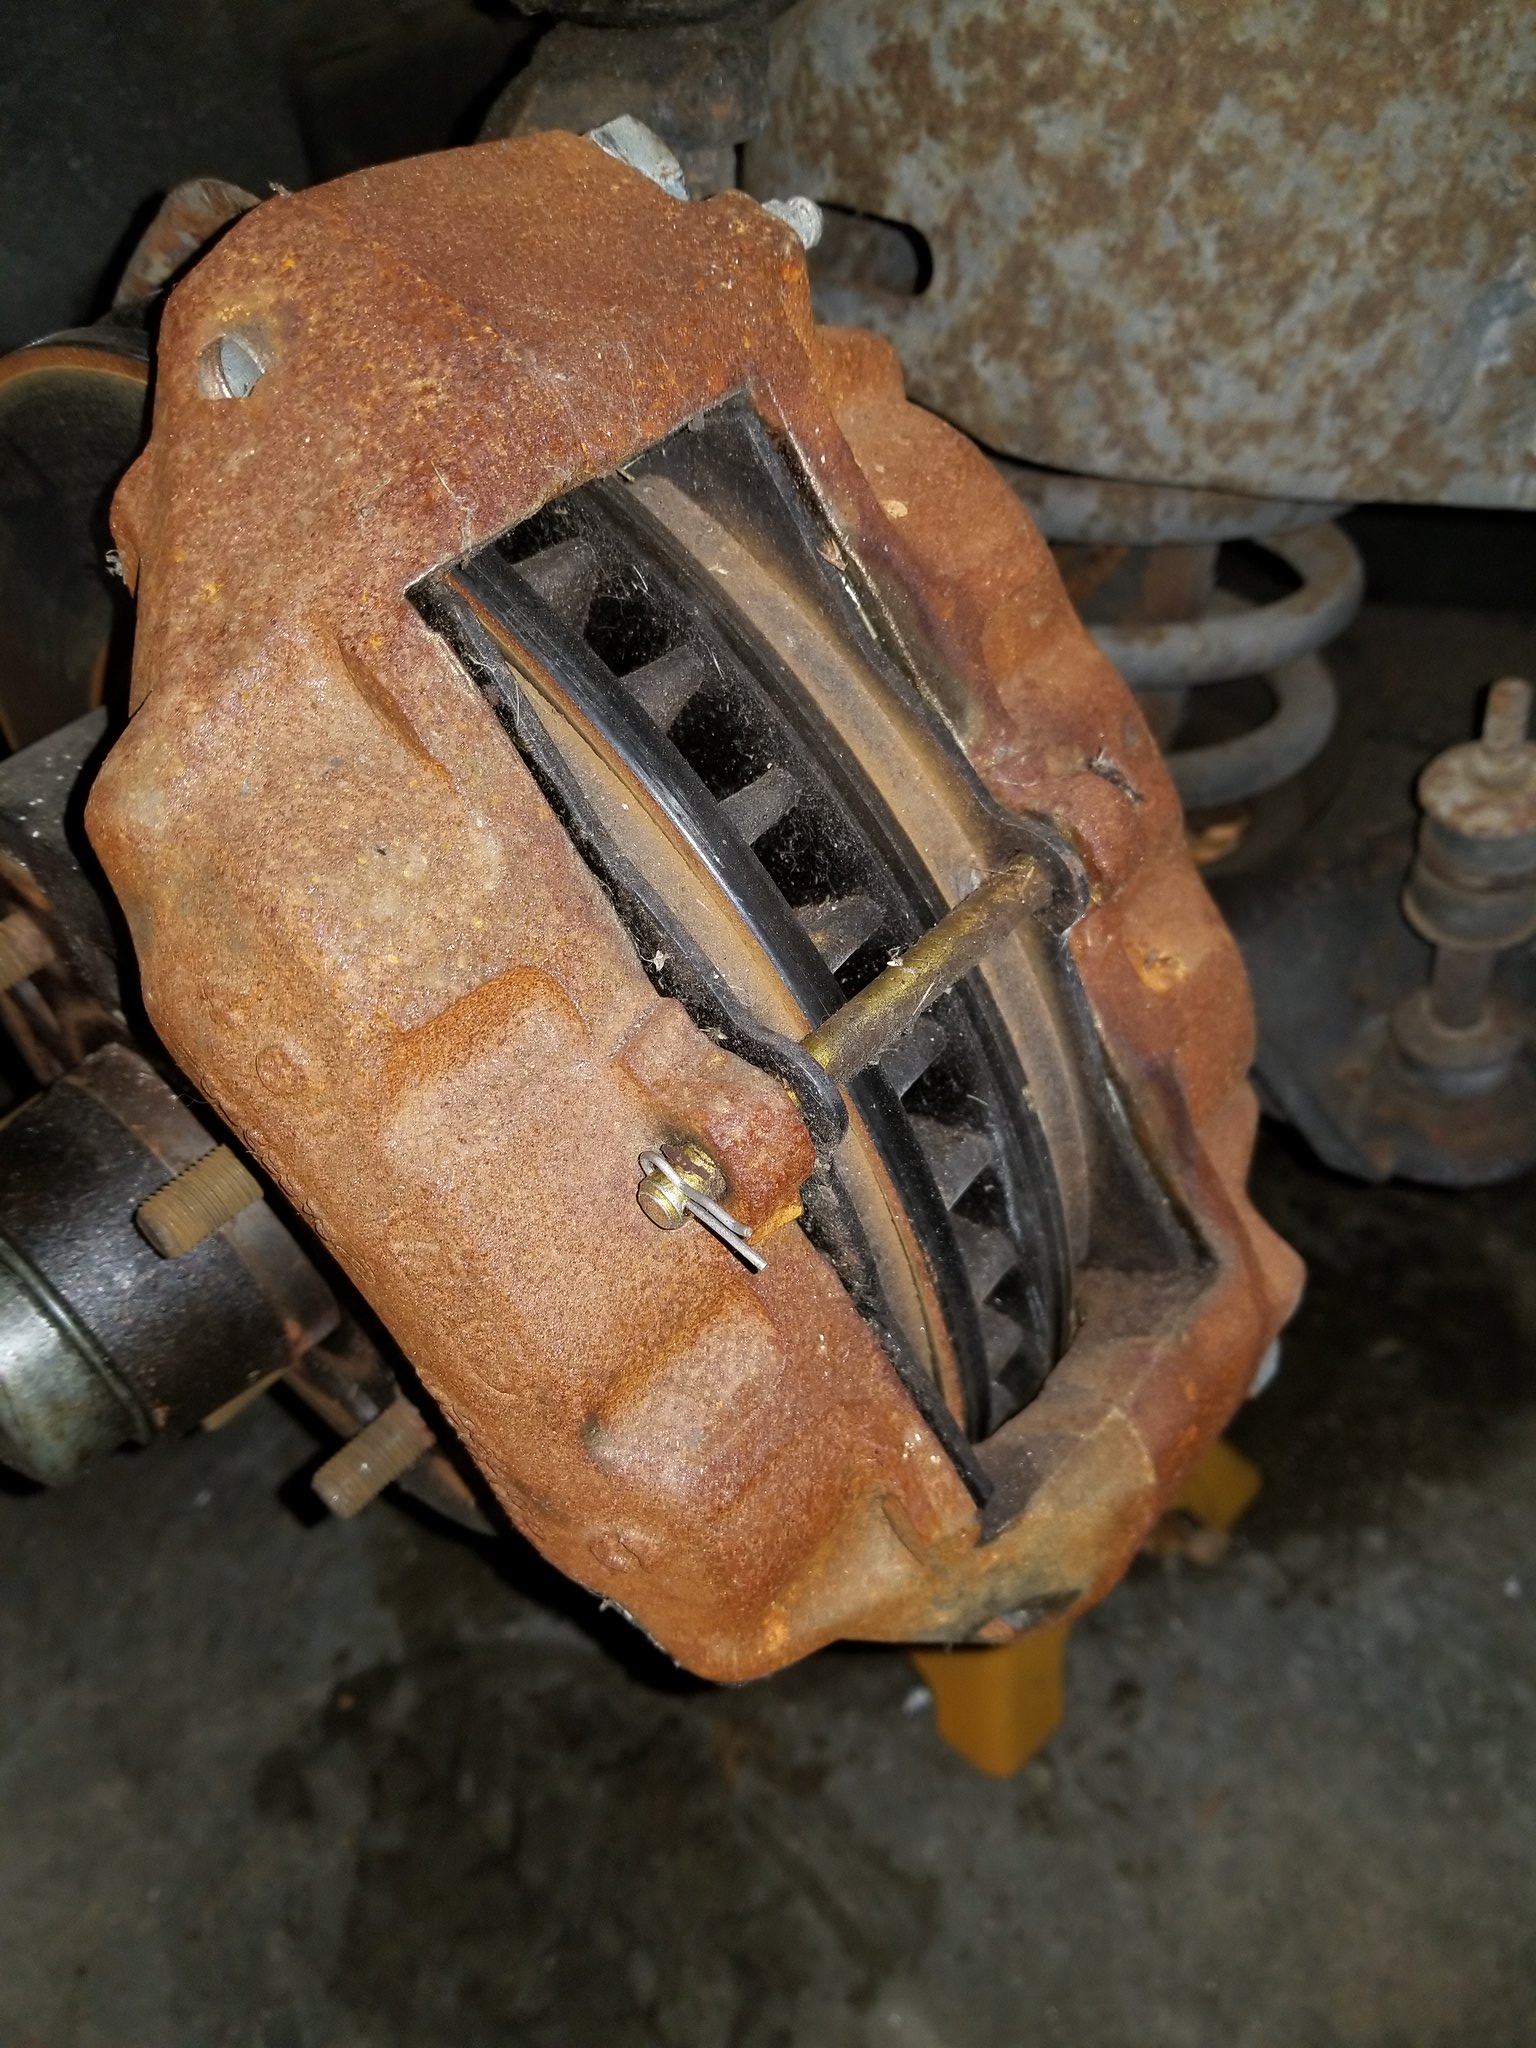
I was pleasantly surprised to see that the pads and rotors have some surface rust from sitting but other than that they are brand new. The brake pad hardware had been replaced recently as well. I have caliper rebuild kits here since I think it is a good idea to rebuild them at this stage, plus I would need to completely disassemble them for powder coating anyway. It looks like I will be able to re-use these rotors which is great news.
The calipers come apart tomorrow and will begin the process of cleaning, powder coating, and rebuilding them.
In the meantime, here is a shot of the wheels I have chosen. I think they are a tad dark next to the green however the final paint color will be orange and I think it will really pop at that point.
And some shots of the brake hardware. It really is in surprisingly good shape after you get past the surface rust!
The Chrome paint on the air vents does a good job as well, its hard to reproduce something that looks like chrome.
Also that orange paint colour is going to POP !!
Thanks Craig. I am not completely thrilled with the chrome on the vents so I am continuing to look for a better solution however in the interim I think it will do just fine.
And thanks also for your thoughts on the color. I am pretty excited to get to that stage although it is a LONG way off.
Well XMas is over and Santa was kind enough to get my cylinder heads back from the machine shop with a clean bill of health so I thought that I would take the time to assemble them.
I have not touched a SBC since the mid-80's so I made sure to do some reading as a refresher but in the end it was pretty much like I remembered and was very easy.
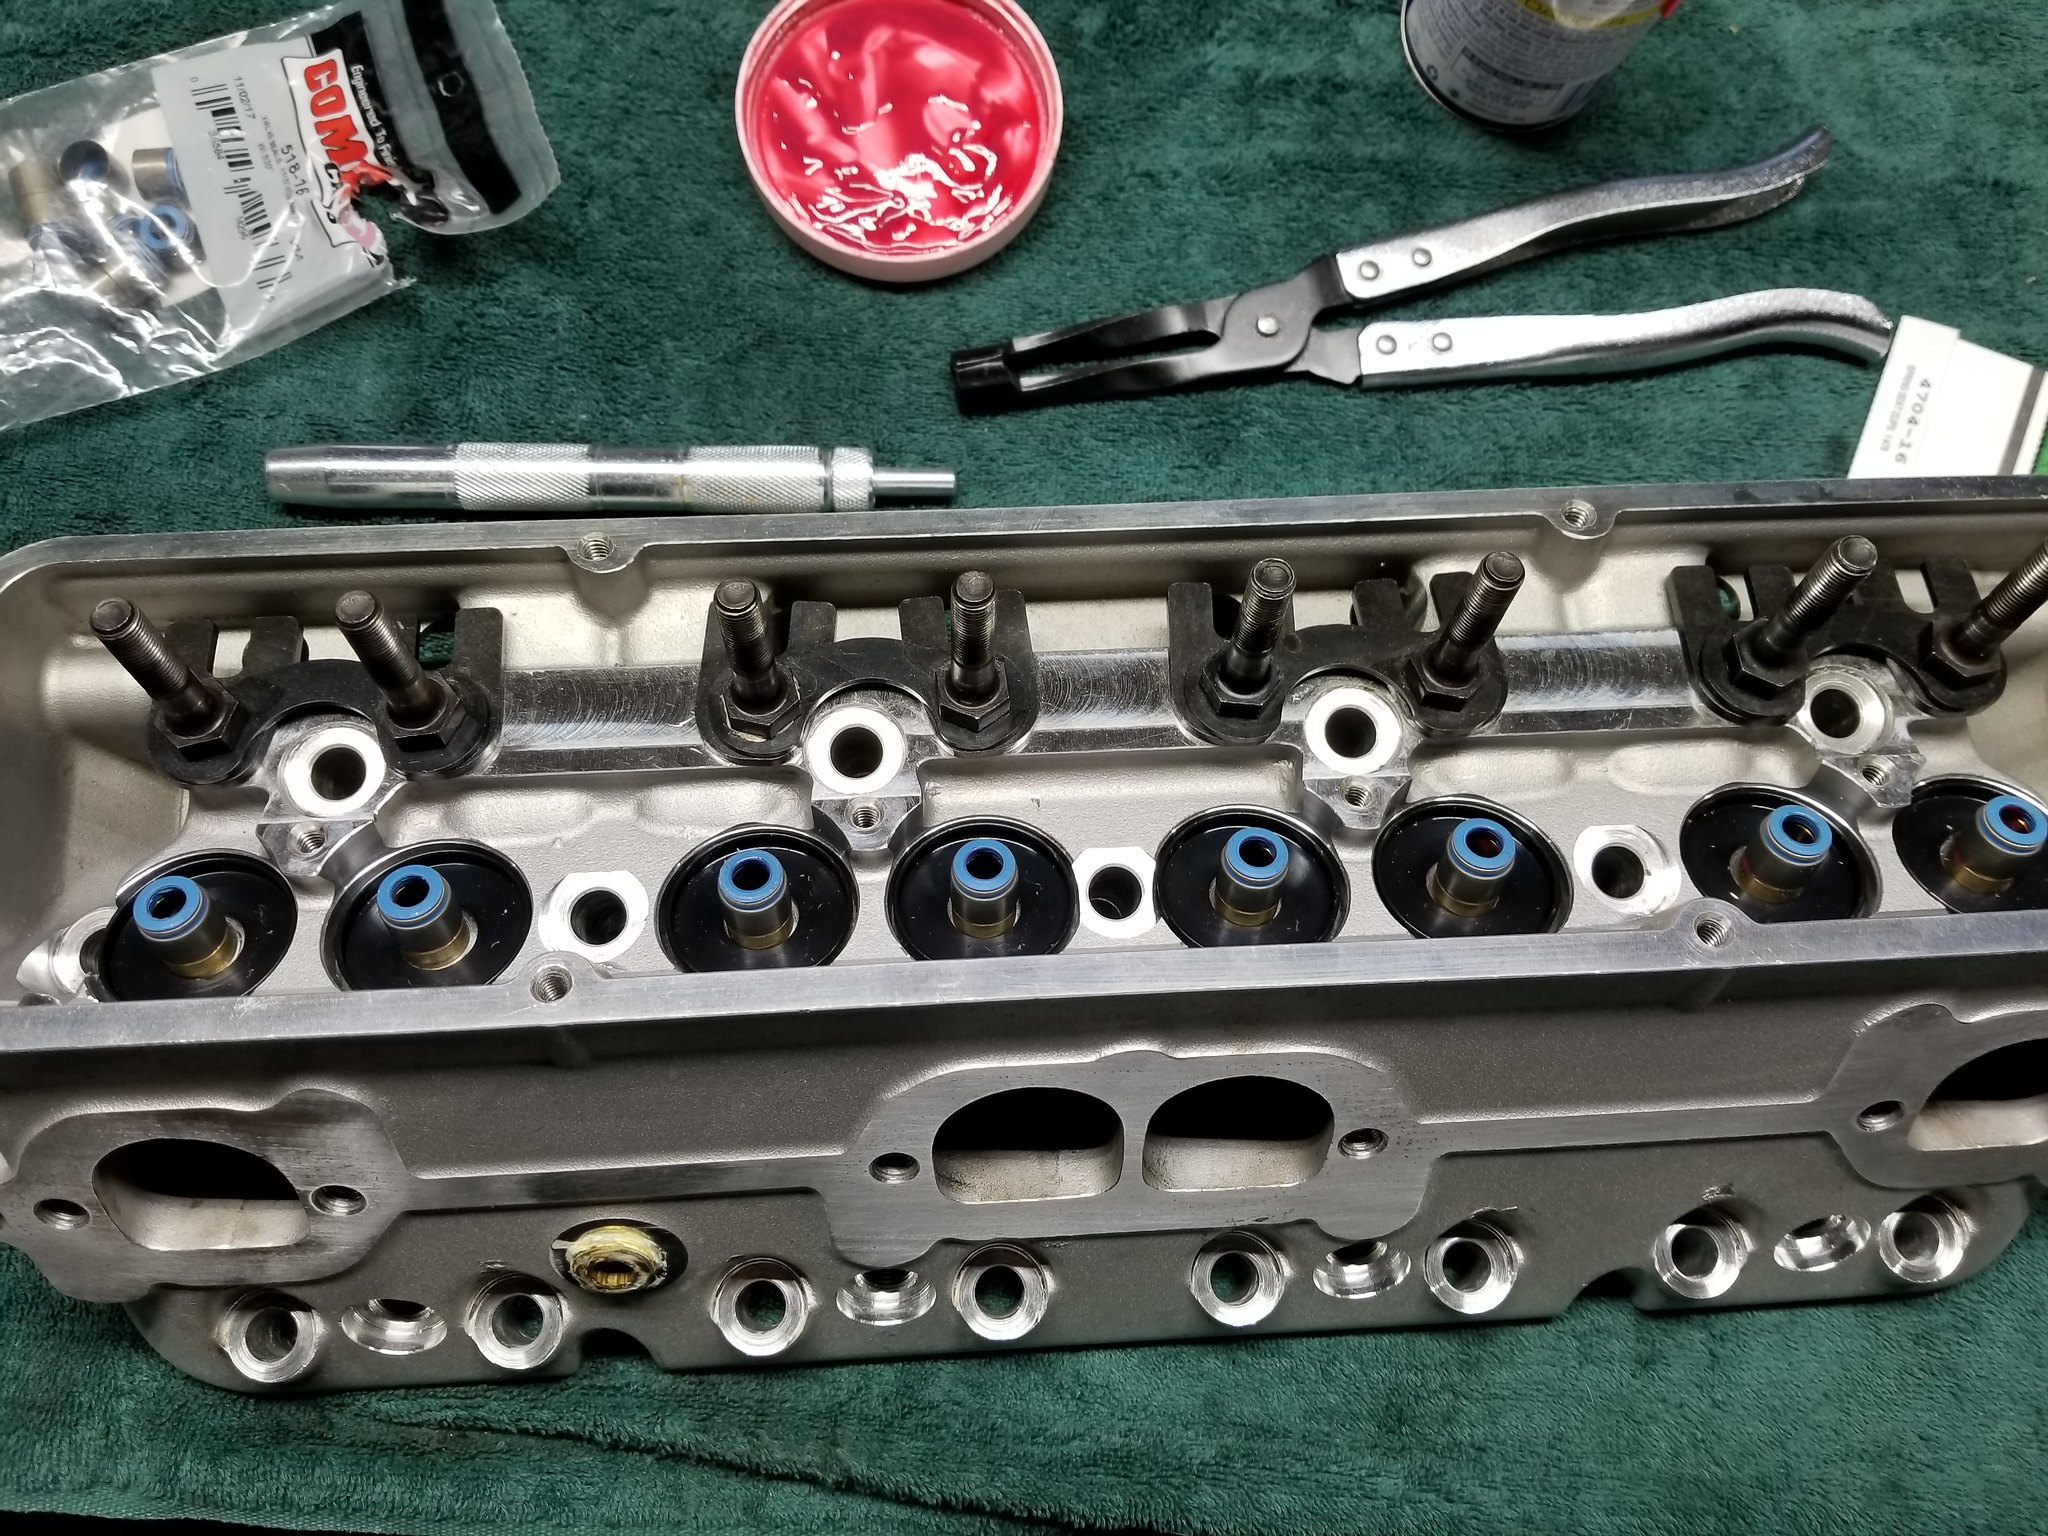
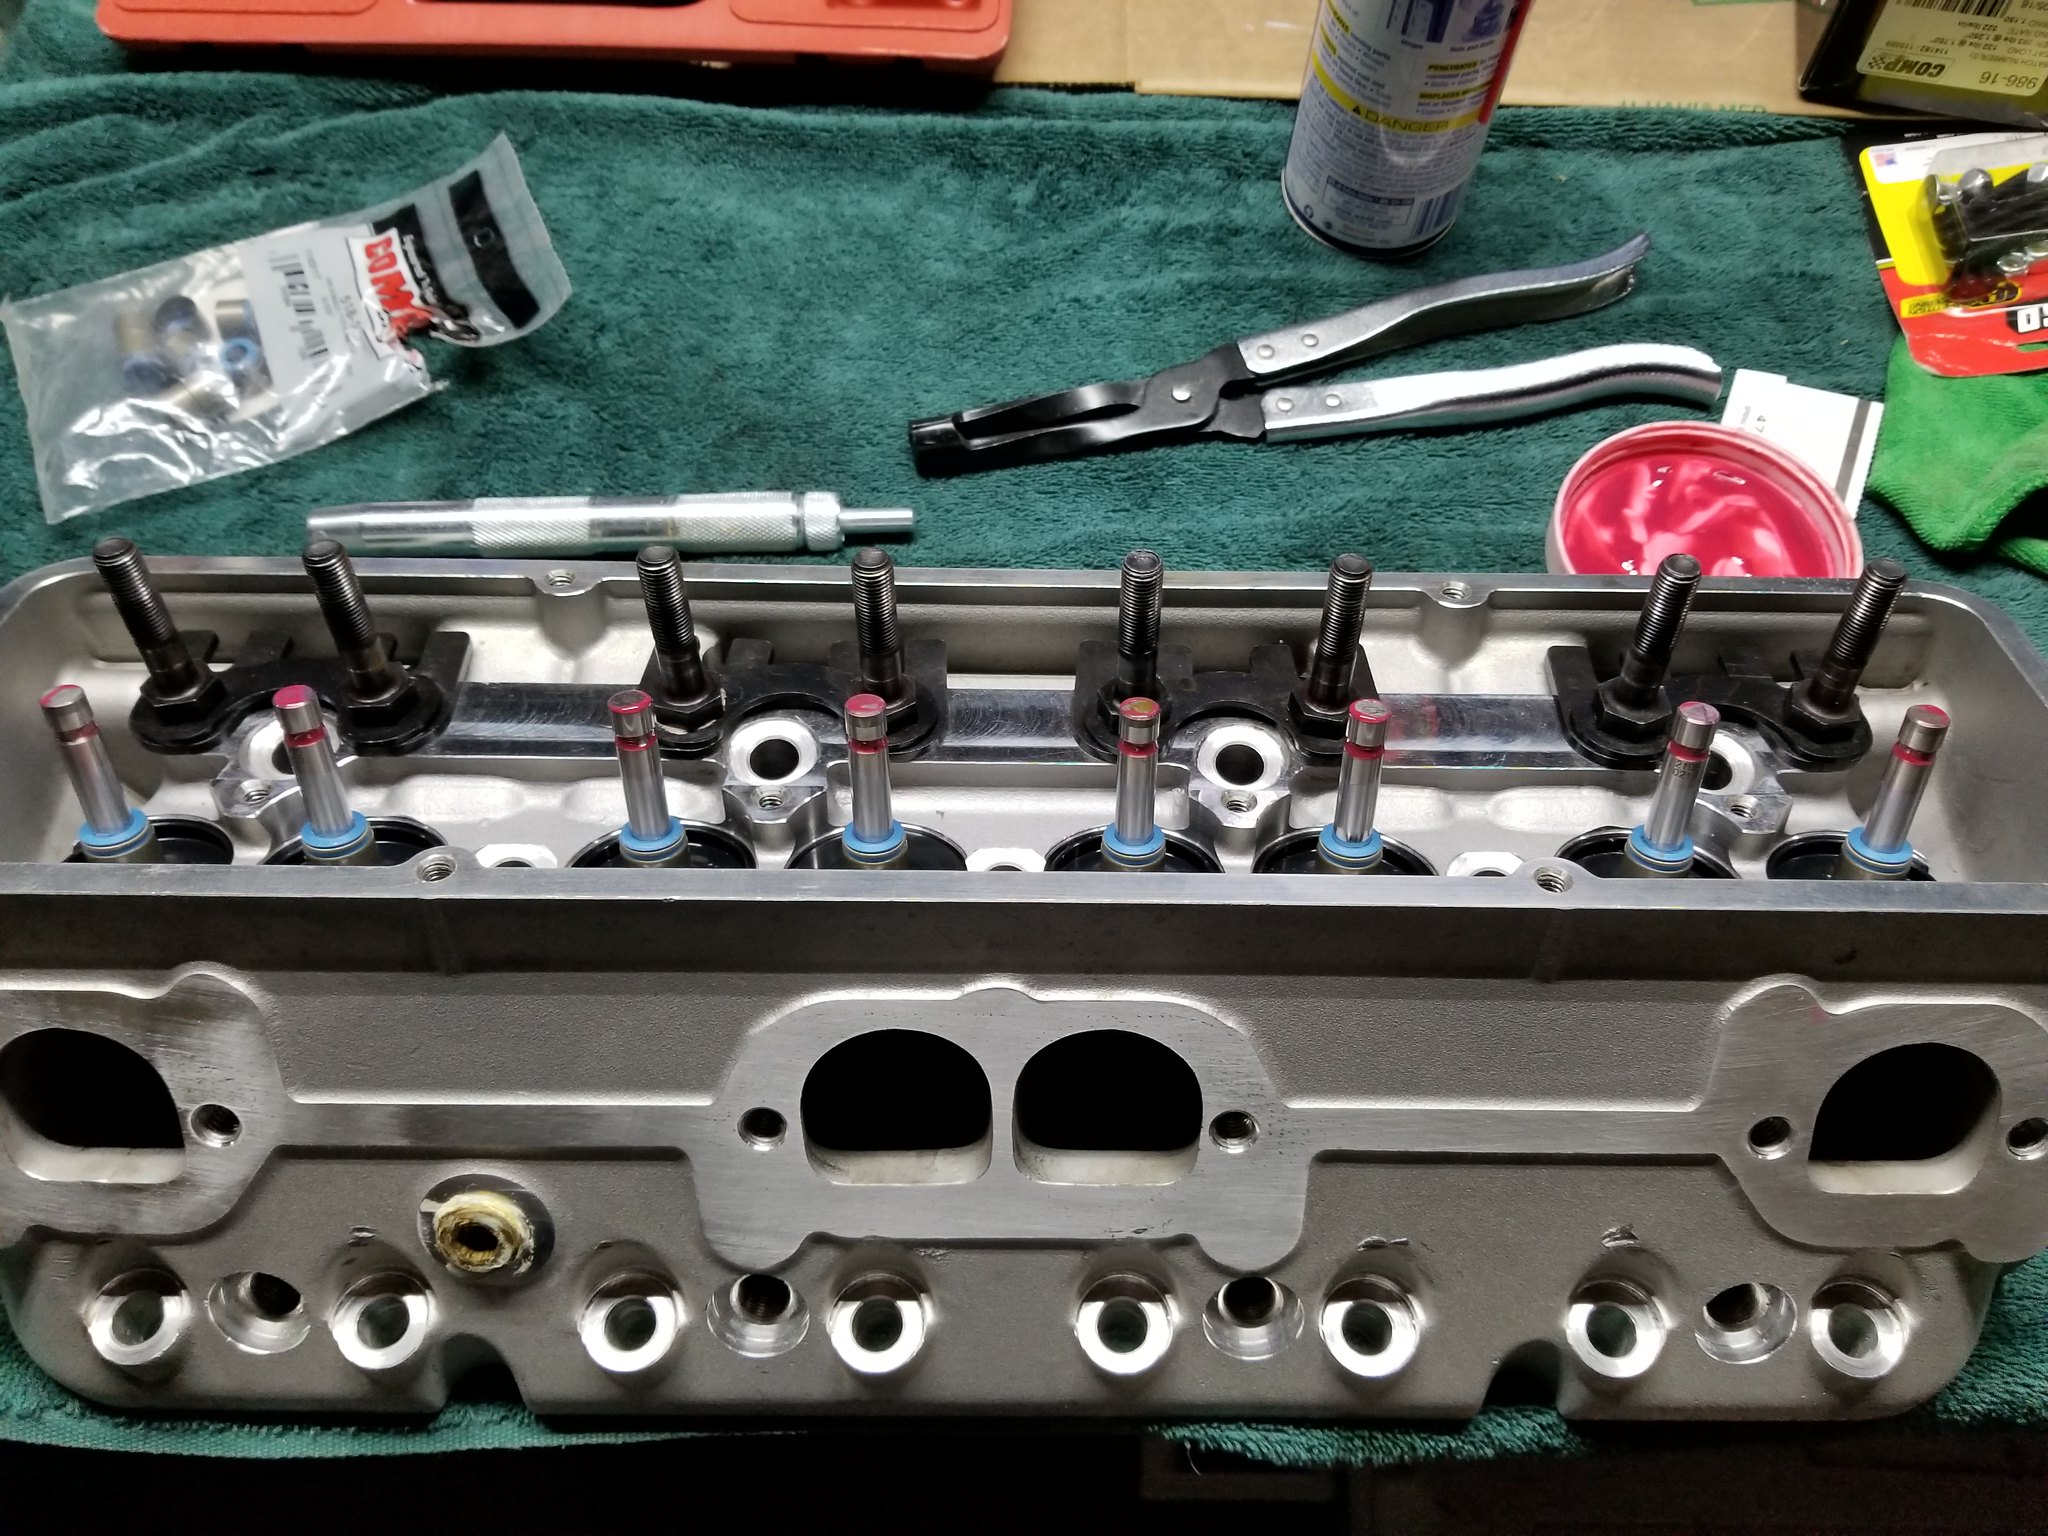
I installed the new valve seals and spring seats...
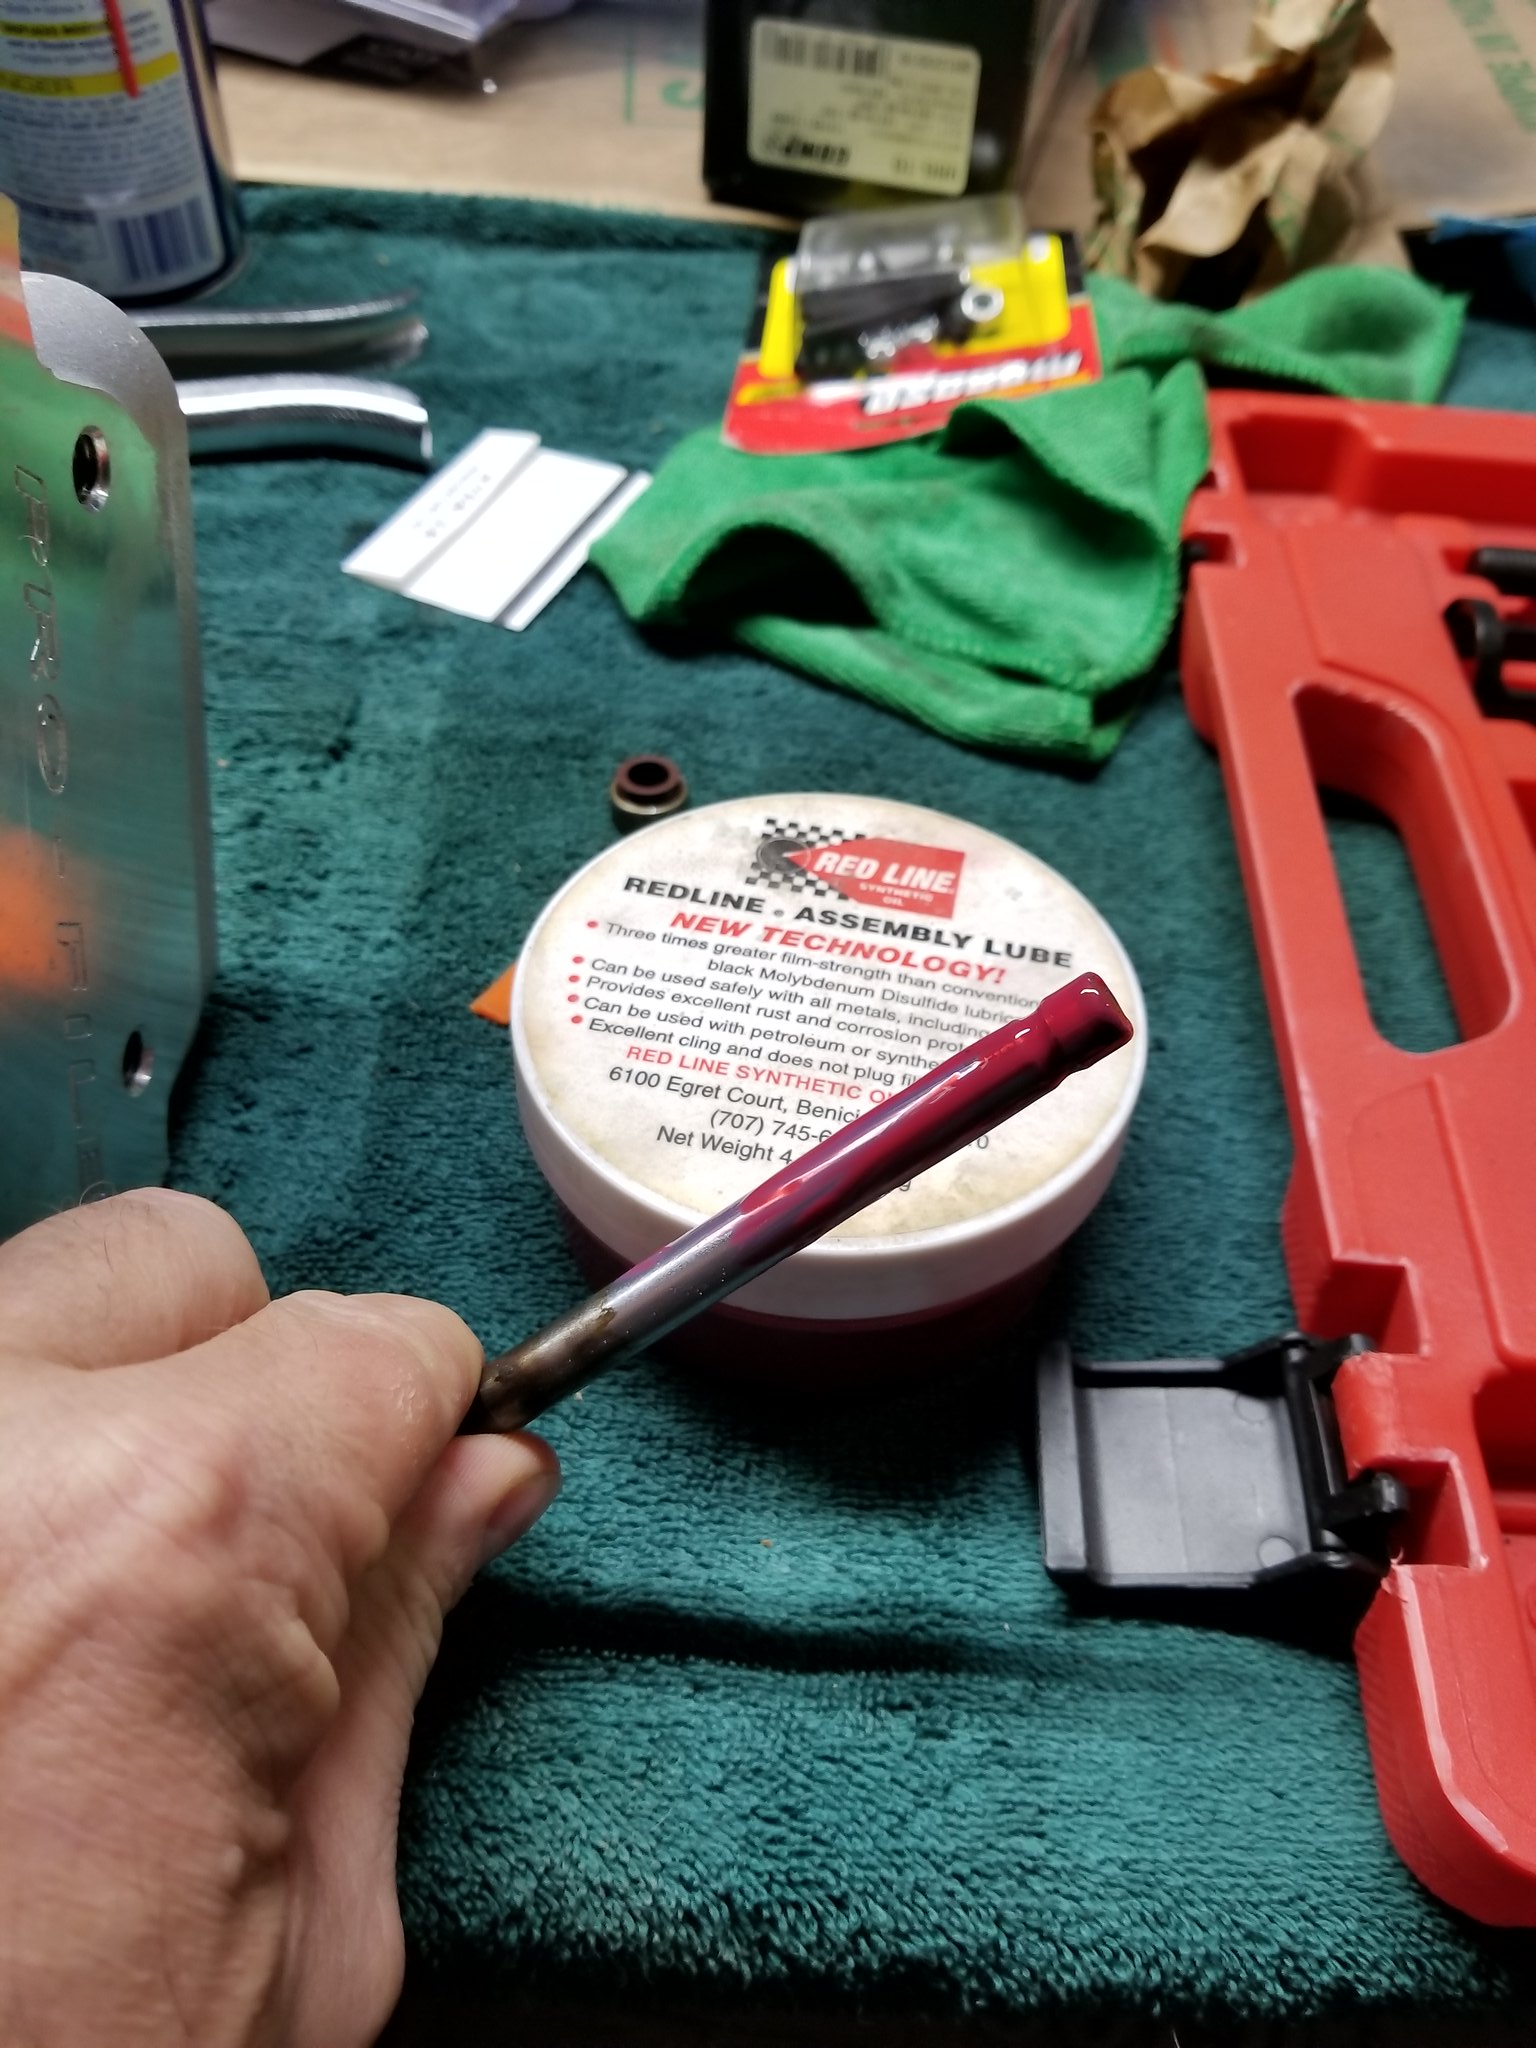
Making sure to use a quality assembly lube along the way...
Valves re-installed...
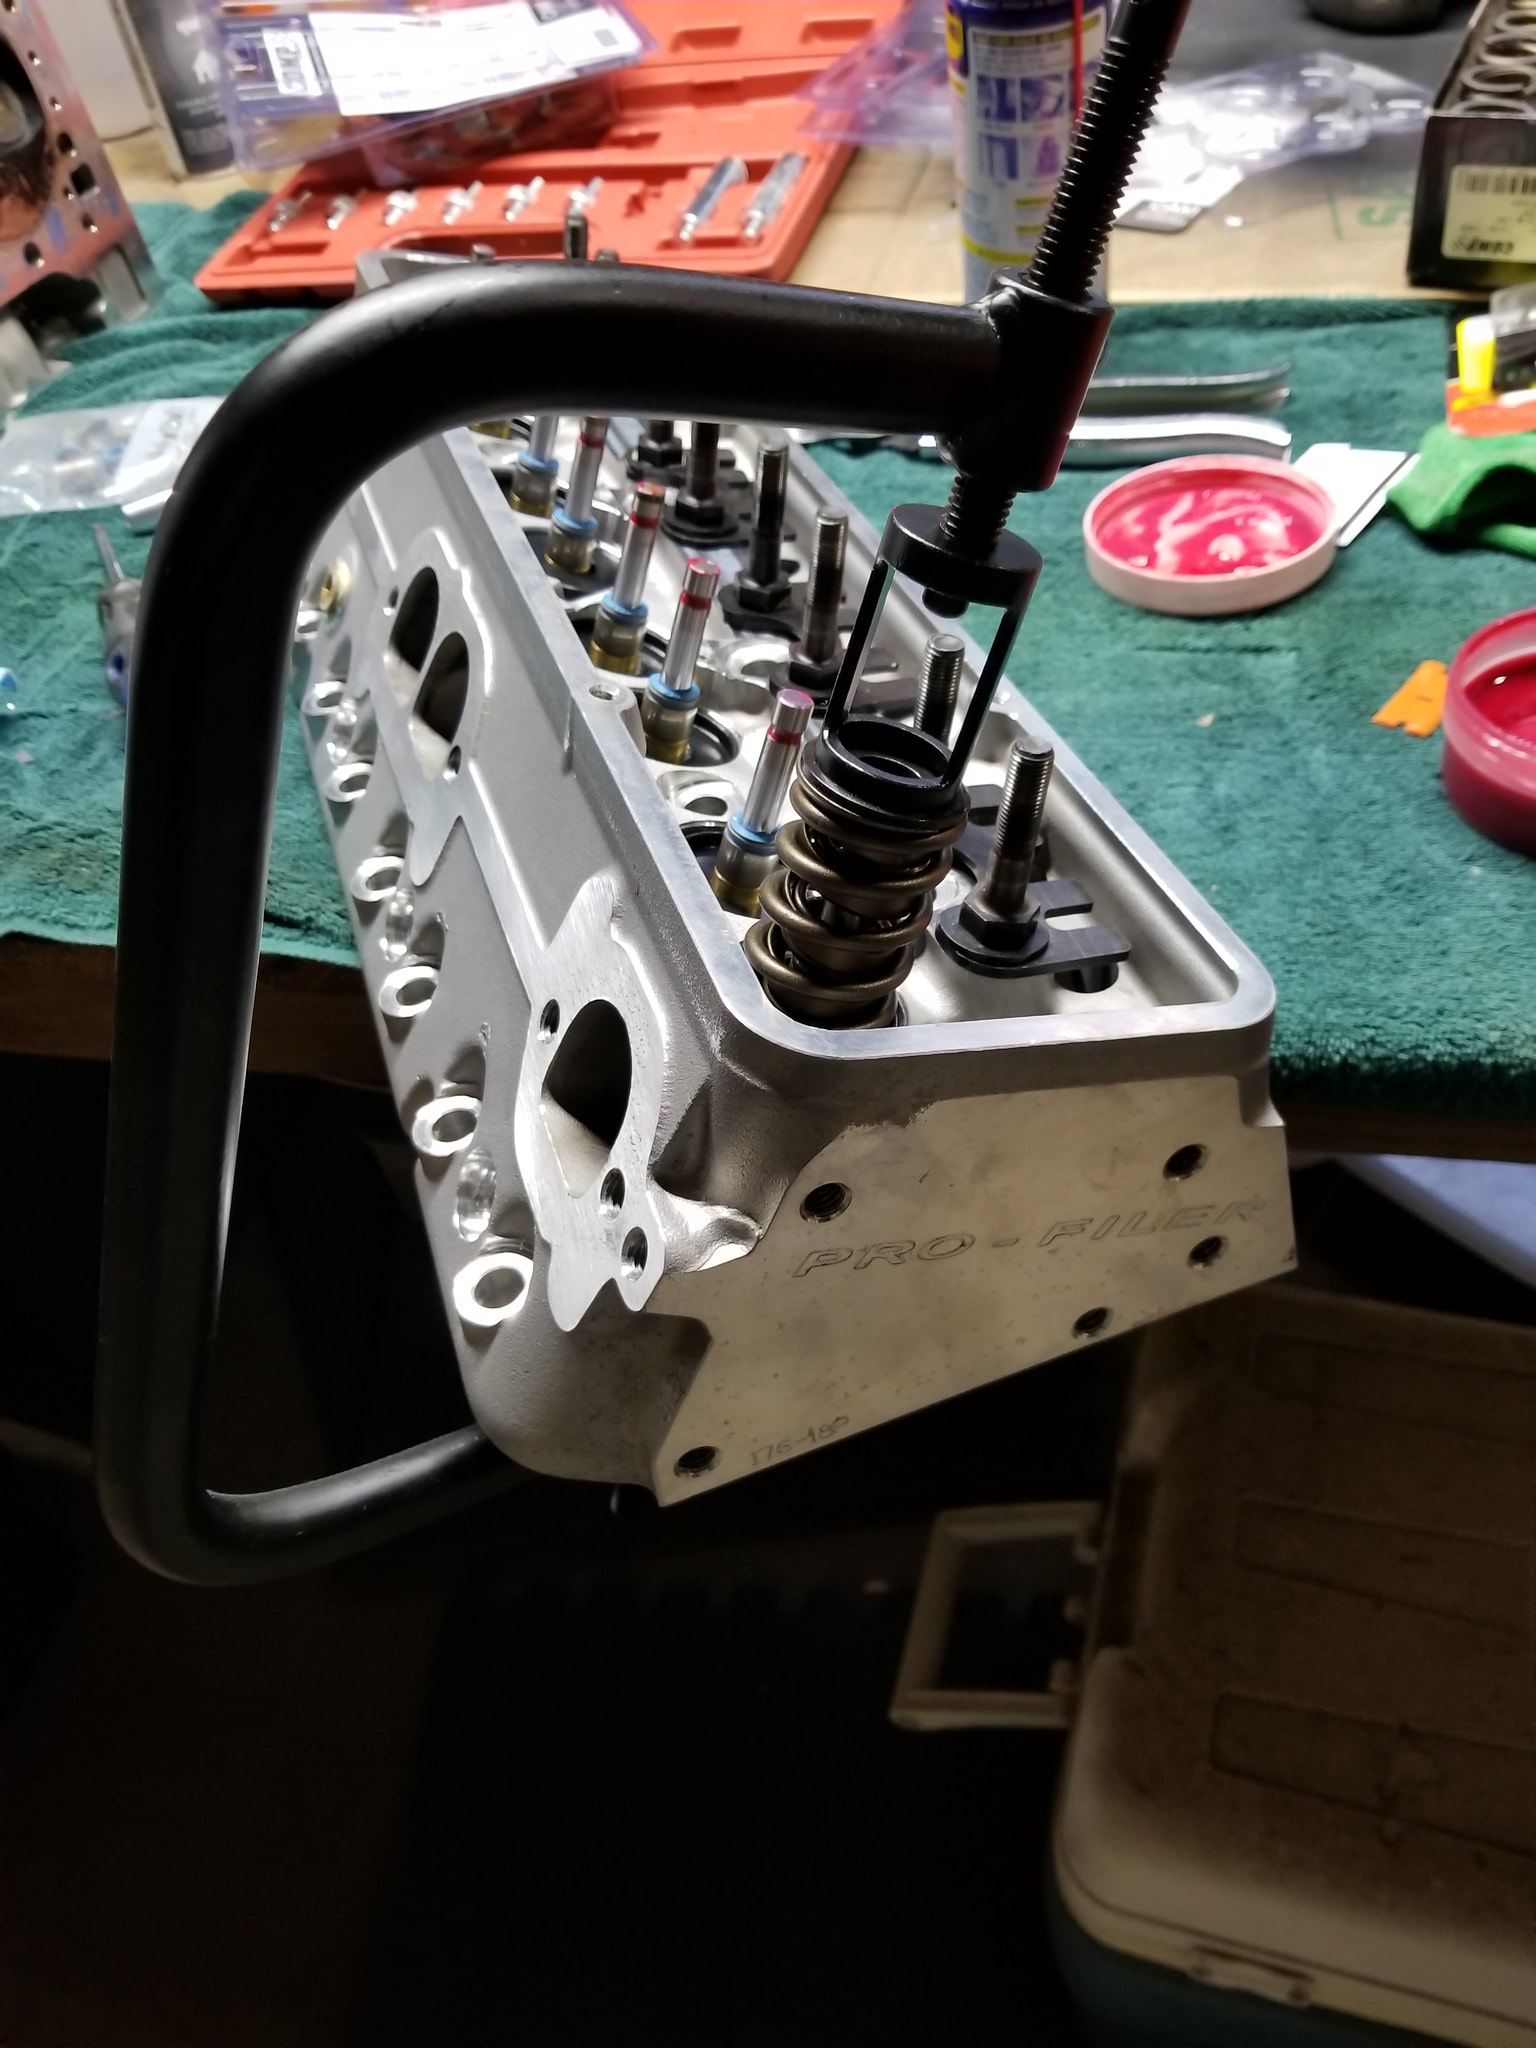
New, beefier springs set up for the roller camshaft...
and finally the new Comp roller rockers in place. After this I tossed them in a plastic bag with some dessicant packs until the time comes to install them on the engine.
That's all for today, time to give the hands a break.
Well XMas is over and Santa was kind enough to get my cylinder heads back from the machine shop with a clean bill of health so I thought that I would take the time to assemble them.
I have not touched a SBC since the mid-80's so I made sure to do some reading as a refresher but in the end it was pretty much like I remembered and was very easy.
I installed the new valve seals and spring seats...
Making sure to use a quality assembly lube along the way...
Valves re-installed...
New, beefier springs set up for the roller camshaft...
and finally the new Comp roller rockers in place. After this I tossed them in a plastic bag with some dessicant packs until the time comes to install them on the engine.
That's all for today, time to give the hands a break.
I should rename this thread "The attention deficit disorder restoration project". I mean, it all has to be done in the end, right?
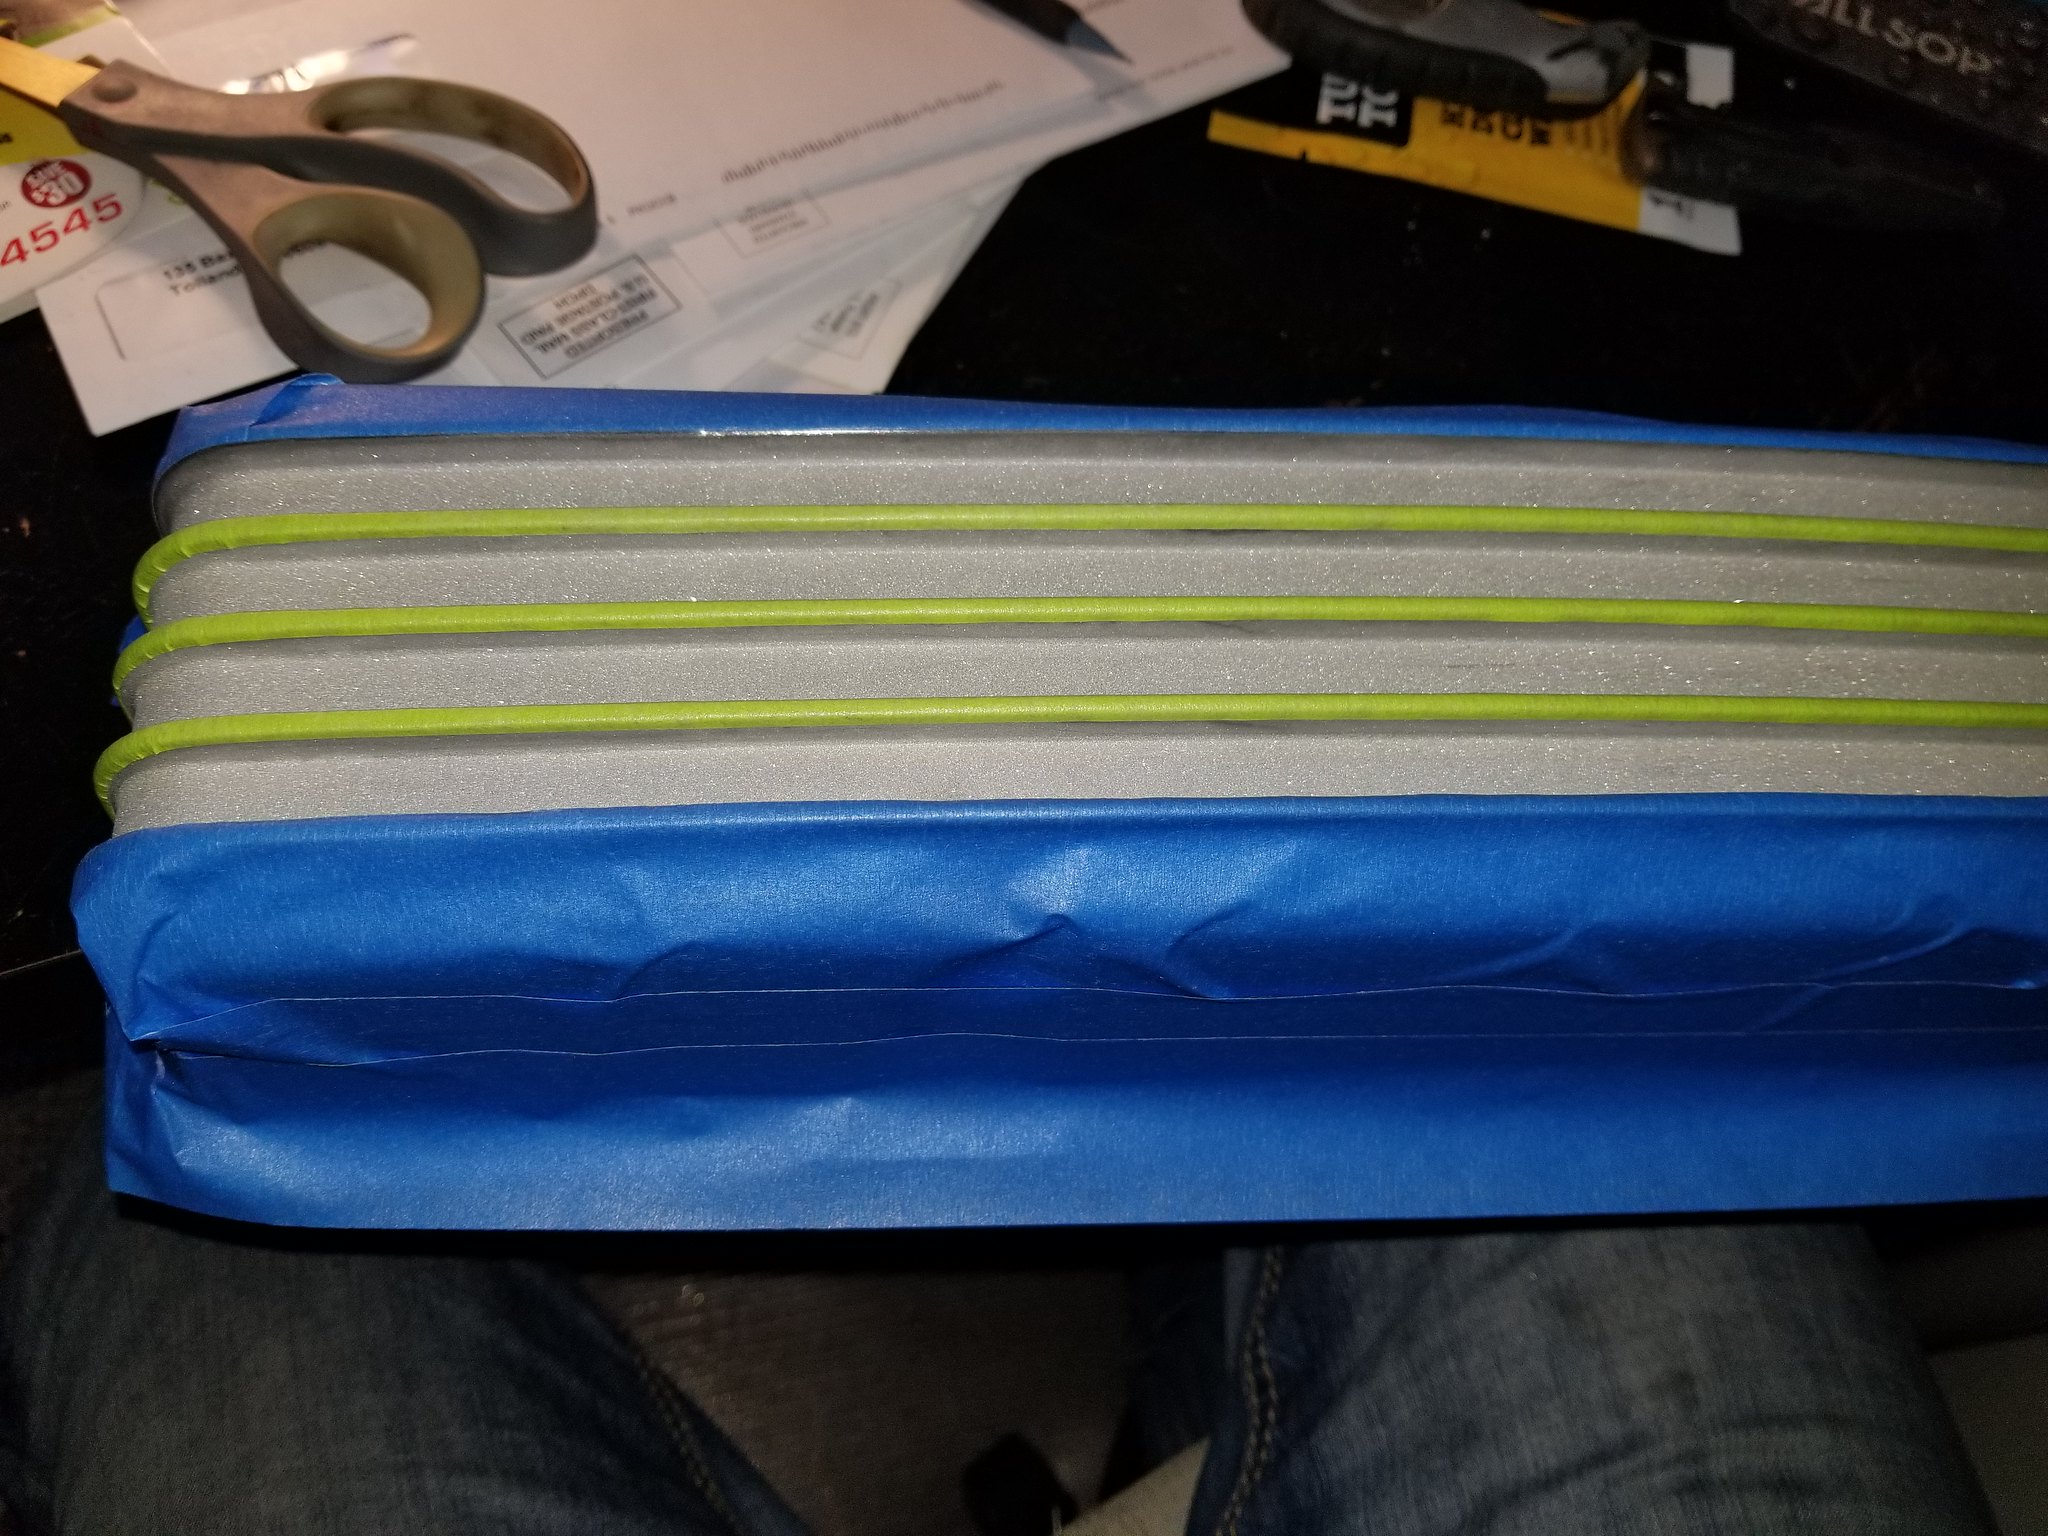
My new valve covers came in today and since I am basically working on parts as they come through my door (either from the delivery man or from the garage) I thought that I would get them done. This is the way that it will be until it warms up enough for me to get the body off of the frame...then the real work starts.
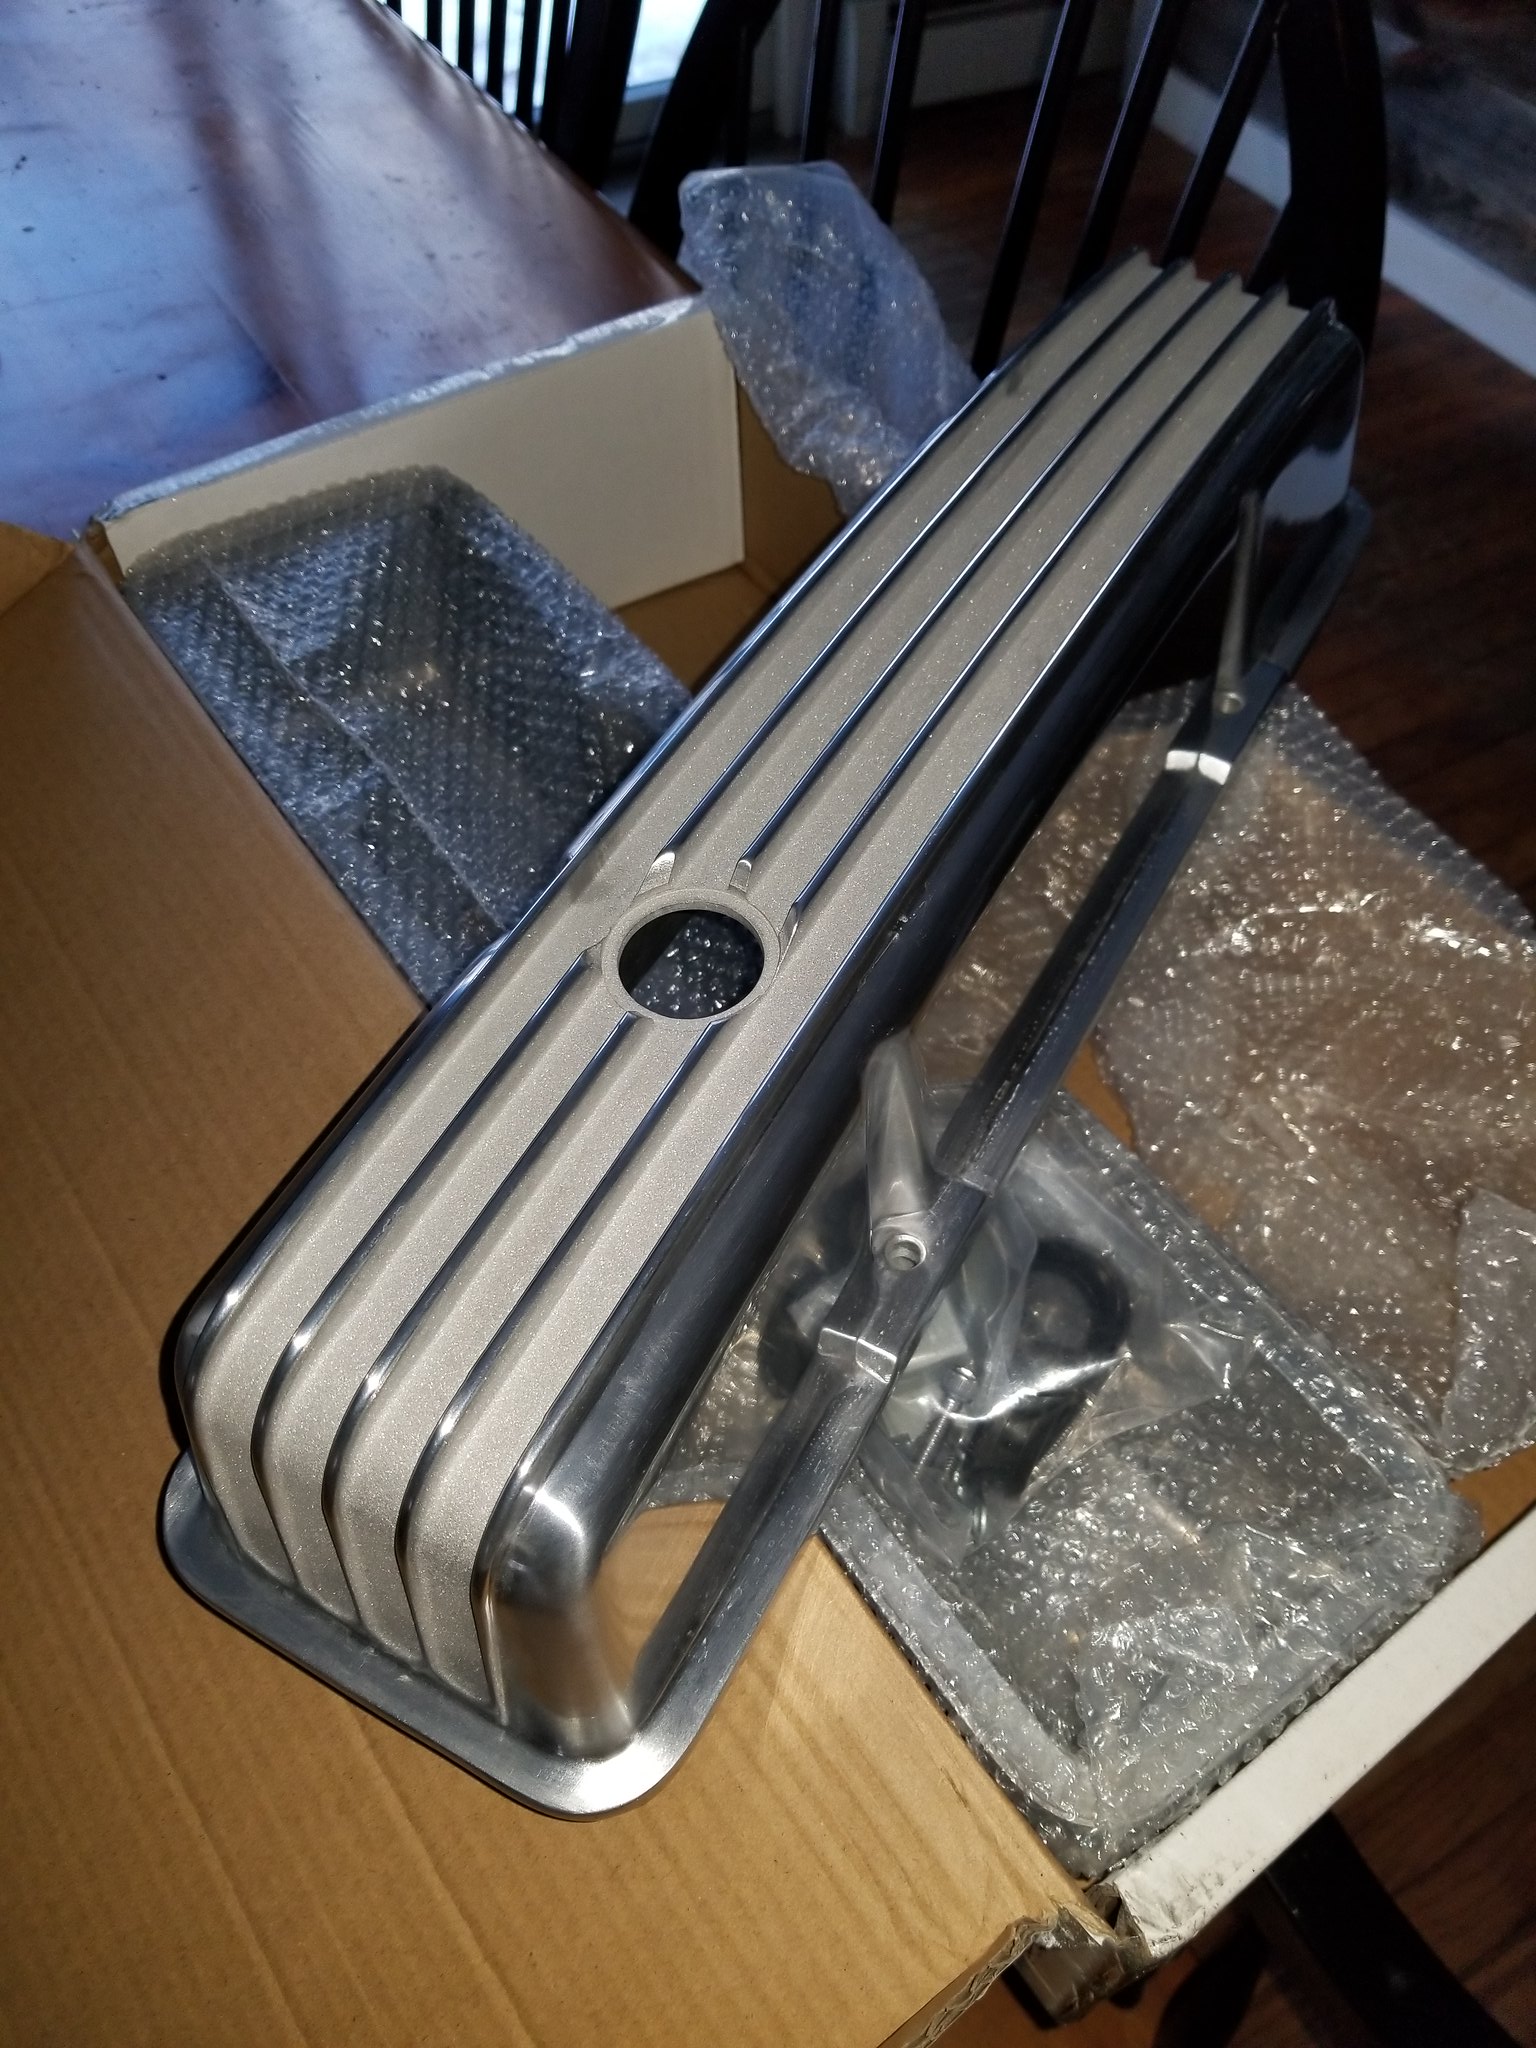
Anyway, I got a tall version (gotta clear those rockers!) of the finnned aluminum covers and since the entire top half of my engine is aluminum (heads, intake, water pump) I decided (after speaking with my favorite member of the C3 fashion police) that a subtle black area around the fins would work fine (the block will be black).
Out of the box:
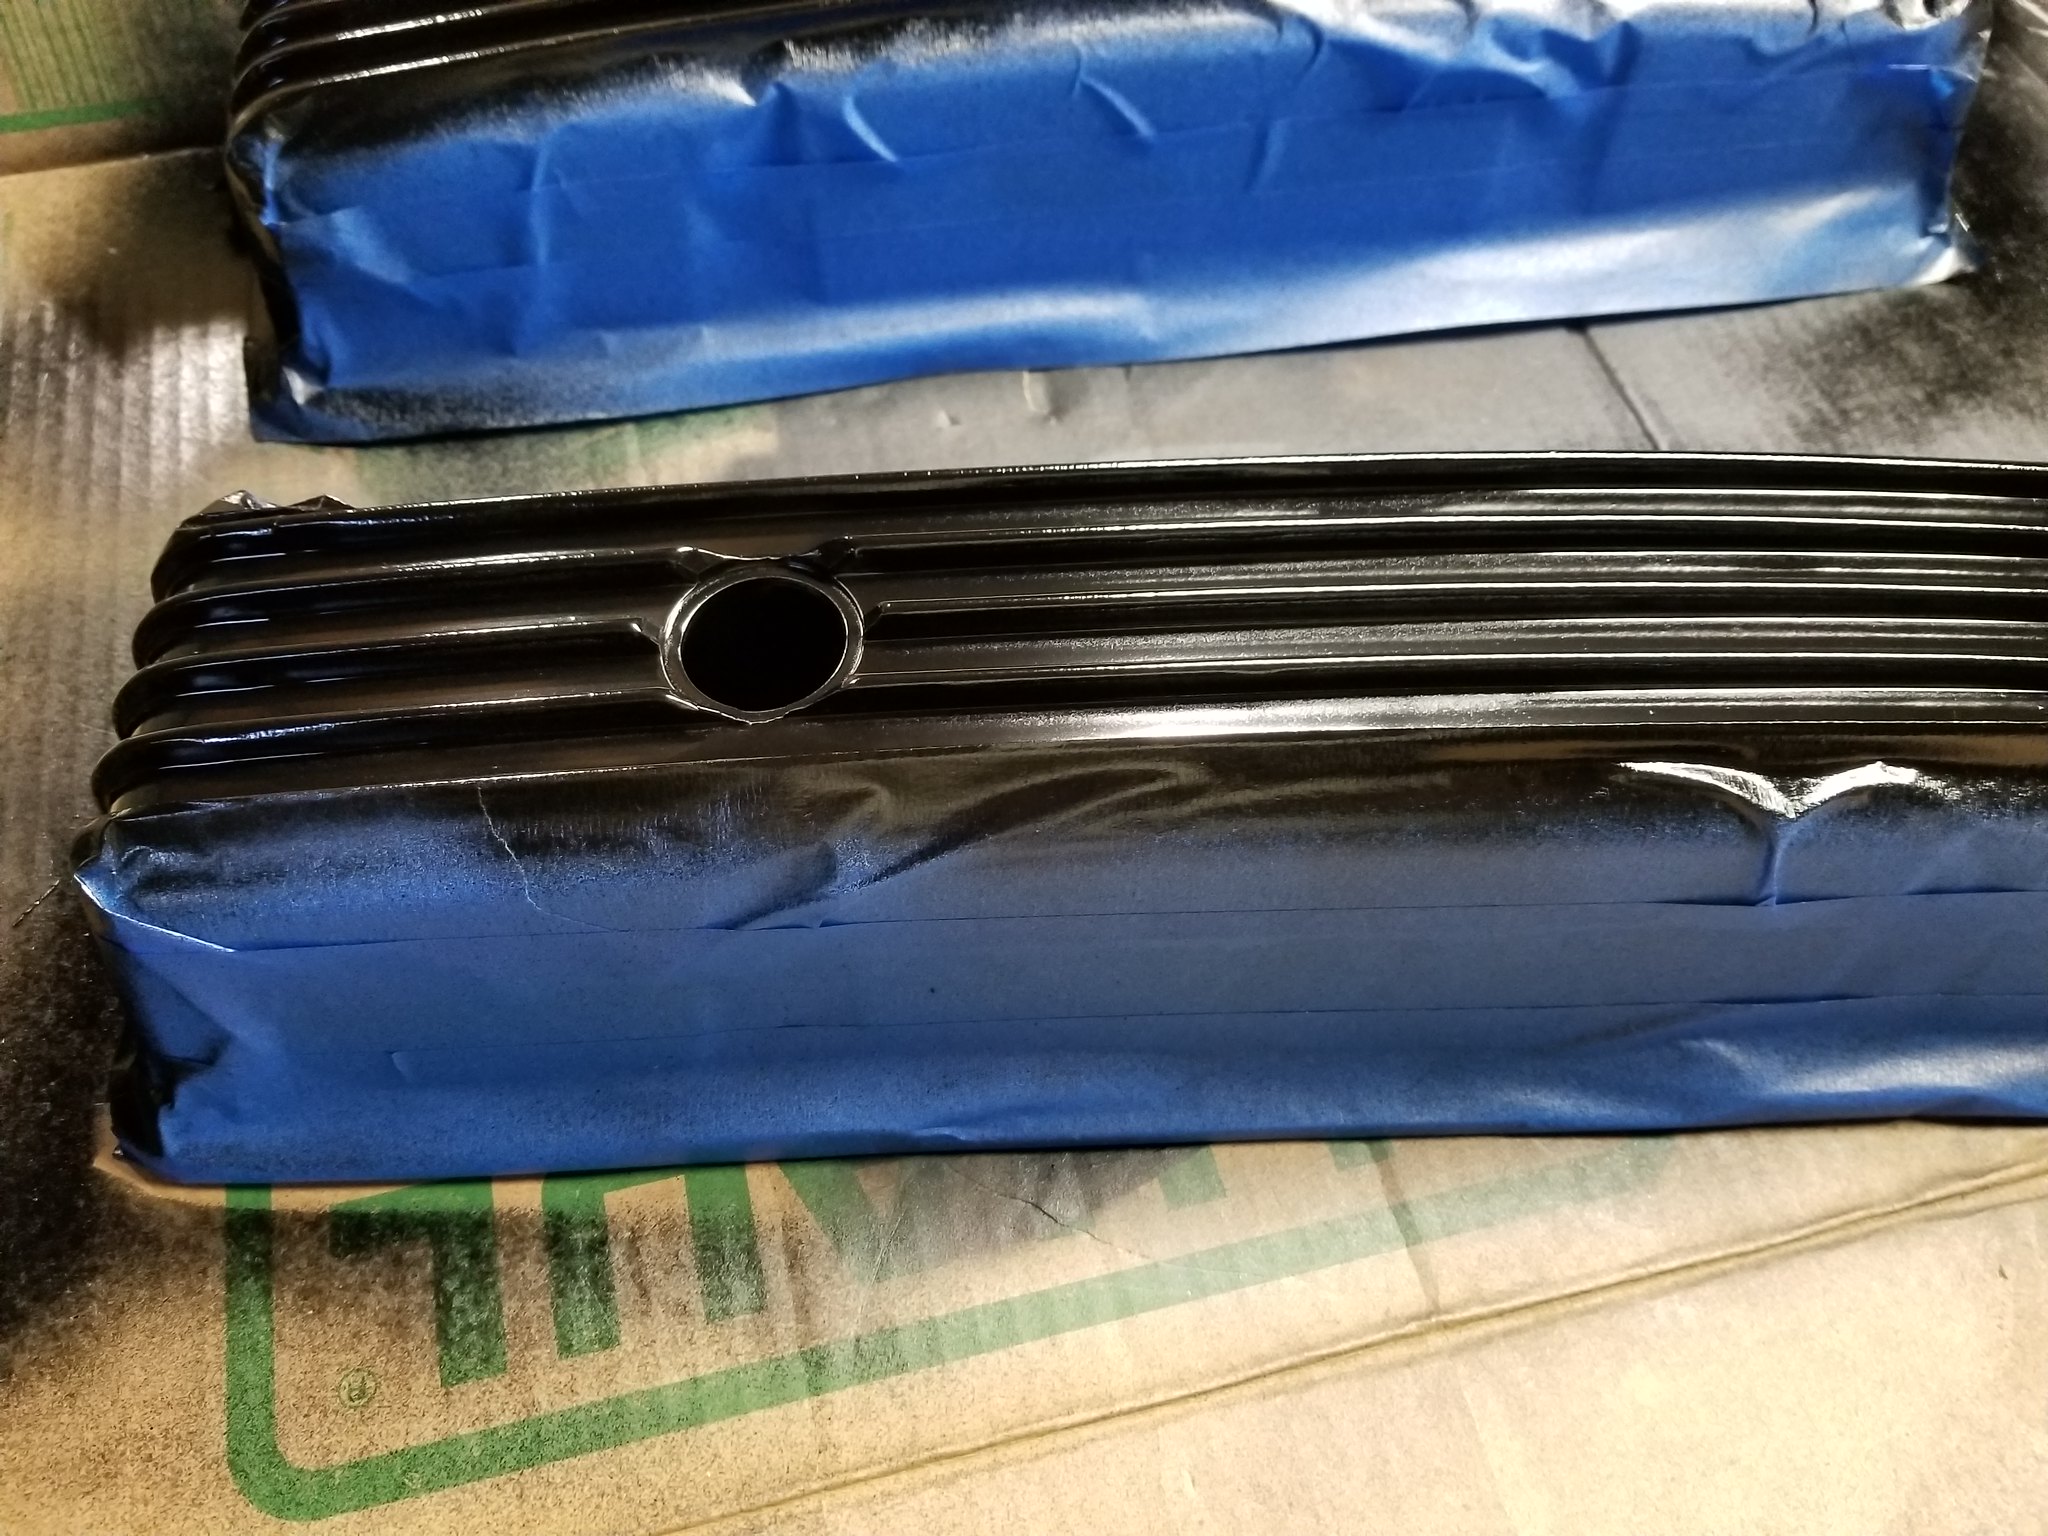
I cleaned the entire cover with acetone and then masked it off after it was dry.
Shooting the black ceramic engine paint. 2 light coats followed by a medium-wet coat. I would normally lay down a self-etching primer first however this area was already roughed up so I was not worried about paint adhesion.
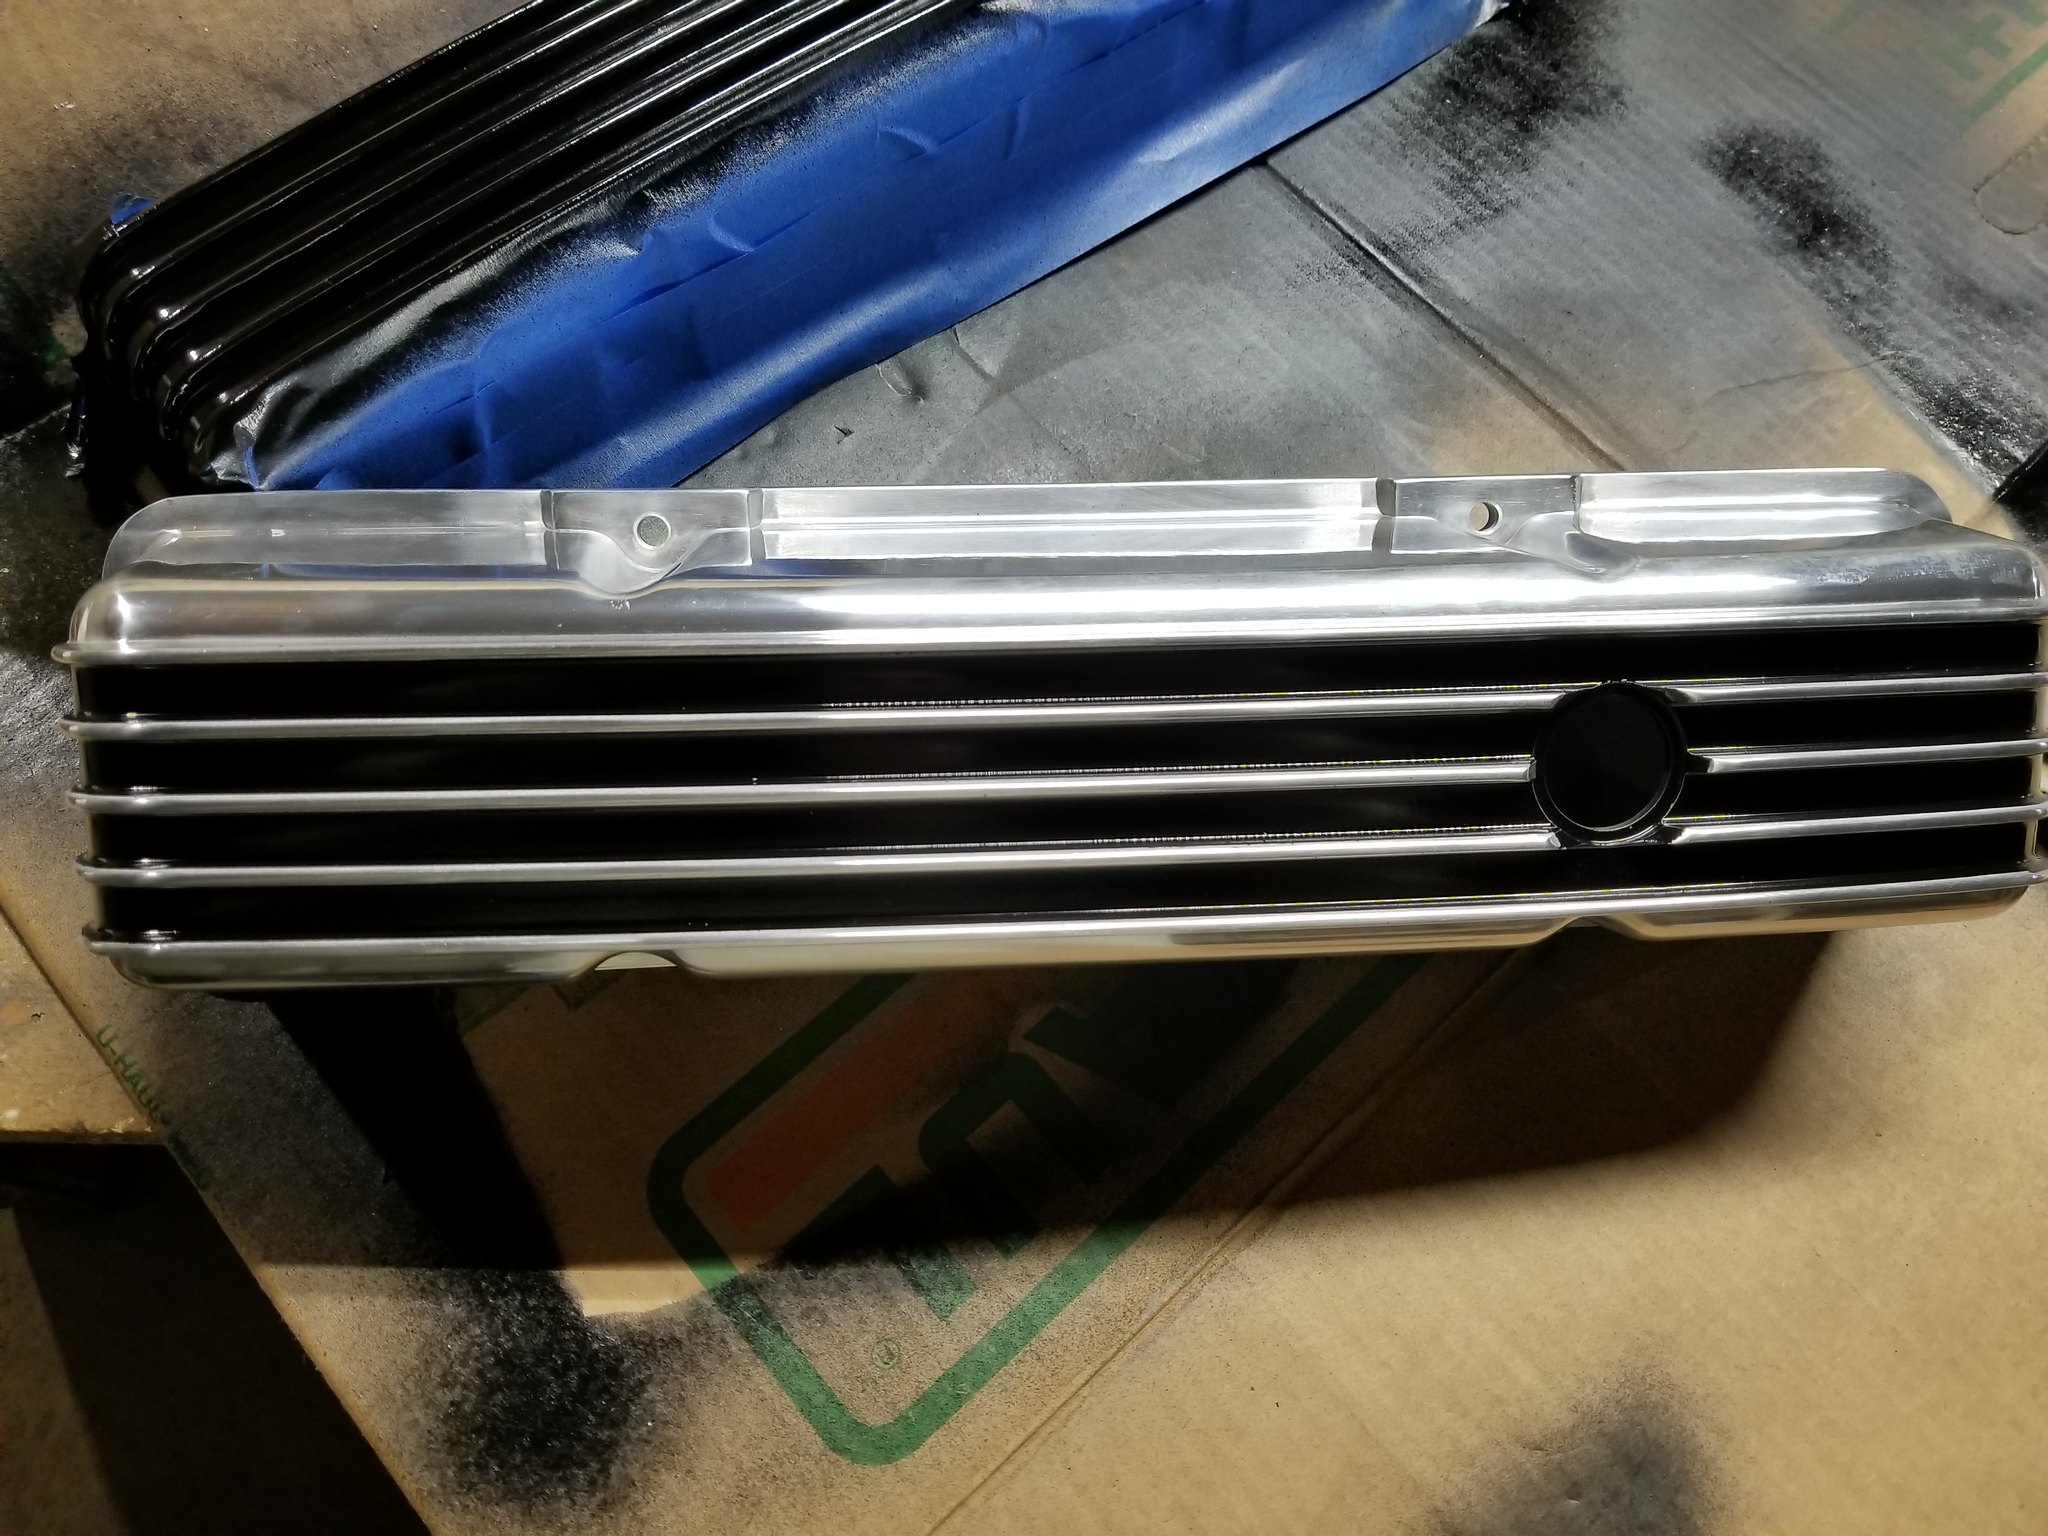
and voila! Classy, tasteful, and pretty damn sweet if I do say so myself.
Now it is back to refinishing those fender side grilles...
Last edited by PainfullySlow; Dec 28, 2017 at 04:47 PM.
I should rename this thread "The attention deficit disorder restoration project". I mean, it all has to be done in the end, right?
My new valve covers came in today and since I am basically working on parts as they come through my door (either from the delivery man or from the garage) I thought that I would get them done. This is the way that it will be until it warms up enough for me to get the body off of the frame...then the real work starts.
Anyway, I got a tall version (gotta clear those rockers!) of the finnned aluminum covers and since the entire top half of my engine is aluminum (heads, intake, water pump) I decided (after speaking with my favorite member of the C3 fashion police) that a subtle black area around the fins would work fine (the block will be black).
Out of the box:
I cleaned the entire cover with acetone and then masked it off after it was dry.
Shooting the black ceramic engine paint. 2 light coats followed by a medium-wet coat. I would normally lay down a self-etching primer first however this area was already roughed up so I was not worried about paint adhesion.
and voila! Classy, tasteful, and pretty damn sweet if I do say so myself.
Now it is back to refinishing those fender side grilles...
Designer Imagines A Corvette That Looks More Like a Corvette Than the Corvette
Slideshow: A Jaguar designer's personal project imagines what a modern front-engined Corvette might look like if Chevrolet revisited the golden age of the Stingray.