When you click on links to various merchants on this site and make a purchase, this can result in this site earning a commission. Affiliate programs and affiliations include, but are not limited to, the eBay Partner Network.
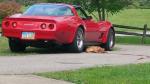
Our pups would love CJ.
New fluffy squeak toy or they would at least have fun chasing around.
They would never hurt a kitty, but love it when they run.
The charcoal canister connects with a short hose to the forward end of the steel vapor return line, that runs the length of the frame, on the driver’s side winding up at the gas tank. I wound up on my back, under the left fender on a creeper, staring at the canister. It had a lot more going on than I could have guessed from the Haynes manual. Fortunately the ports are permanently labeled in molded plastic. After removing the charcoal canister, I pried off the bottom lid. Its port is not labeled for some reason. Maybe it’s just an open vent. It looks like it’s meant to take a hose though. A short one to keep gunk out? Or does it connect somewhere? 🤔 A round pad of fiberglass filter material holds the charcoal inside behind a plastic screen.
Red arrow : “Pry here” So I did.
Last edited by 78Corvetter; Dec 12, 2023 at 10:50 PM.
After un-sticking the rusted plunger on the old master cylinder, the outflow during bench bleeding was weak. I thought about getting a rebuild kit, but I decided that brakes are too important to mess around with… …so, I sold an old boat I never use & bought a brand spanking new master cylinder. I drilled holes in the plastic plugs that came with it & used new fuel line to set up for bleeding. New master cylinder installed onto new brake lines, full of DOT 3, & ready for gravity bleeding the braking system. I like the look of it unpainted, but rust will come if I don’t treat it with something. I’m thinking lanolin might be the thing to use, or clear coat.
I used “Rub ‘N Buff” on my master cylinder. I think it was the pewter color. Looked pretty good for a couple years until my cap started leaking and the brake fluid ruined it.
After installing a new temperature sensor, running wires to the steering column & center console gauges, I’m looking at cracks in the old dash. Here are graphic images documenting the rough state of the dash. I’m thinking that silicone sealer might be the thing to use for filling in cracks & leveling out chunks of foam that are missing. After the silicone dries, I’ll spray the whole dash with rubberized undercoating to bond, preserve & seal the old, dried-out vinyl. It’s “high build” paint, so a couple of coats should smooth out the surface enough for gluing a final layer of fancy shmansy vinyl.
Sounds like a good plan to refurbish that old dash. I'll be looking forward to seeing the final results.
no matter what, it's got to be better than it is now!
When I did my T top headliners. I filled in the missing chunks with bondo. Worked out well.
I used Permatex Ultra Black gasket goo to fill in the cracks & chunks; let it dry overnight, then sanded the whole dash, wiped it down with mineral spirits & sprayed liberally with rubberized undercoating. It still looks rough, but the 4-way stretch vinyl should lay down smoothly over most of the ugly. If I was to do it over, I would’ve spent more time smoothing out the gasket sealer, but overall, the rubberized spray seems to be working well in keeping the old vinyl from cracking & crumbling any more than it already was.
The spray can started spitting out globs after awhile, which is what caused the spots, which I then tried to fix & made worse. I should have let the rubber spray material partially dry & then pressed it down to smooth it out.
Next step involves shopping around for vinyl. I’ll decide that after I figure out what color I’m going to paint the Hillbilly Vette.
Just a quick tip. When I recovered my dash top pad. I chose to cover up the speaker holes as well as I have my speakers elsewhere. I put down a thin sheet of foam first. About 3/16ths thick. Then the vinyl over that. The foam padding, even though very thin. Hid all the sins. I'll dig through all my old photos and if I can find one I'll post it up.
My dash top pad before.
I didn't fill this at all. Just put the thin foam over it. Then new vinyl. Both sides had speaker holes and were cracking out like this. Also a few other minor cracks. Didn't fill any.
the thin layer of foam hid all the sins. I did this 3 or 4 years ago. Still looks great.
It sure does look great! After you suggested the foam, I found 3/16” medium density for 7 bucks a yard, & some cool snake skin vinyl, at Your Auto Trim…
I’m leaning toward the Bordeaux,
as I typically do…🍷
I thought about covering the speaker holes, but I like having speakers front & rear. The original plastic covers are in excellent shape, so I’ll probably opt for some nice new speakers & get my hillbilly groove on.
Last edited by 78Corvetter; Jan 1, 2024 at 11:31 AM.
I tracked the failure to key start the engine to the neutral safety switch, that prevents the car from starting when in gear. It was a good excuse to tear the shift assembly apart, so I could wire brush & prime the rusty bracket. The switch has two copper bearings that make the connection between strips of what looks like brass, imbedded in the plastic housing. The metal strips are bridged by tiny copper rollers when the shift lever is moved into Park or Neutral. The purple wires wake up the starter when the car is in Park or Neutral & the key is turned. The pink & green wires activate the backup lights when the car is shifted into Reverse. Cleaned up, painted & reassembled. I “fixed” the switch by cleaning it, applying new dielectric grease.
Last edited by 78Corvetter; Jan 2, 2024 at 07:43 PM.
Digging into the instrument cluster while waiting for dash padding, 1/16” silver Mylar pin striping & LED bulbs to arrive. Since this feature is so prominent, I’m taking time to clean it up & get it looking good. The clear plastic piece definitely looks better after cleaning & buffing. I have to cut a new hole for the radio, after I figure out what I’m going to be installing. If I can find a Radio/GPS touchscreen unit, I’ll go as high tech as I can. The center console assembly needed a repair where the metal armrest bracket bolts onto the plastic shift plate. I used a double layer of fiberglass cloth heavily resined across the back of the plate to replace the rigid plastic tabs that had broken off. There’s a lot more flex in the fiberglass & it keeps the plate, bracket & rubber pad lined up where they’re supposed to be. On the dash, I decided to go with fine grain faux leather black vinyl, to match the black plastic instrument cluster & shift plate. Wire brushing the headlight switch bracket & interior light switch faceplate.
Disassembled the gauge console in order to lubricate the clockworks. I also replaced all of the old style filament bulbs with blue LEDs. That should reduce heat output from the nine bulbs quite a bit. The seat rails got wire brushed & greased up today, slowly getting the interior hardware cleaned up, ready for painting & reassembly.
Last edited by 78Corvetter; Jan 8, 2024 at 11:03 PM.
I found 1/16” thick neoprene padding with adhesive. It covered the worst of the cracks & repairs on the top of the dash, & was relatively easy to put on. Rather than removing the backing all at once, I pulled it out from underneath the padding as I went. If this stuff ever got stuck together I don’t think it would come apart without tearing. This is what the fake leather vinyl looks like draped over the padding without being glued down. I’ve got a can of 3M’s Super Trim Adhesive warming up inside the cabin along with the dash. It’s freezing cold this week, so I’m keeping all temperature sensitive materials inside.
Last edited by 78Corvetter; Jan 11, 2024 at 10:38 PM.
Disassembled the speedometer & tach down to component parts for cleaning.There’s no saving the old stuff since they’re rusted & ugly. Thirteen filament light bulbs seems like overkill & a lot of heat in a plastic housing. Discoloration in the plastic suggests replacing the old hot bulbs with cool LEDs. Recommendations for upgrades to speedometer & tach are invited!
There’s definitely a learning curve…My first attempt at covering the dash in vinyl didn’t work out. I cut the edges just a little too close — a rookie mistake. It’s been awhile since I’ve done this kind of work. The speaker holes in the top of the dash will be cut after I buy new speakers. Also, I used too much adhesive in a couple of places so the vinyl melted. I’ll get it right the second time.
Mylar pin striping went on easily & looks great. I’ll spray this piece with a light coat of clear lacquer, to fill in scratches in the plastic & secure the mylar to the surface. Still need to cut a hole for whatever music/GPS device I wind up with.
Last edited by 78Corvetter; Jan 11, 2024 at 10:59 PM.