


Project 69-LS3

Thread Starter
Intermediate

Joined: Jun 2008
Posts: 29
Likes: 0
Hi,
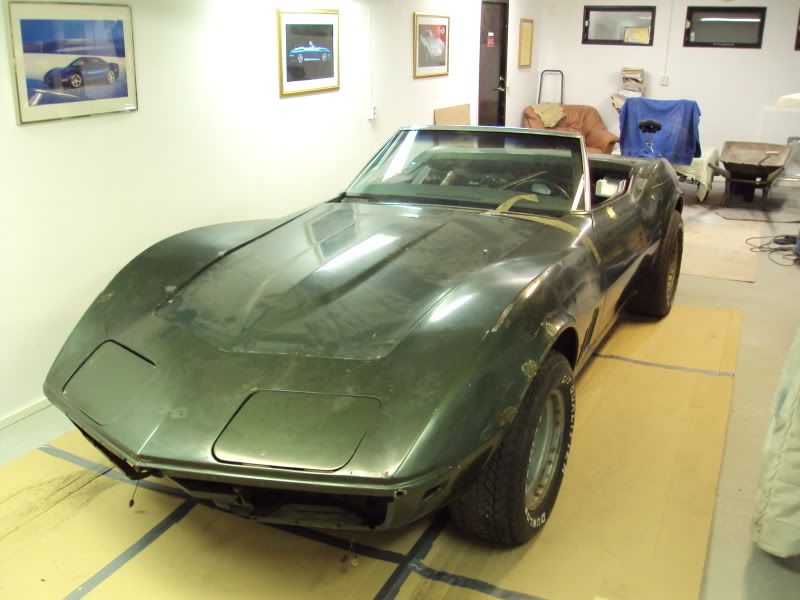
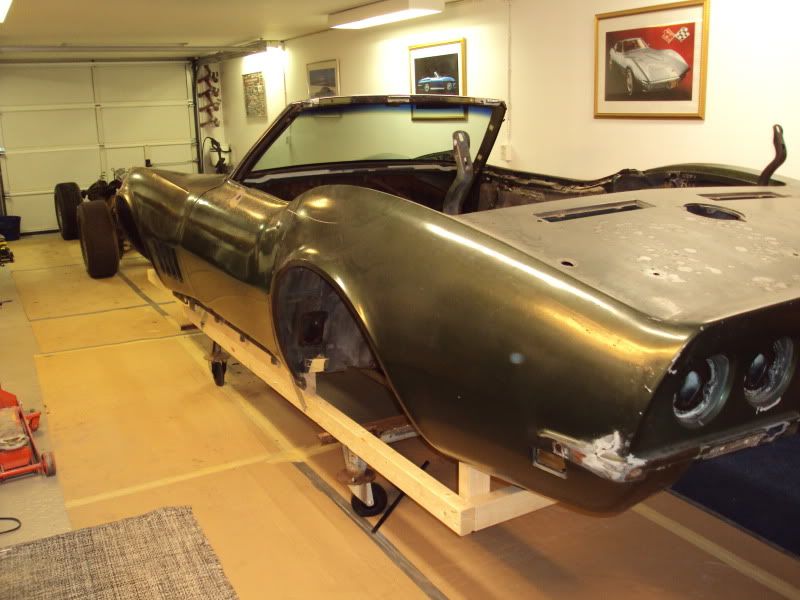
Here is my new project, it�s a matching nr 1969 with a 300hp 350.
My plans for this car is a frame of restoration and mount a LS3 engine and a Tremec TKO trans.
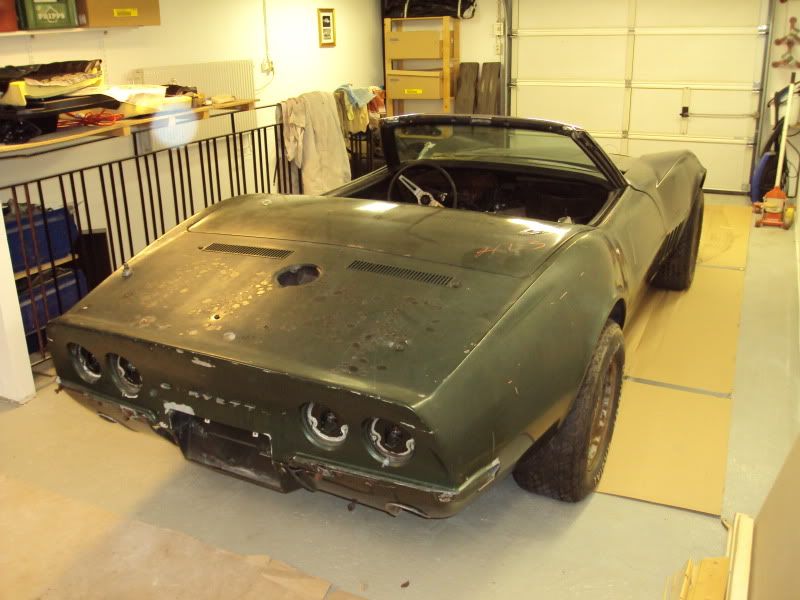
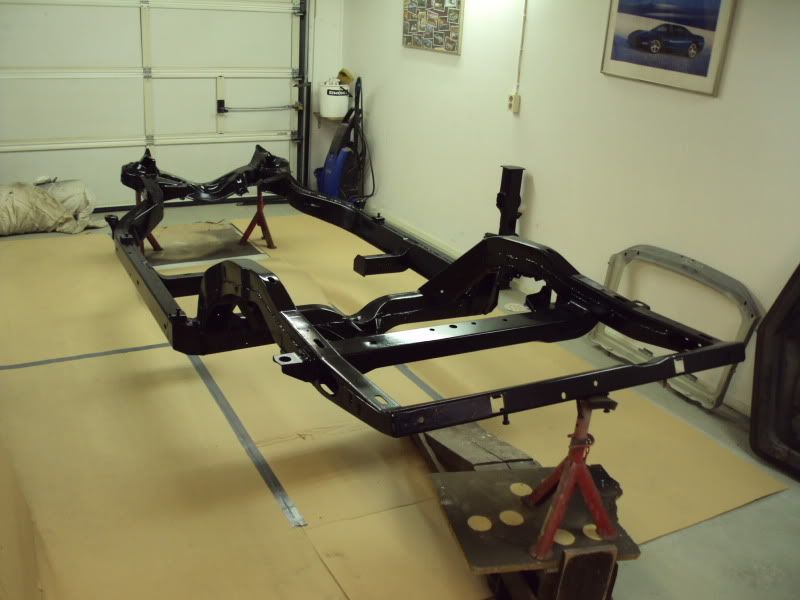
My first job was to remove the body from the frame
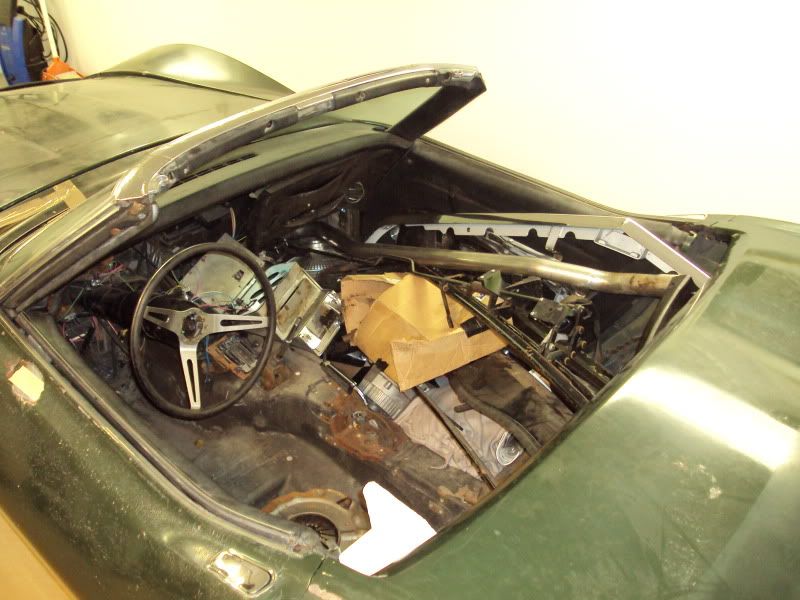
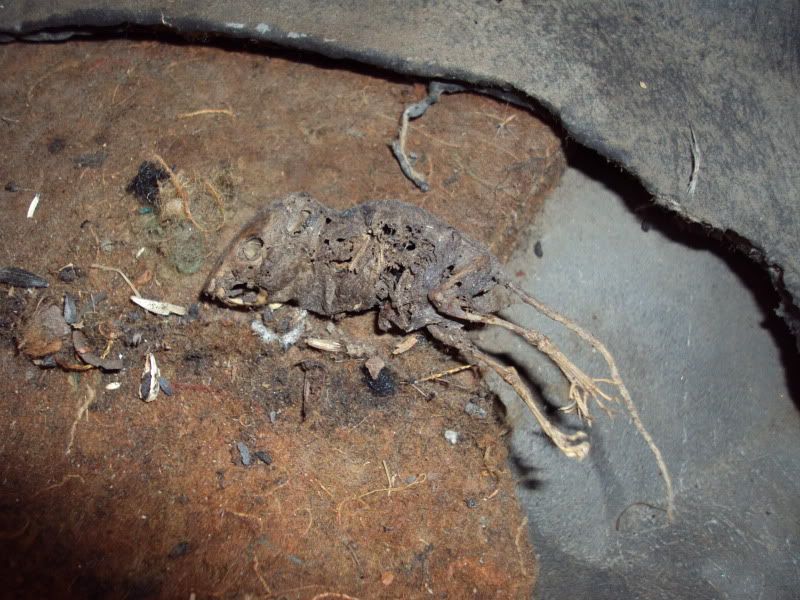
I found this behind the instrument panel
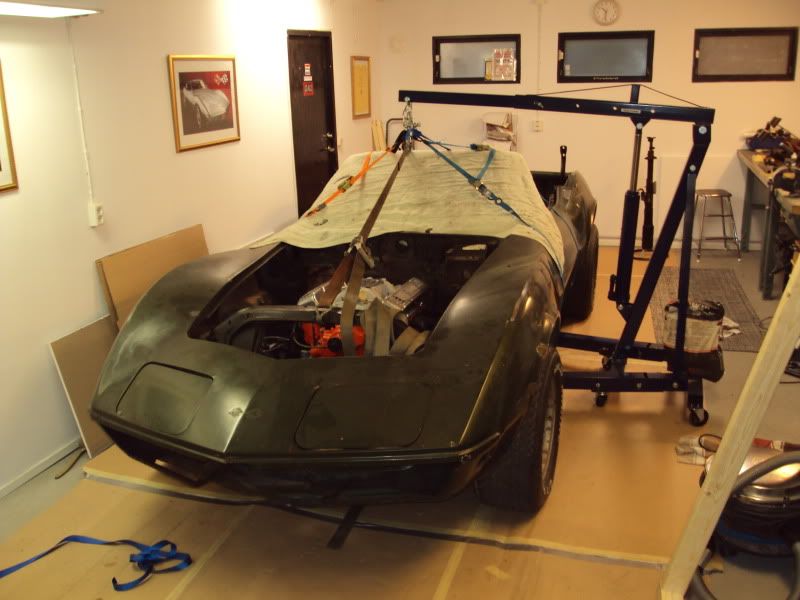
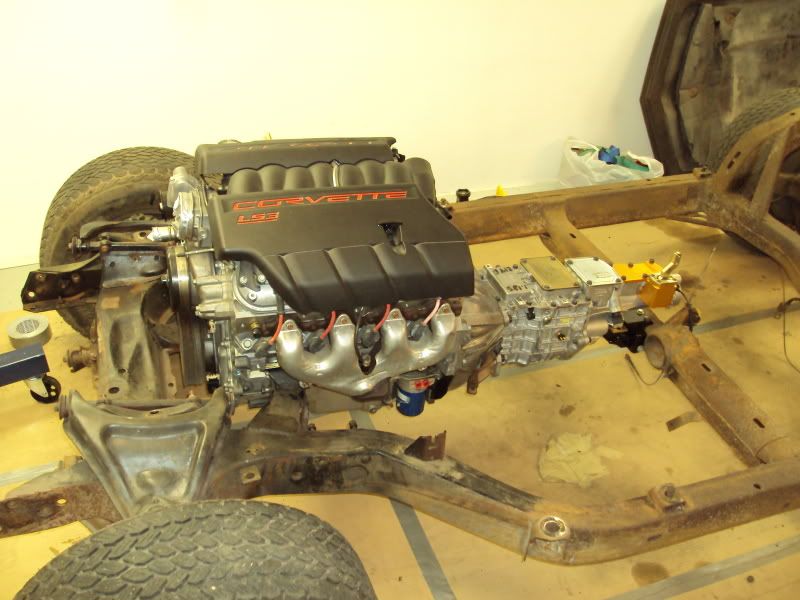
I purchased a used LS3 from a Corvette 08 and a new Tremec TKO 600,
This is the first test with the LS3 and Tremec in the frame.
The normal problem with a LS engine...
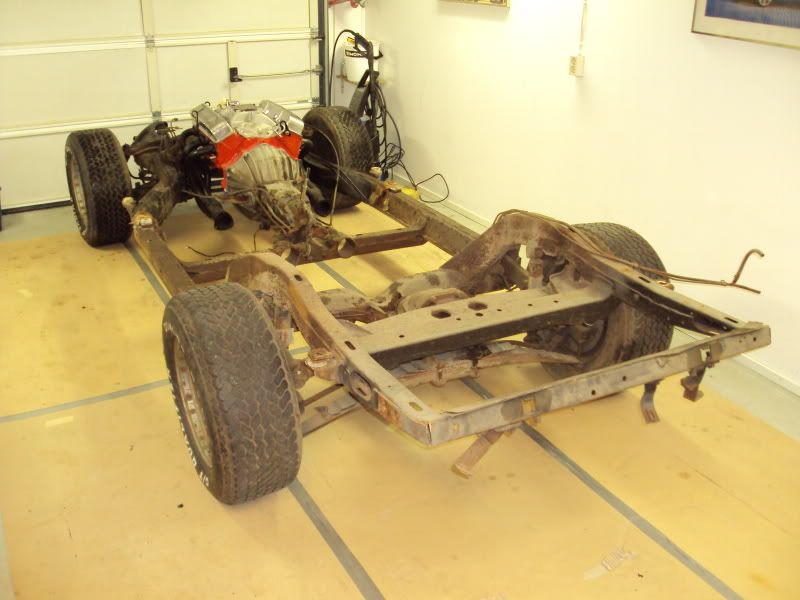
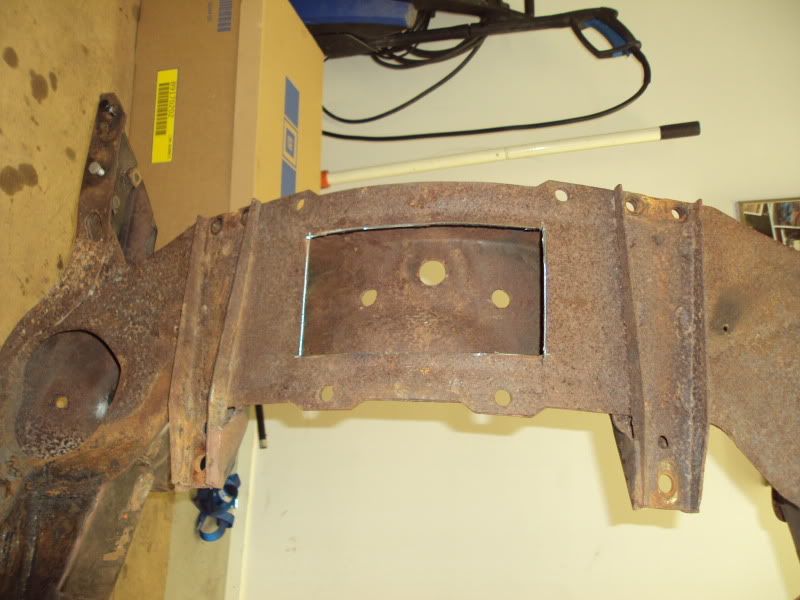
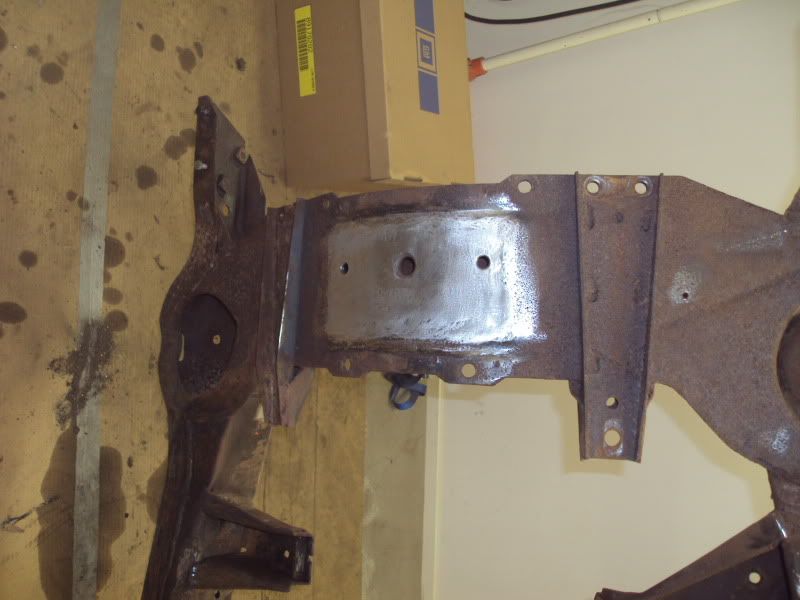
After i have checked the fitting of the engine and trans i stripped the frame, and cut out the only part that was not ok on the frame and welded in a new plate.
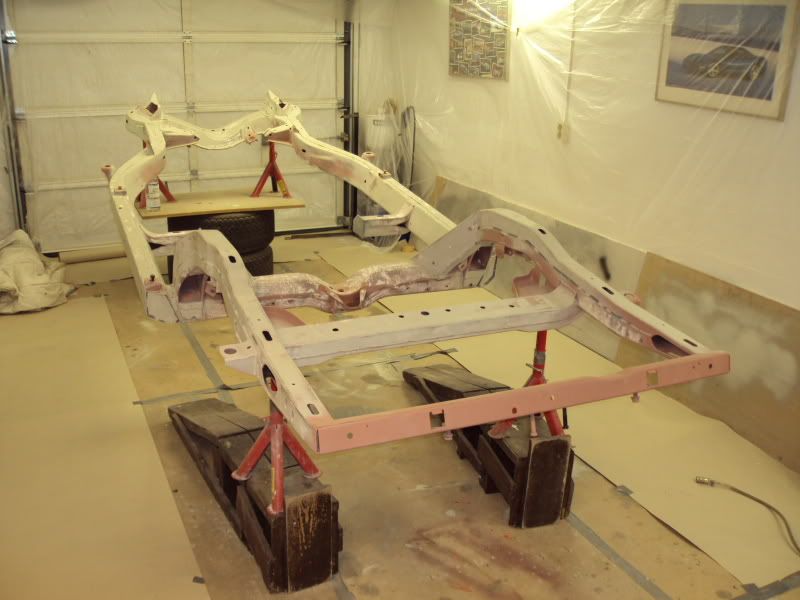
The frame and all the other parts was sandblasted and a epoxyprimed
and painted semi gloss black.
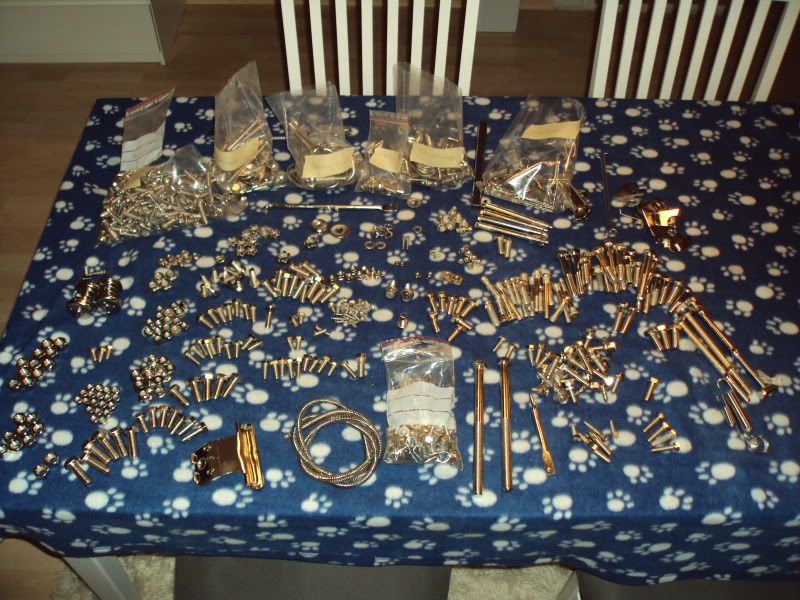
All the bolts,nuts,washers and brackets was coated, this is a few of them.
Here is my new project, it�s a matching nr 1969 with a 300hp 350.
My plans for this car is a frame of restoration and mount a LS3 engine and a Tremec TKO trans.
My first job was to remove the body from the frame
I found this behind the instrument panel
I purchased a used LS3 from a Corvette 08 and a new Tremec TKO 600,
This is the first test with the LS3 and Tremec in the frame.
The normal problem with a LS engine...
After i have checked the fitting of the engine and trans i stripped the frame, and cut out the only part that was not ok on the frame and welded in a new plate.
The frame and all the other parts was sandblasted and a epoxyprimed
and painted semi gloss black.
All the bolts,nuts,washers and brackets was coated, this is a few of them.
Thread Starter
Intermediate
Joined: Jun 2008
Posts: 29
Likes: 0
Thanks " �75 "
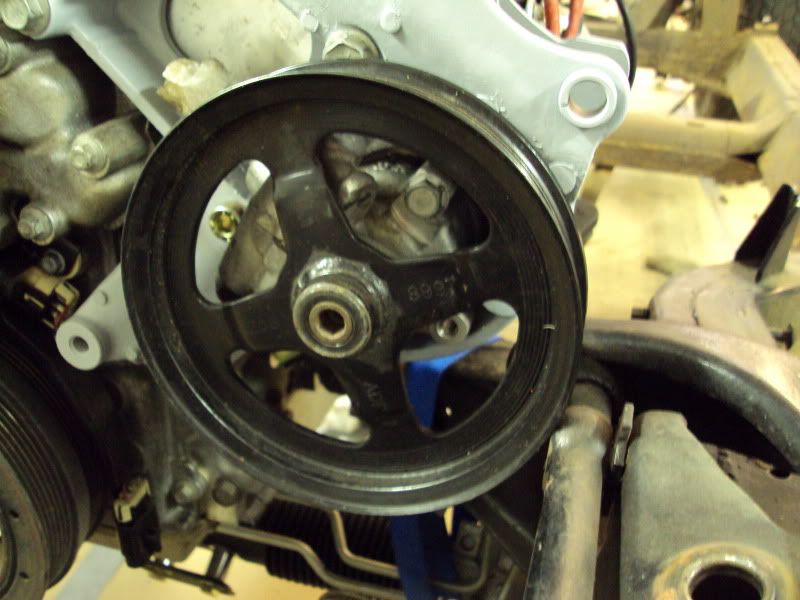
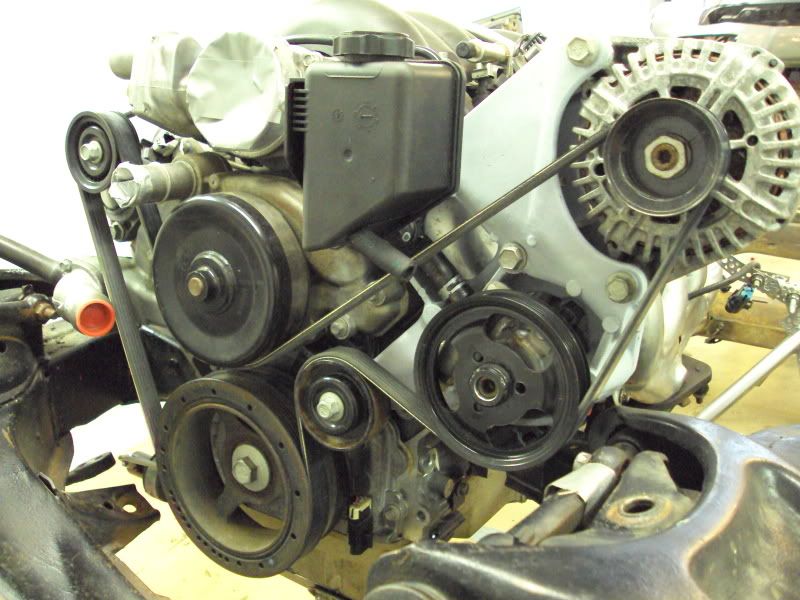
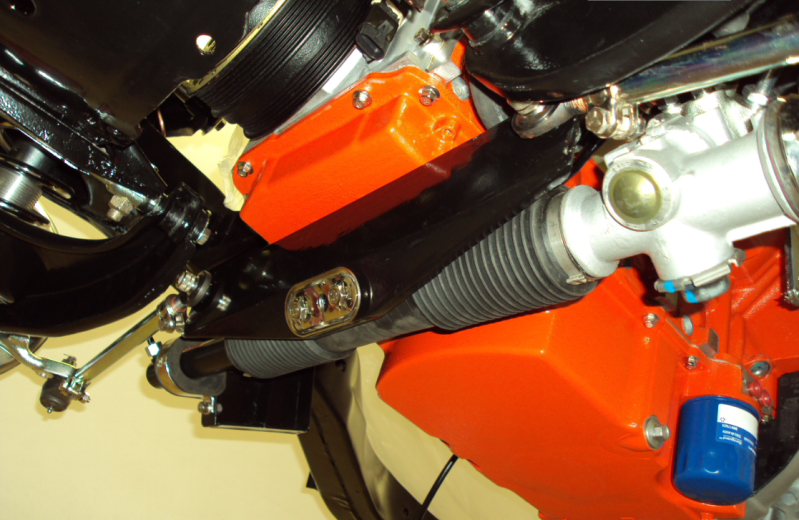
I forgot to show this picture of the new pulley to the steering pump, there is no problem now with the pulley hitting the control arm. ( but i cut the bolt on the control arm , just for safety)
The pulley is a modified pulley from a Saab...
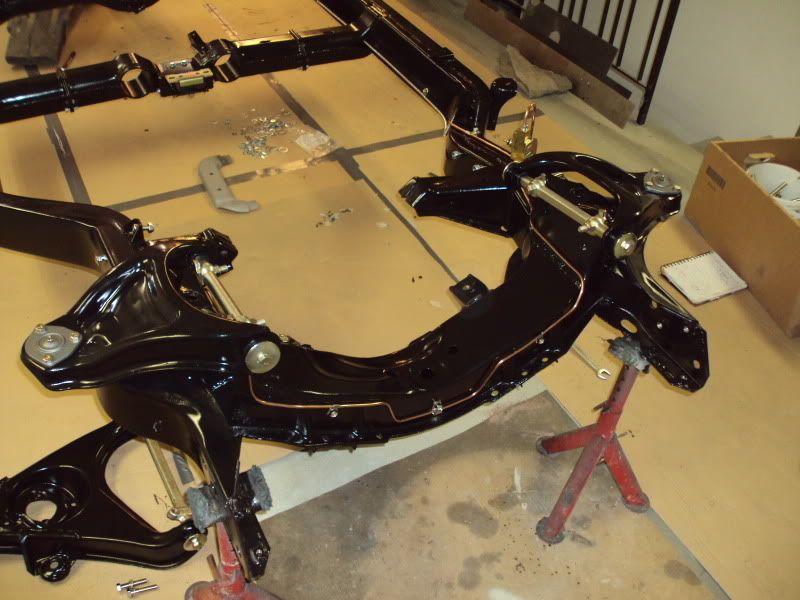
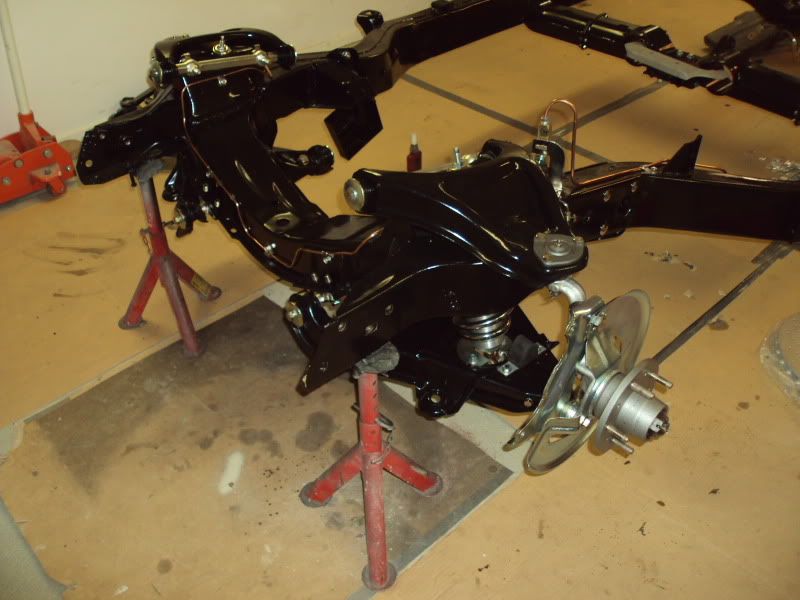
The frame is ready to be reassenbled again.
I made new brake lines:
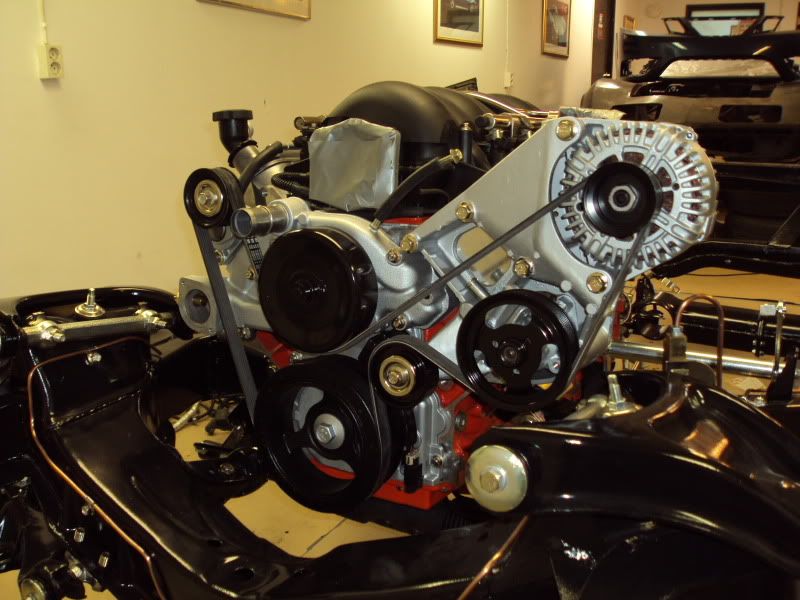
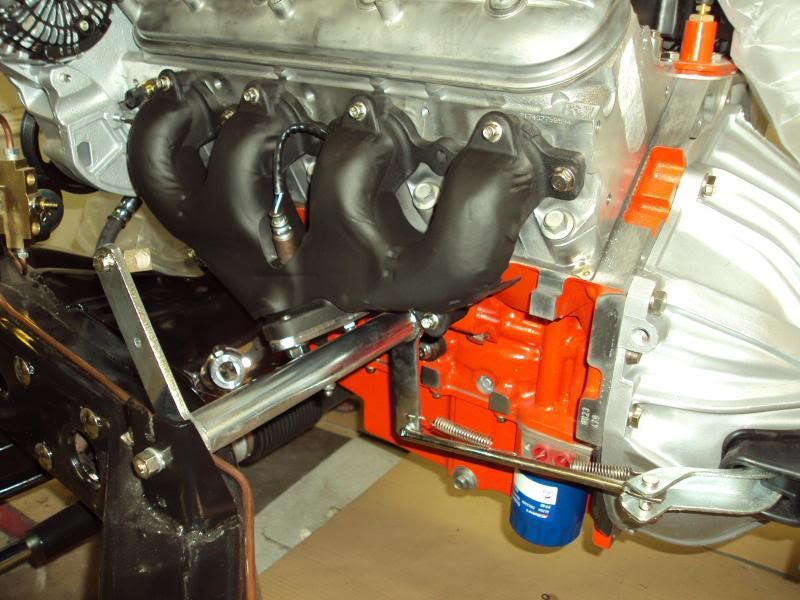
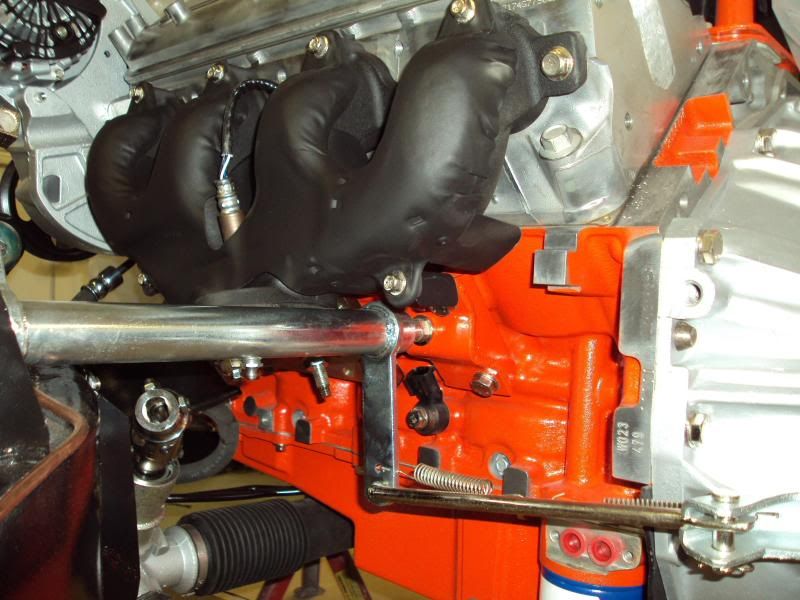
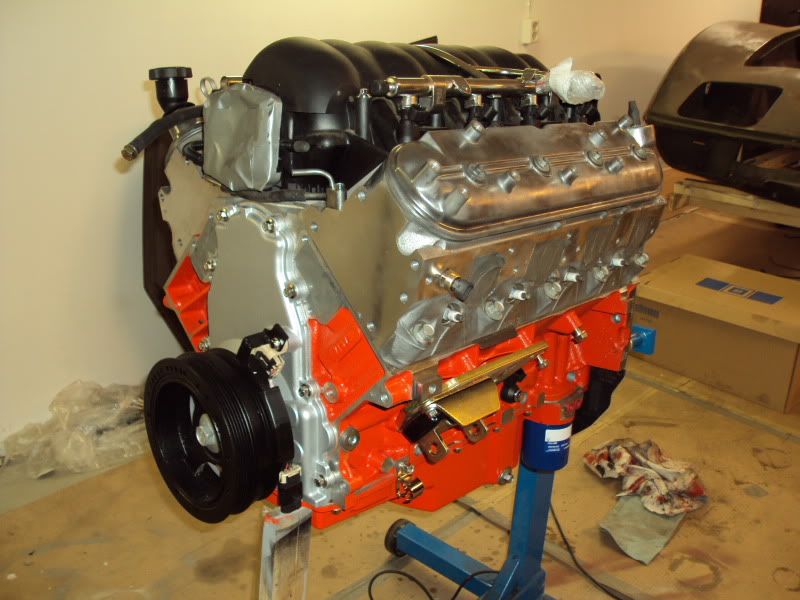
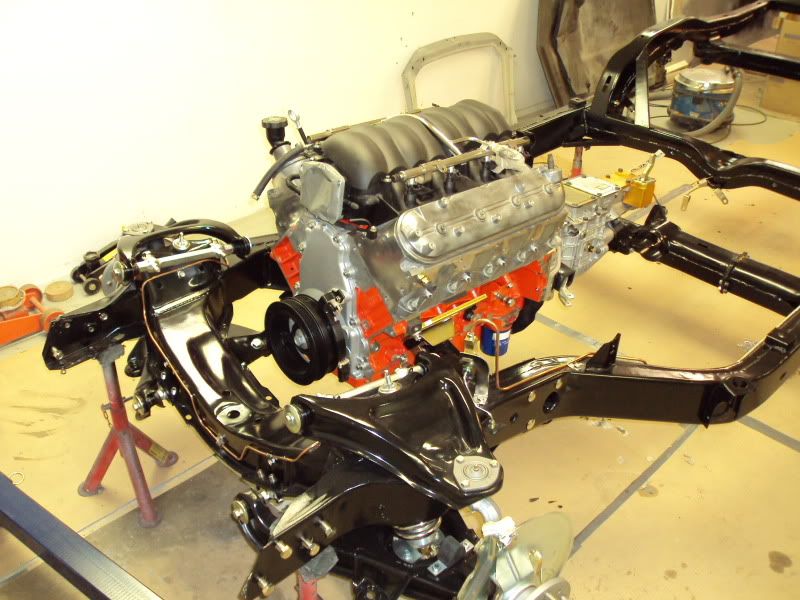
The engine was painted chevy orange:
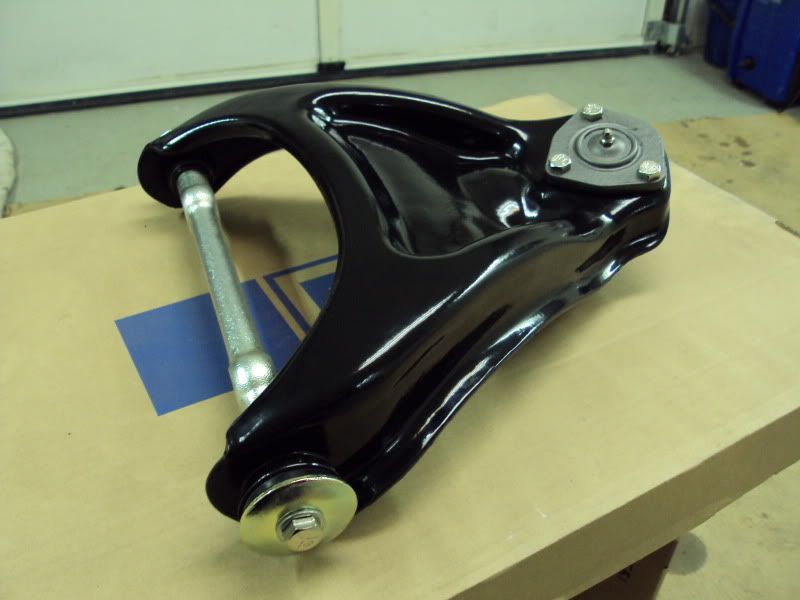
The control arms was rebuild with poly bushings:
I purchased a set of Coilovers:
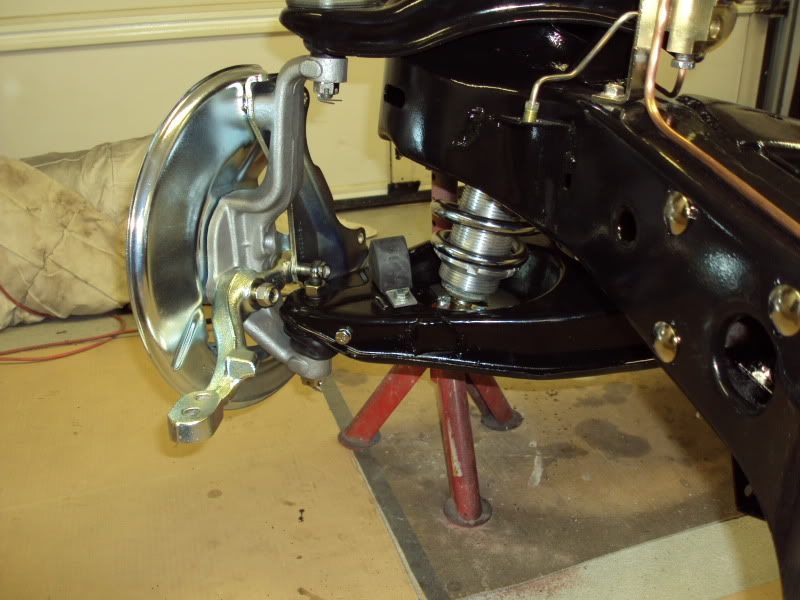
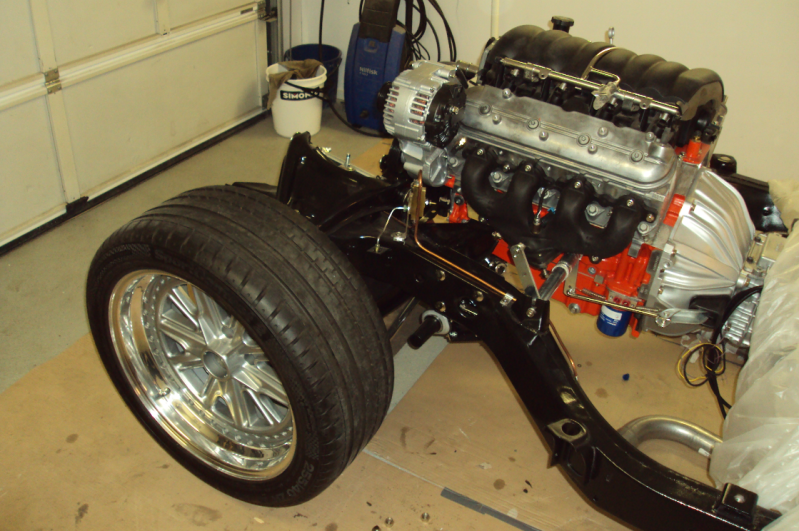
The front end is almost finished:
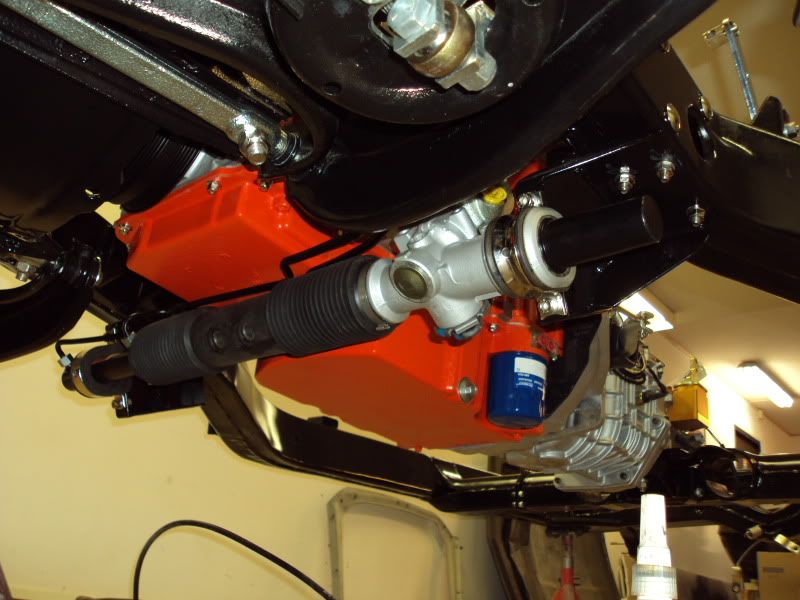
I�m making my own version of the Steeriod rack and pinion kit ( the steering rack is from a Saab 9-3 ), mounted in brackets i have made:
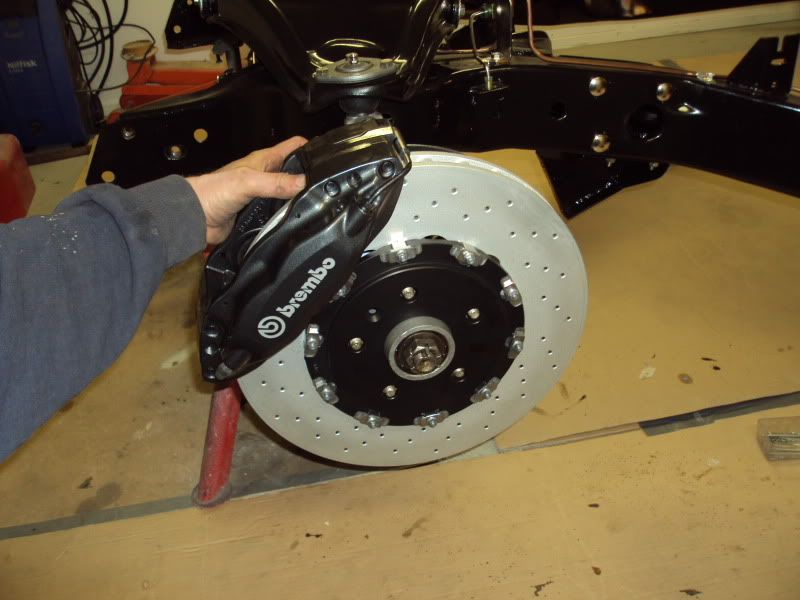
I haven�t decided if i should go with these brakes (I must use 18" wheels or bigger ) or if i should use standard size brakes so i can use 15" rally wheels if i want to:
The engine is back in the frame again:
I made a bracket on the engineblock so i can use the original clutch likange:

This is so far i have come ( i�m from Sweden so you have to excuse the spelling...)
I forgot to show this picture of the new pulley to the steering pump, there is no problem now with the pulley hitting the control arm. ( but i cut the bolt on the control arm , just for safety)
The pulley is a modified pulley from a Saab...
The frame is ready to be reassenbled again.
I made new brake lines:
The engine was painted chevy orange:
The control arms was rebuild with poly bushings:
I purchased a set of Coilovers:
The front end is almost finished:
I�m making my own version of the Steeriod rack and pinion kit ( the steering rack is from a Saab 9-3 ), mounted in brackets i have made:
I haven�t decided if i should go with these brakes (I must use 18" wheels or bigger ) or if i should use standard size brakes so i can use 15" rally wheels if i want to:
The engine is back in the frame again:
I made a bracket on the engineblock so i can use the original clutch likange:
This is so far i have come ( i�m from Sweden so you have to excuse the spelling...)
Last edited by BB502; Jun 25, 2012 at 06:39 PM.
Racer

Joined: Sep 2010
Posts: 302
Likes: 14
From: Northern Ca.
I forgot to show this picture of the new pulley to the steering pump, there is no problem now with the pulley hitting the control arm. ( but i cut the bolt on the control arm , just for safety)
The pulley is a modified pulley from a Saab...
How did you modify the pulley?
The pulley is a modified pulley from a Saab...
How did you modify the pulley?

Burning Brakes


Joined: Sep 2011
Posts: 896
Likes: 7
If you go with the Brembos,check out wheels from Billet specialties. They are designed to fit any of the big brake kit calipers. The big brake wheels are part of their pro-touring wheel collection. I havnt bought mine yet, but will in the next few weeks. I like their wheels because all I have to measure is the backspacing.
Thread Starter
Intermediate
Joined: Jun 2008
Posts: 29
Likes: 0
I forgot to show this picture of the new pulley to the steering pump, there is no problem now with the pulley hitting the control arm. ( but i cut the bolt on the control arm , just for safety)
The pulley is a modified pulley from a Saab...
How did you modify the pulley?
The pulley is a modified pulley from a Saab...
How did you modify the pulley?
Corvette Stories
The Best of Corvette for Corvette Enthusiasts

Top 10 Most Expensive Corvettes Ever Sold on Bring A Trailer
Brett Foote
10 Things Every Corvette Owner Needs (2026 Edition)
Michael S. Palmer
8 Most "Only Corvette Owners Understand" Quirks and Problems
Pouria Savadkouei
10 Reasons the C6 Z06 is Still A Performance Benchmark After 20 Years
Joe Kucinski
How Much Horsepower Every Corvette Engine "LOST" in 1972
Joe Kucinski
Top 10 DOs and DON'Ts for Protecting Your Convertible Top!
Michael S. Palmer
Top 10 Most Explosive Corvettes Ever Made: Power-to-Weight Ratio Ranked!
Joe Kucinski
150 hp to 1,250 hp: Every Corvette Generation Compared by the Specs That Matter
Joe Kucinski
8 Coolest Corvette Pace Cars (and Replicas) of All Time
Verdad GallardoRace Director


Joined: Dec 1999
Posts: 19,610
Likes: 778
From: Forked River NJ
Nice project. I am also in the middle of an LS3 swap into my 72. I am using an 09 LS3 and I had the same issue with the PS pulley. I used a pulley from a Ford Van or something like that. Same shaft diameter but the pulley was smaller. It is tight but it fits. I am using a T56 6 speed and hydraulic clutch on mine. Looking forward to more progress on yours.


Thread Starter
Intermediate
Joined: Jun 2008
Posts: 29
Likes: 0
Nice project. I am also in the middle of an LS3 swap into my 72. I am using an 09 LS3 and I had the same issue with the PS pulley. I used a pulley from a Ford Van or something like that. Same shaft diameter but the pulley was smaller. It is tight but it fits. I am using a T56 6 speed and hydraulic clutch on mine. Looking forward to more progress on yours.

Thank�s everybody for all the comments.

I�m waiting for a call from the firm that has rebuilt the rear axle, so i can put the rear end together.
I also waiting for parts from Ecklers, among other things a stainless steel parking brake kit so i can rebuild my traling arms, i have already set the spindle end play with a set-up tool.
While i wait i�m grinding the underside of the body and the engine compartment so i can paint it in semi gloss black.
Thread Starter
Intermediate
Joined: Jun 2008
Posts: 29
Likes: 0

Thread Starter
Intermediate
Joined: Jun 2008
Posts: 29
Likes: 0
It�s time for a small update...
I have received my new wheels, 18" ( front ) with 255/40 tyre and 19" ( rear ) with 275/35 tyre.
I made a bracket for the steeringrack so the steering is now finished.
I will update the thread soon with more pictures.
I have received my new wheels, 18" ( front ) with 255/40 tyre and 19" ( rear ) with 275/35 tyre.
I made a bracket for the steeringrack so the steering is now finished.
I will update the thread soon with more pictures.