

door weatherstriping


Race Director


Joined: Apr 2009
Posts: 19,294
Likes: 2,754
From: Charlotte NC
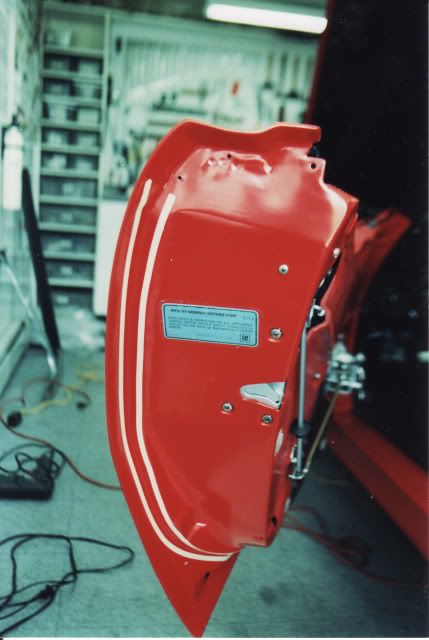
You should have the outer upper trim and window seals installed. I prefer the felt "fuzzy" style instead of the rubber type for the upper outer window seals.
Make sure the door is adjusted/aligned. This is so the plate that covers the upper hinge bolts can be installed.
I also make sure that the area of the door that is painted semi-gloss black like the factory performed is correct. Because painting this area AFTER the weatherstrip is installed is a bit challenging.
Make sure that the glue you use is for the type of weatherstrip you have. 3M offers two types of weatherstrip glue (8008 & 8011 if my memory serves me correctly)...and they work on different types of weatherstrip. If your weatherstrip is made out of EPDM...make sure that the glue is for applying EPDM.... because if you use the glue for latex weatherstrip...the EPDM weatherstrip will fall off over time. ALSO make sure that you apply the glue to the door and the weatherstrip...because it is a contact adhesive and works best if applied to both surfaces and then attached.
DUB

Advanced

Joined: Feb 2013
Posts: 69
Likes: 0
From: DSM Iowa
I agree, and with my years experience with contact adhesive, wipe the surface with a scrotchbrite pad to open the pours on the paint, then use lac. thinner to clean just before applying and make sure your material and door temp. is 70 degrees or better if at all possible..hand rub it for a few minutes after install to make sure all points of contact on the weather stripping are in contact...And yes both pcs. need sprayed, allow 5-10 min of set up time for the adhesive..depending on temp. and humidity...100 percent covererage on both parts you are adhering together...
patience is the key...don't pull or stretch it.. let it lay naturally..if applying vertical, start from the bottom up so u don't stretch it..
good luck my friend..
J
patience is the key...don't pull or stretch it.. let it lay naturally..if applying vertical, start from the bottom up so u don't stretch it..
good luck my friend..
J
Team Owner


Joined: Sep 2006
Posts: 31,270
Likes: 4,362
From: Westminster Maryland
Hi B79V,
I think it's a good idea to test fit the new weatherstrip on the door completely. I made a some reference marks so I would know for sure if I was stretching the weatherstrip or not as I applied it.
I used the weatherstrip adhesive that comes in a tube (I've not seen any spray-on weatherstrip adhesive) and used a brush to apply it to the weatherstrip and door.
While test fitting the weatherstrip I ran 1/4" tape on each side of the weatherstrip so I'd know where to put the adhesive.
I used many pieces of blue painter's tape to hold the weatherstrip firmly in place while the bond set.
At least on earlier cars the weatherstrip was cut in 2 pieces with the joint in the center of the underside of the door. That makes it easier to position the pieces.
I think you need to start with the placement of the top since they're held in place with screws too.... so your sure of a proper positioning for those areas.
Good Luck!
Regards,
Alan


Thread Starter
Melting Slicks

Joined: Mar 2002
Posts: 2,164
Likes: 7
From: Beringen
You should have the outer upper trim and window seals installed. I prefer the felt "fuzzy" style instead of the rubber type for the upper outer window seals.
Make sure the door is adjusted/aligned. This is so the plate that covers the upper hinge bolts can be installed.
I also make sure that the area of the door that is painted semi-gloss black like the factory performed is correct. Because painting this area AFTER the weatherstrip is installed is a bit challenging.
Make sure that the glue you use is for the type of weatherstrip you have. 3M offers two types of weatherstrip glue (8008 & 8011 if my memory serves me correctly)...and they work on different types of weatherstrip. If your weatherstrip is made out of EPDM...make sure that the glue is for applying EPDM.... because if you use the glue for latex weatherstrip...the EPDM weatherstrip will fall off over time. ALSO make sure that you apply the glue to the door and the weatherstrip...because it is a contact adhesive and works best if applied to both surfaces and then attached.
DUB
Make sure the door is adjusted/aligned. This is so the plate that covers the upper hinge bolts can be installed.
I also make sure that the area of the door that is painted semi-gloss black like the factory performed is correct. Because painting this area AFTER the weatherstrip is installed is a bit challenging.
Make sure that the glue you use is for the type of weatherstrip you have. 3M offers two types of weatherstrip glue (8008 & 8011 if my memory serves me correctly)...and they work on different types of weatherstrip. If your weatherstrip is made out of EPDM...make sure that the glue is for applying EPDM.... because if you use the glue for latex weatherstrip...the EPDM weatherstrip will fall off over time. ALSO make sure that you apply the glue to the door and the weatherstrip...because it is a contact adhesive and works best if applied to both surfaces and then attached.
DUB
Thread Starter
Melting Slicks
Joined: Mar 2002
Posts: 2,164
Likes: 7
From: Beringen
When trial fitting, I noticed that the front big chunk of rubber that the door weatherstriping has, seems to severly touch the A-pillar rubberstriping. It pushed the A-pillar striping in when closing the door. Is this normal or does the A-pillar striping needs to be trimmed ?


