


Spreader bar ordered!

Team Owner


Joined: Jul 2004
Posts: 40,404
Likes: 791
From: Redondo Beach, California
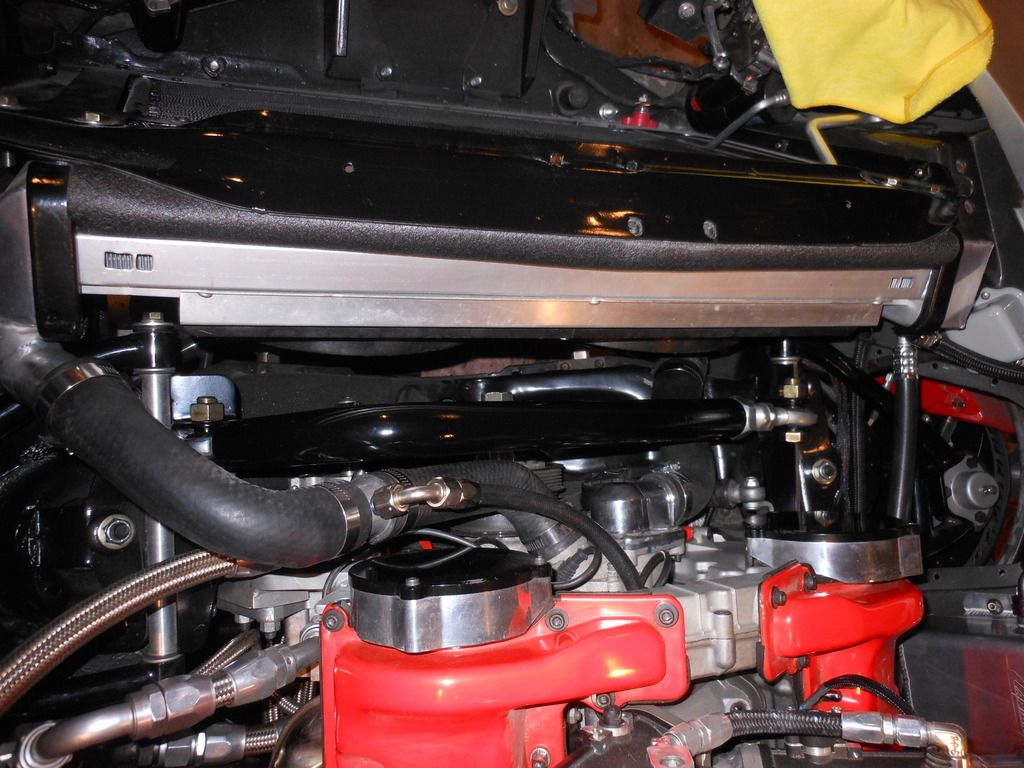
For what ever it's worth. A spreader bar from Dick Guildstrand's Motorsports in my 68 SB. No problem installing it since I have an electric fan. They had to do a little welding to install it. I think it adds a lot of structural strength to the front end.
Thread Starter
Racer

Joined: Jul 2013
Posts: 307
Likes: 19
From: Kirkland WA
Due to the weight loss adding height, I'll also be cutting springs and recording the results, then I plan to rig a lever to measure the spring's compressed height with approximately 700 lbs on it. (That's roughly 1/4 the car's sprung weight). When I do the conversion to the heavier/shorter GT springs later this year I will also measure their compressed height and cut them to match the stock springs. I expect this method to result in a fairly accurate final ride height on the first try.
Le Mans Master


Joined: Apr 2007
Posts: 7,353
Likes: 72
From: Graceland in a Not Correctly Restored Stingray
You'll need to factor into your loaded spring height maths the effective front wheel rate as well as to identify the active coils as installed (post-cut) to accurately predict how much to cut beforehand. I'd suggest waiting until everything else is back together and to set ride heights last.
Instructor
Joined: May 2007
Posts: 130
Likes: 0
From: Houston TX
Anyone with experience installing in a '80 with an LS engine? I have concern about the passenger side mounting point as my return water hose runs in front of the upper A-arm bolting. Haven't seen any pics of the spreader bar mounted on that side. Bolting below the bolting/bushings on the frame?
Burning Brakes

Joined: Oct 2008
Posts: 1,037
Likes: 14
From: Mobile Alabama
Anyone with experience installing in a '80 with an LS engine? I have concern about the passenger side mounting point as my return water hose runs in front of the upper A-arm bolting. Haven't seen any pics of the spreader bar mounted on that side. Bolting below the bolting/bushings on the frame?
Thread Starter
Racer
Joined: Jul 2013
Posts: 307
Likes: 19
From: Kirkland WA
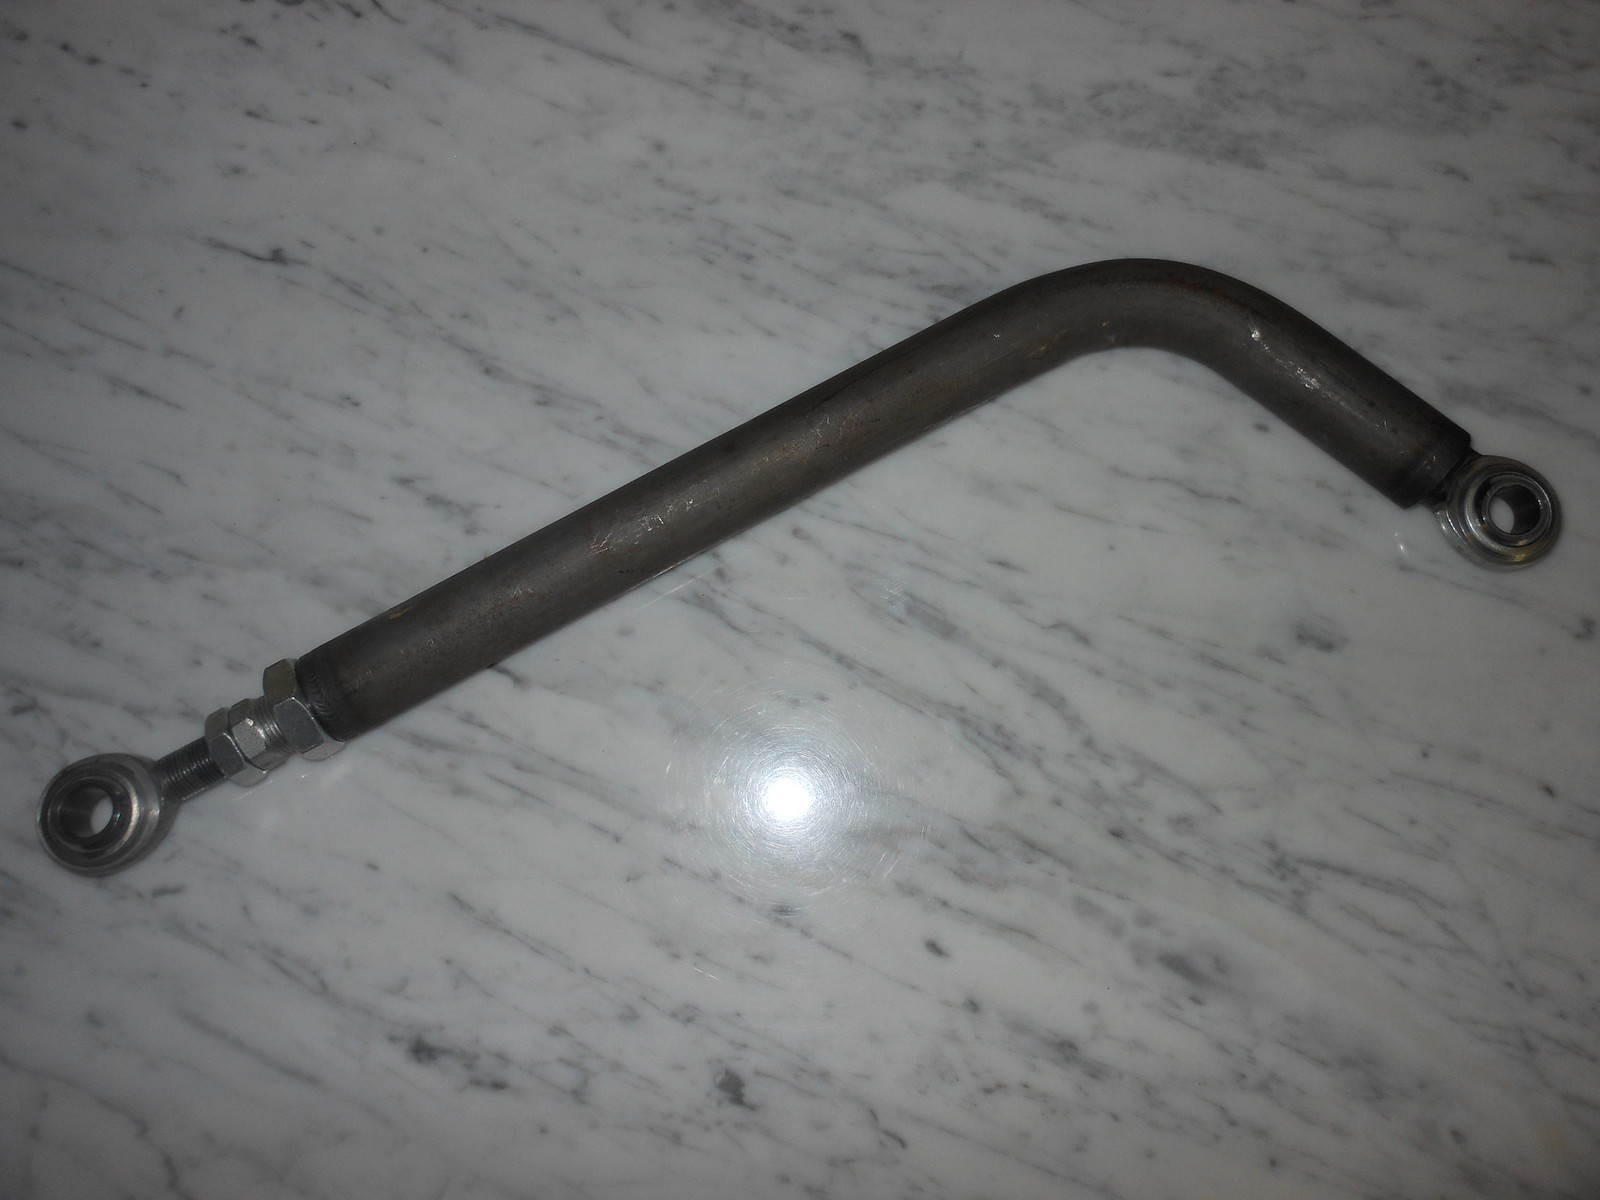
26 1/4". So I picked up 1/8" while on jacks. FWIW, the Sharkbite bar looks like it will work great, plenty of clearance between pulley and fan, and no welding necessary. It was pretty easy to just bend the fan shroud away from the control arm bolt to get the nut on and off. All seemed simple until I realized I needed to grind and repaint the passenger side mounting flange because it has a corner that digs into the lower radiator hose. Then, the bar was too long! I took it down about .040" to barely squeeze in. I guess with a slight frame sag and the maximum shims for caster, there ain't much room left.
Corvette Stories
The Best of Corvette for Corvette Enthusiasts

Top 10 Most Expensive Corvettes Ever Sold on Bring A Trailer
Brett Foote
10 Things Every Corvette Owner Needs (2026 Edition)
Michael S. Palmer
8 Most "Only Corvette Owners Understand" Quirks and Problems
Pouria Savadkouei
10 Reasons the C6 Z06 is Still A Performance Benchmark After 20 Years
Joe Kucinski
How Much Horsepower Every Corvette Engine "LOST" in 1972
Joe Kucinski
Top 10 DOs and DON'Ts for Protecting Your Convertible Top!
Michael S. Palmer
Top 10 Most Explosive Corvettes Ever Made: Power-to-Weight Ratio Ranked!
Joe Kucinski
150 hp to 1,250 hp: Every Corvette Generation Compared by the Specs That Matter
Joe Kucinski
8 Coolest Corvette Pace Cars (and Replicas) of All Time
Verdad Gallardo
Pro


Joined: Jan 2001
Posts: 511
Likes: 66
From: Timnath, CO
It appears I am going to have a similar problem with the bar barely fitting, or perhaps being too long. I wonder why Speed Direct does not manufacture the bar a little shorter given the number of people that are having difficulty. Seems like everyone is getting it to work, but it is more difficult than it needs to be.


Burning Brakes

Joined: Feb 2014
Posts: 1,045
Likes: 226
From: Cape Neddick Maine
2020 C3 of the Year Finalist - Modified
I've got a Speed Direct bar in mine as well. It bolted up with just a little trimming off the ends. I chucked it up and removed .125 off each end. could have simply taken it all of one end but I am a little ****.LOL
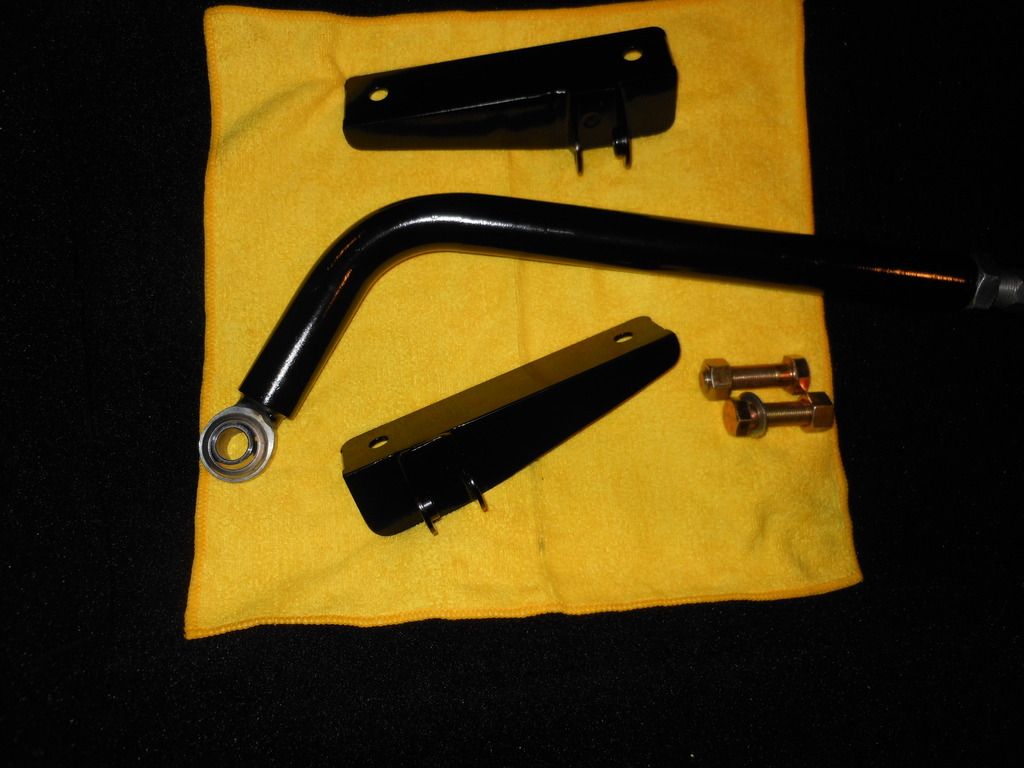
1).Pretty simple to install jack it up remove the upper control arm nuts put the brackets in place then snug them up.
2).run the heim ends in all the way bolt one end in place then put the other end in keeping everything loose.
3).Check the clearance for and aft of the brackets you may need to tap them to reposition them for optimal fit of the bar around the pulleys.
4).Tighten only the upper control arm nuts and remove one of the spreader bar bolts at this time.
5). lower the car and install the remaining spreader bar bolt.
*You may need to remove the bar and trim the bar*.
6).adjust the bar with the cars weight on it by hand then tighten the jam nuts.
don't forget to anti-seez the threads. On my application I did have to shorten the bar only because I had so many shims-I believe it is because of my VBP offset control arms giving so much more adjustment.
Installation was pretty slick took all of maybe 45 minutes
Burning Brakes
Joined: Feb 2014
Posts: 1,045
Likes: 226
From: Cape Neddick Maine
2020 C3 of the Year Finalist - Modified


Le Mans Master


Joined: May 2003
Posts: 8,877
Likes: 3,556
From: Fernandina Beach FL
2023 Restomod of the Year finalist
2020 C3 of the Year Winner - Modified
I have a bunch of stuff on the way- a dry sump and a few extra cylinders.- so imade my own
I used a Panhard bar from Speedway motors and some 2" angle iron-
I think I have about $60 in the set-up.
Just so happens they come in 22�" in length-
Cleaned up the angle iron- prettied it up w/ some paint-
Dry sump pump in the way-
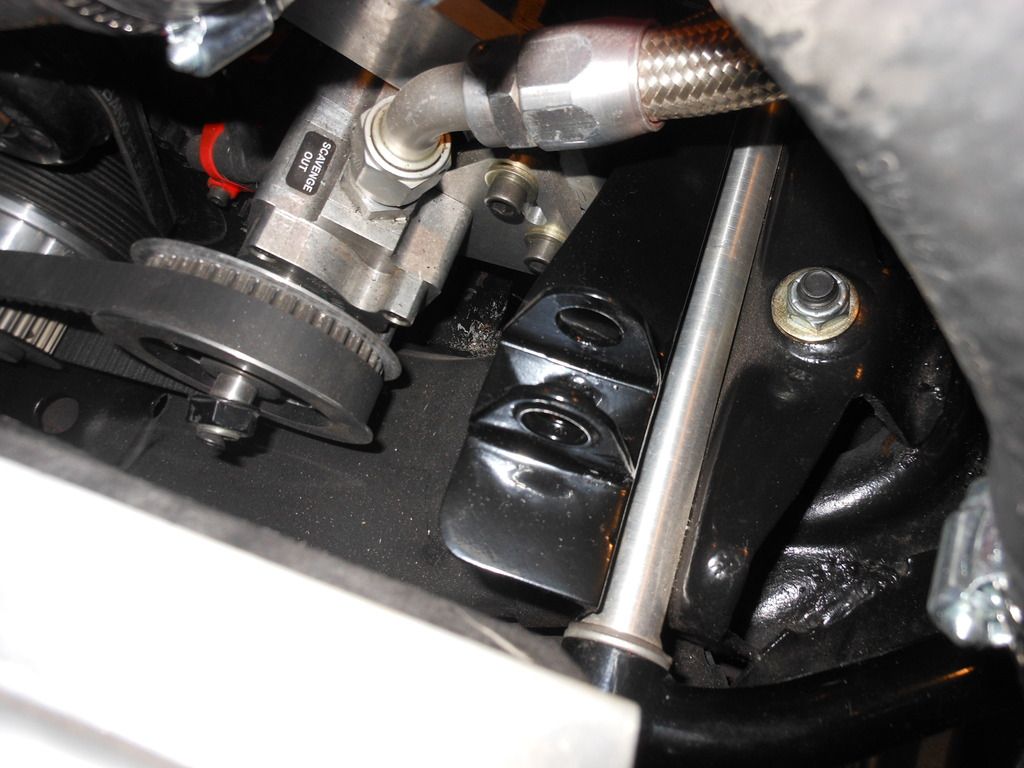
pass side-
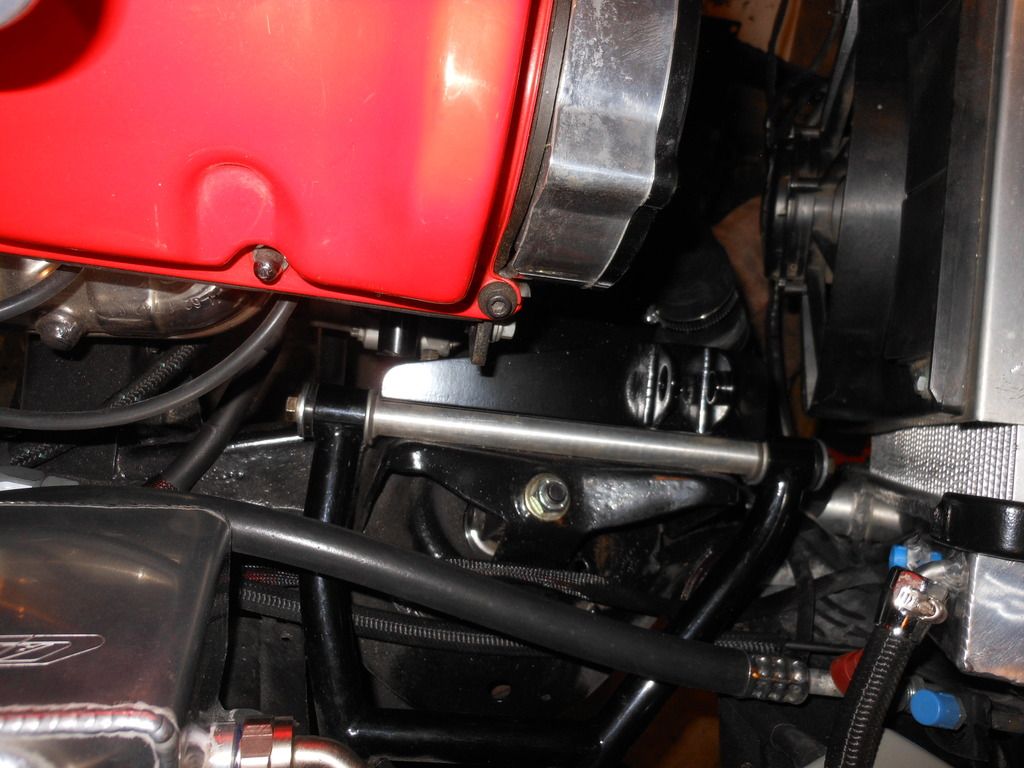
installed-plenty of clearance over the pump
I used a Panhard bar from Speedway motors and some 2" angle iron-
I think I have about $60 in the set-up.
Just so happens they come in 22�" in length-
Cleaned up the angle iron- prettied it up w/ some paint-
Dry sump pump in the way-
pass side-
installed-plenty of clearance over the pump


Instructor
Joined: Feb 2016
Posts: 155
Likes: 6
Two questions for you all:
1. Did any of you have problems with the upper control arm bolt just spinning and the nut not releasing? I tried to install mine yesterday and one of the bolts is just spinning and I can't get anything behind the back of the control arm to hold the bolt for the life of me. Not sure if anyone else has had this issues and figured out an easy fix for it???
2. Does anyone have a spreader bar WITH a Roots style blower? I have a Weiand 142 on order and I'm a little worried that it might cause me some issues with the spreader bar. Really hoping I'm not in a situation where I can't use the spreader bar due to the belts from the blower. :/
Pro

Joined: Oct 2009
Posts: 664
Likes: 89
From: Marysville Ohio
Two questions for you all:
1. Did any of you have problems with the upper control arm bolt just spinning and the nut not releasing? I tried to install mine yesterday and one of the bolts is just spinning and I can't get anything behind the back of the control arm to hold the bolt for the life of me. Not sure if anyone else has had this issues and figured out an easy fix for it???
2. Does anyone have a spreader bar WITH a Roots style blower? I have a Weiand 142 on order and I'm a little worried that it might cause me some issues with the spreader bar. Really hoping I'm not in a situation where I can't use the spreader bar due to the belts from the blower. :/
1. Did any of you have problems with the upper control arm bolt just spinning and the nut not releasing? I tried to install mine yesterday and one of the bolts is just spinning and I can't get anything behind the back of the control arm to hold the bolt for the life of me. Not sure if anyone else has had this issues and figured out an easy fix for it???
2. Does anyone have a spreader bar WITH a Roots style blower? I have a Weiand 142 on order and I'm a little worried that it might cause me some issues with the spreader bar. Really hoping I'm not in a situation where I can't use the spreader bar due to the belts from the blower. :/
Sorry I can't help with the second question.

Melting Slicks

Joined: Mar 2008
Posts: 2,989
Likes: 198
From: Meriden CT
Yes to question #1. As stated knurles are worn off. I was able to get a socket on the front bolt head, the rear one I grabbed the shank with a vice grip. I have new ones coming from Ecklers