When you click on links to various merchants on this site and make a purchase, this can result in this site earning a commission. Affiliate programs and affiliations include, but are not limited to, the eBay Partner Network.
Looks like I need to change out a stub axle on my 69 - I have removed/rebuilt the whole diff before on another corvette. But this time all it needs is a stub axle - can this be done in the car? Looks like the upper cover bolts would be hard to get at though.
I think you would be making the job more difficult by trying to do it in the car. It really doesn't take that long to remove the diff if you just go at it. If you've had it out before, all the bolts should come loose without issue.
Looks like I need to change out a stub axle on my 69 - I have removed/rebuilt the whole diff before on another corvette. But this time all it needs is a stub axle - can this be done in the car? Looks like the upper cover bolts would be hard to get at though.
if you haven't had it out, how do you know that all it needs is a stub axle? Some things can only be seen once it's open.
You can tell it needs a new axle when the yoke shields are rubbing the diff housing AND the strut rods are adjusted to max travel IN and you're still short on camber. The tip must be worn badly.
i fix copiers for a living. i frequently find myself trying to do a repair the hard way to save me 3 minutes of removing a door or an assembly to do it right. it always ends up harder and more time consuming than if i did it right...
You can tell it needs a new axle when the yoke shields are rubbing the diff housing AND the strut rods are adjusted to max travel IN and you're still short on camber. The tip must be worn badly.
Honestly if you have that much wear on the axles you have a lot of metal shavings floating around inside the housing. I'm pretty sure your posi clutches are shot also. If you plan on keeping this for a while you might want to consider a total rebuild. Yank it out and have it gone over.
Thanks for the advice but I'm really looking for a reply if it CAN be done. Not what I should do or what would be wise. Just want to know if it is possible to get the cover off.
It's hard to remove the cover with the diff in the car. The cover mounts the diff to the upper cross member and those bolts are very hard to get out with the cross member in the car. The spring and half shafts will need to be removed either way you do it. By the time you fight with the cover to cross member bolts (cut a hole in the storage area floor or try to make a special wrench for the limited clearance), you could have the whole thing out. I've heard of someone removing the diff and leaving the cover in the car, but that seems an equally hard headed approach to a job that can be done easier by dropping the diff and cover together with the rear cross member. If you try to remove the cover in the car, the only thing holding the diff in after that are the snubber mount and the driveshaft.
I've pulled and rebuilt quite a few of these with the stub axle wear problems, and I can't imagine trying to do it without pulling the diff out of the car. Trying to keep the diff in the car would be a significant and pointless undertaking, since it comes out as easily as it does. Just pull it out.
I have some photos and a process for repairing the stub axle wear if you're interested in having me post some info for you.
For info, here is the process I used. This allows you to repair and re-use the original stub shafts, which are significantly better quality than most of the junk aftermarket shafts being sold.
The issue of the ends of the stub shafts wearing out riding against the spider gear pin is a common Corvette problem.
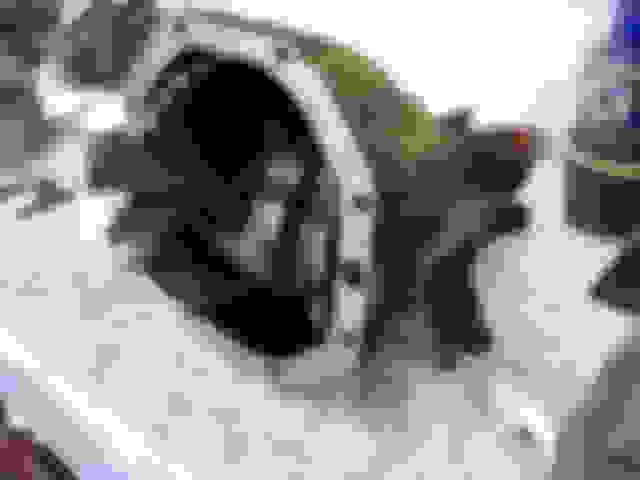
As long as the shafts have not worn so far that the snap ring groove has been consumed, you can repair the shafts by installing hardened steel caps on the ends of the shafts. You need to pull the differential out of the car to do this.
Here I’m measuring the amount of slop at the ends of the stub shafts:
Notice the amount of shaft movement from “in” position to the “out” position:
Spider gear pin pulled, snap rings removed, and shafts pulled out for repair:
Photo shows the severe wear on the end of the one stub shaft. Noting the endplay measured, we then added the amount to be machined off to create a flat surface. The factory center point was modified to create a counterbore:
Machined shaft end with counterbored center to accept a new thrust surface with press-in center nub:
A custom washer was then machined with a nub in the middle for pressing it into the counterbore created in the shaft. The thickness of the washer was determined by adding the measured shaft slop to the amount of material removed off the shaft and adding .010” for endplay clearance. The washers were then heat treated to Rockwell Rc48 and pressed onto the ends of the shafts. Machined and hardened custom thrust washers:
Completed shaft mod ready for install:
This saves the factory shafts and avoids needing to replace them with expensive and inferior aftermarket Chinese-made shafts. Many of these aftermarket shafts are not correctly heat treated, and they fail very quickly due to the soft non-heat-treated shaft ends. Making the custom hardened buttons also allows you to custom tailor the shaft endplay to the exact tolerance desired.
Thanks for the advice but I'm really looking for a reply if it CAN be done. Not what I should do or what would be wise. Just want to know if it is possible to get the cover off.
Yes it CAN be done. Having done many of these it is easier to pull the whole pumpkin.
It can be done, but it will be more work than pulling it out. You'll probably need to pull the carpeting out of the rear compartment and use a hole saw to drill holes through the rear compartment floor to access the bolts holding the diff cover to the crossmember. I've seen it done...
Pulling the differential out with the crossmember - Total time= less than one hour:
One thing to note here is that moving the axle outward to make up for posi clutch wear, also moves the side gears away form the spider (pinion) gears causing more backlash.
Well I might as well jump in for a swim too!
As Gordon and Lars pointed out correctly, yes it is possible to replace the axles in in the car BUT other then labor involvement it is very dangerous since splitting the diff in the car will result in the gear oil not sucked out of the housing all over and potentially 100 lbs of cast iron swinging down very quickly if not properly supported. There is no advantage to leaving the diff in the car.
Original 69 axles were actually hardened and in many cases are still good, yes they can wear but they were better then the 73-79 axles.
Lars repair is a good one, better in fact then the rebuilt axles I have got in over the past year. I have received in and checked both new and rebuilt axles and they all had issues. Spline depths on the replacement tips not deep enough, splines not lining up with the original splines, shields falling off, HD yoke holes stripped out, End dimensions all over the place.
New axles = good hardening, spline fitment, decent end dimension only to find the end cap gaps over 060"
Axle end play comes from 3 areas
1- worn axle faces
2- Sloppy posi setup, even with the band aid springs
3- Worn case cross shaft holes
#1- common with 73-79 originals and some rebuilt/new axles
#2 is the one overlooked, as both new and rebuilt vary a lot.
#3 not as common and the posi can be saved if not too far gone- and if the parts are still available. I stocked up on them years ago.
Good luck, 69 diff's were not too bad. They had the better 2nd design Eaton posi and solid steels but the weaker 10-18 spiders. If you remove the diff you should look it over and check it close. I have several write ups on what to look for and the pictures are still available- for now. If you can't find them look on DC or let me know and I can send you the link.
Not that this matters due to you are going to do it how I know you do things...but I would bet that this differential would not pass the
test used to check the clutches.
Originally Posted by '75
One thing to note here is that moving the axle outward to make up for posi clutch wear, also moves the side gears away form the spider (pinion) gears causing more backlash.
This is odd...due to the best of my recollection...the side yokes or stub axles go in last and are check for end play. So the spider gears are already set.
What lars has shown comes into play due to these hardened plugs can be modified to get the wanted end-play of the side yoke/stub axle if needed.
And knowing when the car is on the ground...the side yoke/stub axle is going inwards....thus this hardened button is making contact with the pinion shaft....thus the snap ring is NOT making contact with the spider gear....because the desired end play has been achieved.
This is odd...due to the best of my recollection...the side yokes or stub axles go in last and are check for end play. So the spider gears are already set. DUB
My comment was directed to anyone thinking that just putting more material on the end of the yoke was the fix for stub axle end play. In the pictures above with the feeler gauge measuring the end play, I guess it's taken for granted the pinion back lash is correct on a well worn diff. If it's a diy insert, there are specific dimensions for the axle tip to the snap ring groove. Not directed to someone doing a proper rebuild that sets up the pinion back lash correctly and also the posi clutches. These are a little more detailed than a lot of differentials. So your recollection is right about the order of assembly during a rebuild, the OP is talking of just replacing a side yoke.

 12-31-2017, 08:46 AM