When you click on links to various merchants on this site and make a purchase, this can result in this site earning a commission. Affiliate programs and affiliations include, but are not limited to, the eBay Partner Network.
If you slotted the c-beam holes at the tailshaft, you might want to use a custom plate at the top and bottom for more clamping clamping force.
My car was LS swapped by someone else and they slotted the c-beam holes. It caused a lot of movement which ended up breaking the Holley brand TKO tailshaft bracket/mount. I had to buy a $325 Silver Sport Transmission mount and a new c-beam to fix it. I was able to patch weld the old one myself once and then had a buddy weld it up good a second time and it still broke in a couple months. It had way better traction with the old mount because of the articulation/movement. After installing the new one it is tight as hell and now traction off the hit suffers but it was fixed right. No more issues or movement.
If you slotted the c-beam holes at the tailshaft, you might want to use a custom plate at the top and bottom for more clamping clamping force.
My car was LS swapped by someone else and they slotted the c-beam holes. It caused a lot of movement which ended up breaking the Holley brand TKO tailshaft bracket/mount. I had to buy a $325 Silver Sport Transmission mount and a new c-beam to fix it. I was able to patch weld the old one myself once and then had a buddy weld it up good a second time and it still broke in a couple months. It had way better traction with the old mount because of the articulation/movement. After installing the new one it is tight as hell and now traction off the hit suffers but it was fixed right. No more issues or movement.
Just some food for thought.
Thanks krusty, that's good info to have. Sucks that you had to find out the expensive way. Part of the problem i was having is I couldn't get the rear bolts loose to take out the cbeam. I got them to turn slightly but on the second try I realized I needed a wrench on the top nuts that I didn't have and so I ground the slots with it in the car. With a knurled bit I had from a harbor freight set that did the job quickly. Have you or anyone else seen the advertisement for the Alumaloy aluminum weld sticks where you hear up the base metal and basically use the sticks like solder to weld aluminum?
Tonight I did some fitting of the passenger side C5 header since that side is always a PITA on any Govenment Motors product and this arrangement proved no different. #4 exhaust tube hits the frame big time and #8 hits the ac box. I can shave the ac box no prob but beating on #4 tube with pieces of wood and a 20# sledge by yourself is no joke. Right now it fits without a gasket but I'll have to pound on it a bit more tomorrow to get more than a sheet of papers clearance to the frame. Then cut off the collector and weld on a new one at the right angle. Maybe. We'll see. Right now after cutting off the end of the header its still extremely close to the bellhousing.
Last edited by banditt1979; Jun 14, 2020 at 08:05 PM.
From what I've read in other posts you have to install them together so I started the driveshaft first then shoved it into the c beam and shoved it back to align with the c beam holes I slotted prior to starting. About a heavy 1/8" just to make sure there was some adjustment, which I ended up needing. I have a transmission jack which made that a lot easier.
Just put my driveshaft back in the other day. C-beam was already installed and it am only took a few turns to get the ds in.
I decided to replace the heater core and ac evaporator while I'm going through everything. Was able to remove the heater core in about 1 1/2 hours including getting tools together, removing the seat and removing the top air duct and ecm box since that's no longer needed. It was a pain getting in and out but not as bad as it seems. The heater door rod had fallen in the box so it had to be done anyway. Core looks newer so someone's been in there prior to my ownership and the white clip holding the rod was in good shape and the rod snapped right back in. Lucky me as I've heard they usually break. Should be fun getting the upper left screw back in.
Last edited by banditt1979; Jun 13, 2020 at 05:02 PM.
Good idea doing all the preventative stuff like the heater core, while you've got the car apart that way you don't have to worry about it once the swaps done.
Good idea doing all the preventative stuff like the heater core, while you've got the car apart that way you don't have to worry about it once the swaps done.
Btw are you going have to trim your heater box?
I could pound on the #8 header tube and make it work. Right now since I have the firewall side box completely removed i think I'll go ahead and trim it. I'll post some pics of the finished box.
One thing that did surprise me is how easy it was to take it out even with the engine in the car. The wheel wells just unbolt and you have plenty of access. Not so much with the F bodies.
Last edited by banditt1979; Jun 14, 2020 at 10:15 AM.
I could pound on the #8 header tube and make it work. Right now since I have the firewall side box completely removed i think I'll go ahead and trim it. I'll post some pics of the finished box.
One thing that did surprise me is how easy it was to take it out even with the engine in the car. The wheel wells just unbolt and you have plenty of access. Not so much with the F bodies.
Ya taking the heater box out in these cars is a pretty easy. Since your going to mod the heater box for the header, you might want to double check that the coil packs at the back of the engine clear it ok also. My coil packs clear the heater box, but some people doing these swaps say the coil packs don't clear without modding the heater box.
Ya taking the heater box out in these cars is a pretty easy. Since your going to mod the heater box for the header, you might want to double check that the coil packs at the back of the engine clear it ok also. My coil packs clear the heater box, but some people doing these swaps say the coil packs don't clear without modding the heater box.
Good point, I'll definitely check before cutting. Thanks for the tip!
Here's some pics of yesterdays abuse.
About a light 1/4" clearance with gasket in place. Hope its enough!
Think I'm gonna do what another forum member did and weld the collector on backwards at an angle to clear the bellhousing. I had a similar issue with my '70 firebird where I cut off the collector and welded it back on only the headers were ceramic coated.
Who says you cant weld stainless steel with mild steel wire lol. I used .030 flux core wire on my 26 year old Campbell hausfeld 110volt welder. Started out by tack welding the collector in position, installing the headat and checking clearances. Did this several times and trimmed in between to get what I felt was the best fit then stitch welded several places then welded everything in between. My welder seems to have a mind of its own, sometimes it welds great sometimes not so much. I only have low and high settings for the power and a control for wire speed. Regardless it doesnt look great but I filled all the holes and it is solid. Painted the weld with vht high temp paint, will probably last a full year
That was the driver side header, passenger side is next. Hopefully tomorrow. Ordered some necessary accessories most should be here this week some coming next week. The plan is still to get this beast fired up early July. I have to move the fuel filter, right now it is too close to the header to run the main fuel line. I bought a bunch of different fittings based on all the builds i've gone through. Shouldnt be a problem just more to go back over and redo
About a light 1/4" clearance with gasket in place. Hope its enough!
Mine is like a 1/32" clearance and the tube hasn't been massaged. But I think since my swap was done with k-member extensions, BB Mopar mounts and C5 mount pedestals that the motor was simply moved over for clearance. I also don't think my motor moves at all side to side (rocking) as there are no rubbing marks on the frame or tube.
Should be fine if your engine mounts are tight and there is no engine rocking under heavy power.
Last edited by Krusty84; Jun 15, 2020 at 12:01 AM.
Mine is like a 1/32" clearance and the tube hasn't been massaged. But I think since my swap was done with k-member extensions, BB Mopar mounts and C5 mount pedestals that the motor was simply moved over for clearance. I also don't think my motor moves at all side to side (rocking) as there are no rubbing marks on the frame or tube.
Should be fine if your engine mounts are tight and there is no engine rocking under heavy power.
Good to know, I did install poly engine mounts and they were extremely tight so we should be good.
I didnt get anything done during the week so I took off yesterday and worked non stop for roughly 12 hours getting the headers fabbed up, heater box re glassed and hooking up the trans linkage. What I did was remove the linkage shaft from the original trans and installed it into the 4L60E. Wish I had thought of that when I had it on the bench but it wasnt hard to do in the car. Passenger side header with massage, repositioned collector and flowmaster reducer and flange for easy removal Driver side hitting the shift cable so I had to take it back out and cut a pie shape in the collector to move it over a bit. Did both sides hope it sticks
Last edited by banditt1979; Jun 20, 2020 at 10:59 AM.



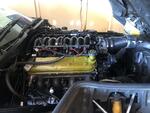
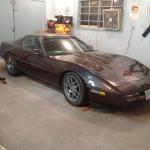










 .
.


