When you click on links to various merchants on this site and make a purchase, this can result in this site earning a commission. Affiliate programs and affiliations include, but are not limited to, the eBay Partner Network.
I did it all (clutch, SMF conversion, pilot, TO, tailshaft bushing and seal, DS yoke, shifter boot, Corsa catback, etc) without removing the cats, but I did remove the starter.
SJW - looks like you loosened the cats from the manifolds and pushed them out of the way? And you appear to have a 94+ due to secondary O2. Thanks for the tips!
Just waiting for a moment where I can sneak back into the garage , appreciate everyone's help!
In case anyone ever struggles with the top left bellhousing bolt, this is how I got it loose easily (I'm sure others use this technique all the time so apologies if this is not worth posting)...there is very little room between the tunnel and that bolt. I picked up a swivel socket set (a wobble ext might work) so I don't have that problem later for proper retorque (my swivel adapter plus regular socket just wouldn't fit)...technique is useful if you need extra leverage to break a bolt free and don't have a direct angle (I use box end wrenches as cheaters/to get a better angle on my normal ratchet drives too)...:
SJW - looks like you loosened the cats from the manifolds and pushed them out of the way? And you appear to have a 94+ due to secondary O2. Thanks for the tips!
Just waiting for a moment where I can sneak back into the garage , appreciate everyone's help!
In case anyone ever struggles with the top left bellhousing bolt, this is how I got it loose easily (I'm sure others use this technique all the time so apologies if this is not worth posting)...there is very little room between the tunnel and that bolt. I picked up a swivel socket set (a wobble ext might work) so I don't have that problem later for proper retorque (my swivel adapter plus regular socket just wouldn't fit)...technique is useful if you need extra leverage to break a bolt free and don't have a direct angle (I use box end wrenches as cheaters/to get a better angle on my normal ratchet drives too)...:
top left bellhousing bolt removal
Until you mentioned it, I had no recollection of loosening the headpipes at the manifolds, but it's pretty clear from the photos that I must have done so. I can forget a lot after seven years. Or seven minutes...
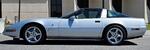
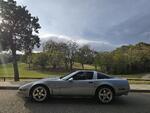
And, yes, the car is my ragtop '94 LT1.
There is nothing that can substitute for a set of high-quality ball-type swivel sockets.
Cats came off super easy, relieved! Bellhousing did not need to loosen ball stud, was able to spin it and it came right off
Here we are, I’ve not heard of this condition before, maybe those are wire wheel marks?...think my flywheel is toast (?). PP looks rather new as does the disk:
Bellhousing off Flywheel.... Flywheel...what are those? Well that would cause shudder (or is that the end result?) Pilot Pressure plate Clutch disk pp side Clutch disk flywheel side...ridges
It looks like someone tried to clean up or resurface the flywheel before and left these marks. But now it looks like the disk was either not contacting that part of the flywheel at all, or just barely, and they never got worn off like the did further out on the radius. So that makes me wonder if the flywheel is really flat, and/or if the disk was flat. Your disk and flywheel seem to show similar patterns of more wear on the outer half of the radius. Maybe this is normal? I'm really not sure.
I don't think that's normal... I think it looks like someone went too aggressive in cleaning up the flywheel...if clamping had been even perhaps it would have smoothed out... Assuming that the marks left over are being "lightly" or not clamped, it's uneven clamping beyond just a radial line (if you look at the one pic you can see that the marks at points extend further to the outside than others). So I suspect uneven clamping from the PP and a transmission misalignment/pilot bearing being worn. See zfdoc comments from post 21 in regards to outside of disc wearing first as pilot bearing wears:
Sad as it looks like this work was done not too far away from where I purchased it (miles wise). Unfortunately I don't have the records.
I also measured the lash of the flywheel, it's slightly over 1.5" (hopefully I'm measuring it correctly) which exceeds the 1.378" in the FSM. If the lash is off I wonder if that is contributing too.
EDIT: I rechecked the procedure, I was not "releasing" the flywheel after rotating by hand with the bolts... the lash is < 1" so well within spec.
I think I will reach out to zfdoc again, especially to get an opinion on the flywheel...I am getting close to pulling the trigger on the RAM setup...
I don't think that's normal... I think it looks like someone went too aggressive in cleaning up the flywheel...if clamping had been even perhaps it would have smoothed out... Assuming that the marks left over are being "lightly" or not clamped, it's uneven clamping beyond just a radial line (if you look at the one pic you can see that the marks at points extend further to the outside than others). So I suspect uneven clamping from the PP and a transmission misalignment/pilot bearing being worn. See zfdoc comments from post 21 in regards to outside of disc wearing first as pilot bearing wears:
Sad as it looks like this work was done not too far away from where I purchased it (miles wise). Unfortunately I don't have the records.
I also measured the lash of the flywheel, it's slightly over 1.5" (hopefully I'm measuring it correctly) which exceeds the 1.378" in the FSM. If the lash is off I wonder if that is contributing too.
EDIT: I rechecked the procedure, I was not "releasing" the flywheel after rotating by hand with the bolts... the lash is < 1" so well within spec.
I think I will reach out to zfdoc again, especially to get an opinion on the flywheel...I am getting close to pulling the trigger on the RAM setup...
The challenge with the DM flywheel is that apparently you can't mount it on whatever machine is used to surface solid flywheels. So I guess you have to resurface it by hand. Honestly, I bet 90% of the flywheels that get resurfaced don't even need it. Probably did more harm than good the last time.
.... So I suspect uneven clamping from the PP and a transmission misalignment/pilot bearing being worn.
I think I will reach out to zfdoc again, especially to get an opinion on the flywheel...I am getting close to pulling the trigger on the RAM setup...
Your pressure plate is a China-manufactured replacement kit from LuK, and if you look at the pedestal feet where it bolts to the flywheel you'll see that you have uneven contact where the pedestal surfaces contact the flywheel. In other words, that clutch dust residue on the mating surfaces is uneven, and it implies that the clamping force of the pressure plate was likely uneven as well because those feet were not in full contact with the flywheel across all 6 pedestal points. Throw in heat expansion / contraction cycles during use, clutch shudder exaggerating the issue over time, and that corrosion that you point out (which causes misalignment between the gearbox and the clutch / flywheel / clutch disk) and the pilot bearing grease killing the pilot, and you have the recipe for what you've been experiencing.
That pressure plate may or may not be savable by having it machined to be absolutely flat and true across the 6 pedestal surfaces, but I don't know for sure. ZFDoc will know.
Just talked to Bill again, he's awesome! He also read through the discussions on this thread, but he's busy and it takes time to be responsive in the forums here so hadn't had a chance yet.
He believes my flywheel should be resurfaced, yes resurfaced! This is due to potential "dishing"(?) of the flywheel. I had not heard of resurfacing being possible, but he states that if the lash is within spec and it's not spewing oil/grease from the center, that there is a process that at least one machine shop has to resurface these DMFs. One of these places is King Balancing in Phoenix (not an endorsement). The trick is they use a set of 6 set screws to stabilize the flywheel, and also take special care to ensure none of the machining fluid gets into the center part of the DM part of flywheel (which would destroy it). A note on the PP, he does not believe it is machinable (feet maybe but the surface no and with the unevenness not worth trying to reuse).
After walking through the costs to get the above done (including notional shipping costs for the DMF), plus new re-machined/fixed PP + disk...I am close enough to a RAM setup that I am going to go ahead and jump on that soon as the solution. Bill seems to think that the RAM setup is very good (although he has not installed personally on a C4, but I think he said he has on an F-body, again not an "endorsement"), just has the caveat of more room for human error on install to get everything measured and set up properly. I then have my "stock" setup that could be salvaged as a backup and for match-balancing the new flywheel.
From Bill/zfdoc I am going to order beam plates, shim kit, pilot bushing (10125896) and going to send my entire shift assembly (including ****/lift ring) to be shortened and freshened up.
He also advised that the "shim kits" are a good idea to install with the transmission out regardless of if you are switching to DMF or not (whenever you can reduce lateral play it is a good idea).
I'll probably lose a synchro after all of this lol!
Sounds as though you're on your way to a satisfactory conclusion. I, too, have nothing but praise for Bill B. He's as nice and helpful as they come. He did great work for me, and shared a lot of his knowledge when I was wrestling with various issues related to driveshaft, etc.
Finally got all the parts a couple of weeks ago, ZFdoc parts/shifter mods as well, and got everything setup and stitched back together (minus the interior). Things went *relatively* smoothly, I did take my time as this is my first clutch and this was a "conversion" to the RAM setup, and I had to redo some things as I went. Hopefully you like pics and vids because here comes a bunch/big post.
After being frustrated with pilot bearing removers (too big or broken), the slide hammer I rented was found to thread perfectly into the soft pilot bearing and allowed for easy removal...use at your own risk but worked great!
Cleaned up with maroon scotch bright pads. Shows stud and countersunk bolt.
RAM hydraulic TO bearing, note rubber o-ring inside sleeve
bellhousing installed for measurement of face to clutch finger measurement with caliper
Mockup with provided shims (took all of them) to make sure of correct gap between bearing face and clutch fingers with TO bearing fully retracted (too small and you have short clutch life, too big and clutch won't disengage or TO bearing will pop c clip at end of sleeve). Also note mark on stud which indicates where to trim back stud to prevent any chance of interference with PP.
Ready to install transmission. Aluminum spacers were removed, surfaces cleaned of corrosion with scraper and maroon scotch brite. You can see some left over pitting from the corrosion, but the surface is flat and smooth.
Hydraulic line connections (holy adapters batman). Moved the lines up from this position to keep away from exhaust after bleeding and keep from flopping. NOTE: the bleeder provided is terrible, because it threads directly into the loose nut at the end of the hydraulic hose. This means it leaks like crazy at that spinny joint, and of course my vacuum bleeder would not work. Luckily I have a 12 year old son who helped me bleed it the old fashioned way. It should come with an adapter that screws into the end of the hose with the bleeder screw inside of that. I swear that the adapters would not go another way...
final location of hydraulic lines
Do not put the hole here, mostly a waste. Should be closer towards the mating surface with the trans (hard to get an angle to the stud/TO bearing). Rubber cap on way.
At this point I had a problem. The transmission when installing would not push in the last quarter inch no matter what I did. Before I broke something I decided to "see" what was going on, so ran out and picked up a borescope since I couldn't see well enough from my stupidly cut hole in the bellhousing and sure didn't want to poke another hole. I suspected that it could be something with the TO bearing binding (sleeve to trans collar) since it should have already made its way at least partially into the pilot bearing, and I wanted to be 100% sure the TO bearing was on the stud. On a hunch, I setup the new toy on "record" and pumped the not fully bled clutch. here is what I saw:
Pumping the clutch (I had a bolt loosely installed to prevent the trans from sliding way back) did the trick to completely seat the TO bearing, and it slid together just fine (not sure that was the holdup but it worked!).
transmission mated. At very top of pic can barely see bolt with cut off head used as guides (x2). Careful not to make it so after install you cannot get the guide bolts back out!
Trans fully installed, hydraulic connections and view of TO bearing back to ensure amount of free space is approximately correct to spec (should be .135-.2, which you can see "about .2" between the shims and bottom of the TO bearing). (borescope)
view of stud with TO bearing (fully installed) (borescope)
ZFDoc beam plates, with driveline alignment spacer/helpers (didn't expect that!)
C-beam beam plate installed (trans). I think I am going to regret following the directions to put window weld on there (there was no goop when I pulled things apart and it was fine). Plus regardless of trying to use gloves...my hands are still black with urethane.
I still won't have a chance for a test drive for a bit (I have to finish my stereo install and other odds and ends, plus want the salt gone from the roads), but I fired it up on the jack stands and everything appears to be working perfectly and shifted fine into first/second (I kept it very slow since suspension drooping). I can tell it's already "snappier" just with the modest weight reduction of the steel SMF. I threw the RAM SMF directly on there with no match balance and there is 0 vibration at 3k RPM (it's smoother than it *ever* was)...many reasons why I decided to leave it alone I can go into if anyone is curious. Clutch pedal feels a little "lighter" than stock but smoother/more consistent (throughout the range) and completely silent. No more pilot bearing whir either!!!!!!!!!!! ->
Parts:
- RAM C4 Clutch Conversion (steel flywheel, organic disk)
- ARP flywheel bolts (RAM 575)
- ZFDoc short shifter (shipped my entire shifter assembly and had numerous parts replaced and freshened up)
- ZFDoc beam plates
- ZFDoc shim kit
- Fluted bronze oilite pilot bushing
- New reverse switch
- New shifter rubber boot (planning to put baby powder on it before installing to prevent rubber squeaks, similar to the "powder" coating on the OEM boot)
- CAGS disconnect plugs
Misc parts "while I'm in there":
- New fuel filter
- New O2 sensors
- New RMS
Final note...that excessive corrosion was due to PO having mice live above the transmission in the tunnel apparently... their feces was up there and obviously they literally "peed" onto the interface between the trans and bellhousing... now I'm glad I have a garage cat!
Finally got all the parts a couple of weeks ago, ZFdoc parts/shifter mods as well, and got everything setup and stitched back together (minus the interior). Things went *relatively* smoothly, I did take my time as this is my first clutch and this was a "conversion" to the RAM setup, and I had to redo some things as I went. Hopefully you like pics and vids because here comes a bunch/big post.
After being frustrated with pilot bearing removers (too big or broken), the slide hammer I rented was found to thread perfectly into the soft pilot bearing and allowed for easy removal...use at your own risk but worked great!
Cleaned up with maroon scotch bright pads. Shows stud and countersunk bolt.
RAM hydraulic TO bearing, note rubber o-ring inside sleeve
bellhousing installed for measurement of face to clutch finger measurement with caliper
Mockup with provided shims (took all of them) to make sure of correct gap between bearing face and clutch fingers with TO bearing fully retracted (too small and you have short clutch life, too big and clutch won't disengage or TO bearing will pop c clip at end of sleeve). Also note mark on stud which indicates where to trim back stud to prevent any chance of interference with PP.
Ready to install transmission. Aluminum spacers were removed, surfaces cleaned of corrosion with scraper and maroon scotch brite. You can see some left over pitting from the corrosion, but the surface is flat and smooth.
Hydraulic line connections (holy adapters batman). Moved the lines up from this position to keep away from exhaust after bleeding and keep from flopping. NOTE: the bleeder provided is terrible, because it threads directly into the loose nut at the end of the hydraulic hose. This means it leaks like crazy at that spinny joint, and of course my vacuum bleeder would not work. Luckily I have a 12 year old son who helped me bleed it the old fashioned way. It should come with an adapter that screws into the end of the hose with the bleeder screw inside of that. I swear that the adapters would not go another way...
final location of hydraulic lines
Do not put the hole here, mostly a waste. Should be closer towards the mating surface with the trans (hard to get an angle to the stud/TO bearing). Rubber cap on way.
At this point I had a problem. The transmission when installing would not push in the last quarter inch no matter what I did. Before I broke something I decided to "see" what was going on, so ran out and picked up a borescope since I couldn't see well enough from my stupidly cut hole in the bellhousing and sure didn't want to poke another hole. I suspected that it could be something with the TO bearing binding (sleeve to trans collar) since it should have already made its way at least partially into the pilot bearing, and I wanted to be 100% sure the TO bearing was on the stud. On a hunch, I setup the new toy on "record" and pumped the not fully bled clutch. here is what I saw:
Pumping the clutch (I had a bolt loosely installed to prevent the trans from sliding way back) did the trick to completely seat the TO bearing, and it slid together just fine (not sure that was the holdup but it worked!).
transmission mated. At very top of pic can barely see bolt with cut off head used as guides (x2). Careful not to make it so after install you cannot get the guide bolts back out!
Trans fully installed, hydraulic connections and view of TO bearing back to ensure amount of free space is approximately correct to spec (should be .135-.2, which you can see "about .2" between the shims and bottom of the TO bearing). (borescope)
view of stud with TO bearing (fully installed) (borescope)
ZFDoc beam plates, with driveline alignment spacer/helpers (didn't expect that!)
C-beam beam plate installed (trans). I think I am going to regret following the directions to put window weld on there (there was no goop when I pulled things apart and it was fine). Plus regardless of trying to use gloves...my hands are still black with urethane.
I still won't have a chance for a test drive for a bit (I have to finish my stereo install and other odds and ends, plus want the salt gone from the roads), but I fired it up on the jack stands and everything appears to be working perfectly and shifted fine into first/second (I kept it very slow since suspension drooping). I can tell it's already "snappier" just with the modest weight reduction of the steel SMF. I threw the RAM SMF directly on there with no match balance and there is 0 vibration at 3k RPM (it's smoother than it *ever* was)...many reasons why I decided to leave it alone I can go into if anyone is curious. Clutch pedal feels a little "lighter" than stock but smoother/more consistent (throughout the range) and completely silent. No more pilot bearing whir either!!!!!!!!!!! ->
Parts:
- RAM C4 Clutch Conversion (steel flywheel, organic disk)
- ARP flywheel bolts (RAM 575)
- ZFDoc short shifter (shipped my entire shifter assembly and had numerous parts replaced and freshened up)
- ZFDoc beam plates
- ZFDoc shim kit
- Fluted bronze oilite pilot bushing
- New reverse switch
- New shifter rubber boot (planning to put baby powder on it before installing to prevent rubber squeaks, similar to the "powder" coating on the OEM boot)
- CAGS disconnect plugs
Misc parts "while I'm in there":
- New fuel filter
- New O2 sensors
- New RMS
Final note...that excessive corrosion was due to PO having mice live above the transmission in the tunnel apparently... their feces was up there and obviously they literally "peed" onto the interface between the trans and bellhousing... now I'm glad I have a garage cat!
Too late now, but FWIW I had success removing the pilot bearing with the Harbor Freight Three-Jaw Pilot Bearing Puller 4876. I had to undercut the "barbs" at the end of each little jaw to get it to adequately grip the bearing, but that was easily accomplished and it worked fine for $20.
Too late now, but FWIW I had success removing the pilot bearing with the Harbor Freight Three-Jaw Pilot Bearing Puller 4876. I had to undercut the "barbs" at the end of each little jaw to get it to adequately grip the bearing, but that was easily accomplished and it worked fine for $20.
Thanks, I'll definitely do that if there is a next time! I tried rentals... First one from advanced the threads were stripped...then the one from O'Reilly's was perfect but too big to fit (and I couldn't modify it of course)...I hadn't received the new pilot bushing yet to try it in-store. I think I was laying there dejected thinking of something else I could use and gazed over to the slide hammer...it really threaded in like it was supposed to lol...I threaded it in about halfway for good measure and it came right out
Thanks, I'll definitely do that if there is a next time! I tried rentals... First one from advanced the threads were stripped...then the one from O'Reilly's was perfect but too big to fit (and I couldn't modify it of course)...I hadn't received the new pilot bushing yet to try it in-store. I think I was laying there dejected thinking of something else I could use and gazed over to the slide hammer...it really threaded in like it was supposed to lol...I threaded it in about halfway for good measure and it came right out
Nothing wrong with the slide hammer as long as you don't mind trashing the bearing (which is coming out anyway). Now that you mention it, I might have had to grind down the tips of the barbs a teeny bit to get them to fit through the bearing.
I used a slide type bearing removal tool from Amazon. The manufacturer was K tool international; model KTI-70356. At the time the tool was only $39.59 but I see the price is around $50.00 now.
This tool worked great with the jaws grabbing the bearing perfectly.
I have been going through this same process as pedricd did since the beginning of April. I have not run into any major problems...it's simply a lack of time that's taking me so long.
Anyway, I have the transmission with the new setup back into the bellhousing and I'm stuck just like pedricd was:
"At this point I had a problem. The transmission when installing would not push in the last quarter inch no matter what I did. Before I broke something I decided to "see" what was going on, so ran out and picked up a borescope since I couldn't see well enough from my stupidly cut hole in the bellhousing and sure didn't want to poke another hole. I suspected that it could be something with the TO bearing binding (sleeve to trans collar) since it should have already made its way at least partially into the pilot bearing, and I wanted to be 100% sure the TO bearing was on the stud. On a hunch, I setup the new toy on "record" and pumped the not fully bled clutch. here is what I saw: "
Admittedly, I was more focused on ensuring the slot on the bearing slid into the stud that I completely forgot to push the bearing back against the tranny all the way. I used my borescope, and everything seems lined up and where it should be. I have all 5 tranny-to-bellhousing bolts installed a few threads and the tranny seems lined up pretty well. I have about 1/2" to go or about the thickness of my fingers. I am going to try the trick pedricd did and see how that goes.
By the way, I did not drill the hole on the housing per the instructions. I was able to maneuver the bearing onto the stud just like grandsp suggested.
Just note, I had my dad's help installing and removing the trans itself. We had to put the trans in with the bell housing attached to the trans at the same ttime. I don't remember having that issue of the trans not wanting to fully go in. That said, we both had to push on it. But I'll ask my dad if we had this issue and report back.









 , appreciate everyone's help!