When you click on links to various merchants on this site and make a purchase, this can result in this site earning a commission. Affiliate programs and affiliations include, but are not limited to, the eBay Partner Network.
For my oil tube, i just bent the bracket from the tube, shortened it (cut a section off), drilled a hole and bolted it to the air pipe bolt. Works great, no issues in 5 years and is what a good amount of people have done. Glad you figured out your angles. Hope you didnt scare off potential customers because these are really good headers for the price.
Chris
Driver's side: had to grind off a small area sticking out of the bellhousing, remove the motor mount nut, and raise the engine using a jack and a piece of wood. Then it slid right in. Went in from bottom.
Passenger's side: removed starter/wiring, squish AC lines over. Went in from top.
I'll have to look at how difficult it is to reposition the dip stick tube.
Does anyone have a picture showing it after bending and fastening to the block?
I also noticed that the AIR flange location has changed on the XPS passenger side header. The AIR flange was moved from the first tube to the second tube. Jon at Huron Speed said GM did this from 2001 onwards. Since mine is a 1999, I'll have to extend the Air tube to reach the new flange position.
Save yourself a lot of hassle and just delete the AIR system. Ideally you'll get tuned for the power modifications, so you can delete the AIR system in the tune at the same time.
Buy the 01-04 dipstick in advance for a much cleaner install. It's possible to make the 97-00 tube work, but it looks a bit rigged.
Quote from my build thread last year:
"rather than upgrade to the newer 01-04 dipstick I made the older version work by bolting to the AIR fitting. the AIR won't be around for long, will wait until I install the LS6 intake before tuning
What is the AIR tube's purpose?
Where can I get a blank to block the off?
Thanks.
AIR stands for "Air Injection Reaction" - its purpose is to pump fresh air into the exhaust manifolds during cold start to reduce emissions before the catalytic converters have had a chance to warm up.
Blanks are readily available - I think they might even come with the headers? Check with the vendor.
If you don't plan on ever using the AIR system, you might even want to cut off and weld up the AIR flanges. A buddy of mine with 10 year old Dynatech headers just had his AIR port snap off at the weld due to corrosion.
I finished installing them and noticed the headers extend about 1" lower than shown in Huron Speed's website.
Huron Speed's picture
My install
I slide a straight edge across the rocker panels and sure enough they
are too low. The straight edge is prevented from touching the rocker panels, 1/2" gap, by the rear part of the collector tube. You can also see the collector tube preventing the straight edge from being seen by another 1/2" or more.
It appears the header heights and shape is not correct.
Driver side tube to collector are clearly at a sharp angle from the chassis to wards the oil pan
This is probably why I had a hard time inserting the header into position before I loosened the oil pan. The upper side of the flange is tight but there is a small gap on lower flange. Obviously there will be a leak at the flange and wear and tear of the tube and oil flange causing noise and possible leaks.
Passenger side:
about 1/2" lower than should be and the collector tube is lower than the drive side
And the mid pipe clamp's curved metal piece broke in half.
These clamps do not close all the way and put too much stress on the metal piece.
I've been discussing this with Jon at Huron Speed.
Ground off the corner, better now, should keep oil temp down
Definitely need new clamps
It is hard to tell from the Huron Speed picture, but mine appear to hang lower as well. My wife and I actually went for a ride today, and I heard a very slight scrape as we went over a small speed bump that was the collector flange scraping. Is this normal, or is the shape incorrect and they hang too low?
It is hard to tell from the Huron Speed picture, but mine appear to hang lower as well. My wife and I actually went for a ride today, and I heard a very slight scrape as we went over a small speed bump that was the collector flange scraping. Is this normal, or is the shape incorrect and they hang too low?
I think the Huron Speed picture is from their version 1 or 2 of the headers where they seem to be tucked in nicely. These versions rubbed the steering shaft, then in version 3 good steering shaft clearance (I have a 1/4") but hang about 1" lower than the oil pan/filter, thus the scraping sound.
I think the Huron Speed picture is from their version 1 or 2 of the headers where they seem to be tucked in nicely. These versions rubbed the steering shaft, then in version 3 good steering shaft clearance (I have a 1/4") but hang about 1" lower than the oil pan/filter, thus the scraping sound.
Good for track, bad for street
This prompted my curiosity, so I just went out and took pictures.
Does this look normal? Would different motor mounts, such as the Hinson motor mounts, make the engine sit higher thus increasing the clearance here?
Different problem, now fully assembled, car won't start.
Starter turns, sounds rougher than before but engine won't start.
I'm wondering if I connected the starter properly?
If the starter is turning does it mean that it's connected ok and the problem is something else?
Need help troubleshooting
I am not sure, but here is a picture of the wires on my starter before disassembly.
*EDIT* Make sure the coil packs are plugged back in on each side and that all of the plug wires are seated into their respective places on the coil packs and on each plug.
1.) How do you ground off a corner of the oil pan?
2.) Any way to install these without grounding off the oil pan?
3.) Is it bad to hack the oil pan? I'd just be worried it's not good for it.
I am not sure, but here is a picture of the wires on my starter before disassembly.
*EDIT* Make sure the coil packs are plugged back in on each side and that all of the plug wires are seated into their respective places on the coil packs and on each plug.
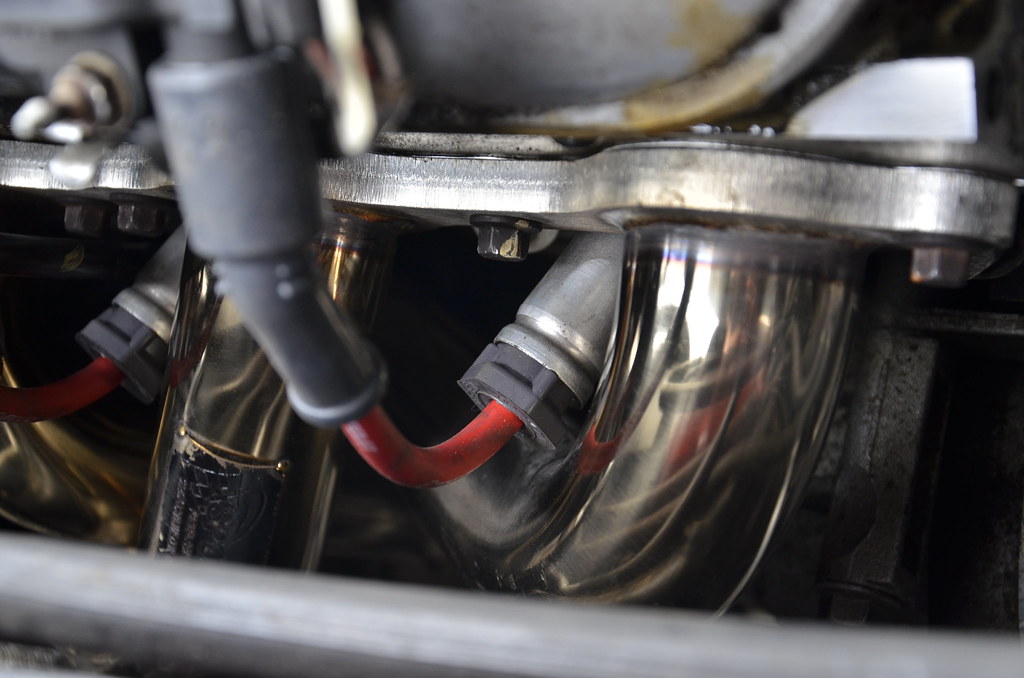
Yup, my connections are ok. I think I found the problem
This connector above the starter became unplugged.
To the right of the bolt,small conenctor
What is it and can I plug it back in without removing the header?
1.) How do you ground off a corner of the oil pan?
2.) Any way to install these without grounding off the oil pan?
3.) Is it bad to hack the oil pan? I'd just be worried it's not good for it.
I used a thin metal hacksaw blade.
It depends on the quality of the header, I got a bad one that was way off on shape. You can see from my previous pics the angle of the driver side connector is sharper towards the oil pan than the angle of the passenger side connector.
Spoke to a local speed shop and they have done it in the past.
I'm told the pan walls are 1/8", corners are a little thicker.
My blade was ~1/16". No oil leaks, so I think I'm ok.
I would have preferred not to do it, but since I had these headers coated didn't want to loose that money so I kept them
A fellow member on another thread (Neutron82) explains:
crank position sensor, that will do it... it's tight but you should be able to plug it back in... if not you can loosen the header enough that you can move it over a tad, you shouldn't have to remove it completely out of the car
That explains why the starter sounded rough, the crank wasn't moving.
The noise I heard was the starter skipping on the teeth of the crank wheel
These XSP headers are very tight, can't fit my hand in between the tubes.
Hopefully Neutron82's suggestion will work.