


Engine hardly starts/runs

Thread Starter
Advanced


Joined: Feb 2008
Posts: 77
Likes: 1
From: Winter Haven Florida
The other night I went out for dinner and while I was eating it started pooring rain. When the rain slowed enough to run to the car I drove home (about 5 miles). When I pulled into my driveway the car just staled and when I tried to start again it hardly starts/runs. The engine pops, backfires, knocks and that's if it starts. And then when you turn the key off the gauge backlights flicker while the seatbelt light, check engine light and abs lights stay lit. I'm pretty convinced water got into somewhere it shouldn't be or I have a loose ground so I disconnected the battery and let it sit for 2 days. But I'm still having the same problem. Any ideas on where I should start or anyone had a simular problem? Was reading how the wheel speed sensors can get water in them but can that really make the engine run like this?
Thread Starter
Advanced
Joined: Feb 2008
Posts: 77
Likes: 1
From: Winter Haven Florida
I did...no codes...probably because I disconnected the battery which I wish I didn't do. But with the dash lights flickering I wasn't sure if there was a short that would cause damage to the wiring. I was talking to someone else and they suggested the mass air flow sensor being unpluged will cause the engine to run rough like this. Crankshaft sensor seems more likely being closer to the bottom on the engine. Thanks for the input.
Tech Contributor

Joined: Dec 2006
Posts: 10,962
Likes: 29
From: Van Buren Arkansas
Wounded Warrior Escort '11
Lights flickering and so on, might be a bad ignition switch itself, possible bad connection at the starter solenoid which is the electrical power center of the car. But that high of a voltage, if factual, is a serious problem. My first thoughts there is the alternator's internal regulator has failed and overcharged the battery. That much voltage might also cause a serious problem for the PCM. I think it best that you PM to Bill Curlee about this thread right away and especially if you verify the voltage is truly that high. Also, pull the battery and alternator and have them tested at the local auto shop.
Thread Starter
Advanced
Joined: Feb 2008
Posts: 77
Likes: 1
From: Winter Haven Florida
Well it was after I had the battery charging all night, I was thinking about it today and was wondering if it should be that high. So I check the voltage on my silverado...it was around 16 volts. I checked the vette again tonight, it is now at 16.75 volts. Maybe that is the problem. I cleaned two grounds under the hood that mount to the frame today also...problem still exists. Hopefully the PCM isn't fried because of a high voltage.
Corvette Stories
The Best of Corvette for Corvette Enthusiasts

How Much Horsepower Every Corvette Engine "LOST" in 1972
Joe Kucinski
Top 10 DOs and DON'Ts for Protecting Your Convertible Top!
Michael S. Palmer
Top 10 Most Explosive Corvettes Ever Made: Power-to-Weight Ratio Ranked!
Joe Kucinski
150 hp to 1,250 hp: Every Corvette Generation Compared by the Specs That Matter
Joe Kucinski
8 Coolest Corvette Pace Cars (and Replicas) of All Time
Verdad Gallardo
Top 10 Corvette Engines RANKED by Peak Torque (70+ Years of Muscle!)
Joe Kucinski
Corvette ZR1X Will Be Pacing the Indy 500, And Could Probably Race, Too!
Verdad Gallardo
Top 10 Corvettes Coming to Mecum Indy 2026!
Brett Foote
Top 10 C9 Corvette MUST-HAVES to Fix These C8 Generation Flaws!
Michael S. Palmer

Thread Starter
Advanced
Joined: Feb 2008
Posts: 77
Likes: 1
From: Winter Haven Florida
The thing that I don't get is why isn't the computer throwing a code to say that the MAF sensor or the crank shaft position sensor is bad. Only thing I can think is that I can't get the engine to run long enough when the problem occurs. And maybe the computer has to detect a problem with those sensors 3-4 times before it will throw a code.
Thread Starter
Advanced
Joined: Feb 2008
Posts: 77
Likes: 1
From: Winter Haven Florida
Well that made me think...I could just unplug the MAF to see if the car runs rougher. So I tried that...it did run rougher and the engine light came on immediately. It threw these codes also P1120, P1220, P1516 all pertaining to the MAF according to my scan tool. Also started getting "Reduction of Engine Power" and "Service Traction Control" when MAF unpluged. Not sure if this is an accurate way to rule out the MAF as the problem.

Tech Contributor


Joined: Dec 1999
Posts: 32,910
Likes: 2,402
From: Anthony TX
CI 6,7,8,9,11 Vet
St. Jude Donor '08
Your volt meter is trashed and not correct. MAF has nothing to do with it. Why are you using a scan tool????
Always start with the built in diagnostic tool:
READING YOUR Engine Diagnostic Codes (DTCs)
The Diagnostic Display Mode is entered with the following procedure:
1) Turn on the ignition but don't start the engine.
2) Press the RESET button to turn off any warning messages. (i.e. door open, trunk open etc�)
3) Press and hold OPTIONS
4) While holding OPTIONS, press FUEL four times within a 10-second period.
Initially, on-board diagnostics go into an Automatic Mode which shows diagnostic codes in a pre-set sequence: PCM - TCS - RTD - BCM - IPC - RADIO - HVAC - LDCM - RDCM - SCM - RFA. All codes will be displayed for each. ( i.e. PCM = 4 codes)
If none are present in a given module, you will see No More Codes on the display.
There are two kinds of diagnostic codes, Current and History designated with a letter suffix, C or ;H. A current code indicates a malfunction is present in the module displaying data. A history code indicates a problem existed sometime in the last 40 or 50 ignition cycles. When not accompanied by a current code of the same number, it's potential evidence of a previous problem, now resolved, that was not removed by clearing the codes.
More likely it's an indication of an intermittent malfunction.
Intermittent codes are the most challenging of the diagnostics. An intermittent code may have happened once, may have happened more than once but is inconsistent or may be happening on a regular basis but not at the time the codes are displayed. History codes can also be caused by a current malfunction in a system that is not operating at the time codes are displayed. An example is the rear window defogger which doesn't operate until the Body Control Module detects engine rpm. For history codes set by a module that does not operate with the key on and engine off, a special diagnostic tool called a Scan Tester is necessary to properly diagnose the malfunction.
Once the system has displayed all modules, it goes into the manual mode which allows selection of each module using combinations of Driver Information Center buttons. Manual mode can also be entered during the automatic sequence by pressing any button except E/M. Once the display shows Manual Diagnostics, select a module by pressing the OPTIONS button to go forward or the TRIP button to go back. Once a module is selected, a code is displayed, and if more than one are present;
press GAGES to go forward or FUEL to go back.
To exit the diagnostic mode at any time, press E/M. If you want to erase codes in a given module, press RESET
To reset the codes once in manual mode, press and hold RESET until it displays NO CODES Press OPTIONS to go to the next module. Repeat the steps until you have reset the codes in all the computer modules.
NOTE!! Only reset the codes IF you want to - it is NOT necessary to do this. Clearing a code does not repair a problem. You are simply erasing the evidence of it in the module's memory. If you clear the code/s, and extinguish the Check Engine Light, your emissions status ready will NOT allow you to pass an emissions test until you have completed the required driving cycles.
Once you have the codes, the next question is: What to do with the information?
First, consult the factory service manual. Any serious C5 Do-It-Yourself owner should invest in the Corvette Service Manual of the appropriate model year. The Service Manual is really a requirement if you want to understand and work on your C5.
Here is very good site of DTC definitions:
http://www.gearchatter.com
Make sure to include the H or C suffix!!
It sounds like your BCM is wet or damp. Check the passengers foot well and see if the carpet underlayment is damp. Make sure you check the area under the seat. Thats where the ater pools when it leaks. If the BCM gets wet, it will cause some of these symptoms.
BC
Thread Starter
Advanced
Joined: Feb 2008
Posts: 77
Likes: 1
From: Winter Haven Florida
Yep volt meter is trashed, I picked up another and battery is reading 12.2 volts.
The codes are the following:
A0-LDCM
B2282H
B2284H
U1064H
A1-RDCM
B2283H
B2285H
U1064H
BCM
B0507H
B2587H
B2592H
TCS
C1278H
I pulled the cover off of the electronics in passanger foot well based on a initial inspection. I have to check under the seat to see if it is wet there.
The codes are the following:
A0-LDCM
B2282H
B2284H
U1064H
A1-RDCM
B2283H
B2285H
U1064H
BCM
B0507H
B2587H
B2592H
TCS
C1278H
I pulled the cover off of the electronics in passanger foot well based on a initial inspection. I have to check under the seat to see if it is wet there.
Tech Contributor
Joined: Dec 1999
Posts: 32,910
Likes: 2,402
From: Anthony TX
CI 6,7,8,9,11 Vet
St. Jude Donor '08
Yep volt meter is trashed, I picked up another and battery is reading 12.2 volts.
The codes are the following:
A0-LDCM
B2282H
B2284H
U1064H
A1-RDCM
B2283H
B2285H
U1064H
BCM
B0507H
B2587H
B2592H
TCS
C1278H
I pulled the cover off of the electronics in passanger foot well based on a initial inspection. I have to check under the seat to see if it is wet there.
The codes are the following:
A0-LDCM
B2282H
B2284H
U1064H
A1-RDCM
B2283H
B2285H
U1064H
BCM
B0507H
B2587H
B2592H
TCS
C1278H
I pulled the cover off of the electronics in passanger foot well based on a initial inspection. I have to check under the seat to see if it is wet there.

If you have any damaged or bare wires, seal them with liquid electrical tape.
Bill
Thread Starter
Advanced
Joined: Feb 2008
Posts: 77
Likes: 1
From: Winter Haven Florida
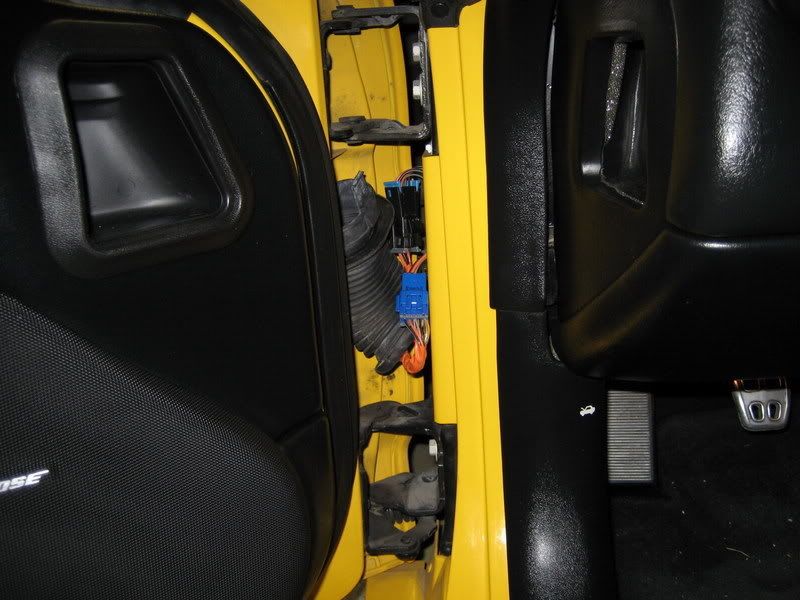
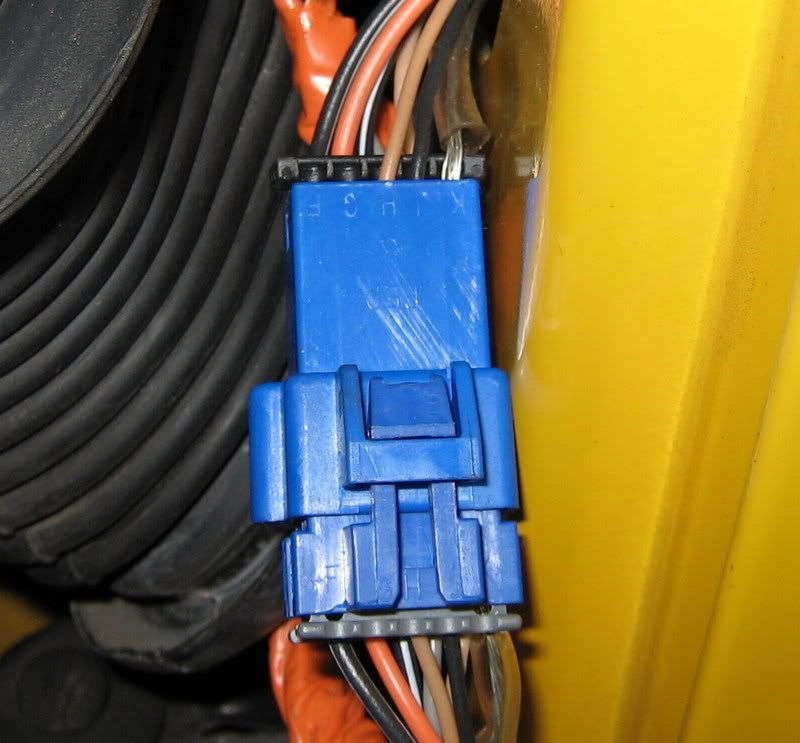
Checked those connections in the door, they didn't look corroded or bent. Tried to start the car when they were disconnected and the car still hardly starts. So no change when whatever circuits are within the door are eliminated from the wiring.
I did remove the passanger seat and checked under the carpet. It was dry but found a small area of moisture adjacent the seat belt near the grounding point which I removed and cleaned. The connections inside the ground where clean and not bent...they looked good. All of the other areas under this carpet beneath the passanger seat were dry.
I did remove the passanger seat and checked under the carpet. It was dry but found a small area of moisture adjacent the seat belt near the grounding point which I removed and cleaned. The connections inside the ground where clean and not bent...they looked good. All of the other areas under this carpet beneath the passanger seat were dry.
Tech Contributor


Joined: Jan 2007
Posts: 19,421
Likes: 1,146
From: Dyer, IN
Does the engine start, but run rough?
Does the engine start, and die?
Also, Bill's suggestion was not to check for moisture under the seat, it was to check for moisture around the BCM...
Thread Starter
Advanced
Joined: Feb 2008
Posts: 77
Likes: 1
From: Winter Haven Florida
Ok so someone said to check the connections to the starter which I was doing and they look fine. But noticed some wiring near the starter that was burned from the exhaust. There are two sensors in the block one above the starter and one below the starter. The burned wiring goes to the sensor above the starter...is this the crankshaft position sensor? The protective sheath is gone on both wires so are shorting. What is the sensor under the starter?
Last edited by jac1979; Oct 10, 2009 at 03:35 PM.
Tech Contributor
Joined: Jan 2007
Posts: 19,421
Likes: 1,146
From: Dyer, IN
