When you click on links to various merchants on this site and make a purchase, this can result in this site earning a commission. Affiliate programs and affiliations include, but are not limited to, the eBay Partner Network.
Hello,
I need to replace the passenger side A/C Actuator, but I don't know where it is or how to remove it. Is there a thread that anyone knows about that describes the procedure? I have been searching for it for several hours now, but I can not find anything.
Your help is greatly appreciated.
Thank you.
Best Regards,
The blend door servo. I've tried everthing else I can find, and now that is the last thing left. When the A/C is on, heat comes out of the passenger side vents. As far as I can tell, all of the vacuum hoses are ok. I've tried clearing the codes, pulling the fuses, resetting the system, and nothing has helped.
Had the exact problem with my '97 about a month ago. All codes pointed to passenger side temp actuator (forgot the codes) I tried all the stuff you did and nothing helped. Lots of threads on this topic. It seemed to be a bit more work than I wanted to try on my own so took it to dealer. Actuator $263 (could be bought online for $150), labor $420, total around $700! Ouch! Some people on this forum say its not that hard to do, others say its a nightmare. Do a search and you decide. Good Luck!
Mine is on a 2002 with the dual zone climate control. I already bought the actuator, and would like to do it myself.
I have searched for over a couple hours though and can't find any info on how to actually do it. I would even settle for somebody just telling me where it is located. Nothing so far though.
There are detailed instructions with pics out there. I wish I could be of more help in directing you were to look but I am still not as familliar with this sight as I hope to be someday. Someone will eventually point you in the right direction. I do remember the actuator being up under the dash somewere and that you have to remove a portion of the dash to get to it. From what I remember reading about it, it didn't sound like fun unless you like unless you like being in tight, cramped positions for long periods of time. In fact the last post I remember reading about it the guy and his "mechanic" friend replaced the actuator themselves, then after putting everything back together discovered all kinds of electrical gremlins and other problems that weren't there before and ended up taking it to the dealer anyway. I understand the drivers side one is not as hard to replace. I see Mr. Curlee posted before mine went out. Now if you can be shown how to get to it while its still in the car!
Last edited by egrand333; May 18, 2010 at 06:07 PM.
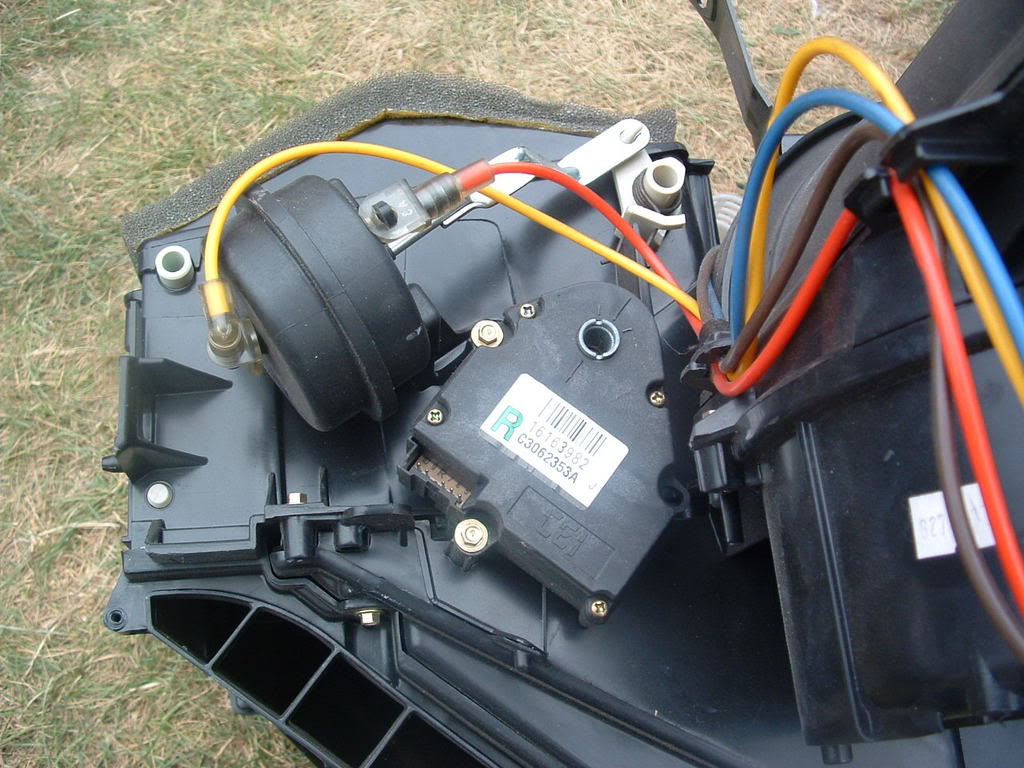
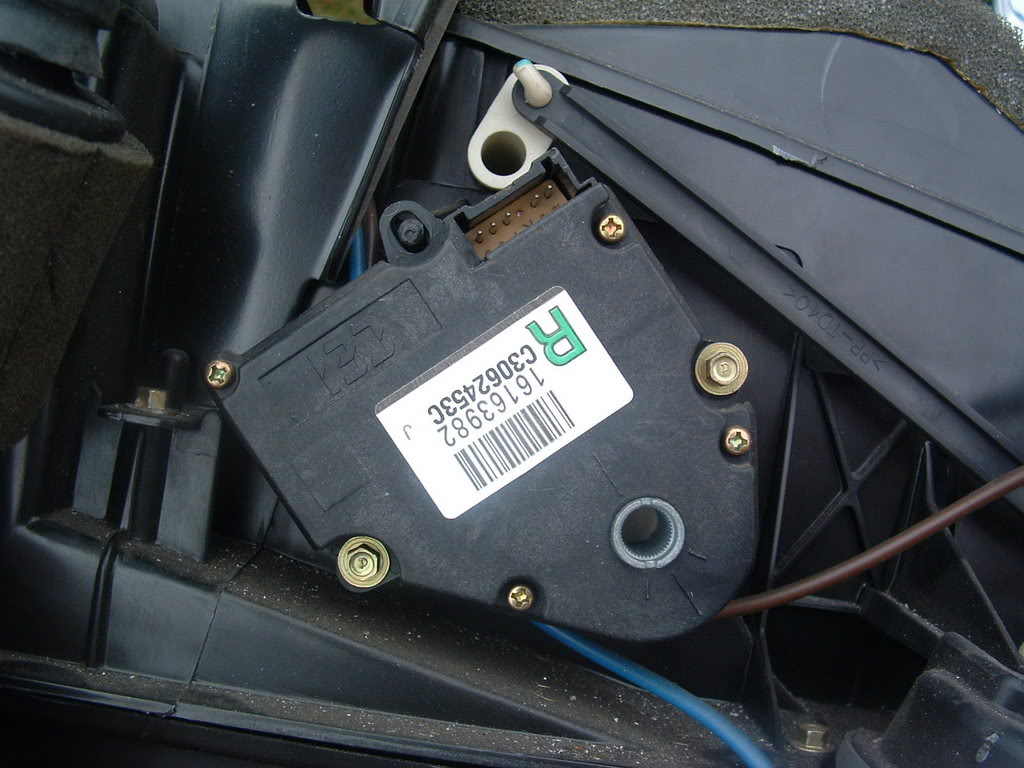
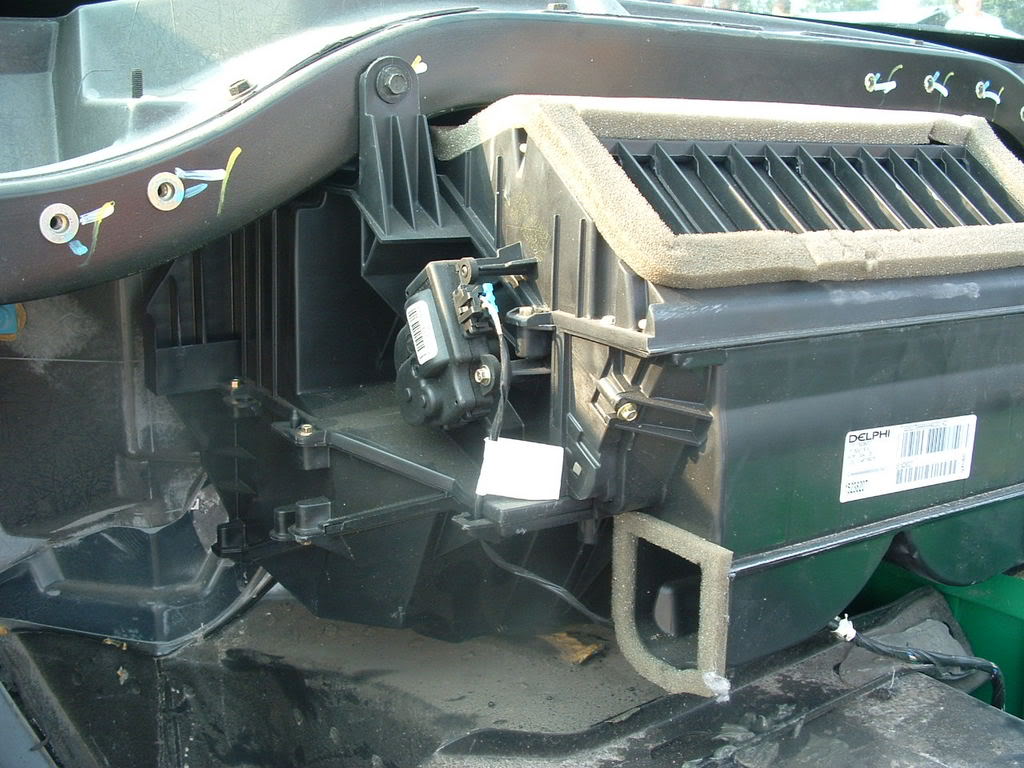
It is my understanding that the "newer" actuators don't come put together with screws anymore like the one shown in BC's pics. You may want to check the one you bought. (not sure if the screwless one is "new and improved") I looked at the one they put in my car and it was screwless.
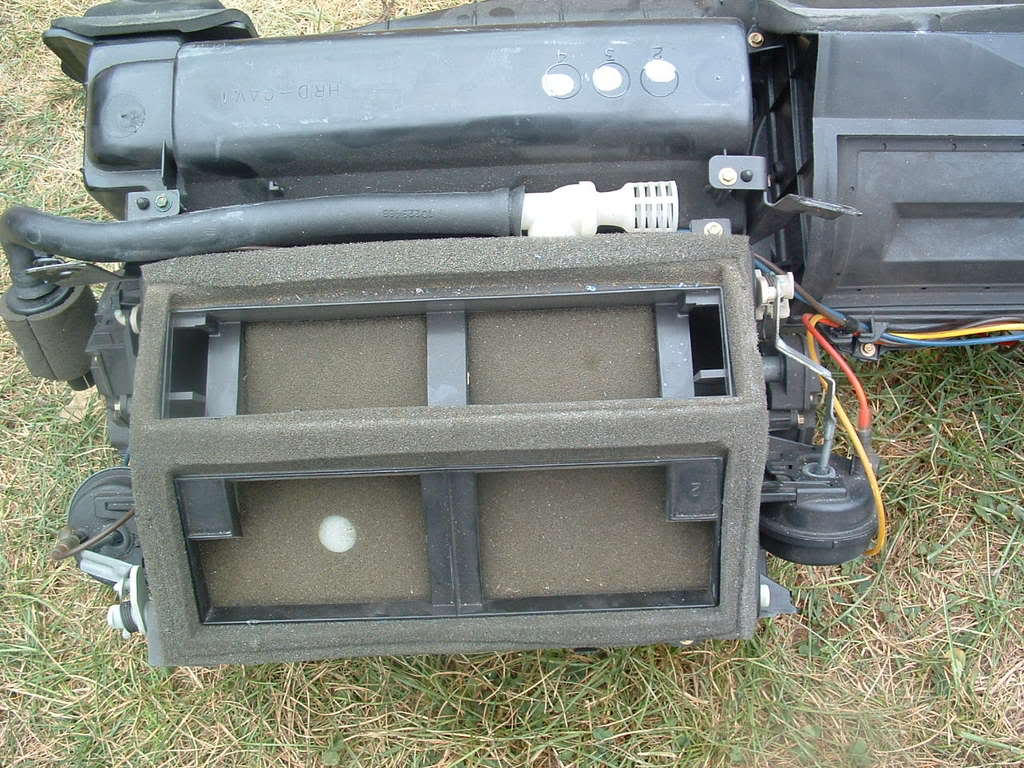
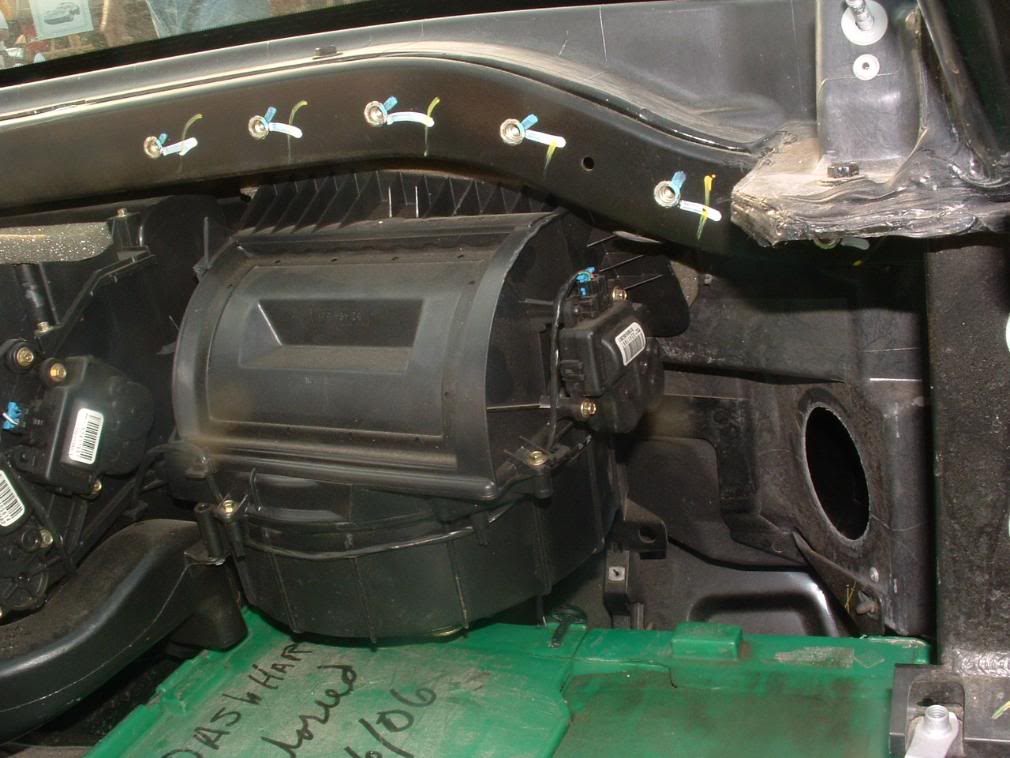
Thanks a lot for the replies. Bill, in the first picture, I see that the actuators/servos are attached to the sides of the section with the foam seals. Can you tell me where the section with the foam seals is located? Is that section centered in the car?
Also, am I looking at the unit from the front or the back of the car?
Thanks. That REALLY helps a LOT! Now I get it. It looks like I'll need to remove the whole dash pad. I assume the access is too tight to get at it from below.
FYI- Its done. The problem was the actuator. After I got it back together, it was like a meat locker in the car. I had to turn the A/C down pretty quickly. It works great.
Here are some notes for the anyone trying this in the future:
You MUST follow the instructions in this thread: http://forums.corvetteforum.com/c5-t...th-pics-3.html
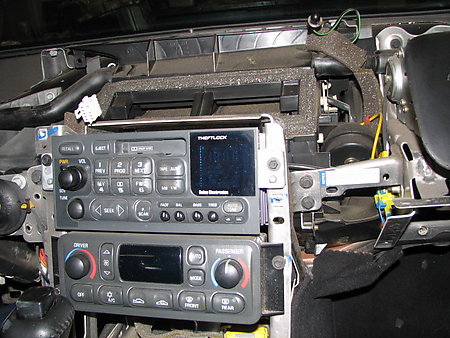
Go to post #48. Then, follow the directions for dash removal, starting with the center console, trim panels, dash, glove box, etc. When you get to the point in post #48 where the picture showing the dash, etc. is on the ground in his garage, you can stop following the post.
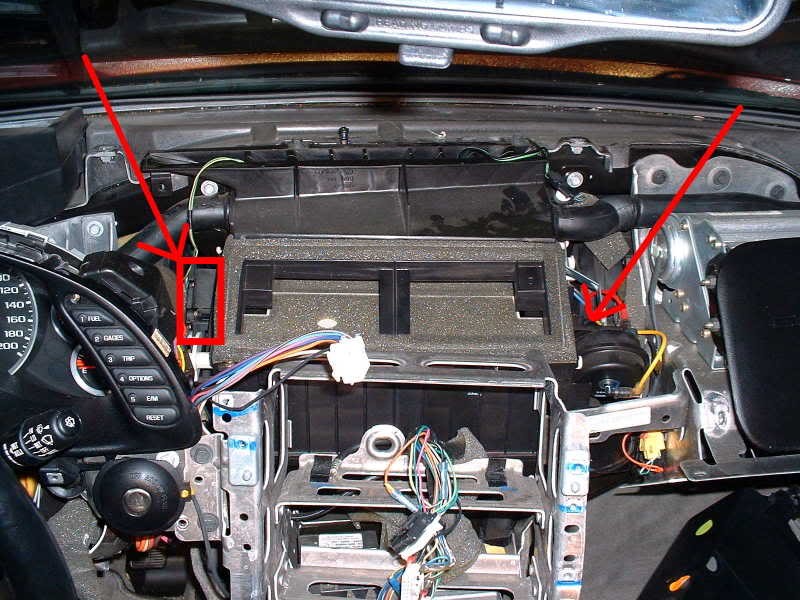
Then, find the large aluminum bracket that is above where the glovebox was. It supports the air bag. Make a note of where the bolts are that hold it into place. Maybe trace the outline of it. Then unbolt it, and slide it out to the side, rotating the left side of the backet toward the passenger's side door. You will now have access to the actuator to replace it. You can unbolt it without moving the bracket mentioned above, but there is no room to get it out for replacement.
After replacing the actuator, put everything back in the reverse order. Be sure that the aluminum bracket is as close to the original position as possible. That way, the air bag will line up with the hole in the dash. I would recommend that you NOT put the glove bax back in until you are sure that the airbag lines up with the hole in the dash. If it does not, then loosen the four nuts up under the aluminum bracket. These hold the air bag in place. You can then fine tune the fit to make it match the dash exactly.
Yes it helps! Helps me feel like a fool for not trying to do it myself. Honestly, some people are just more confident than others when it comes to doing a job like you just did. It just looked to complicated to me although I would not hesitate to remove the intake myself to replace the oil pressure sending unit and check valve when the time comes. Congratulations on a job well done!
Based on this thread, I am replacing mine right now!! Tested it and it works great! It never worked on the passenger side for 6 years of ownership. Quotes of $900 kept me from doing it. VetteNutts sent me a pair of Actuators at a good price and it worked great. I opened my passenger sensor and it had a cracked gear, causing misalignment and losing the home position. Awesome thread, and you guys didn't miss anything, except being carefull with the airbag and disco the battery for safety. Doesn't seam to want to turn the temp down with the passenger control, but good enough. I'll find out from her if it don't work, lol.. I have the dash out and watch the actuators move, cool stuff. Also scanned the code and it cleared.
I replaced my actuators this past weekend. My passenger side was not working and it was the classic problem of the broken gear. so I went ahead and replaced both sides.
Actually, not as bad a job as I thought it would be.
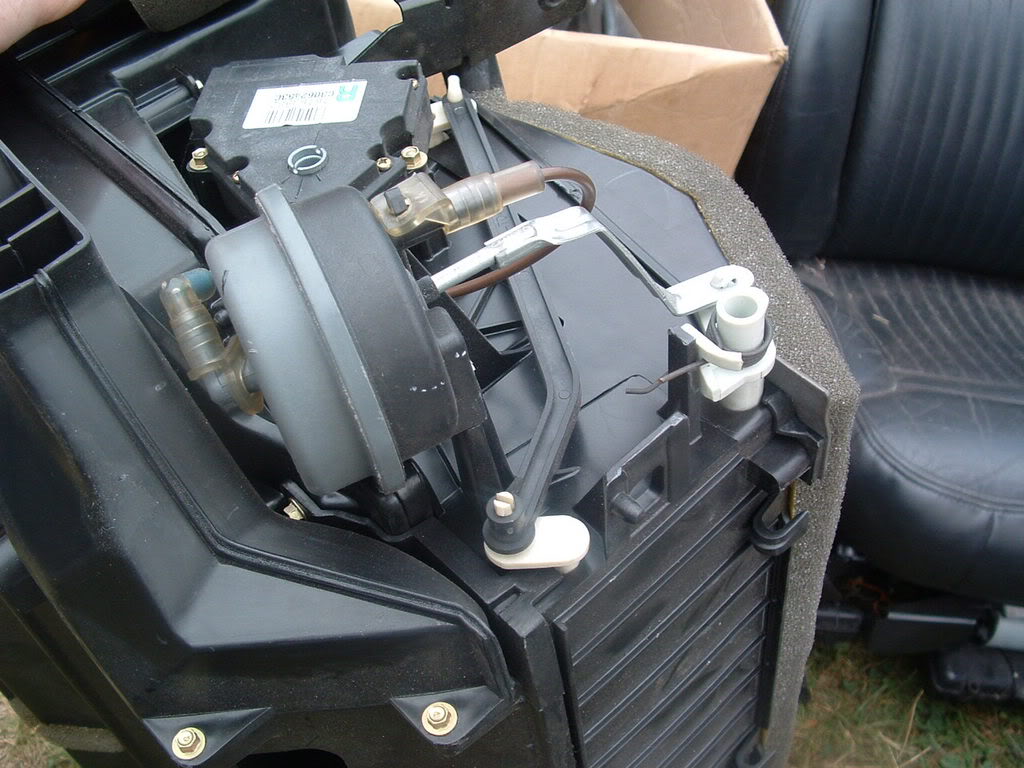
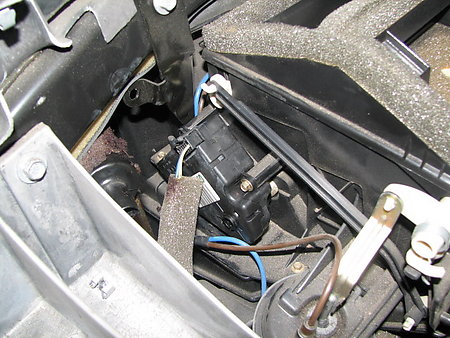
My question is related to the Air Temperature sensor tube that goes from the dash, just to the left of the ignition switch, to inside the dash.
you see it in the middle of the picture. is it supposed to be connected to the other tube in the picture?
Last edited by gwalt584; Sep 19, 2017 at 04:25 PM.