



My build thread

Team Owner

Joined: Jul 2006
Posts: 97,155
Likes: 1,471
From: Calgary, AB. There's a reason why white was the only color offered on every year Corvette. Proud Canadian German Jamaican!
St. Jude Donor '09, '12-'13-'14-'15-'16-'17

To each their own.

OP, good luck with your build, looking forward to seeing the finished product.

Last edited by themonk; Dec 8, 2013 at 04:39 PM.
Racer


Joined: Dec 2005
Posts: 411
Likes: 2
From: southeastern pa
glen,
i have great respect for your assiduous approach to mods and upgrades. one thing that i haven't seen [or maybe missed] is what you do about the factory installed clear film on the sides.
is it removable without damage so a larger more effective piece could be installed? if not, what to do to protect it from damage? if its purpose is to protect the small area of paint, then what happens if it fulfills its duty and becomes pizza faced?
thanks for your thoughts, if it is not imposing.
i have great respect for your assiduous approach to mods and upgrades. one thing that i haven't seen [or maybe missed] is what you do about the factory installed clear film on the sides.
is it removable without damage so a larger more effective piece could be installed? if not, what to do to protect it from damage? if its purpose is to protect the small area of paint, then what happens if it fulfills its duty and becomes pizza faced?
thanks for your thoughts, if it is not imposing.

Thread Starter
Race Director


Joined: Sep 2013
Posts: 11,825
Likes: 2,474
From: Ft Lauderdale
Tech Contributor
glen,
i have great respect for your assiduous approach to mods and upgrades. one thing that i haven't seen [or maybe missed] is what you do about the factory installed clear film on the sides.
is it removable without damage so a larger more effective piece could be installed? if not, what to do to protect it from damage? if its purpose is to protect the small area of paint, then what happens if it fulfills its duty and becomes pizza faced?
thanks for your thoughts, if it is not imposing.
i have great respect for your assiduous approach to mods and upgrades. one thing that i haven't seen [or maybe missed] is what you do about the factory installed clear film on the sides.
is it removable without damage so a larger more effective piece could be installed? if not, what to do to protect it from damage? if its purpose is to protect the small area of paint, then what happens if it fulfills its duty and becomes pizza faced?
thanks for your thoughts, if it is not imposing.
I might rip it off for some larger cleartastic pieces soon. If so, I'm sure it will come clean just like any of the logos - meaning goo gone, a bit of heat and patient and gentle pulling....clean it all up with acetone or alcohol...then using rinseless as a lube. I will clay using a speedy prep towel and then apply the cleartastic...
Last edited by Glen e; Dec 8, 2013 at 07:26 PM.
Racer
Joined: Dec 2005
Posts: 411
Likes: 2
From: southeastern pa
a timely question!
I might rip it off for some larger cleartastic pieces soon. If so, I'm sure it will come clean just like any of the logos - meaning goo gone, a bit of heat and patient and gentle pulling....clean it all up with acetone or alcohol...then using rinseless as a lube. I will clay using a speedy prep towel and then apply the cleartastic...
I might rip it off for some larger cleartastic pieces soon. If so, I'm sure it will come clean just like any of the logos - meaning goo gone, a bit of heat and patient and gentle pulling....clean it all up with acetone or alcohol...then using rinseless as a lube. I will clay using a speedy prep towel and then apply the cleartastic...
Thread Starter
Race Director
Joined: Sep 2013
Posts: 11,825
Likes: 2,474
From: Ft Lauderdale
Tech Contributor
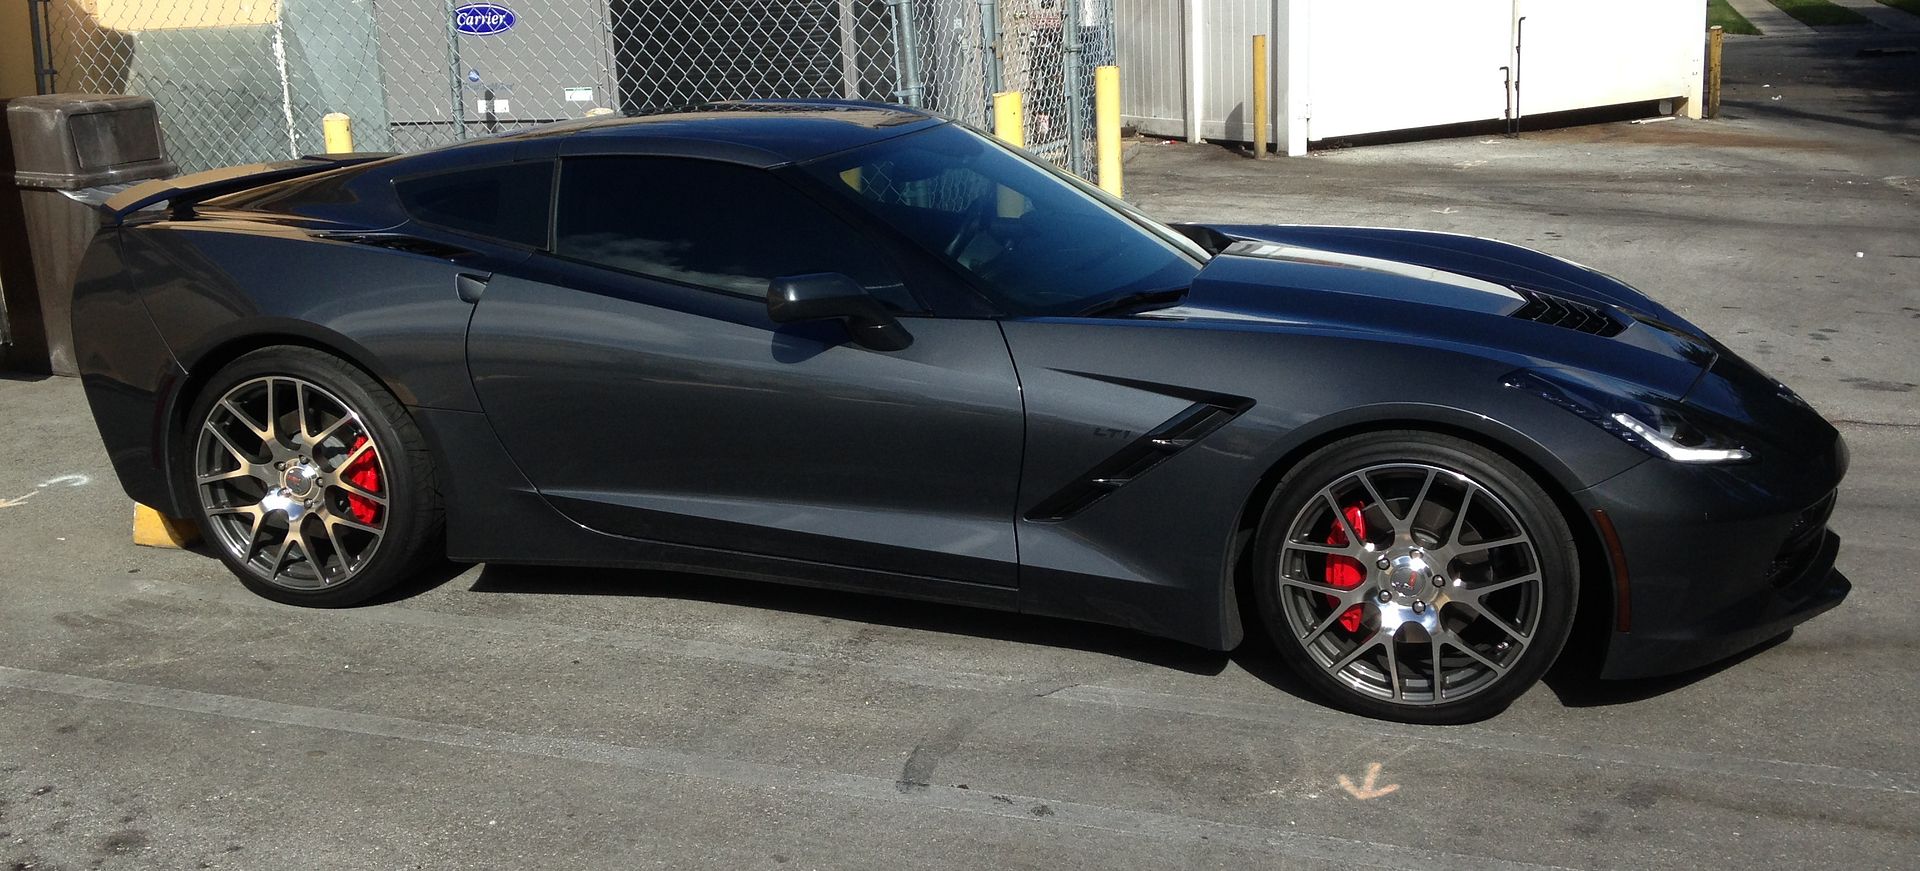
Ok, here the details on this spoiler install...thanks to Erik at Lashway who gave me some advice on how to take off the rear bumper. It really is easy if you know basics like sockets and hand tools. In general:
1. there are bolts underneath, near lights , torx screws across top inside and under the mudflaps. you need to pull off the taillight bezels with trim tools...
2. bumper then pulls off easy and you need to disconnect key cable and two sockets for the lights - pull the red tab out on connectors then unplug.
3. apply the template and center bunch the holes
4. drill the holes a bit wider than studs so you can adjust side to side
5. mount spoiler, with the supplied vhb tape and loctite red the studs and tighten supplied nuts.
6. Reassemble and while it's loose, you can readjust bumper seams on sides
Erik will do this for about 2 hours labor...took me about 2.5 as I was learning...and had plenty of time...
http://www.lashwaymotorsports.com/
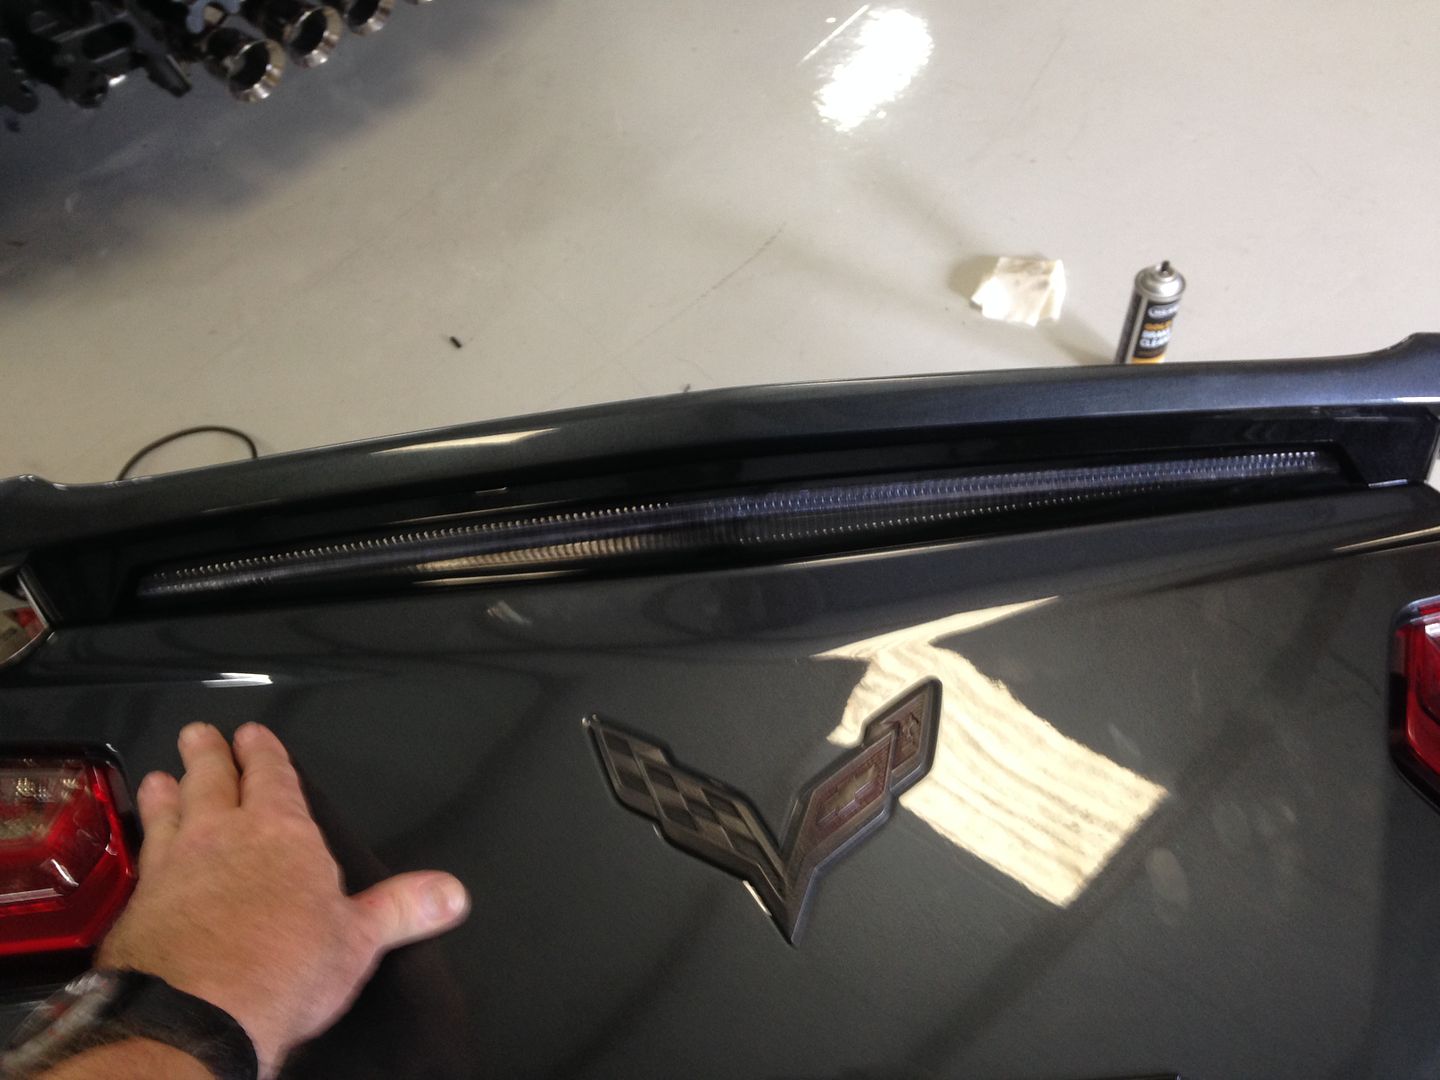
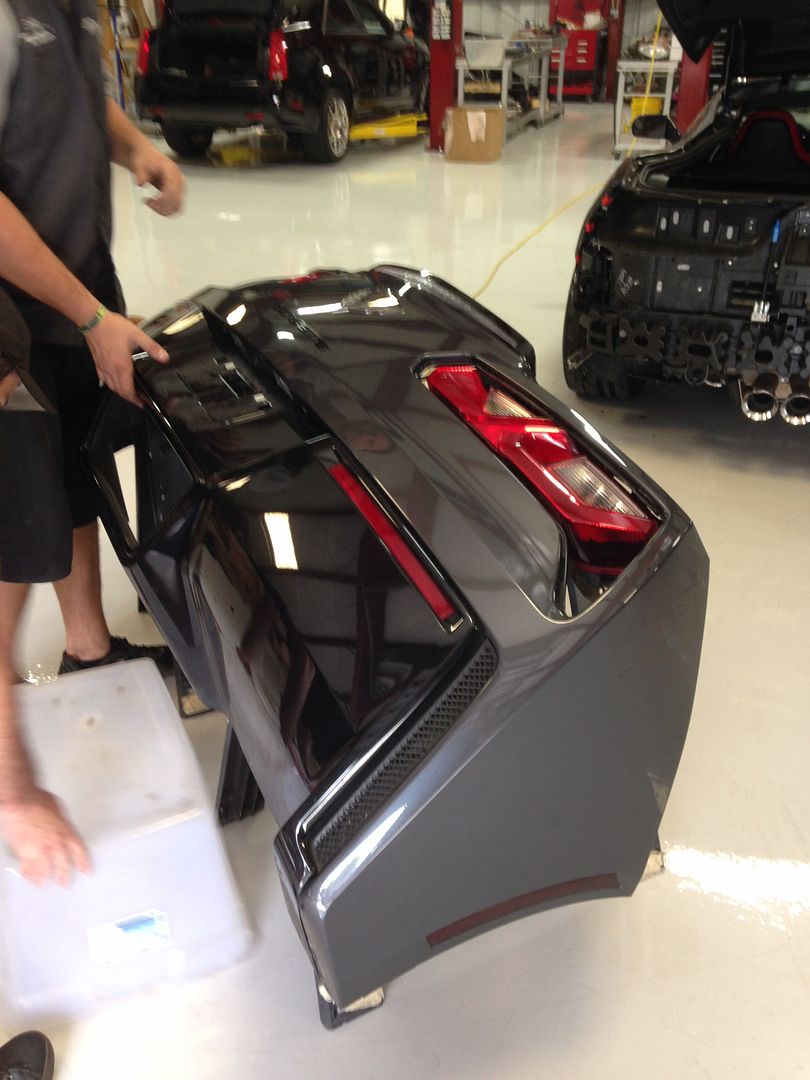
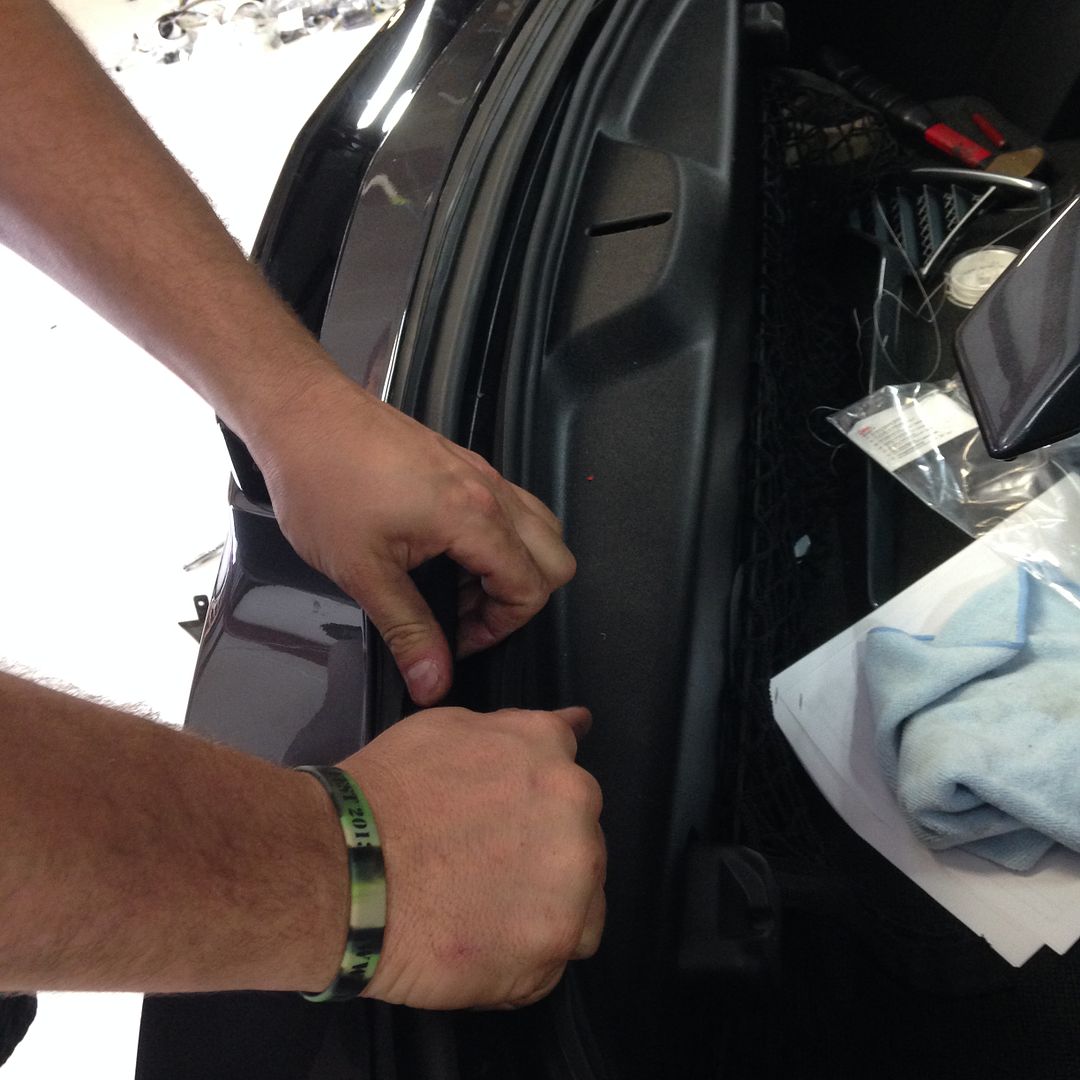
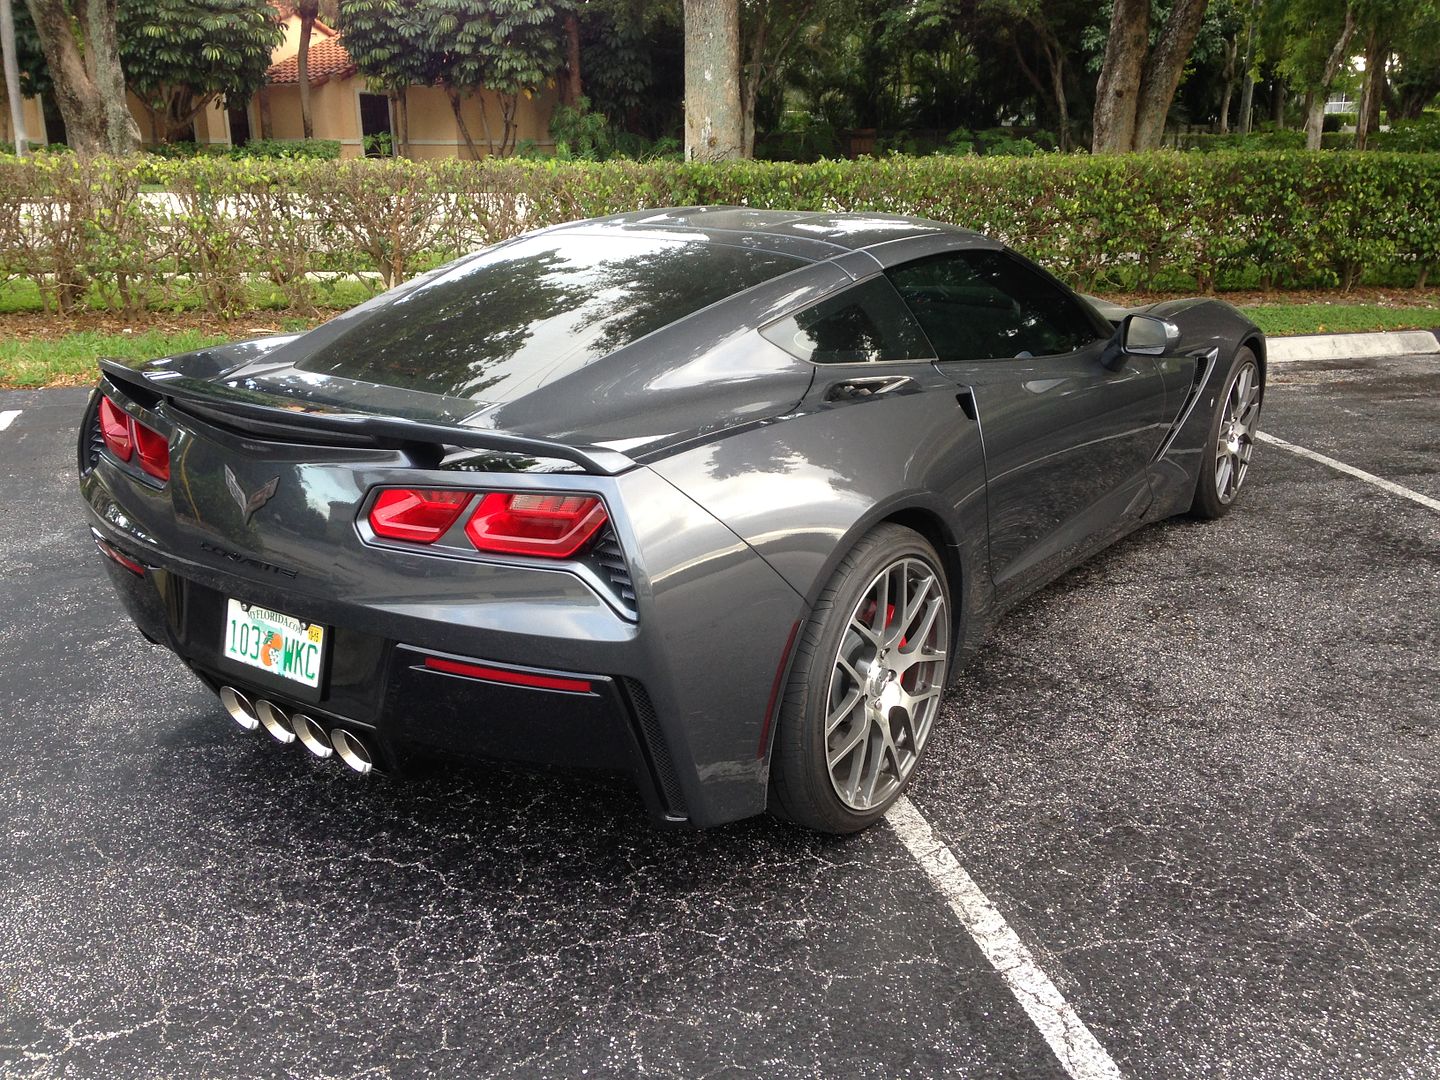
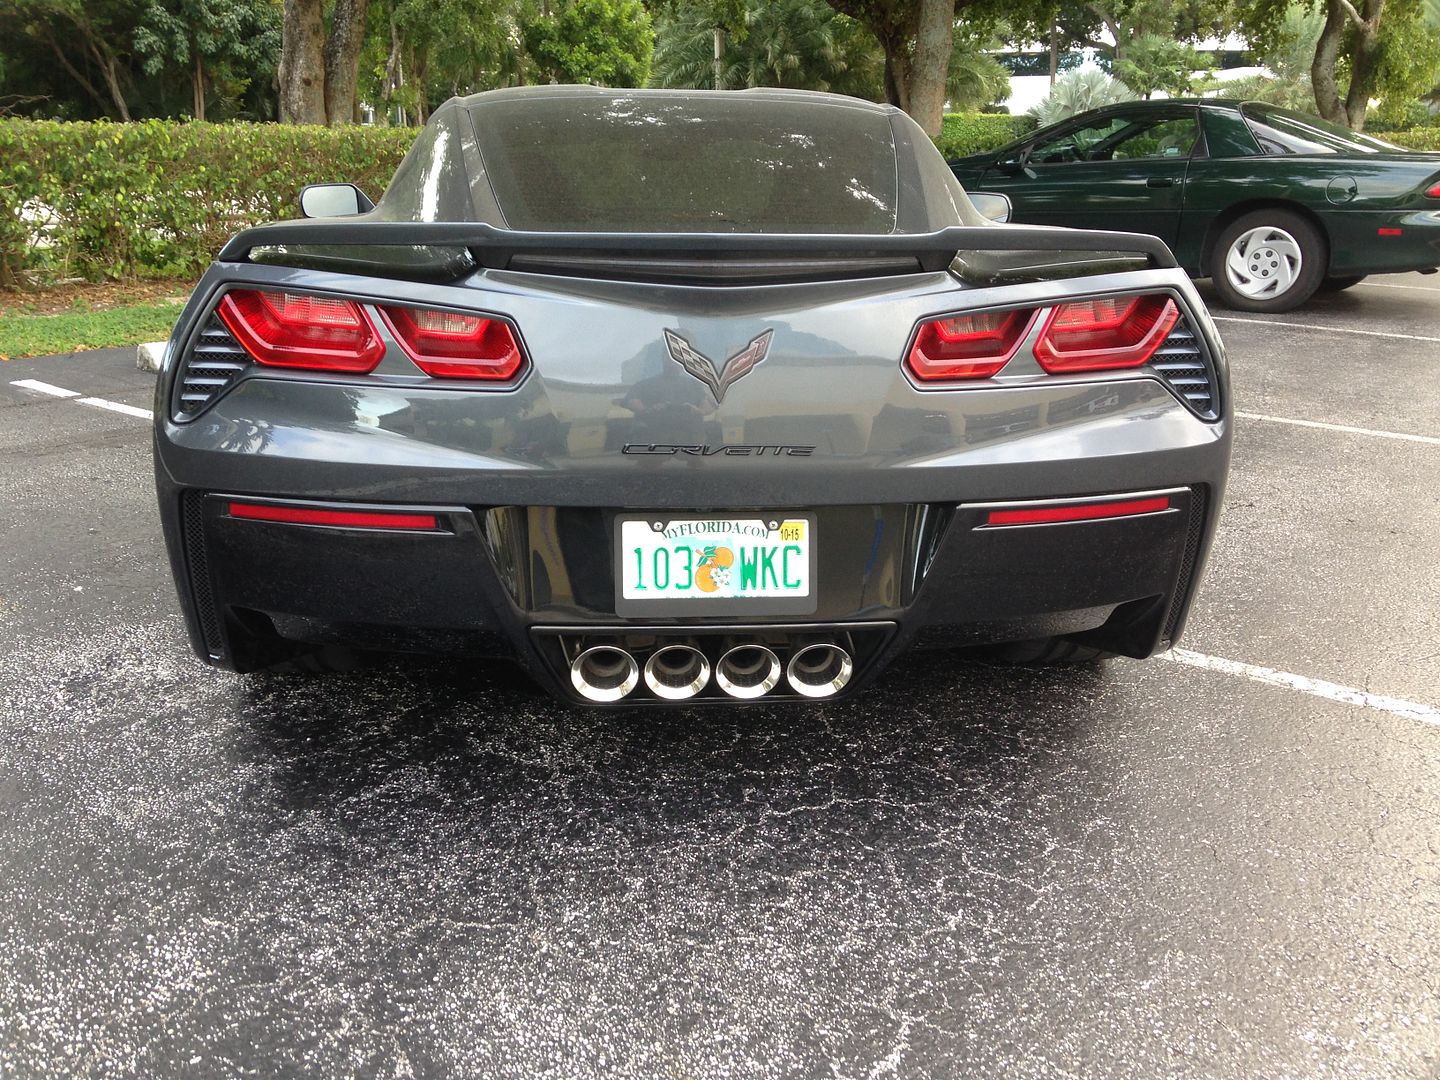
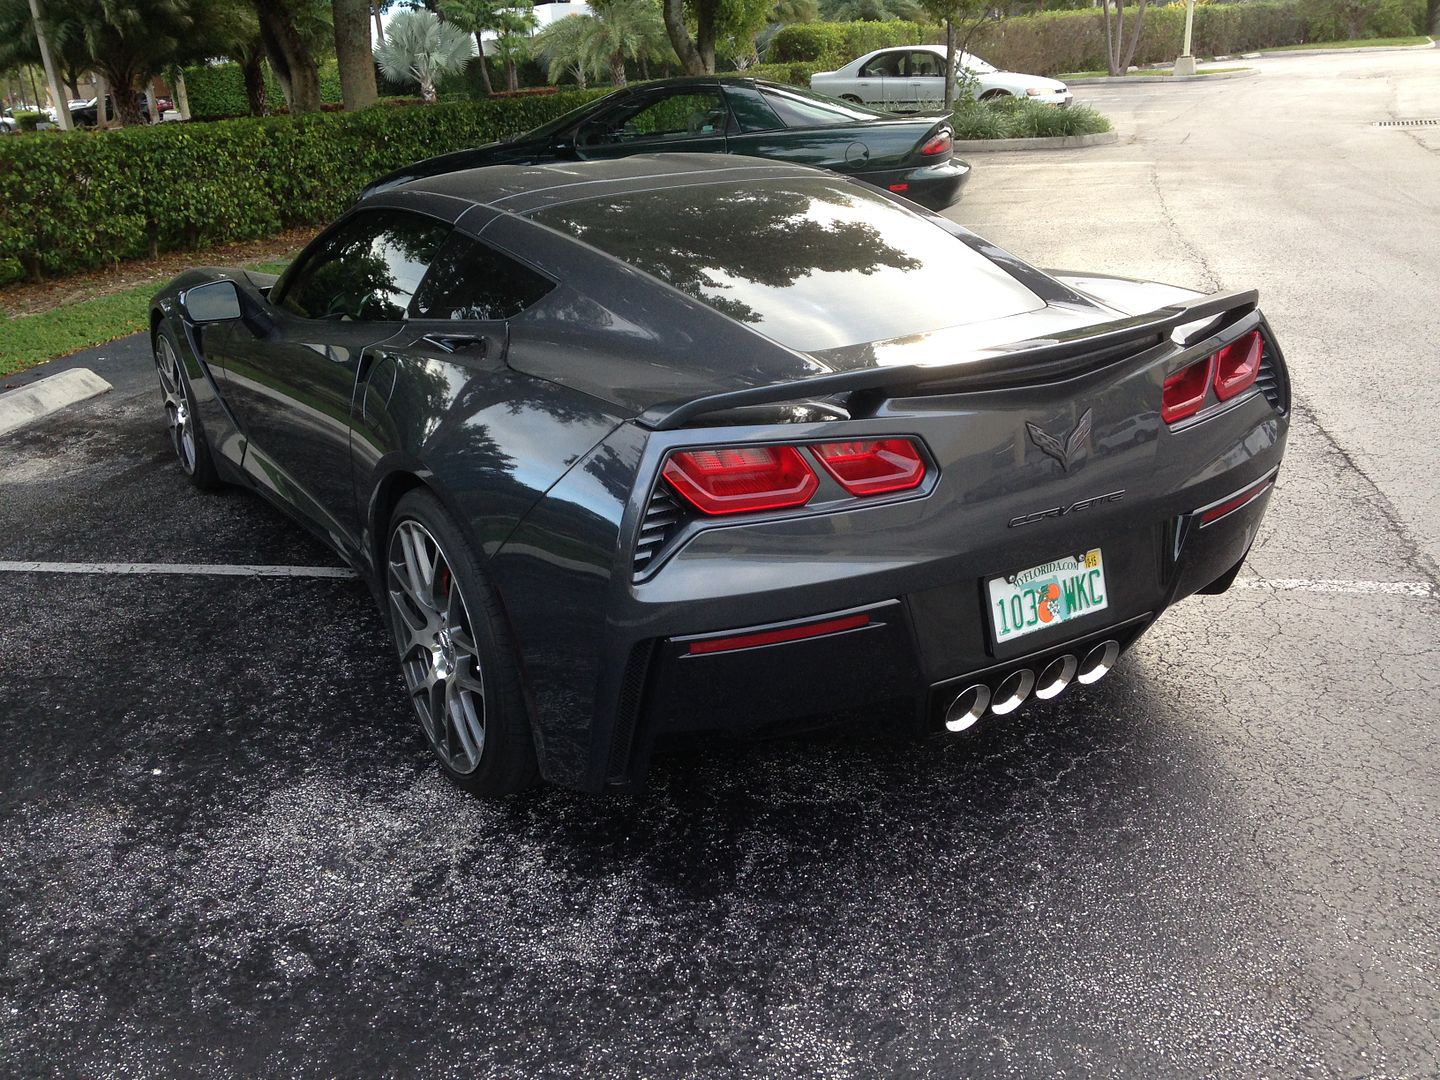
this is really a nice look, and not like a wing at all, because it houses the brake light and stays low...it still shows the shoulders and I think a more appropriate name is an "open blade" spoiler...
1. there are bolts underneath, near lights , torx screws across top inside and under the mudflaps. you need to pull off the taillight bezels with trim tools...
2. bumper then pulls off easy and you need to disconnect key cable and two sockets for the lights - pull the red tab out on connectors then unplug.
3. apply the template and center bunch the holes
4. drill the holes a bit wider than studs so you can adjust side to side
5. mount spoiler, with the supplied vhb tape and loctite red the studs and tighten supplied nuts.
6. Reassemble and while it's loose, you can readjust bumper seams on sides
Erik will do this for about 2 hours labor...took me about 2.5 as I was learning...and had plenty of time...
http://www.lashwaymotorsports.com/


this is really a nice look, and not like a wing at all, because it houses the brake light and stays low...it still shows the shoulders and I think a more appropriate name is an "open blade" spoiler...


Last edited by Glen e; Dec 14, 2013 at 04:39 PM.
Corvette Stories
The Best of Corvette for Corvette Enthusiasts

How Much Horsepower Every Corvette Engine "LOST" in 1972
Joe Kucinski
Top 10 DOs and DON'Ts for Protecting Your Convertible Top!
Michael S. Palmer
Top 10 Most Explosive Corvettes Ever Made: Power-to-Weight Ratio Ranked!
Joe Kucinski
150 hp to 1,250 hp: Every Corvette Generation Compared by the Specs That Matter
Joe Kucinski
8 Coolest Corvette Pace Cars (and Replicas) of All Time
Verdad Gallardo
Top 10 Corvette Engines RANKED by Peak Torque (70+ Years of Muscle!)
Joe Kucinski
Corvette ZR1X Will Be Pacing the Indy 500, And Could Probably Race, Too!
Verdad Gallardo
Top 10 Corvettes Coming to Mecum Indy 2026!
Brett Foote
Top 10 C9 Corvette MUST-HAVES to Fix These C8 Generation Flaws!
Michael S. Palmer
Instructor


Joined: Oct 2007
Posts: 246
Likes: 17
From: Olathe, KS
Absolutely beautiful Glen! Very well executed mods.
I have one thought, after looking thru the entire thread and all the photos. When you dipped the flag emblems you mentioned that they looked dirty. Have/had you considered just dipping the chrome portion and allowing the colors of the emblem to be bright. I think it might look nice and tie in with the bright plastic taillight lenses...just a thought!
I have one thought, after looking thru the entire thread and all the photos. When you dipped the flag emblems you mentioned that they looked dirty. Have/had you considered just dipping the chrome portion and allowing the colors of the emblem to be bright. I think it might look nice and tie in with the bright plastic taillight lenses...just a thought!
Thread Starter
Race Director
Joined: Sep 2013
Posts: 11,825
Likes: 2,474
From: Ft Lauderdale
Tech Contributor
Absolutely beautiful Glen! Very well executed mods.
I have one thought, after looking thru the entire thread and all the photos. When you dipped the flag emblems you mentioned that they looked dirty. Have/had you considered just dipping the chrome portion and allowing the colors of the emblem to be bright. I think it might look nice and tie in with the bright plastic taillight lenses...just a thought!
I have one thought, after looking thru the entire thread and all the photos. When you dipped the flag emblems you mentioned that they looked dirty. Have/had you considered just dipping the chrome portion and allowing the colors of the emblem to be bright. I think it might look nice and tie in with the bright plastic taillight lenses...just a thought!

Race Director


Joined: Jun 2006
Posts: 10,352
Likes: 9,631
From: Lawton, OK
C7 & C8 Events Correspondent
Tech Contributor
2020 C8 of the Year Finalist - Unmodified
2020 Corvette of the Year (track prepared)
2020 Corvette of the Year Finalist (appearance mods)
C7 of Year Winner (appearance mods) 2019
2017 C7 of Year Finalist
2015 C7 of the Year
St. Jude Donor '14-'15-'16-'17-'18-'19
First, your mods look great on your car! Very tasteful indeed!
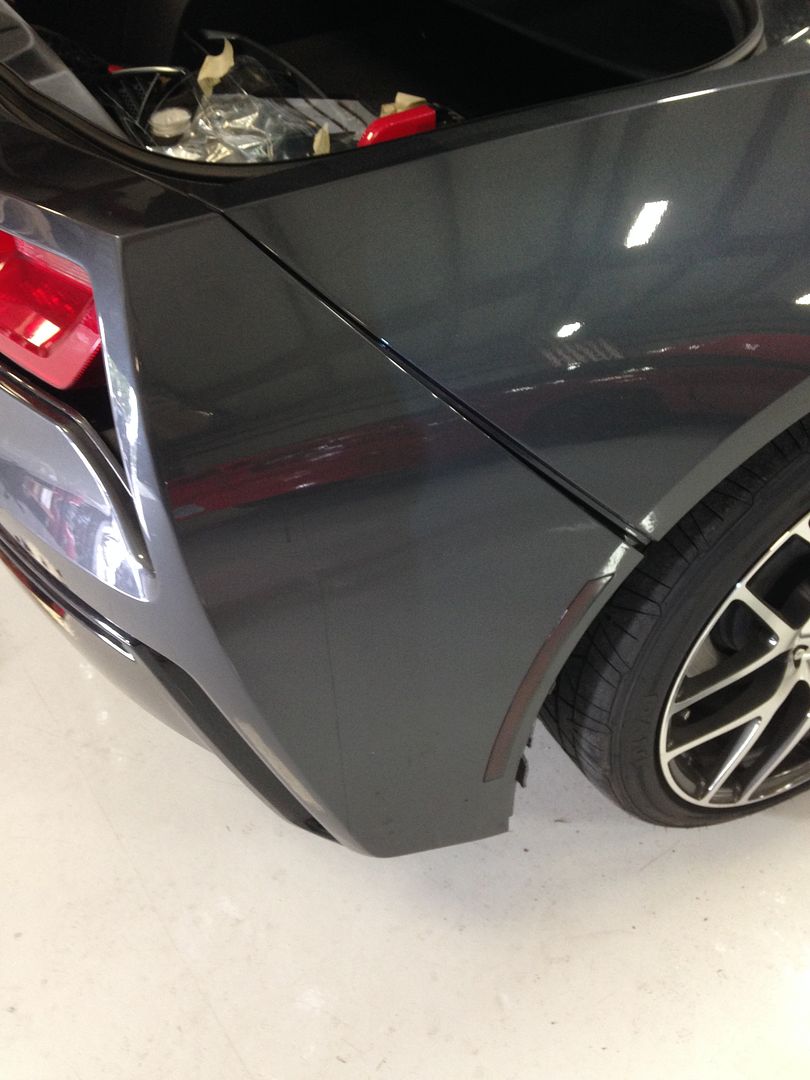
Second, I can't believe the terrible rear fascia fitment as viewed in this photo!


Second, I can't believe the terrible rear fascia fitment as viewed in this photo!
Racer
Joined: Dec 2005
Posts: 411
Likes: 2
From: southeastern pa
glen, real nice. the CG color appears to be very adaptable to the mods without looking overdone.
question: i have seen lots of pix of misaligned rear and front sections that look like loosening a few bolts and tweaking would fix the alignment. when you had the rear end off did you notice whether there is any adjustment in the fit when you were reassembling? the misalignment seems to be at the wheel well and the other problem i have seen is a large gap between the panels along the side.
yours looks perfect, of course.
question: i have seen lots of pix of misaligned rear and front sections that look like loosening a few bolts and tweaking would fix the alignment. when you had the rear end off did you notice whether there is any adjustment in the fit when you were reassembling? the misalignment seems to be at the wheel well and the other problem i have seen is a large gap between the panels along the side.
yours looks perfect, of course.
Thread Starter
Race Director
Joined: Sep 2013
Posts: 11,825
Likes: 2,474
From: Ft Lauderdale
Tech Contributor
glen, real nice. the CG color appears to be very adaptable to the mods without looking overdone.
question: i have seen lots of pix of misaligned rear and front sections that look like loosening a few bolts and tweaking would fix the alignment. when you had the rear end off did you notice whether there is any adjustment in the fit when you were reassembling? the misalignment seems to be at the wheel well and the other problem i have seen is a large gap between the panels along the side.
yours looks perfect, of course.
question: i have seen lots of pix of misaligned rear and front sections that look like loosening a few bolts and tweaking would fix the alignment. when you had the rear end off did you notice whether there is any adjustment in the fit when you were reassembling? the misalignment seems to be at the wheel well and the other problem i have seen is a large gap between the panels along the side.
yours looks perfect, of course.
Melting Slicks


Joined: Nov 2011
Posts: 2,850
Likes: 38
From: Cleveland (Ohio City) OH
Race Director
Joined: Jun 2006
Posts: 10,352
Likes: 9,631
From: Lawton, OK
C7 & C8 Events Correspondent
Tech Contributor
2020 C8 of the Year Finalist - Unmodified
2020 Corvette of the Year (track prepared)
2020 Corvette of the Year Finalist (appearance mods)
C7 of Year Winner (appearance mods) 2019
2017 C7 of Year Finalist
2015 C7 of the Year
St. Jude Donor '14-'15-'16-'17-'18-'19
Glen, I saw your comment and now see it is gone, so I'm guessing you noticed the and at the end of my post. I was just kidding. Your car looks great!
and at the end of my post. I was just kidding. Your car looks great!
Thread Starter
Race Director
Joined: Sep 2013
Posts: 11,825
Likes: 2,474
From: Ft Lauderdale
Tech Contributor

Thread Starter
Race Director
Joined: Sep 2013
Posts: 11,825
Likes: 2,474
From: Ft Lauderdale
Tech Contributor
see post #100 for the orginal mod:
update: while I had my rear fascia off for my new spoiler I yanked the plate and decided to make it black - so 800 grit paper wetsand, a dusting coat of alum primer, and then two coats of hi temp engine flat black...hard to take a pic as now it just goes away but you don't look thru to the unfinished muffs...a classy mod and what chev should have done:
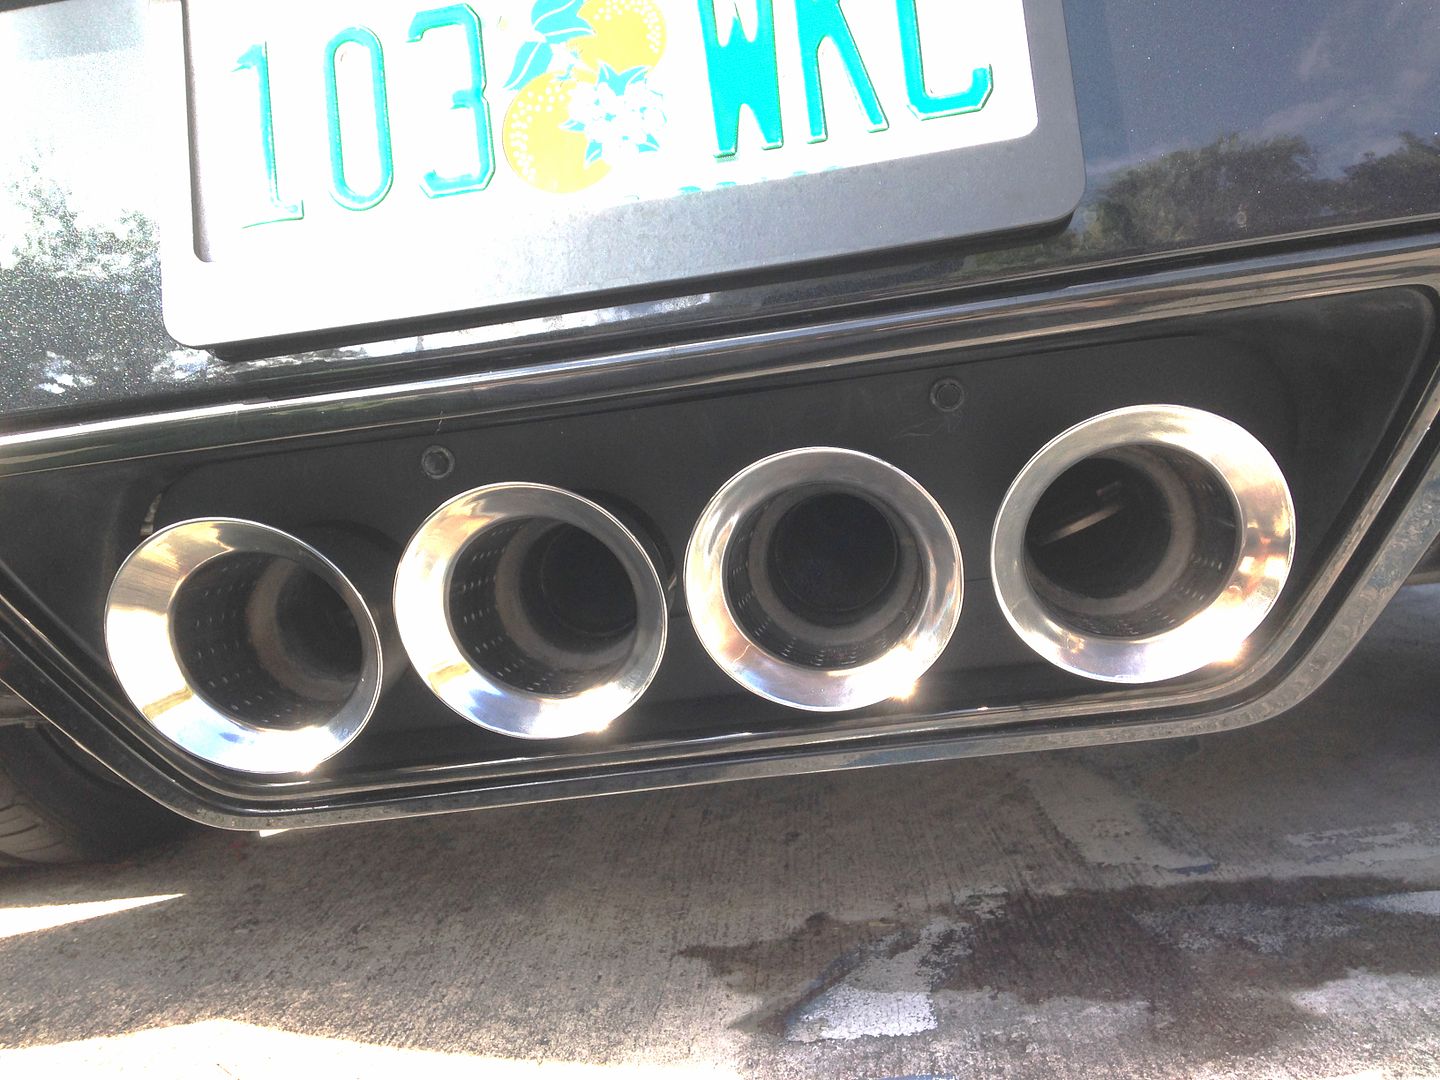
update: while I had my rear fascia off for my new spoiler I yanked the plate and decided to make it black - so 800 grit paper wetsand, a dusting coat of alum primer, and then two coats of hi temp engine flat black...hard to take a pic as now it just goes away but you don't look thru to the unfinished muffs...a classy mod and what chev should have done:

AIR FORCE VETERAN
Joined: Nov 2009
Posts: 6,223
Likes: 441
From: Pennsylvania
What Chevrolet should have done in your opinion. Not a fact. The beauty of owning a car is you can mod it anyway you would like. In fact please yourself as to what is "correct".
The problem is you will never get others to agree with you 100%. No one, not even the best designers in the world, will get everyone to agree with them. You have done nice work. I would not do that to my car because I like the way it was made much better.
The problem is you will never get others to agree with you 100%. No one, not even the best designers in the world, will get everyone to agree with them. You have done nice work. I would not do that to my car because I like the way it was made much better.
Thread Starter
Race Director
Joined: Sep 2013
Posts: 11,825
Likes: 2,474
From: Ft Lauderdale
Tech Contributor
Agreed, to each his own, I don't care to look at unfinished mufflers when walking toward the car....IN MY OPINION.....
At the very least, black out muffs would take care of the eyesore too....
At the very least, black out muffs would take care of the eyesore too....
Last edited by Glen e; Dec 13, 2013 at 02:30 PM.