When you click on links to various merchants on this site and make a purchase, this can result in this site earning a commission. Affiliate programs and affiliations include, but are not limited to, the eBay Partner Network.
My DIY tool is the Tenhulzen four wheel system, specifically, one gauge and string frame option. Another session out in the garage will increase my confidence and understanding with the tool, but so far, I am very pleased.
This equipment measures a tire's individual toe. From my initial session, I found the right front toe measured 37/64" out, and the left front toe 34/64" in. If my mental math is right, then the total toe is 3/64" out. The total toe is relatively close to track-alignment specs. However, I'm concerned about the difference with the individual tires. Is this current measurement worth adjusting? And, if so, is my adjusting front-toe process the best way to do it? ( After a 15 minute search, I could not locate instructions on how to adjust front toe for C7s.)
Adjusting front toe:
0. Level vehicle
1. Place low-friction plate underneath tire
2. Center steering wheel and secure
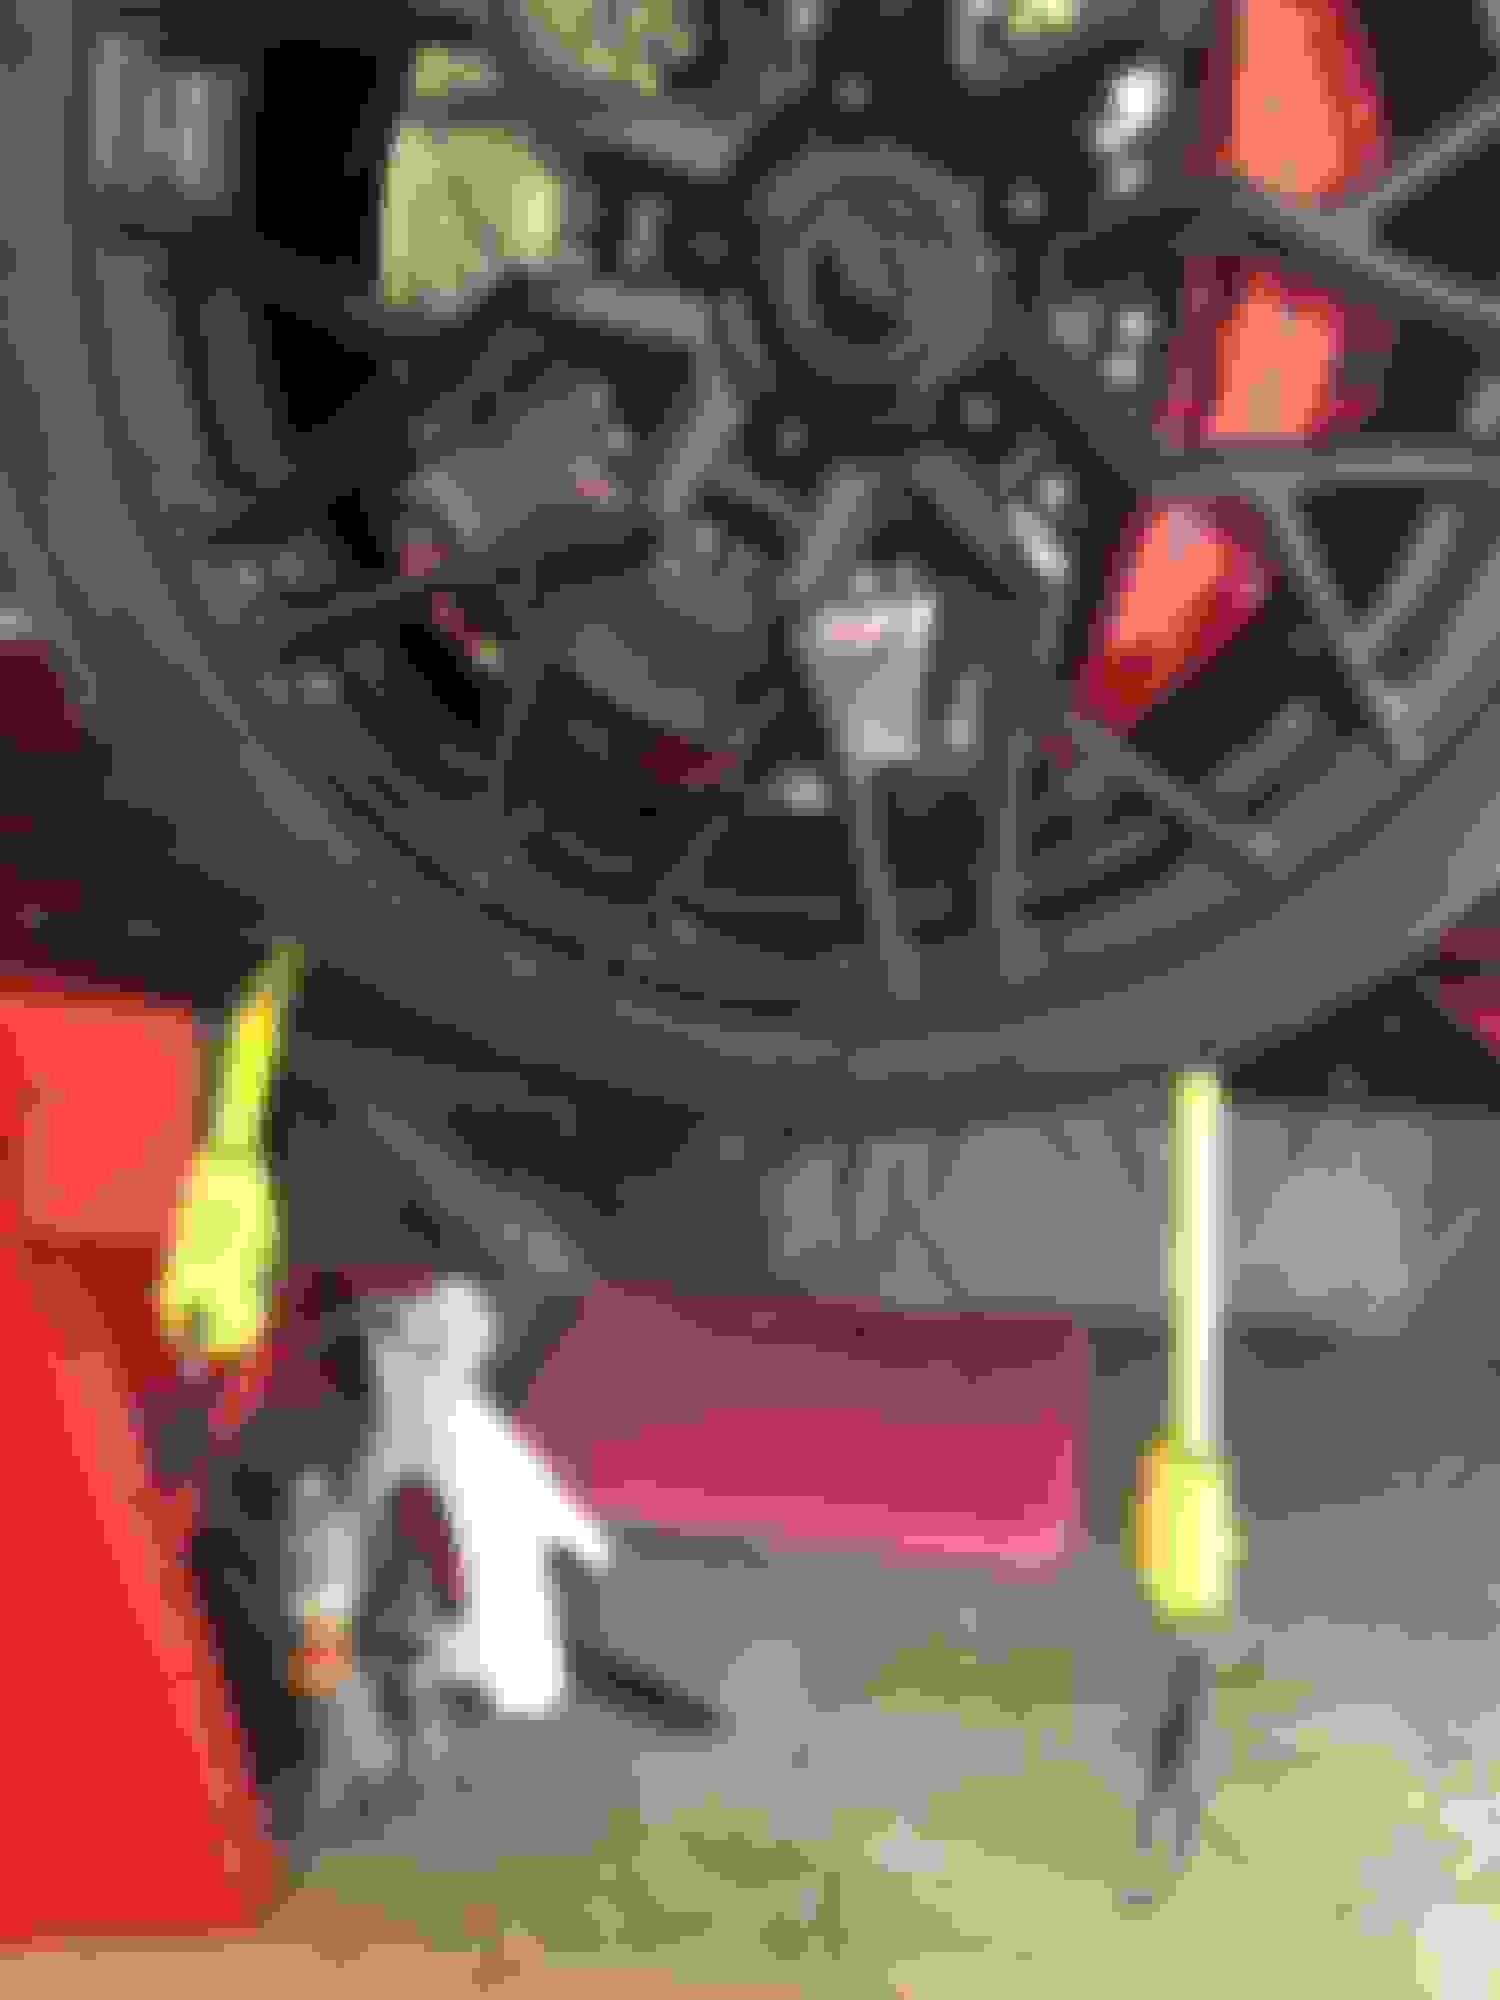
3. Loosen nut, yellow arrow
4. Adjust bolt, red arrow
5. Measure for desired change, tighten nut
6. Test drive to settle suspension
7. Measure again, repeat steps 1-7 as necessary.
Last edited by bhk2; Jul 17, 2019 at 06:08 PM.
Reason: order
Badhabit, thanks. The second go around for measuring came in closer to the dealer setting. On my first measuring attempt, I didn't know what to pay attention to when setting up the gauge. Overall, the front driver side is 1/8" toe out, and the passenger front is 1/16" in. I'll get better with familiarity and practice. dealer setting Camber wheel rear wheel front
Yes your toe measurements make a difference (first post question). Individual toe counts in the back, total toe in the front. If rear toe settings are not the same, you will have a thrust angle problem. In the front, differences in individual toe will result in the steering wheel being off-center. One thing to worry about is that the traction control system measures steering angle to decide to intervene in a "driving event". I don't know for sure, but suspect that if the steering wheel has a noticeable offset, this could cause a mistake by the TCS system.
What are you using for step 2? There doesn't appear to be anything under the tires so they are free to slide.
Recheck the string setup if the strings are not perfectly parallel then any error will end up in the final settings of the car.
If the measurements you are getting are real (not caused by the two items above) then your math is right you will have a bit over 1/16 toe out per the OP's second post. However, since the two front wheels are connected together by the steering rack, such a difference should show up in the steering wheel not being perfectly centered. The string is almost a mm thick, you might need to think about the error that can be introduced by this.
One thing that will screw up your work is jam nut tightening. The yellow arrow points to it. When you think you are done and the settings are dialed in, tightening these nuts will add 1/32 toe out each side. So, to compensate, adjust to 1/32 toe in each side, tighten the jam nut, check again.
K2...6--Fantastic! Thanks for the tip about the jam nut. The 1/32 compensation is noted. Again, thanks for the pro tip!
Installed the AMT bolts in the front and added HF shims to set up for street driving. From the AMT brochure, a 1/8" shim equals .6 degree. I added a total of 1/4" to see if that corresponded to the desired change in camber. On the passenger side, the reading changed from from -2.0 to -1.4 with two 1/8" shims. On the driver's side, 3/16" in HF shims changed the camber from -1.7 to -1.1. At least it went in the right direction. I'm ok with these readings for the street and measured the original washer thickness to set it back for the track.
My question is, with the asymmetrical shims added to the front, (left side versus right side) are these new toe readings expected?
On the side where 3/16" shims were added, the toe went from slightly positive to zero.On the 1/4" side, the toe changed significantly from 1/32" in to 5/16" in. (From my trial size of two, adding positive camber moves the toe measurement in.)The steering wheel is still aligned TDC. Thanks again for all the other posters referencing the AMT bolts and HF shims. Very helpful!
I think your findings are expected, since the shims changed camber, the vertical axis of the knuckle is further in (more vertical looking front-to-back that is). Since the steering link is in the front, you would expect the front to toe out when you reduce camber, since this represents a constraint. whether you use the LCA eccentrics (or AMT octagon shims) or add/remove shims camber is going to change, so toe will have to be adjusted to get the desired setting.
So maybe a rule of thumb will help. if you only change camber on one side, then toe adjustments should only be needed on THAT side. Maybe a tweak to center steering wheel on the other side. Extending this rule of thumb. more toe adjustment will be needed on the side with the most change in camber setting.
In the front total toe is what counts, along with centering the steering wheel. It is fine to measure it individually, but the sum is what counts. Really, if things are right and you have 1/16 total toe, then each side should contribute 1/32. obviously, if you shoot for 0 toe, then each side HAS to contribute 0 (this is a dumb observation, but I'm on my second glass of Crown-R)
When fine adjusting the steering wheel, If it is rotated slightly to the right, then to fix that, add one flat of toe increase on the right toe link and take out one flat on the left. this will turn both wheels to the right. Then to compensate, you then need to turn the wheel to the left to steer straight ahead. Drive it around the block. Usually, one or two times is all it takes to get the wheel back centered, and if you are careful how you measure one flat of rotation each side, there probably is no reason to go back and measure toe again. This is an estimation, but one flat is worth 1/64 of individual toe, plus or minus a bit of KY windage. After all the location of the toe rod sucks, and it is dark. When both hands have wrenches, the only other place for a light is in your teeth.
K6, wow, excellent contribution and everything, even down to the 1/32" change when tightening the lock nut, is as you wrote. Thank you! I found six "flats," or one complete rotation, corresponded with a 3/32" change in toe. Just as you said, after I obtained zero toe, the steering wheel turned off center, but to the left. The instructions for centering the wheel are counterintuitive due to my inexperience, but I followed what said, and BINGO, the steering wheel lined back up dead center!
As soon as I left the driveway for a test drive, I felt the car has much less rolling resistance. Going from 5/16" to 1/32" toe in was noticeable or very wishful thinking. Thanks again for helping out big time. Grease pencil from HF help me keep track of the turns. After getting the initial read out from Tenhulzen, went with two tapes so I could work under car.
Sounds like progress to me. You have learned a lot, and soon you will be able to relate your alignments to driving performance. If you are driving to the track, I see no reason why you could not put -2-2 camber in the front and -2.0 in the back, and ZERO toe both front and back. this will give you pretty good track feel and not chew up tires too much. I wouldn't daily drive this, but an occasional beer run between track days should be OK.
Once thing you can do is just measure total toe directly on the tire tread. The rain grooves in the sticky tires like MPSS are near perfect with very little runout variation. just pull a tape measure from left to right and measure the edge of the groove. You will be good to a bit less than 1/32 with a simple tool. just measure at the same height from he ground at the front of the FRONT tires and compare to the same measure at the back of the FRONT tires. That's what I do at the track if something gets loose. Take a bar of soap and scrub the crap out of the pavement with the bar to make a slick surface layer for the tire. Actually works and the mess goes away next rain. Motel soap is pretty good for this.
Great tips! Your instructions really helped, and I like the motel soap suggestion. For the toe, I placed the lip of the tape measure in the outer most groove of the tire. A piece of duct tape held it in place. Simply rolled it out and compared readings front and back to the other tire's outside groove. The measurement confirmed what T-hlzn equipment showed. Thanks again. Even though it is simple, getting the steering wheel straight was a big leap forward! Getting this all set up is the harder part. The adjustments were relatively easy to do. Just thrilled with the results and a new ability to change settings between track and street driving.
My track -prep day began well. Loosened the nuts to remove HF shims and reset front camber to track spec. Easy. Now to redo front toe. I spent way too much time messing it up. After futzing around, the steering wheel is rotated 30 degrees CCW.
When following the directions in a previous post, I either have a straight steering wheel or desired toe settings. But not both.
What am I missing?
If your steering wheel is straight you need to adjust equal amounts on both sides to get toe correct. If your toe is right you need to adjust equal amounts on both sides to get toe correct one out one in.
If your steering wheel is straight you need to adjust equal amounts on both sides to get toe correct. If your toe is right you need to adjust equal amounts on both sides to get toe correct one out one in.
Bad habit, thanks. I gave it a go rotating the flats in opposite and parallel directions but am still missing something.
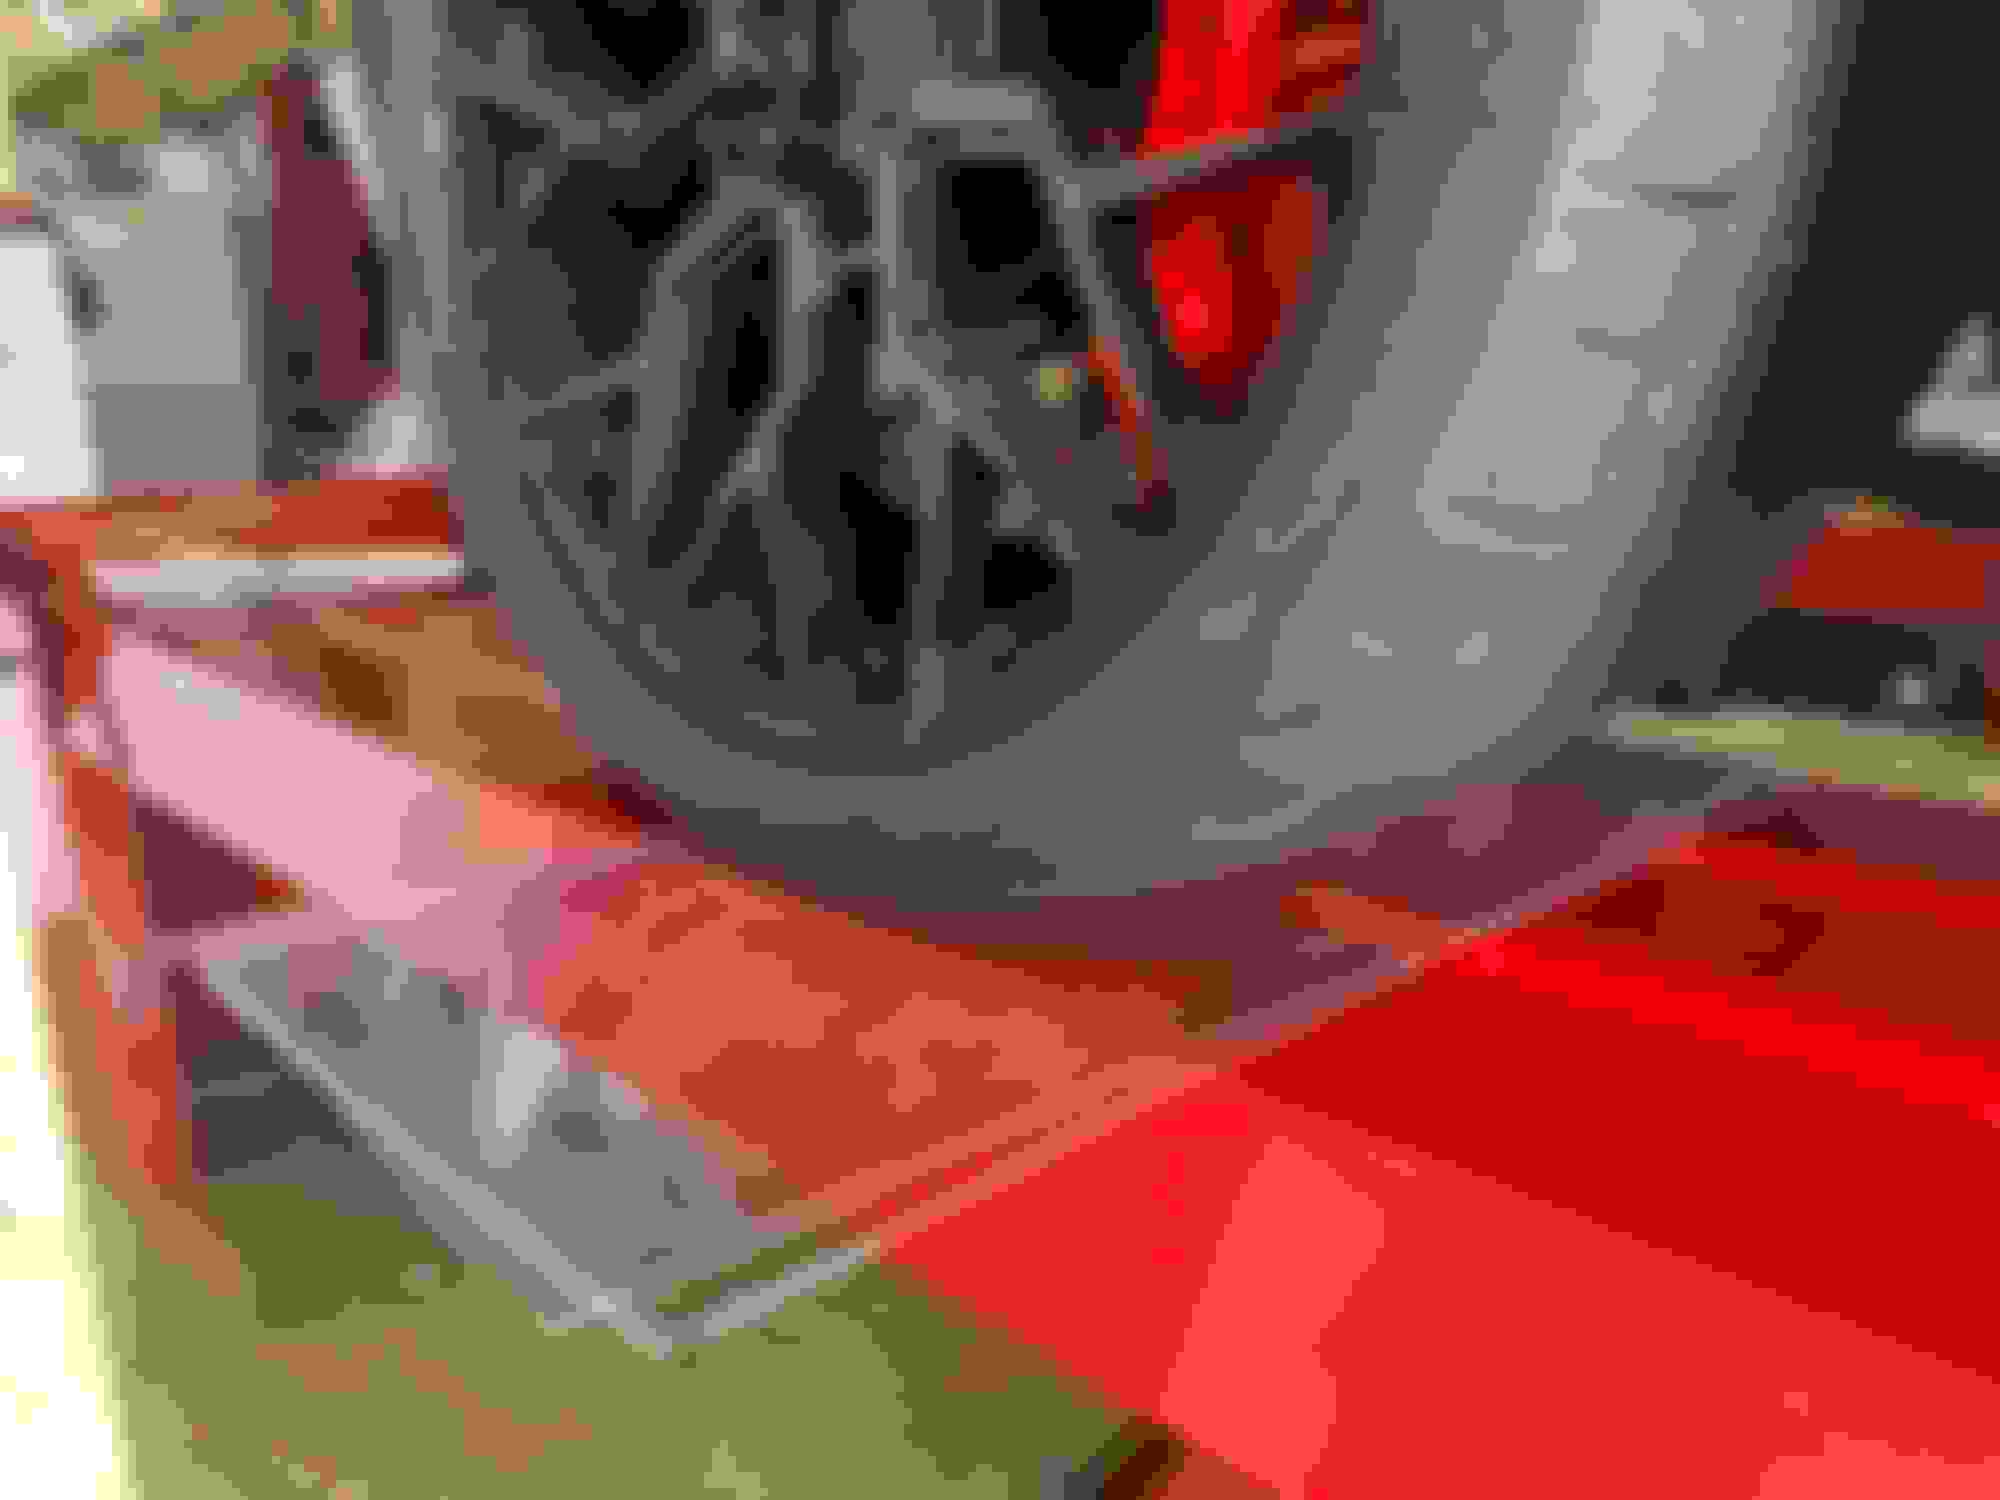
bhk2, What are you doing about the tires? the tire contact patch needs to be able to be friction free to be able to get repeatable measurements. You might have some luck raising the tire off the lift and placing a bunch of plastic shopping bags under each tire. I think you might be "binding up" and that is why it seems you are not going in the right direction. The tires need to be really free to move over a pretty large range in order to dial in toe correctly. And more importantly, they need to be free to move when you are setting camber. If your lift is smooth and not a checker-plate steel, then soak the contact patch with something slick like 409 cleaner. Won't hurt the tires and will wash away.
Are the lift treads level? That will throw everything off, as the car will be locked against the rear wheels to prevent rolling off. Your pic looks like it is sloped.
It looks like you are using a string setup. So a string setup provides a reference pair of lines that are parallel to the long axis centerline of the car. Since there is no mark (called a fudicial) on the car, the centerline is basically imaginary. So the strings are set up with respect to the hubs, and more importantly at the very center of the hubs, so that camber setting changes are not affected by the parallel string lines. The accuracy of your string setup will dictate the accuracy of your alignment. The lasers I use (and the high buck commercial rigs too) have a beam spread issue that requires a little Kentucky windage to reduce error. In the end a good string setup is as good as lasers, and for a number of reasons, you can produce a better alignment than many shops. The shops have to make money, you have to make it right.
So for argument sake, let's say your strings are perfectly setup, your tires are free to rotate easily, and your steering wheel is tied down and perfectly centered. THEN, setting toe is a matter of going to each tire and adjusting each with respect to the string to get the desired final toe.
To make your life easier, shoot for zero toe on each side. Unless you are the hottest shoe at the track, the OM-recommended -2.0 camber front and rear, and zero toe front and rear will give you a darn nice handling track day car.
Then, you can experiment with front and rear camber/toe settings on future track days to optimize alignment to suit your driving style. We aren't robots, so each of us run our cars a little differently. The pro racers are different. They can succeed with some really bad settings.
Finally, you have a Z06, I think. Be careful with the UCA shims, your tires may rub stuff. That's why the OM has restrictions on shim removal. If you run a track-day on a banked oval, you might run into rubbing. After market wheels with different offsets? mmmm
Bad habit, thanks. I gave it a go rotating the flats in opposite and parallel directions but am still missing something.
If you have a tool to hold the steering wheel in place, which I strongly recommend, lock it down and then take your measurements and get each wheel in front to exactly where you want it toe wise. Your tires have to be free to rotate so that when you change the alignment they are not binding.
K...6- wow, the finer points provided here address many if not most of my errors. Thank you. For starters, I realized the Hefty style plastic bag was missing from underneath the tire. The bag helps free up the tire, but it is still binding on the driver’s side. The passenger side tire moves more freely than the driver’s side. Some 409 spray or jacking up the front to reduce the weight on the wheels is my next step. The binding is what I am missing. The concept makes sense after you pointed out the obvious.
For the shim removal, there are two per AMT bolt, and removing one shim per bolt gets the camber back to track specs. Easy, glad I installed them.
Yes, the ramp is sloped. Will the slope make a difference in setting toe? I can get the ramp level if needed. Thanks again for the reply. I really appreciate the help!
If you have a tool to hold the steering wheel in place, which I strongly recommend, lock it down and then take your measurements and get each wheel in front to exactly where you want it toe wise. Your tires have to be free to rotate so that when you change the alignment they are not binding.
Bad habit, thank you. Do you have a recommendation for the steering wheel tool? Yes, I now see the flaw in my set up:not having the wheels freed up. Thanks again.
I don't remember what tool I got but it was a fairly cheap tool if I remember correctly. I'd try a local auto parts store and if you don't like it you can take it back.
BHK, Yes the ramp needs to be level. In the front with the 7.0-8.0 caster, any suspension loading will affect toe measurements (camber too for that matter) The large amount of caster causes the knuckle to add a moment to the spring, increasing compression of the suspension. So your ride height will not be what it is when the car is level. The toe measurements that are desired are small, so small changes in the car's ride height means the suspension is in a different place, and hence the camber/toe will be different.
For tying down the steering wheel, what I do is use the button on the side of the column to lower the wheel. Then I cross-tie the steering wheel to the seat frame. Once tied down, use the button to adjust the wheel up and really put a tightening on the cross ropes. when everything is tight look at the steering wheel, give it a few wiggles,and see if it returns to rest exactly centered. I don't tie down the steering wheel until I have the rear settings done, and NEVER tie it down unless the tires are on a slick surface or turntables. some sort of adjustment on the ropes is needed to make sure the tension on each is close to the same.
Regarding shims, be really careful adding a lot of shims. you could get rubbing of the tires on the car, or wheels on suspension parts in high suspension compression like ovals or big carousels
Without the support of the CF, I would be not be able to safely drive my car. A giant thank you to bad habit and K24556 for the expert suggestions and getting me unstuck. Based on their suggestions, I finally got the alignment dialed in. The pics represent my interpretation of their suggestions. For my '19 Z06, one full rotation of the rod yields a 6/32 change in toe.
Get the car level!
Get the wheels to move freely--two plastic sheets cut by the technician at Lowe's. The pieces could be less rectangular, but it worked. A few squirts of 3 in 1 oil between the plastic pieces lowered the mu.
Secure the steering wheel-I am sure there are better approaches. One 40" and 24" bungees used. I am back on the road and headed to the track!
Glad I could help. Poorsha helped me and answered my questions as I was learning. He also gave me tips with that and the DSC module and shocks. I'm just paying it forward. Glad to hear you got it sorted out.