Corvette: How to Install Center Console Insulator
The amount of heat radiating from your car's center console can be quite overwhelming, especially in the warm summer months. Adding insulation may seem like a tricky process, but it's actually very simple. Aside from a few spare minutes, you'll need a few basic tools to get the job done.
This article applies to the Corvette C5, C6 and C7 Corvette (1997-current).
The center console can get quite hot, prompting many owners to look for a quick fix. Fortunately, it's a simple process that even novice car owners can use to reduce center console heat. Whether you incorporate it into a larger interior project or you simply add a bit of insulation to your car's center console, this fun project is ideal for a slow Saturday afternoon. Once you've chosen the insulation you want to use, you'll probably need to spend a bit of time perfecting the fit. In most cases, once the size is correct, the insulation piece will simply snap into place.

Materials Needed
- Desired amount of insulation
- Razor
- T-15 torx bit
- Phillips-head screwdriver
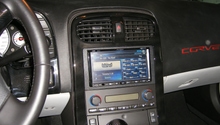
Step 1 – Remove the center console
The console is held in with T-15 torx screws and Phillips-head screws. Unscrew the arm rest, shifter cover and plastic bezel, and then pull up on the console to release it.

Step 2 – Cut out desired pieces
Cut out the size and amount of installation pieces you want to use. Lay the pieces out after cutting them.

Pro Tip
To match the stock interior console, you'll want a 1/4-inch insulation piece covered in black felt.
Step 3 – Trim off excess material and make holes for installation
You'll need to trim off any excess material after cutting the pieces. Set aside any excess and reserve for later use. If there is adhesive backing on the installation pieces, avoid peeling it off. Now is the time to make holes for the screws that attach to the center console.

Step 4 – Peel off backing and apply to center console
When you're ready to attach the insulation to the center console, slowly peel off the backing. Then, apply the material to the console by putting enough pressure on the piece to secure it in place. It's OK to overlap the pieces if necessary.

Pro Tip
Avoid the console's lock linkage as you're applying the insulation pieces.
Step 5 – Cover up any blank spaces
If there are any blank or uneven spaces, cover them up or fill them in with the excess insulation material. You may need to use a razor for any spaces requiring precise cuts. When you've sufficiently covered up the spaces, gently press down and massage the material to get it to stick to the console's plastic material.
Step 6 – Re-install the center console
Once you're satisfied with the insulation you've installed, simply re-install the center console cover. The end result should appear completely seamless, but offer substantially reduced interior cabin temperatures.

Related Discussions
- DIY Center Console Insulation - CorvetteForum.com
- C5 Center Console Insulator - CorvetteForum.com
- Center Console Removal - CorvetteForum.com