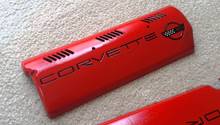
Corvette: How to Wrap Your Corvette Parts in Carbon Fiber
Actual carbon fiber parts are expensive. Wrapping or skinning parts in carbon fiber is relatively inexpensive and can be done in your own garage.
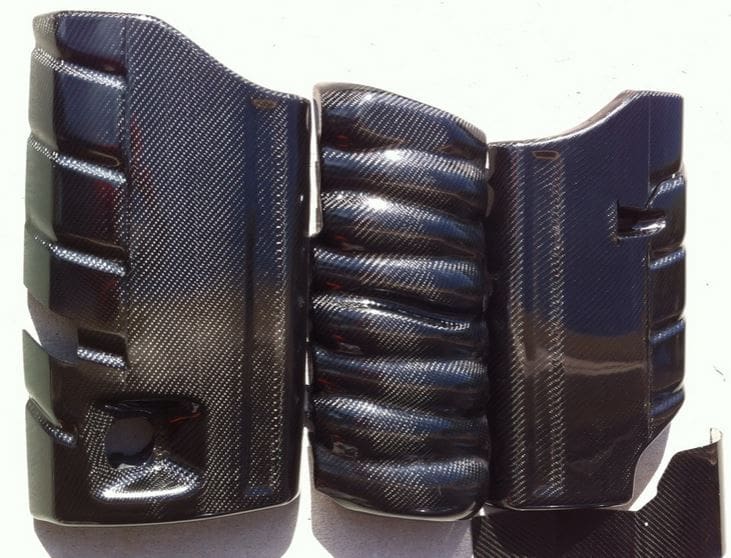
This article applies to the C5, C6 and C7 Corvette (1997-current).
The popularity of carbon fiber has exploded within the past several years. Although carbon fiber is designed to reduce weight, obtaining the "carbon fiber" look has become a desired styling feature on many Corvette parts. Ever since the 2006 C6 Corvette was upgraded to include some carbon fiber parts, along with this continuing trend into the C7, the Corvette community has had a new buzz to talk about. The process of skinning or wrapping your parts can easily be done with a little time and patience. Compared to the professional cost, which varies depending on the size and complexity of the parts you wish to wrap, the DIY cost mainly accounts for the price of a wrap kit.

Materials Needed
- Carbon fiber kit: base; epoxy and hardener; carbon fiber fabric
- Sandpaper (assorted grit 150-1200)
- Mixing cup (paper) and stirring sticks
- Brushes (2)
- Blow dryer
- Shop cloths
- Scale or measuring cup
- Scissors
- Gloves/mask/goggles
- Rubbing compound or lacquer
Warning
Always use gloves, a mask, protective eyewear and a long-sleeve shirt. You will be dealing with products that can irritate your skin, eyes and nose, so it is a good idea to eliminate or at least minimize this contact.
Step 1 – Sand part to be wrapped
Using the coarsest sandpaper in the kit (150 grit), sand the surface of the area that is to be covered with carbon fiber. This creates a surface on which the primer layer can bond.
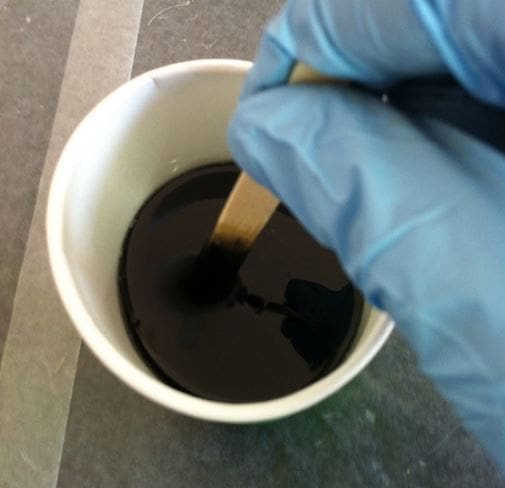
Step 2 – Mix base coat and apply
In a paper cup, mix the black base coat and hardener in a 2:1 ratio. For example, if 100 grams of base coat is needed to cover the part, mix it with 50 grams of the hardener. Stir continuously for about one minute, and do not create bubbles while stirring. Unwanted air bubbles will transfer to the surface of the part during application.
Pro Tip
A kitchen scale is useful to achieve a perfect 2:1 mixture ratio. Don’t forget to zero the scale with an empty cup before weighing it with the base coat and again with the addition of hardener.
Step 3 – Apply base coat
With a brush, apply an even, thin coat to the surfaces that will be wrapped. Do not apply too much as the coat will run. Once covered, let the base coat dry until it is tacky and does not come off when you touch it. This curing process should take about 3-4 hours. In that time, clean your brush but do not discard any of the remaining base coat mixture.
Pro Tip
Cover and protect any area of the part you wish to remain stock. This is best achieved by applying wax to these areas (so the base coat cannot adhere to the surface) or masking such areas off.
Step 4 – Inspect the base coat application and touch up for complete coverage
While waiting for the base coat to cure, inspect the part and reapply the mixture where necessary. Without proper coverage, the carbon fiber will not adhere to the part. Given that some time has elapsed, the mixture will have hardened a bit. You will have to stir it again, but the slightly thicker mixture will be easier to apply in areas where there may have been run-off during the initial application.
Pro Tip
Make sure that the resin has cured to tack without staining your glove. If the coating comes off easily, it may seep into the carbon fiber fabric and not adhere properly to the part. The necessary time for curing will greatly depend on the temperature and humidity in your working area.
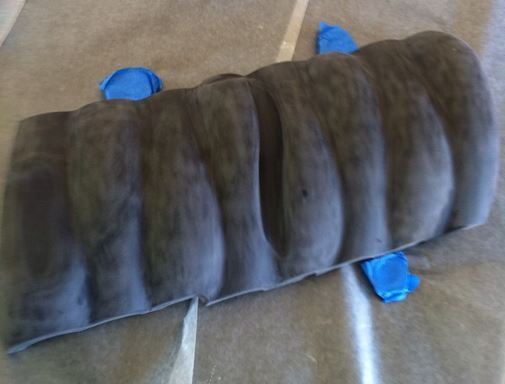
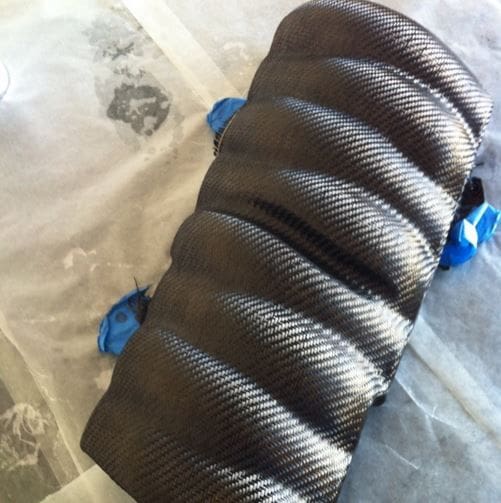
Step 5 – Apply the carbon fiber fabric
After the piece has been cured to tack, the carbon fiber fabric is ready to be applied. Cut the fabric with a surface area that is larger than the designated part. Carefully place the fabric over the part and rub it down to secure it to the part. Start from the center and work toward the edges. Make sure there are no bubbles or gaps between the fabric and the part. The fabric will stretch and compress where needed, so do not expose too much of the part (by stretching) or bunch the fabric (due to compression).
Pro Tip
Take your time with this step. The complexity of the part (edges, points, curves, shapes) will add a degree of difficulty to this process. If you have several parts that you want to wrap, begin with the simplest shape since you will improve with experience.
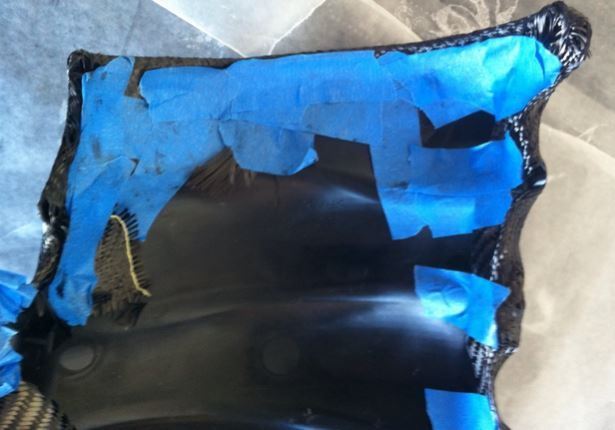
Step 6 – Trim off and wrap the excess fabric
With sharp scissors, trim off some excess fabric, leaving just enough to fold underneath, and tape the part (or an area that will not be seen once the part is re-installed).
Pro Tip
Be sure to wrap the edges completely. Once you believe the fabric is secure, let it sit for a while to make sure the fabric has properly adhered to the desired surfaces.
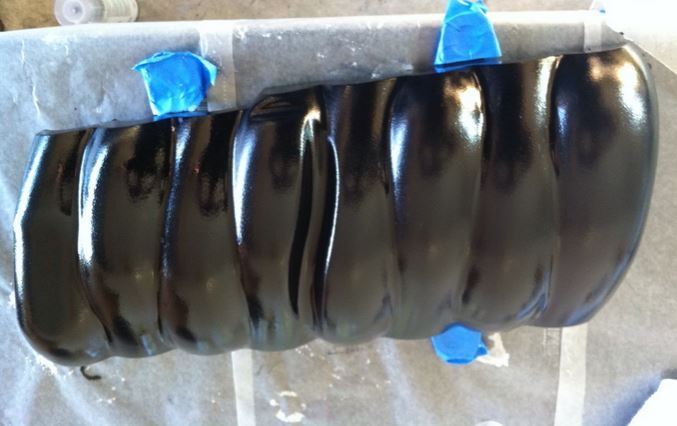
Step 7 – Apply the initial layer of clear-coat
Apply the first layer of clear-coat to the covered part. Using the same 2:1 ratio, mix the clear epoxy with the hardener and be sure not to create bubbles. Using a brush, slowly apply it in the same way you applied the base coat, creating a nice, thin and even layer. Blow-dry the part on low heat to bring any air bubbles to the surface and pop. Let the part cure for at least 8 hours (possibly overnight).
Pro Tip
This mixture should be greater (maybe twice as much) than your previous mixture, depending on how much you will use. The carbon fiber fabric will soak up more of this clear-coat mixture than how much was used for the base coat.
Step 8 – Scuff up surface with sand paper
Once the surface has cured and is hard to the touch, use 150-grit sand paper to scuff up the surface. This will remove any protruding spots on the surface, but do not overdo it. You are only trying to even out the surface to apply another layer of clear-coat.
Pro Tip
If you happen to break through the carbon fiber while evening the surface, simply add a little resin (original mixture) to the spot and push the fabric to blend over the spot.
Step 9 – Apply additional layers of clear-coat
To ensure that the carbon fiber fabric is completely saturated, apply additional (at least 2-3 more) layers of clear-coat. It is not necessary to key the surface after each application unless you find high or rough spots that need to be removed.
Pro Tip
You will not need as much clear-coat mixture for each subsequent layer since you are applying it to the previous layer; not as much will be soaked up by the fabric.
Step 10 – Sand from coarse to fine
After the part has totally cured (24 hours), use the 150-grit sandpaper to wet-sand the surface one more time. To do so, apply a small amount of soapy water on the sandpaper, which will prevent clogs from adhering to the paper. If clumping still occurs or you are not seeing a fine, grey dust, your part is not fully cured. Repeat this process successively using a finer grit of sandpaper until you have reached the 1200-grit sandpaper. Change the water after each grade of sandpaper so any previous sanded material in the water does not scratch the clear-coat. Completely wipe down the part after each change in sandpaper grade.
Pro Tip
Use a small block of wood to keep the sandpaper flat. It is very important to take your time on this step. Do not be too aggressive with the sandpaper or you might break through the clear-coat to the carbon fiber fabric.
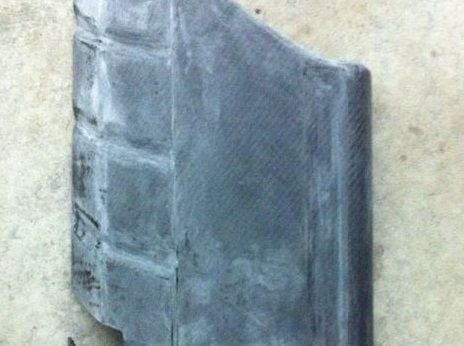
Step 11 – Polish to shine
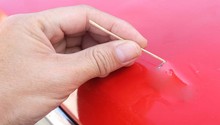
Once you have achieved a smooth, satin finish using the 1200-grit sandpaper, the part is ready to be polished. Apply rubbing compound (often supplied in the kit) to a rag and apply it to the surface of the part in a circular motion. Buff the part up to its final shine and wipe off any excess compound. A small amount of detail mist can enhance the shine even more.
Pro Tip
You can also finish this step with a spray-on lacquer in lieu of the rubbing compound. Mask all necessary areas and spray according to the product's instructions. Whether you are using a spray-on finish or rubbing compound, you may find it necessary to repeat the process, lightly sanding (1200 to 1500-grit) and spraying or re-polishing to achieve your desired finish.
Related Discussion
- DIY Carbon Fiber Skinning - CorvetteForum.com