


 Mar 25, 2015, 01:53 PM
Last edit by: IB Advertising
See related guides and technical advice from our community experts:
Browse all: Interior How-Tos
- C6 Corvette: How to Install an Android Tablet
Step by step instructions for do-it-yourselfers...
Browse all: Interior How-Tos

Android Head Unit & Backup Camera Installation
Thread Starter
Pro


Joined: May 2014
Posts: 578
Likes: 39
From: Mount Airy MD
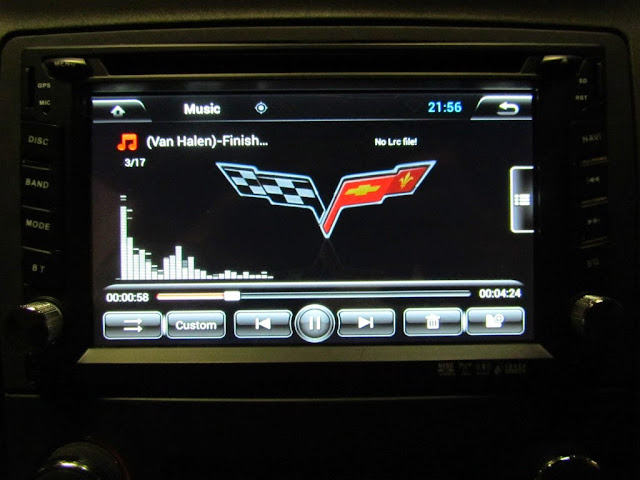
I just replaced the AM/FM, CD, GPS Touchscreen Navigation w/ NAV DVD, GM 15791220 in my 2007 Z06 2LZ with a Pumpkin GS-C0219 (nee JY-C0227) 1.6 GHz Dual-Core Android Double-Din 6.2" Capacitive Touchscreen Navigation Head Unit with Bluetooth, Wifi, DVD, DVR, etc.

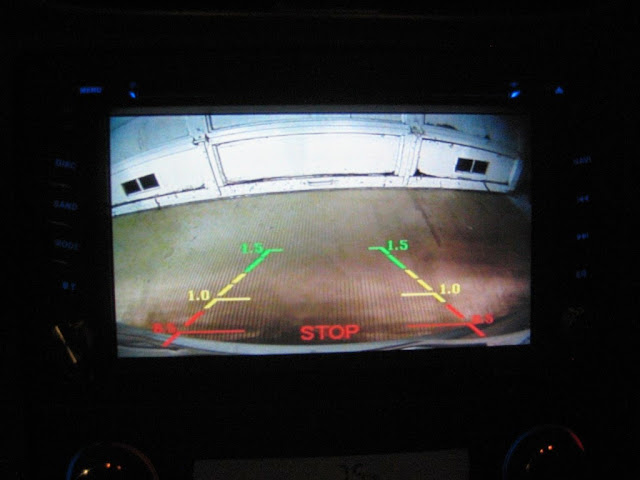
I also installed a Crimestopper SV-6819EM 170 Degree Embedded Style CMOS Color Back-up Camera with Rotating Lens. Here are a few notes and photos for others who might be interested in doing similar.
I found this Center Console and Radio Bezel Removal guide very helpful. There is no need to be intimidated!

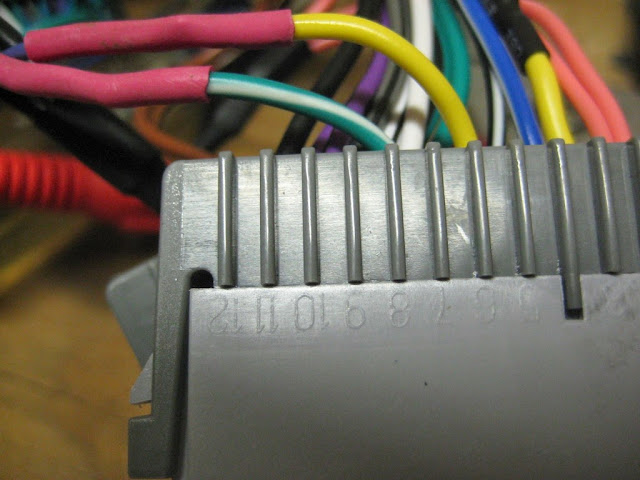
I used the PAC Radio Pro 5 Radio Replacement Interface (RP5-GM11) for compatibility with OnStar and the Bose amp. Cut the ISO plug off of the new head unit (HU) harness and connect the wires to those of the same color from the PAC harness (I used solder and shrink tubing). There is no dedicated amplifier trigger wire, so connect the HU red ACC wire to the PAC red ACC wire and the PAC blue/white AMP wire. Use double-sided tape to adhere the GPS antenna to the top of a center vent (or use an adapter to connect the stock GPS antenna, which looks the same and is just to the left of that location). Use a screwdriver to turn down the chime speaker module volume and make sure that module ends up in an accessible location for later adjustment.
The PAC has two types of steering wheel control (SWC) connections; a mini phono jack and a single blue/yellow wire. It also has a 10-position switch that determines SWC signal compatibility with mainstream HUs. This HU has two wires labeled KEY1 and KEY2 and according to the documentation works with only resistive signals like the Corvette's (see Volume 1 of the shop service manual for schematic). I tried the single wire, and I cut off the phono jack and tried the red and white wires, and I tried all ten switch settings, but nothing worked and I couldn't make sense of the PAC SWC signals with my multimeter. I solved it by cutting the yellow and green/white wires from the PAC that correspond to the purple (6) and dark blue (7) wires from the car and connecting them to the KEY1 and GND leads from the HU. The HU immediately recognized the buttons and made it easy to map them to the desired functions (my 1-6 button now controls mute).
So, to recap:
Since the head unit supports SWC natively and the SWC section of the RP5-GM11 is bypassed, those who follow can go with a cheaper interface as suggested here:
For the camera, connect the power and ground to the passenger-side reverse lamp wiring. Reach in from the exhaust side to twist out the bulb socket, pop the wire routing clip out for more length, remove a few screws from the under body panel behind the rear tire and pull the socket through so there is room to work on it. Drill a hole behind the inner brake light, feed the wire through and seal with silicone (or a grommet). Remember to run the RCA wire up through the center console before snapping that back in place.

The Metra 95-3304 Double DIN Installation Kit has a 173mm x 97mm opening that must be modified to fit the 178mm x 102mm HU bezel. To do this I used a caliper and masking tape to mark 3mm from each side. I then used a rotary tool with my largest cut-off wheel on medium-low speed to trim away the excess. For the bottom I used a sharp utility knife to slice through from the back at the first corner. The top I left alone. It turned out nicely.

I am really pleased with this HU. It is very high quality, integrated well with my car, and can run any Android app I want. My favorite so far is Torque, which offers real-time monitoring of my car via an OBDLink MX. I should also mention that delivery took only four business days, and the seller replied to my questions within 12 hours (I couldn't figure out the navigation volume mixing settings, so they hooked one up and took photos to show me what to do).


I also installed a Crimestopper SV-6819EM 170 Degree Embedded Style CMOS Color Back-up Camera with Rotating Lens. Here are a few notes and photos for others who might be interested in doing similar.
I found this Center Console and Radio Bezel Removal guide very helpful. There is no need to be intimidated!
I used the PAC Radio Pro 5 Radio Replacement Interface (RP5-GM11) for compatibility with OnStar and the Bose amp. Cut the ISO plug off of the new head unit (HU) harness and connect the wires to those of the same color from the PAC harness (I used solder and shrink tubing). There is no dedicated amplifier trigger wire, so connect the HU red ACC wire to the PAC red ACC wire and the PAC blue/white AMP wire. Use double-sided tape to adhere the GPS antenna to the top of a center vent (or use an adapter to connect the stock GPS antenna, which looks the same and is just to the left of that location). Use a screwdriver to turn down the chime speaker module volume and make sure that module ends up in an accessible location for later adjustment.
The PAC has two types of steering wheel control (SWC) connections; a mini phono jack and a single blue/yellow wire. It also has a 10-position switch that determines SWC signal compatibility with mainstream HUs. This HU has two wires labeled KEY1 and KEY2 and according to the documentation works with only resistive signals like the Corvette's (see Volume 1 of the shop service manual for schematic). I tried the single wire, and I cut off the phono jack and tried the red and white wires, and I tried all ten switch settings, but nothing worked and I couldn't make sense of the PAC SWC signals with my multimeter. I solved it by cutting the yellow and green/white wires from the PAC that correspond to the purple (6) and dark blue (7) wires from the car and connecting them to the KEY1 and GND leads from the HU. The HU immediately recognized the buttons and made it easy to map them to the desired functions (my 1-6 button now controls mute).
So, to recap:
The PAC harness brings its power in on the yellow wire and loops it back out on pin 6 to power the car SWC (purple wire on the car side of the connector). I believe yellow is constant power rather than switched, so I didn't care for that approach anyway (why energize the car SWC resistor tree when the ignition is off?). Cut that loop and connect the outbound yellow wire on pin 6 to the KEY1 wire. The SWC circuit becomes:
HU KEY1 <--> connector side PAC yellow pin 6 <--> car SWC purple pin 6 (+)
HU GND <--> connector side PAC green/white pin 7 <--> car SWC dark blue pin 7 (-)
HU KEY1 <--> connector side PAC yellow pin 6 <--> car SWC purple pin 6 (+)
HU GND <--> connector side PAC green/white pin 7 <--> car SWC dark blue pin 7 (-)
The OS-2X from PAC is over $100 less, still retains Bose (and works without it, too!), RAP, Onstar, etc; and doesn't include the SWC that we don't need.
The Metra 95-3304 Double DIN Installation Kit has a 173mm x 97mm opening that must be modified to fit the 178mm x 102mm HU bezel. To do this I used a caliper and masking tape to mark 3mm from each side. I then used a rotary tool with my largest cut-off wheel on medium-low speed to trim away the excess. For the bottom I used a sharp utility knife to slice through from the back at the first corner. The top I left alone. It turned out nicely.
I am really pleased with this HU. It is very high quality, integrated well with my car, and can run any Android app I want. My favorite so far is Torque, which offers real-time monitoring of my car via an OBDLink MX. I should also mention that delivery took only four business days, and the seller replied to my questions within 12 hours (I couldn't figure out the navigation volume mixing settings, so they hooked one up and took photos to show me what to do).
Last edited by bjmsam; Apr 18, 2017 at 05:17 PM. Reason: added Trios' suggestion to use cheaper PAC interface
Thread Starter
Pro
Joined: May 2014
Posts: 578
Likes: 39
From: Mount Airy MD
I'm really impressed with it, and the support offered by the seller half-way around the world.
I used a file to enlarge the existing hole for the license plate light just enough to snugly slide in the camera, which can also be secured with silicone. Remove the tail light to see the large grommet through which an existing wire cluster enters the cabin. I opted against puncturing it since it would be harder to seal a rubber tear than a small plastic hole.
I also installed a Crimestopper SV-6819EM 170 Degree Embedded Style CMOS Color Back-up Camera with Rotating Lens.
...
Drill a hole behind the inner brake light, feed the wire through and seal with silicone (or a grommet).
...
Drill a hole behind the inner brake light, feed the wire through and seal with silicone (or a grommet).
Thread Starter
Pro
Joined: May 2014
Posts: 578
Likes: 39
From: Mount Airy MD
The Metra 95-3304 Double DIN Installation Kit has a 173mm x 97mm opening that must be modified to fit the 178mm x 102mm HU bezel. To do this I used a caliper and masking tape to mark 3mm from each side. I then used a rotary tool with my largest cut-off wheel on medium-low speed to trim away the excess.
Thread Starter
Pro
Joined: May 2014
Posts: 578
Likes: 39
From: Mount Airy MD
Yes, but since Google Maps is a web app, it would require cellular service with a data plan (via smart phone or the HU's connection for a 3G dongle) to update the map as you drive. There are many Android navigation apps that use maps stored on the SD card; this HU came with iGO as the default, which is light-years ahead of the stock HU's navigation system.
Google Maps:


iGo:

Google Maps:
iGo:
Last edited by bjmsam; Jul 21, 2014 at 07:13 PM. Reason: added photos
Corvette Stories
The Best of Corvette for Corvette Enthusiasts

Top 10 Most Expensive Corvettes Ever Sold on Bring A Trailer
Brett Foote
10 Things Every Corvette Owner Needs (2026 Edition)
Michael S. Palmer
8 Most "Only Corvette Owners Understand" Quirks and Problems
Pouria Savadkouei
10 Reasons the C6 Z06 is Still A Performance Benchmark After 20 Years
Joe Kucinski
How Much Horsepower Every Corvette Engine "LOST" in 1972
Joe Kucinski
Top 10 DOs and DON'Ts for Protecting Your Convertible Top!
Michael S. Palmer
Top 10 Most Explosive Corvettes Ever Made: Power-to-Weight Ratio Ranked!
Joe Kucinski
150 hp to 1,250 hp: Every Corvette Generation Compared by the Specs That Matter
Joe Kucinski
8 Coolest Corvette Pace Cars (and Replicas) of All Time
Verdad Gallardo
Thread Starter
Pro
Joined: May 2014
Posts: 578
Likes: 39
From: Mount Airy MD
I bought mine used on eBay for $80 and it works great! The OBDLink software had a bug that prevented pairing, but it was corrected quickly (thread here; it was pretty sweet to receive the debug version via GMail, watch the logs get Emailed back to the developer, and ultimately receive a working patch, all on a "car stereo").

Instructor


Joined: May 2002
Posts: 213
Likes: 8
From: columbus ohio
Yes, but since Google Maps a web app, it would require cellular service with a data plan (via smart phone or the HU's connection for a 3G dongle) to update the map as you drive. There are many Android navigation apps that use maps stored on the SD card; this HU came with iGO as the default, which is light-years ahead of the stock HU's navigation system.
Thread Starter
Pro
Joined: May 2014
Posts: 578
Likes: 39
From: Mount Airy MD
Phones can be connected via Bluetooth, wi-fi, USB and iPhone connector.
There is also a dedicated USB connection for a 3G dongle (see ad).
Yes, and it can serve as a wi-fi hot spot to network-enable other devices in the car as well.
There is also a dedicated USB connection for a 3G dongle (see ad).
Yes, and it can serve as a wi-fi hot spot to network-enable other devices in the car as well.
Last edited by bjmsam; Jul 20, 2014 at 04:53 PM. Reason: forgot one
Thread Starter
Pro
Joined: May 2014
Posts: 578
Likes: 39
From: Mount Airy MD
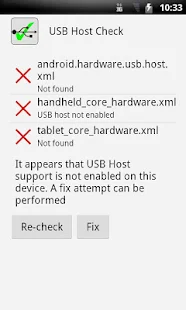
I did not attempt to enable it because my device isn't rooted and I don't need this capability. If you send the seller a note I'm sure you will receive a prompt response.
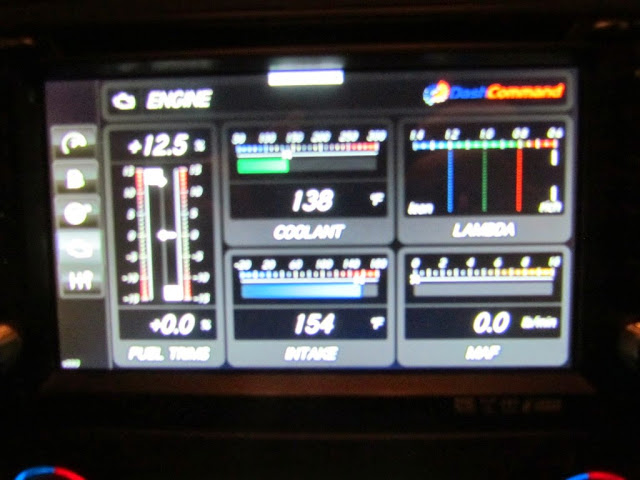
Speaking of logging, here is a shot of one of my gauge dashboards in Torque:

Here is a track from today exported to Google Earth:

I hope to try this soon:

DashCommand works, too.

...except for the Skid Pad, perhaps because the car's accelerometers are inaccessible via the OBD2 port?
OBD II is for components that will effect emission levels such as MAF, HO2S, CTS, MAP, etc. The steering wheel sensor, yaw rate sensor and the lateral accelerometer are used primarily for traction control. That is why you will only find these system codes in the TCS diagnostic portion in your drivers information center.

Last edited by bjmsam; Jul 27, 2014 at 07:58 PM. Reason: DashCommand
Thread Starter
Pro
Joined: May 2014
Posts: 578
Likes: 39
From: Mount Airy MD
Yeah, I really hope this is one I can grow in to rather than out of for the foreseeable future. I had extra gauges and modules all over the cockpit of my last car (AFR, EGT, MAP, knock, navigation, radar detection, etc.), but for this one I would much rather have everything displayed and controlled via the HU. So far so good!
Race Director


Joined: Mar 1999
Posts: 12,597
Likes: 237
From: Bartlett Illinois
Yeah, I really hope this is one I can grow in to rather than out of for the foreseeable future. I had extra gauges and modules all over the cockpit of my last car (AFR, EGT, MAP, knock, navigation, radar detection, etc.), but for this one I would much rather have everything displayed and controlled via the HU. So far so good!
but I have about everything else:
current set-up:

Thread Starter
Pro
Joined: May 2014
Posts: 578
Likes: 39
From: Mount Airy MD
Thread Starter
Pro
Joined: May 2014
Posts: 578
Likes: 39
From: Mount Airy MD
Answers to questions received via PM:
I love it! It was a typical eBay sale and arrived via DHL with no customs tariffs or delays. The seller communicates promptly and has a much better command of English than I do of Cantonese.  I noticed no heat when testing it for 30-45 minutes before completing the installation, which is not surprising since the internal amplifier is under no load (the car's stock Bose amp powers the speakers). The fan either did not kick in or was too quiet to notice.
There are many Android head units for sale, but beware of cheaper examples that have an older, single-core CPU, less memory, a lower resolution display, etc. If you intend to run datalogging apps like I do, be advised that it lacks the internal accelerometers commonly found in handheld devices to detect display rotation; that is obviously not a factor for a fixed display mounted in the dash, but inconvenient considering the Vette's accelerometers are inaccessible via OBD2. Oh, and I found out only after installing everything that my local Best Buy would have done it for $100 plus $80 to modify the trim kit - doh!
Such innovative engineering and open source compatibility makes it increasingly difficult to justify purchasing a proprietary mainstream head unit even if it were possible to do so at near the same price point. I am convinced that this is the future of mobile audio (Apple agrees and is releasing CarPlay to compete with Android).
Icing on the cake: my stock head unit just sold on eBay for over $400!
I am really interested in the Android unit. Are you still happy with it?
How did the purchase go? I am concerned about customs.
Any other words of wisdom? How is the heat output?
How did the purchase go? I am concerned about customs.
Any other words of wisdom? How is the heat output?
I noticed no heat when testing it for 30-45 minutes before completing the installation, which is not surprising since the internal amplifier is under no load (the car's stock Bose amp powers the speakers). The fan either did not kick in or was too quiet to notice.There are many Android head units for sale, but beware of cheaper examples that have an older, single-core CPU, less memory, a lower resolution display, etc. If you intend to run datalogging apps like I do, be advised that it lacks the internal accelerometers commonly found in handheld devices to detect display rotation; that is obviously not a factor for a fixed display mounted in the dash, but inconvenient considering the Vette's accelerometers are inaccessible via OBD2. Oh, and I found out only after installing everything that my local Best Buy would have done it for $100 plus $80 to modify the trim kit - doh!
Such innovative engineering and open source compatibility makes it increasingly difficult to justify purchasing a proprietary mainstream head unit even if it were possible to do so at near the same price point. I am convinced that this is the future of mobile audio (Apple agrees and is releasing CarPlay to compete with Android).
Icing on the cake: my stock head unit just sold on eBay for over $400!