


1973 Corvette Convertible Resto

Pro


Joined: Sep 2006
Posts: 547
Likes: 13
From: Carlstadt NJ
Danny--
I have 50 grit on a 7" grinder which I use to knock off the top layer... Pretty careful with speed control... Then I switch to 4.5" grinder with a 120 grit flapper disc... Use this down to the tape... Again, very careful with speed control... I then use 80 grit on a block (I have a 5 inch and 16 inch block)...
Won't use anything finer on my grits until I finish my last layer of filler...
Rogman
Thread Starter
Drifting

Joined: Aug 2003
Posts: 1,868
Likes: 13
From: Mascoutah IL
Did a little mechanical work tonight... Attached the one piece braided brake lines to the rear calipers... Liked this option much better than a steel braided hose into the rubber hose into the hard line...


Plumbed the intake... Used brass fittings... Wish I could've found innies instead of outies, but if you know where I can buy a kit, please shoot me the link...

Temporarily put the old water pump heater hose outlet into the intake and cut a piece of 3/4" heater hose to join these... Joined the transmission hoses as well (sorry, didn't take a picture of this...

Tomorrow, going to do a little more engine prep, sand blasting and painting parts... Planning on cranking for the first time in a couple of weeks before I put the body back on...
Thanks
Rogman
Plumbed the intake... Used brass fittings... Wish I could've found innies instead of outies, but if you know where I can buy a kit, please shoot me the link...
Temporarily put the old water pump heater hose outlet into the intake and cut a piece of 3/4" heater hose to join these... Joined the transmission hoses as well (sorry, didn't take a picture of this...
Tomorrow, going to do a little more engine prep, sand blasting and painting parts... Planning on cranking for the first time in a couple of weeks before I put the body back on...
Thanks
Rogman
Thread Starter
Drifting
Joined: Aug 2003
Posts: 1,868
Likes: 13
From: Mascoutah IL
Was a work late today so was pretty fried when I got home... No energy to turn any wrenches... After reading a couple of wheel/tire threads, figured I would throw one of my wheels on the rear to see what type of clearance I have (or don't have)... Here are some pics:


Wheels are Centerline Lazer's (18 x 8, 4 BS all the way around)... Planning on 235/50-18 tires all the way around... See any issues??
Thanks much
Rogman
Wheels are Centerline Lazer's (18 x 8, 4 BS all the way around)... Planning on 235/50-18 tires all the way around... See any issues??
Thanks much
Rogman
Corvette Stories
The Best of Corvette for Corvette Enthusiasts

Top 10 Most Expensive Corvettes Ever Sold on Bring A Trailer
Brett Foote
10 Things Every Corvette Owner Needs (2026 Edition)
Michael S. Palmer
8 Most "Only Corvette Owners Understand" Quirks and Problems
Pouria Savadkouei
10 Reasons the C6 Z06 is Still A Performance Benchmark After 20 Years
Joe Kucinski
How Much Horsepower Every Corvette Engine "LOST" in 1972
Joe Kucinski
Top 10 DOs and DON'Ts for Protecting Your Convertible Top!
Michael S. Palmer
Top 10 Most Explosive Corvettes Ever Made: Power-to-Weight Ratio Ranked!
Joe Kucinski
150 hp to 1,250 hp: Every Corvette Generation Compared by the Specs That Matter
Joe Kucinski
8 Coolest Corvette Pace Cars (and Replicas) of All Time
Verdad Gallardo
Thread Starter
Drifting
Joined: Aug 2003
Posts: 1,868
Likes: 13
From: Mascoutah IL
KevinG--thanks, appreciate it...
Rogman
Thread Starter
Drifting
Joined: Aug 2003
Posts: 1,868
Likes: 13
From: Mascoutah IL
Got quite a bit done today... Fiber glassed the last few holes in the astro vent block off plates... Didn't realize those were made out of metal... Hope my fiberglass adheres to the metal...
Drilled out my rear bumper holes which I plugged when I glassed the seams... Continued to clean the undercarriage getting ready for the lizard skin... Routed the new plug wires on the motor and will trim/put caps on tomorrow...
Major project of the day was cleaning the rocker channels to include getting the broken off rocker bolts and fasteners off... Easier said than done... After struggling through the first two, the last four were a little easier... I then marine cleaned, sprayed prep&ready, then put two coats of POR on the channels... Just looking to get a little protection down there...


Thanks for looking... Will get back after it tomorrow...
Rogman
Drilled out my rear bumper holes which I plugged when I glassed the seams... Continued to clean the undercarriage getting ready for the lizard skin... Routed the new plug wires on the motor and will trim/put caps on tomorrow...
Major project of the day was cleaning the rocker channels to include getting the broken off rocker bolts and fasteners off... Easier said than done... After struggling through the first two, the last four were a little easier... I then marine cleaned, sprayed prep&ready, then put two coats of POR on the channels... Just looking to get a little protection down there...
Thanks for looking... Will get back after it tomorrow...
Rogman
Thread Starter
Drifting
Joined: Aug 2003
Posts: 1,868
Likes: 13
From: Mascoutah IL
Are you talking about this:

If so, that's a bicycle lift that's mounted the the ceiling of the garage... It's only supporting about 30-40 lbs of the front clip... It's more of a backup to the main support...
The front clip will move to the body dolly as soon as the body goes back on the frame in a couple of weeks...
Rogman
Thread Starter
Drifting
Joined: Aug 2003
Posts: 1,868
Likes: 13
From: Mascoutah IL
Spent most of yesterday putting the proper torque on the rear end bolts (minus the few that have to be adjusted during the alignment)...
Wrapped the rear pipes (know this is contentious, but will wrap all the pipes and have heat sheilds in place at certain locations...


Also got the pitman arm in place which allowed me to take my "new" steering cylinder off... Put that up for sale in the "for sale" section... Finished the frame rails and will get to work prepping the undercarriage for the lizard skin...
Rogman
Wrapped the rear pipes (know this is contentious, but will wrap all the pipes and have heat sheilds in place at certain locations...
Also got the pitman arm in place which allowed me to take my "new" steering cylinder off... Put that up for sale in the "for sale" section... Finished the frame rails and will get to work prepping the undercarriage for the lizard skin...
Rogman
Thread Starter
Drifting
Joined: Aug 2003
Posts: 1,868
Likes: 13
From: Mascoutah IL
Finally finished prep and got the first coat of lizard skin on the under carriage... Will touch up a few spots Sound Control tomorrow and then move onto the Ceramic Insulation... This was a little messier (and smellier) than I expected and got a little on face, neck and hair... Washed right off though...
Mix:

Befores:


Afters (looks a lighter grey color in the photos):


Mix:
Befores:
Afters (looks a lighter grey color in the photos):
Pro


Joined: Sep 2011
Posts: 613
Likes: 11
From: EVANSVILLE Wisconsin
Hey Rogman, what kind of sealant or adhesive did you use on the panel joints, it almost looks like Silicone caulk in the pictures. Also wondering if you are doing another coat of the Lizard skin, that first coat looks very "spotty" but not sure what it's supposed to look like as I've not seen it applied before.
As always great looking project and thanks!
As always great looking project and thanks!
Thread Starter
Drifting
Joined: Aug 2003
Posts: 1,868
Likes: 13
From: Mascoutah IL
Hey Rogman, what kind of sealant or adhesive did you use on the panel joints, it almost looks like Silicone caulk in the pictures. Also wondering if you are doing another coat of the Lizard skin, that first coat looks very "spotty" but not sure what it's supposed to look like as I've not seen it applied before.
As always great looking project and thanks!
As always great looking project and thanks!
Thanks... The bonding adhesive you see in the pictures is Fusor 127 EZ... Not digging the white color, but it is HARD as a rock after it sets... Very easy to use, and I had plenty of work time when I installed the firewall... Front clip may be another story, but I have a little time before I have to tackle that...
LizardSkin--yepper, have some spots I need to touch up with a second coat... Think the splotch-iness came from taking pictures during the drying process... Today, it had completely dried and turned an even darker shade of black... Looks good, but I will hit it with another coat of Sound Control before starting the Ceramic Insulation sometime tomorrow...
Here are some of the same point of view photos as last night... The flash lights the surface up, but in person, it looks like a very dark, flat Black surface...


Rogman
Le Mans Master

Joined: Jan 2007
Posts: 5,485
Likes: 7
From: Peekskill NY
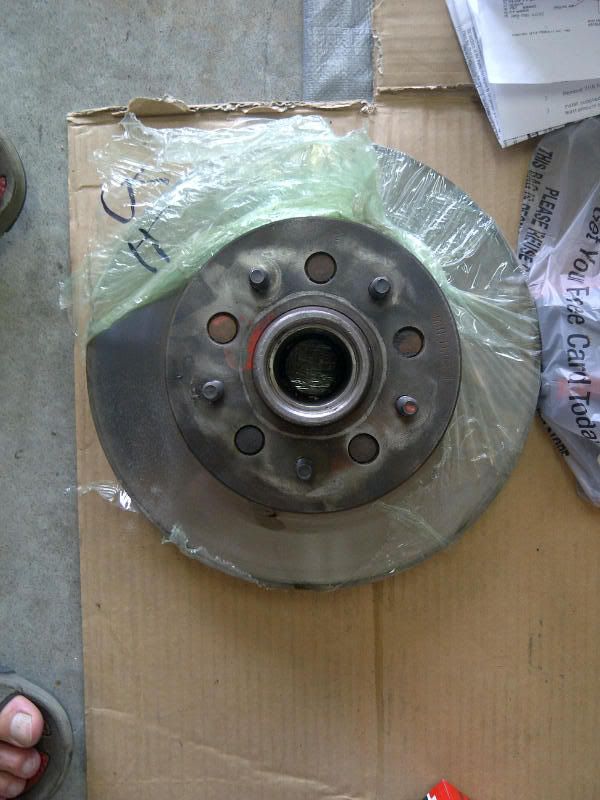
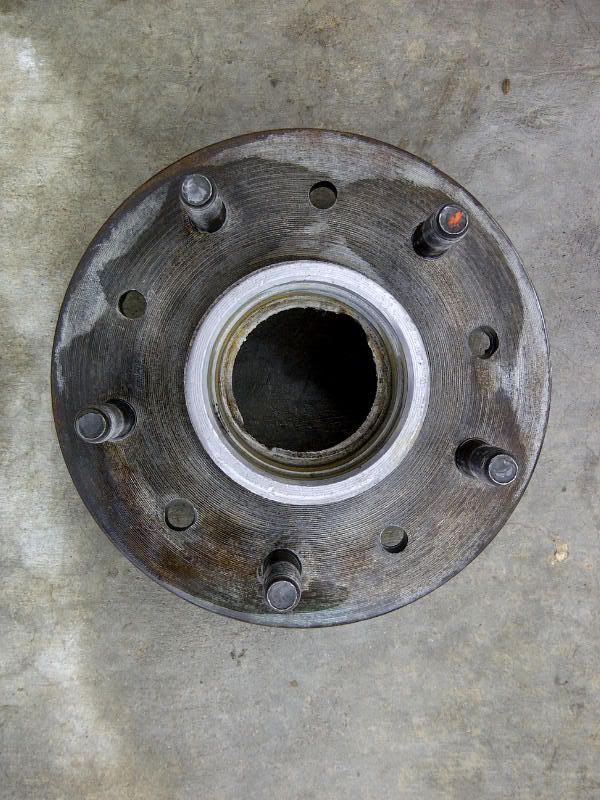
As I worked on drilling out the rivets on the front rotors:
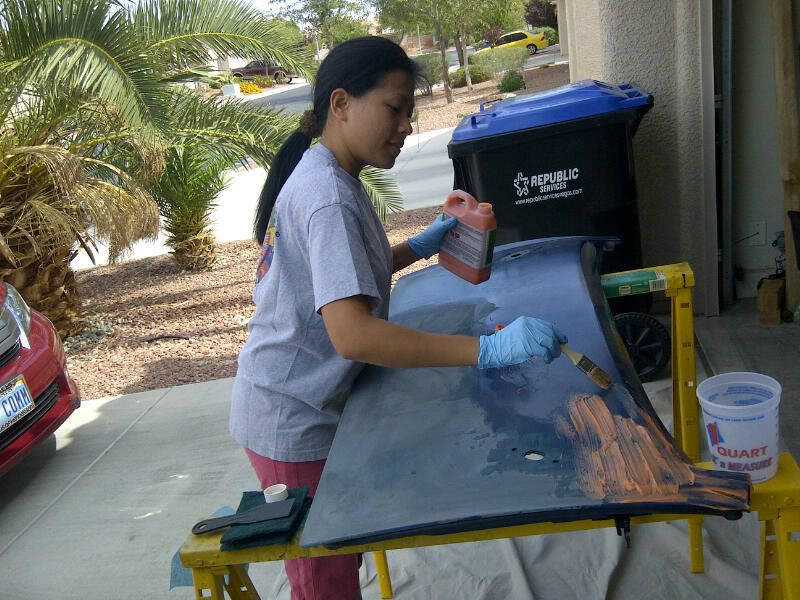
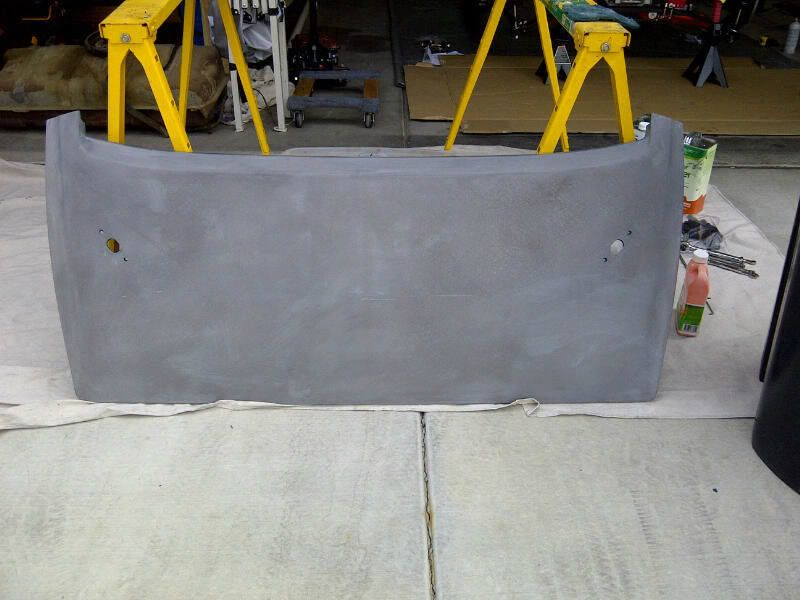
My wife (yes the understanding wife ) stripped the paint off the vert hatch... She did a very good job
  :
:
Plan is to get a couple of coats of paint on the front bearing assembly carriers so I can put the new bearings in and mount tomorrow night... Have to go drill the rivets out of the left front after I get caught up on the football games and NASCAR race ... Will try to install rear half shafts and rear sway bar later tonight as well (if I have the energy)...
No comments on stock steering, steeroids or flaming river rack-n-pinion??
Rogman
My wife (yes the understanding wife
) stripped the paint off the vert hatch... She did a very good job :Plan is to get a couple of coats of paint on the front bearing assembly carriers so I can put the new bearings in and mount tomorrow night... Have to go drill the rivets out of the left front after I get caught up on the football games and NASCAR race
... Will try to install rear half shafts and rear sway bar later tonight as well (if I have the energy)...No comments on stock steering, steeroids or flaming river rack-n-pinion??
Rogman
The question is, will she want to take the Vette when it's girls night out!
Looks great!
Glenn
Thread Starter
Drifting
Joined: Aug 2003
Posts: 1,868
Likes: 13
From: Mascoutah IL
Thanks much... I certainly won't have any issue with her taking it out... She's the main reason I sought out an automatic... Personally, I think she will be too scared to scratch anything once it is completely done... I could be wrong (which happens ALL the time)...

Rogman
Le Mans Master
Joined: Jan 2007
Posts: 5,485
Likes: 7
From: Peekskill NY
Glenn--
Thanks much... I certainly won't have any issue with her taking it out... She's the main reason I sought out an automatic... Personally, I think she will be too scared to scratch anything once it is completely done... I could be wrong (which happens ALL the time)...
Rogman
Thanks much... I certainly won't have any issue with her taking it out... She's the main reason I sought out an automatic... Personally, I think she will be too scared to scratch anything once it is completely done... I could be wrong (which happens ALL the time)...
Rogman
One comment about women & automatics. My wife prefers a manual, and have several female co-workers who prefer them!
Back in 1990 we were buying a Honda Cicic hatchback. I wanted a manual and she wanted an auto. I told her a maunal is WAY more fun to drive. Well, she took it upon herself and took a couple classes driving a manual and never looked back! She had never driven one prior to that.
A few years later we went to buy a Odyssey, (read kids hauler) and when we were at the dealer her first question was could we get it with a manual! Since then we've always had one car with a manual trans, though she never drove my Vette when I had it.
Keep having fun and look forward to your progress pics.
Glenn
Pro
Joined: Sep 2011
Posts: 613
Likes: 11
From: EVANSVILLE Wisconsin
Thanks for the updated pics and info, it definitely looks much different after drying, I was a little concerned for you when I saw the can in the first picture and it was Purple  Looks great dry and not nearly as splotchy, nice work!
Looks great dry and not nearly as splotchy, nice work!