


1971 Journey

Thread Starter
Melting Slicks


Joined: Apr 2010
Posts: 2,795
Likes: 1,196
From: Canberra Australia
2025 C3 of the Year Finalist - Modified
Thanks guys, am looking forward to the reassembly.
A little nervous about the headlight doors but should be fun.
Lots if masking tape needed to protect things.
A little nervous about the headlight doors but should be fun.
Lots if masking tape needed to protect things.

Drifting


Joined: Jul 2012
Posts: 1,255
Likes: 297
From: Slovenia, EU
2017 C3 of Year Finalist

Last edited by Primoz; Jan 19, 2019 at 05:53 PM.
Thread Starter
Melting Slicks
Joined: Apr 2010
Posts: 2,795
Likes: 1,196
From: Canberra Australia
2025 C3 of the Year Finalist - Modified
I think Bridgehampton Blue has some more green tones than Targa blue.
however as someone said before there are so many different tones to it if you look at cars that have been re shot.
however as someone said before there are so many different tones to it if you look at cars that have been re shot.
Corvette Stories
The Best of Corvette for Corvette Enthusiasts

Top 10 Most Expensive Corvettes Ever Sold on Bring A Trailer
Brett Foote
10 Things Every Corvette Owner Needs (2026 Edition)
Michael S. Palmer
8 Most "Only Corvette Owners Understand" Quirks and Problems
Pouria Savadkouei
10 Reasons the C6 Z06 is Still A Performance Benchmark After 20 Years
Joe Kucinski
How Much Horsepower Every Corvette Engine "LOST" in 1972
Joe Kucinski
Top 10 DOs and DON'Ts for Protecting Your Convertible Top!
Michael S. Palmer
Top 10 Most Explosive Corvettes Ever Made: Power-to-Weight Ratio Ranked!
Joe Kucinski
150 hp to 1,250 hp: Every Corvette Generation Compared by the Specs That Matter
Joe Kucinski
8 Coolest Corvette Pace Cars (and Replicas) of All Time
Verdad Gallardo
Thread Starter
Melting Slicks
Joined: Apr 2010
Posts: 2,795
Likes: 1,196
From: Canberra Australia
2025 C3 of the Year Finalist - Modified
I fitted new door sticker pins.
They were nice stainless steel ones with 2 washers under each.
All worked well after some minor adjustment then I put the Vette up on the jack.....
There is always some minor flex but the passenger door would hardly open as the pin was too short by less than half a mm
Had not seen this before.
Placed my crossmember jack under the front and gave it a few turns by hand and then all worked great.
I measured the new one piece stainless door pins and found they were about 2 mm shorter than the originals.
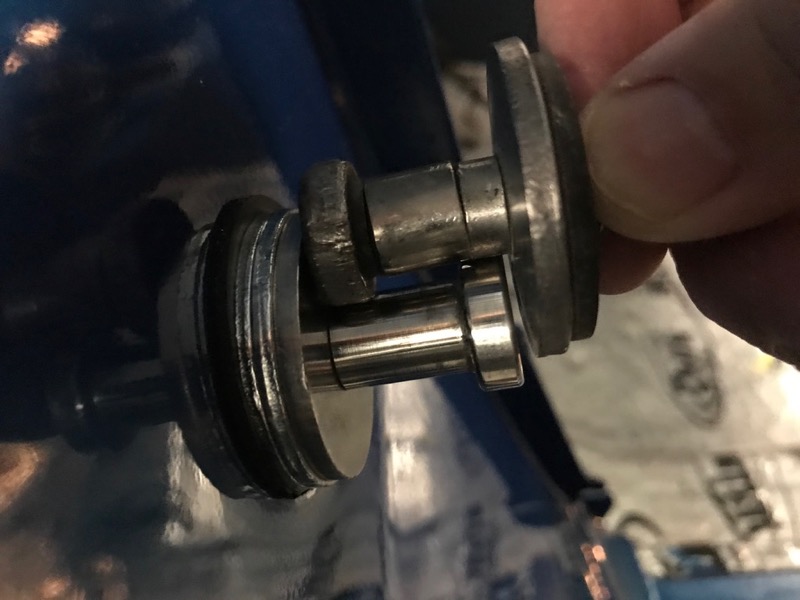
When compared the black aftermarket ones about 4-5 mm shorter.
Possibly a third washer or thicker ones is needed :-)
They were nice stainless steel ones with 2 washers under each.
All worked well after some minor adjustment then I put the Vette up on the jack.....
There is always some minor flex but the passenger door would hardly open as the pin was too short by less than half a mm
Had not seen this before.
Placed my crossmember jack under the front and gave it a few turns by hand and then all worked great.
I measured the new one piece stainless door pins and found they were about 2 mm shorter than the originals.
When compared the black aftermarket ones about 4-5 mm shorter.
Possibly a third washer or thicker ones is needed :-)
Last edited by CraigH; Apr 10, 2023 at 06:28 AM.
Le Mans Master


Joined: Nov 2016
Posts: 9,264
Likes: 951
From: Lake Tahoe, CA
I fitted new door sticker pins.
They were nice stainless steel ones with 2 washers under each.
All worked well after some minor adjustment then I put the Vette up on the jack.....
There is always some minor flex but the passenger door would hardly open as the pin was too short by less than half a mm
Had not seen this before.
Placed my crossmember jack under the front and gave it a few turns by hand and then all worked great.
I measured the new one piece stainless door pins and found they were about 2 mm shorter than the originals.
Possibly a third washer or thicker ones is needed :-)

Thread Starter
Melting Slicks
Joined: Apr 2010
Posts: 2,795
Likes: 1,196
From: Canberra Australia
2025 C3 of the Year Finalist - Modified
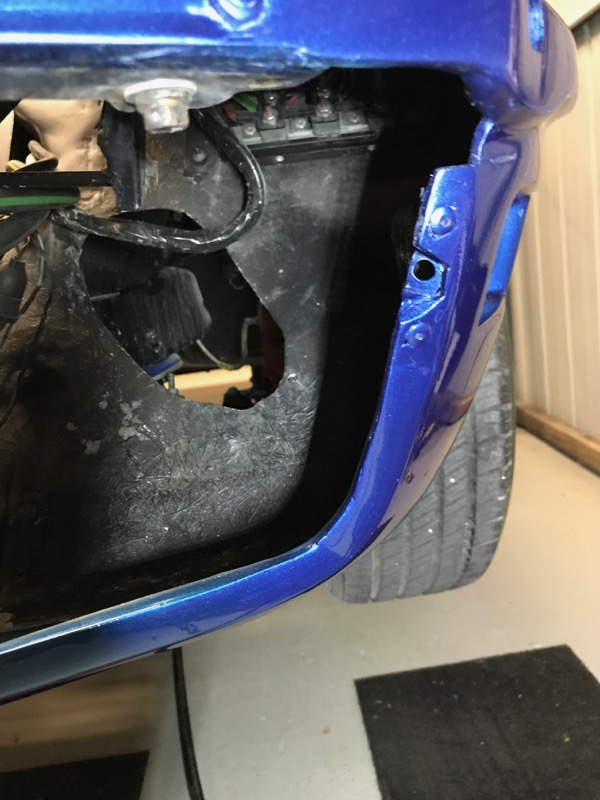
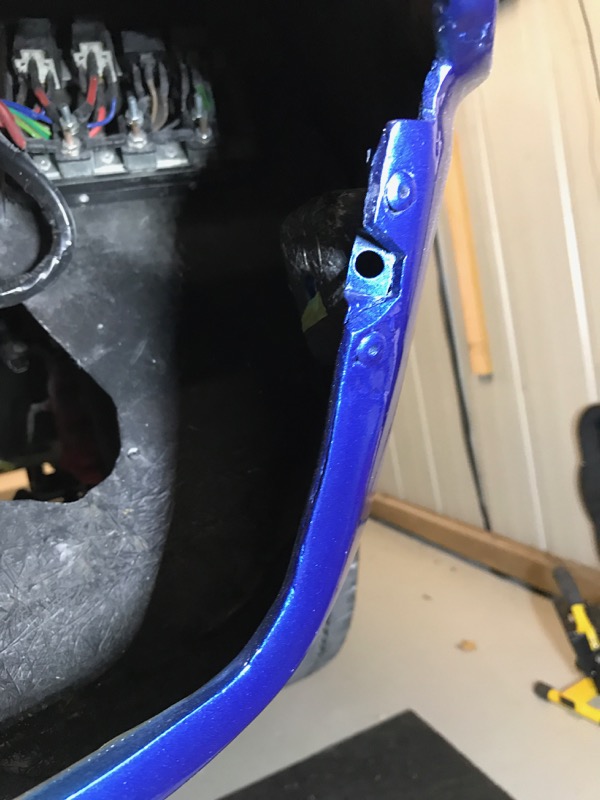
I spent a bit of time on the front apron today.
Looked fairly good but on close inspection it could do with some more work.
Started by sanding it all flat with 2000 wet and dry.
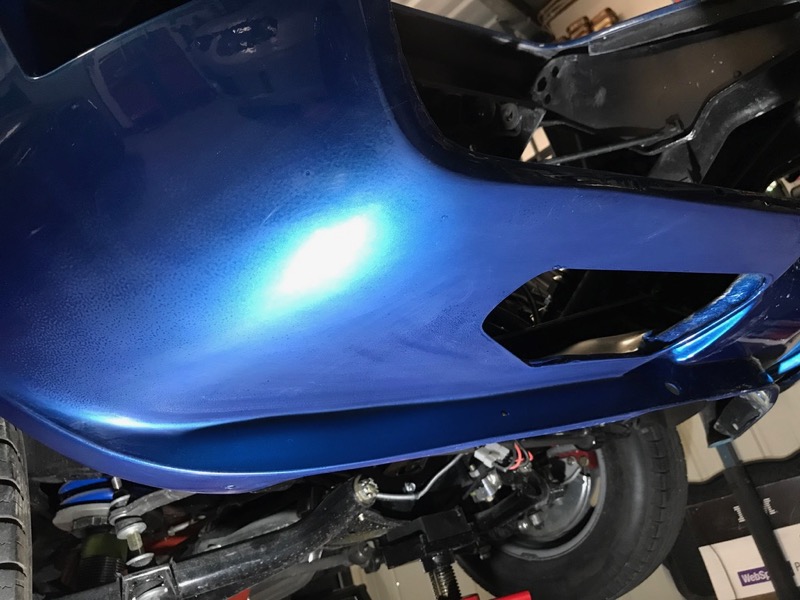
Followed by 3000 wet and dry, then some buffing compound. you can see the progress.
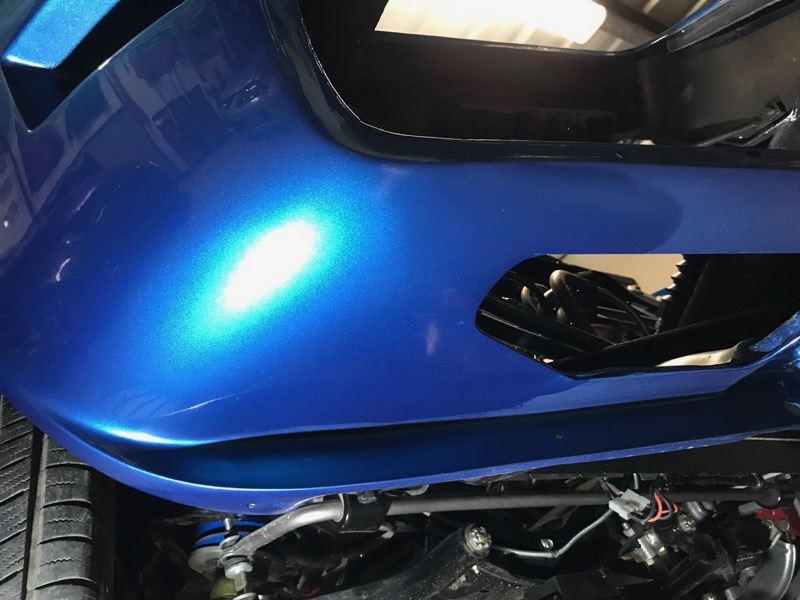
After an hour or two I am happy with how it looks..

Shame it won't be seen once bars etc are on and car is back down.
Looked fairly good but on close inspection it could do with some more work.
Started by sanding it all flat with 2000 wet and dry.
Followed by 3000 wet and dry, then some buffing compound. you can see the progress.
After an hour or two I am happy with how it looks..
Shame it won't be seen once bars etc are on and car is back down.
Last edited by CraigH; Apr 10, 2023 at 06:28 AM.
Thread Starter
Melting Slicks
Joined: Apr 2010
Posts: 2,795
Likes: 1,196
From: Canberra Australia
2025 C3 of the Year Finalist - Modified

Safety Car


Joined: Jun 2013
Posts: 4,399
Likes: 793
I spent a bit of time on the front apron today.
Looked fairly good but on close inspection it could do with some more work.
Started by sanding it all flat with 2000 wet and dry.

Followed by 3000 wet and dry, then some buffing compound. you can see the progress.

After an hour or two I am happy with how it looks..


Shame it won't be seen once bars etc are on and car is back down.
Looked fairly good but on close inspection it could do with some more work.
Started by sanding it all flat with 2000 wet and dry.
Followed by 3000 wet and dry, then some buffing compound. you can see the progress.
After an hour or two I am happy with how it looks..
Shame it won't be seen once bars etc are on and car is back down.
Last edited by SB64; Feb 12, 2019 at 04:14 AM.
Thread Starter
Melting Slicks
Joined: Apr 2010
Posts: 2,795
Likes: 1,196
From: Canberra Australia
2025 C3 of the Year Finalist - Modified
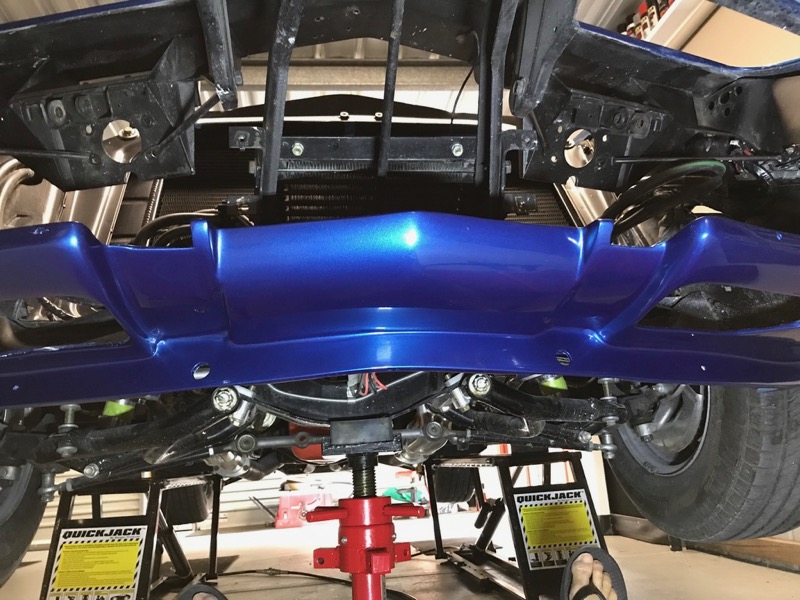
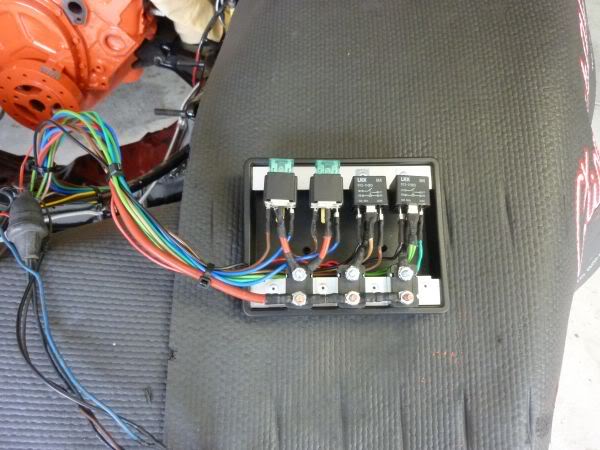
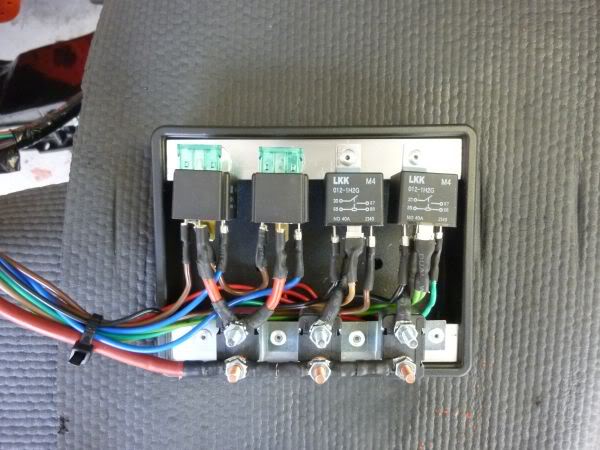
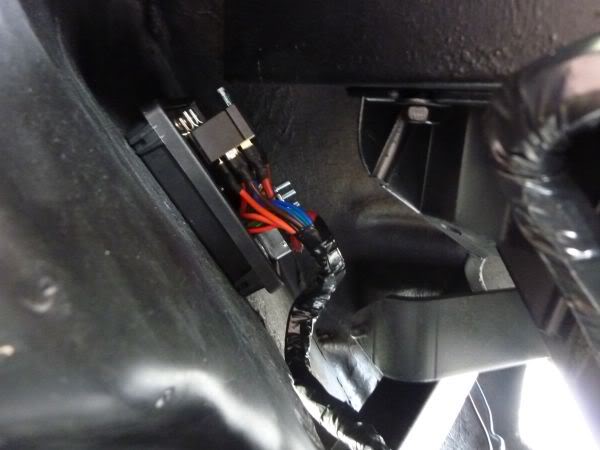
I assume this is what your after

Last edited by CraigH; Apr 10, 2023 at 06:28 AM.
Safety Car
Joined: Jun 2013
Posts: 4,399
Likes: 793


Thread Starter
Melting Slicks
Joined: Apr 2010
Posts: 2,795
Likes: 1,196
From: Canberra Australia
2025 C3 of the Year Finalist - Modified
It’s my fuse and relay box for headlights and thermo fans Roger
its integrated into original harness the wrapped again.
its integrated into original harness the wrapped again.
Last edited by CraigH; Apr 10, 2023 at 06:27 AM.
Drifting
Joined: Jul 2012
Posts: 1,255
Likes: 297
From: Slovenia, EU
2017 C3 of Year Finalist
Craig nice work. I suggest good quality wax or sealant for that front apron so you can protect it as best as you can.
Craig can you please look at the front driver side at the radiator support if there are any wires bolted to the support for ground?
I have some wires there that looks like they are detached and I don't know where they should go.
Craig can you please look at the front driver side at the radiator support if there are any wires bolted to the support for ground?
I have some wires there that looks like they are detached and I don't know where they should go.
Last edited by Primoz; Feb 12, 2019 at 10:53 AM.