When you click on links to various merchants on this site and make a purchase, this can result in this site earning a commission. Affiliate programs and affiliations include, but are not limited to, the eBay Partner Network.
Rbrid, Are you going to be installing a serpentine belt drive system ? I'm not sure if the spreader bar in front will allow a enough room. I haven't gotten back to mine yet but initially with my Holley sepentine there was an issue. Just a thought.
Here comes the 10 microns filter install for the Holley Sniper EFI system.
RBrid, Are you using the existing fuel return line for your Holley Sniper system? I'm in the process of installing the same system and was told that the existing line was too small and I ended up installing another line to handle the flow.
2020 Corvette of the Year Finalist (performance mods)
2019 C3 of Year Winner (performance mods)
2016 C3 of Year Finalist
If you use the Holley in tank pump, the bypass is in the tank at the pump and you dont need the return line. I used it for a couple of years and never had an issue.
If you use the Holley in tank pump, the bypass is in the tank at the pump and you dont need the return line. I used it for a couple of years and never had an issue.
That is true and if that 's the case then RBrid is fine. It just looked like he might have been reinstalling the existing return line to use on the new system. Hope that is not the case.
That is true and if that 's the case then RBrid is fine. It just looked like he might have been reinstalling the existing return line to use on the new system. Hope that is not the case.
that's not the issue - the supply line is too small. Holley's suggestion is use the supply line as the return and run a larger line for the supply.
with that said, expected HP is what determines the line size; and in this case, the stock line is adequate. Running a return line allows the system to bleed faster and keeps away fuel starvation issues when the tank level is low.
Thanks caskiguy - it's the beginning of a new chapter for all involved.
Something that carries on is my daily rendez-vous with my vette. So here's the latest progress.
I had some more hardware to blacken but the local company I had been using for the black oxide treatment apparently closed down. So I did it myself with Evaporust and the rest of Eastwood's Metal Blackening Solution I had. Both worked pretty well.
Afterward I poured a bit of thin oil into the hardware pile to protect it further.
A bunch of hooks hanging from the ceiling. Is this a scene from a horror movie?
Nope - next I had to finish brackets and pulleys for the engine accessories. I added a bunch of other steel parts to the pile. I sandblasted them, then primed and top-coated with either black epoxy or Gloss Jet Black Single Stage Acrylic Urethane.
The pully alignments gave me a lot of grief, mostly because of a trickle-down effect of picture #1 in https://www.corvetteforum.com/forums...post1605078374. I couldn't use the original steering pump bracket and got another style one, which I had to file down to avoid contact with the alternator belt.
That gray bracket still has to be top-coated with black SPI epoxy.
I will remove the steering pump belt before the first engine start to take the entire steering system out of the picture.
This marks the end of the light grey spraying (Daewoo color named Casablanca White). That's good because I have just a bit of paint left for touch-ups.
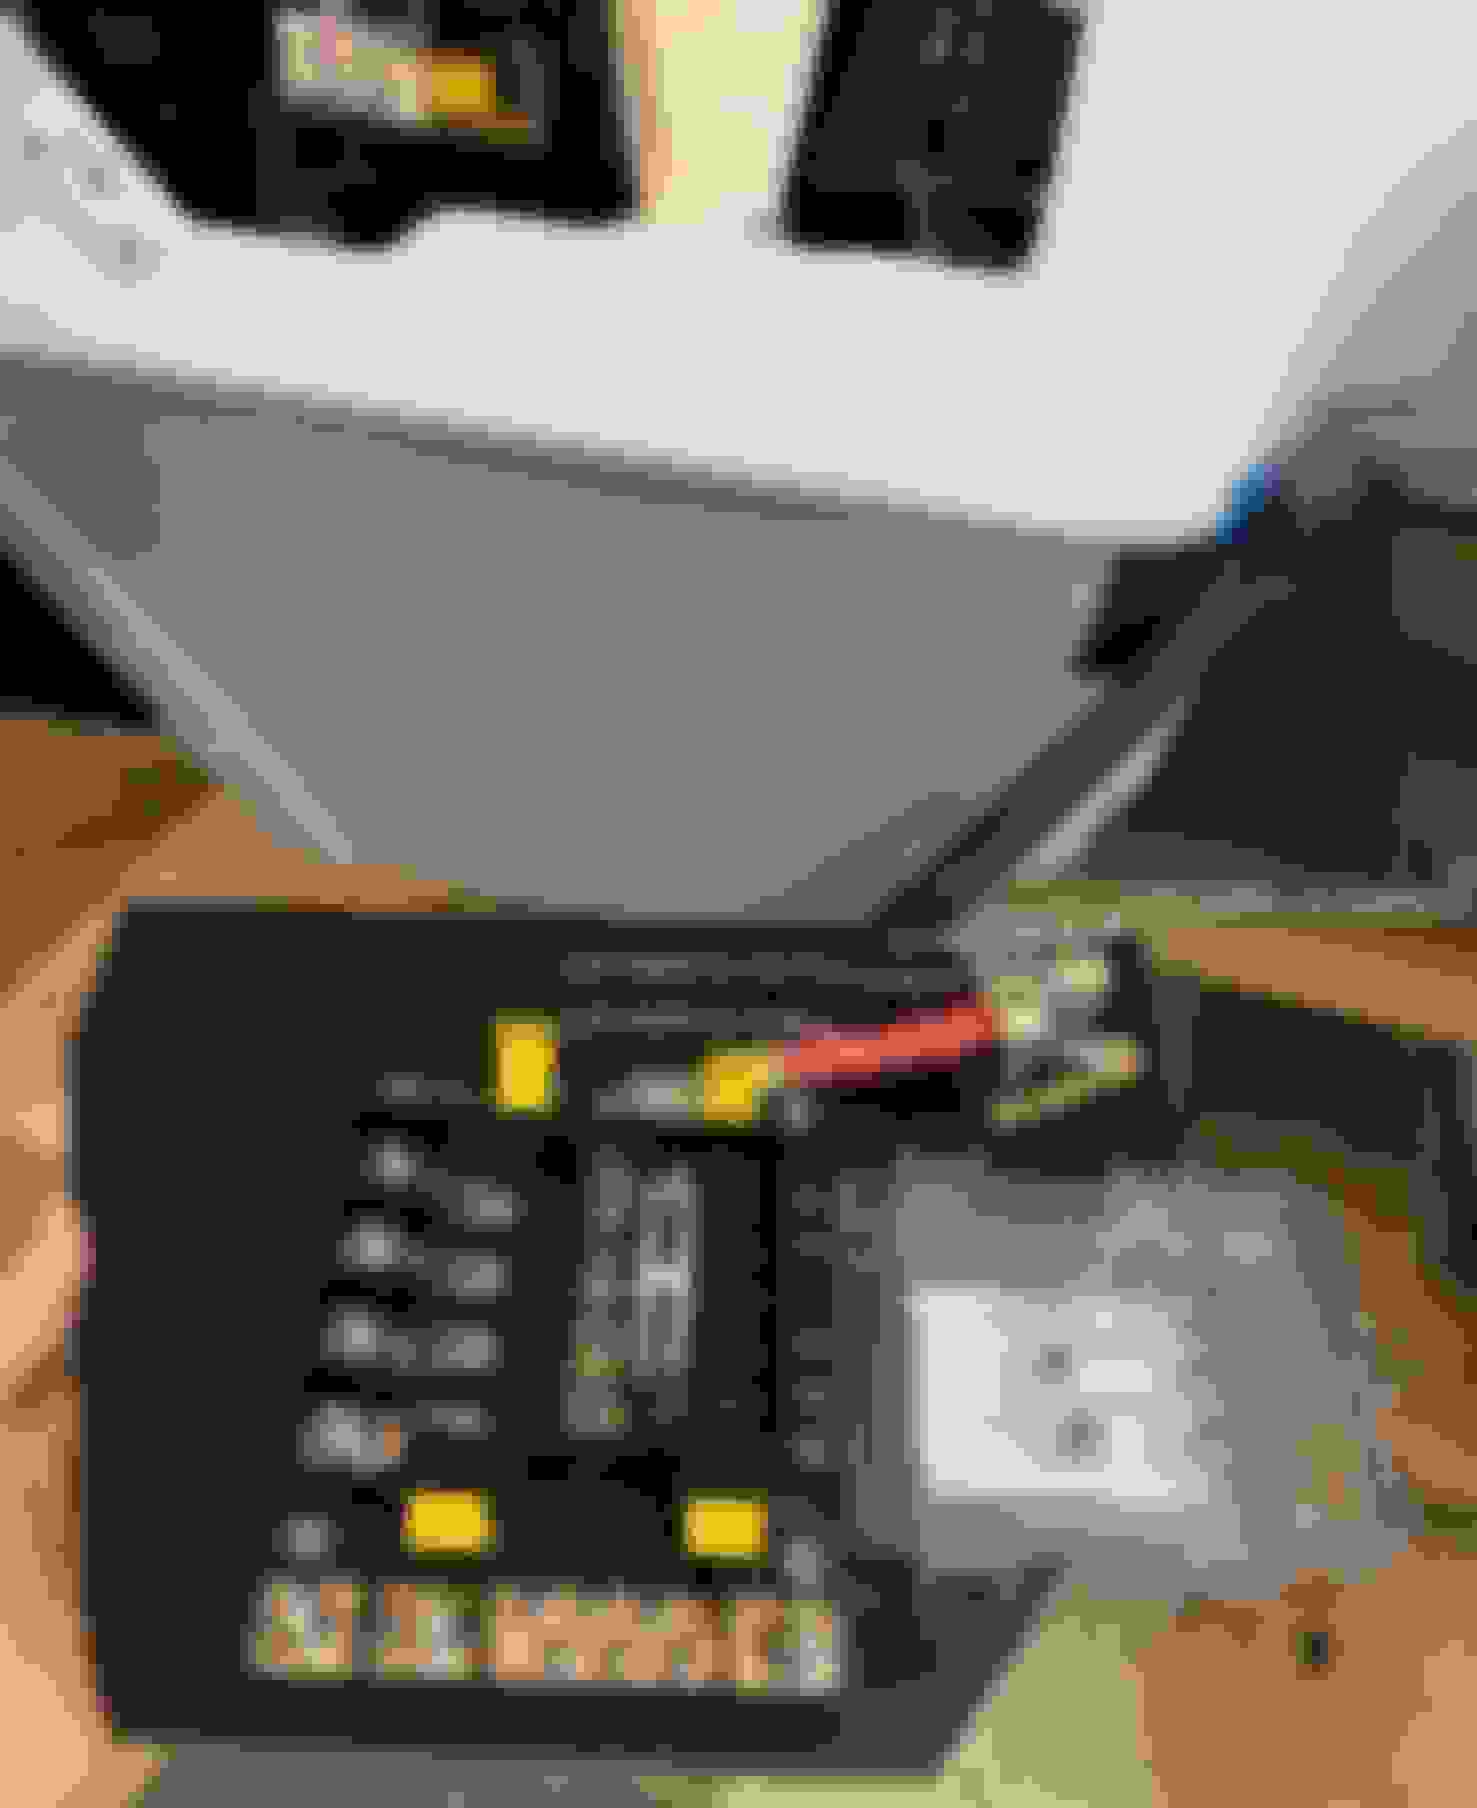
I have also started to build the backbone of the electrical system, with:
- a general 4-prong cut-off switch,
- a small fuse block directly connected to the battery that will feed the relays for the fuel pump and EFI.
- 1/0 AWG cables to the mini-starter, the 250Amp alternator, an interior hub, an exterior firewall hub.
I cut some temporary composite wood plates to mock up component placements. I will ultimately use ABS plastic sheets instead.
Designer Imagines A Corvette That Looks More Like a Corvette Than the Corvette
Slideshow: A Jaguar designer's personal project imagines what a modern front-engined Corvette might look like if Chevrolet revisited the golden age of the Stingray.


 :
: