When you click on links to various merchants on this site and make a purchase, this can result in this site earning a commission. Affiliate programs and affiliations include, but are not limited to, the eBay Partner Network.
I have been debating on if I should chronicle my restoration and after following Kortensi's restoration and Tim Cote's I have decided to pull the trigger. So here goes.
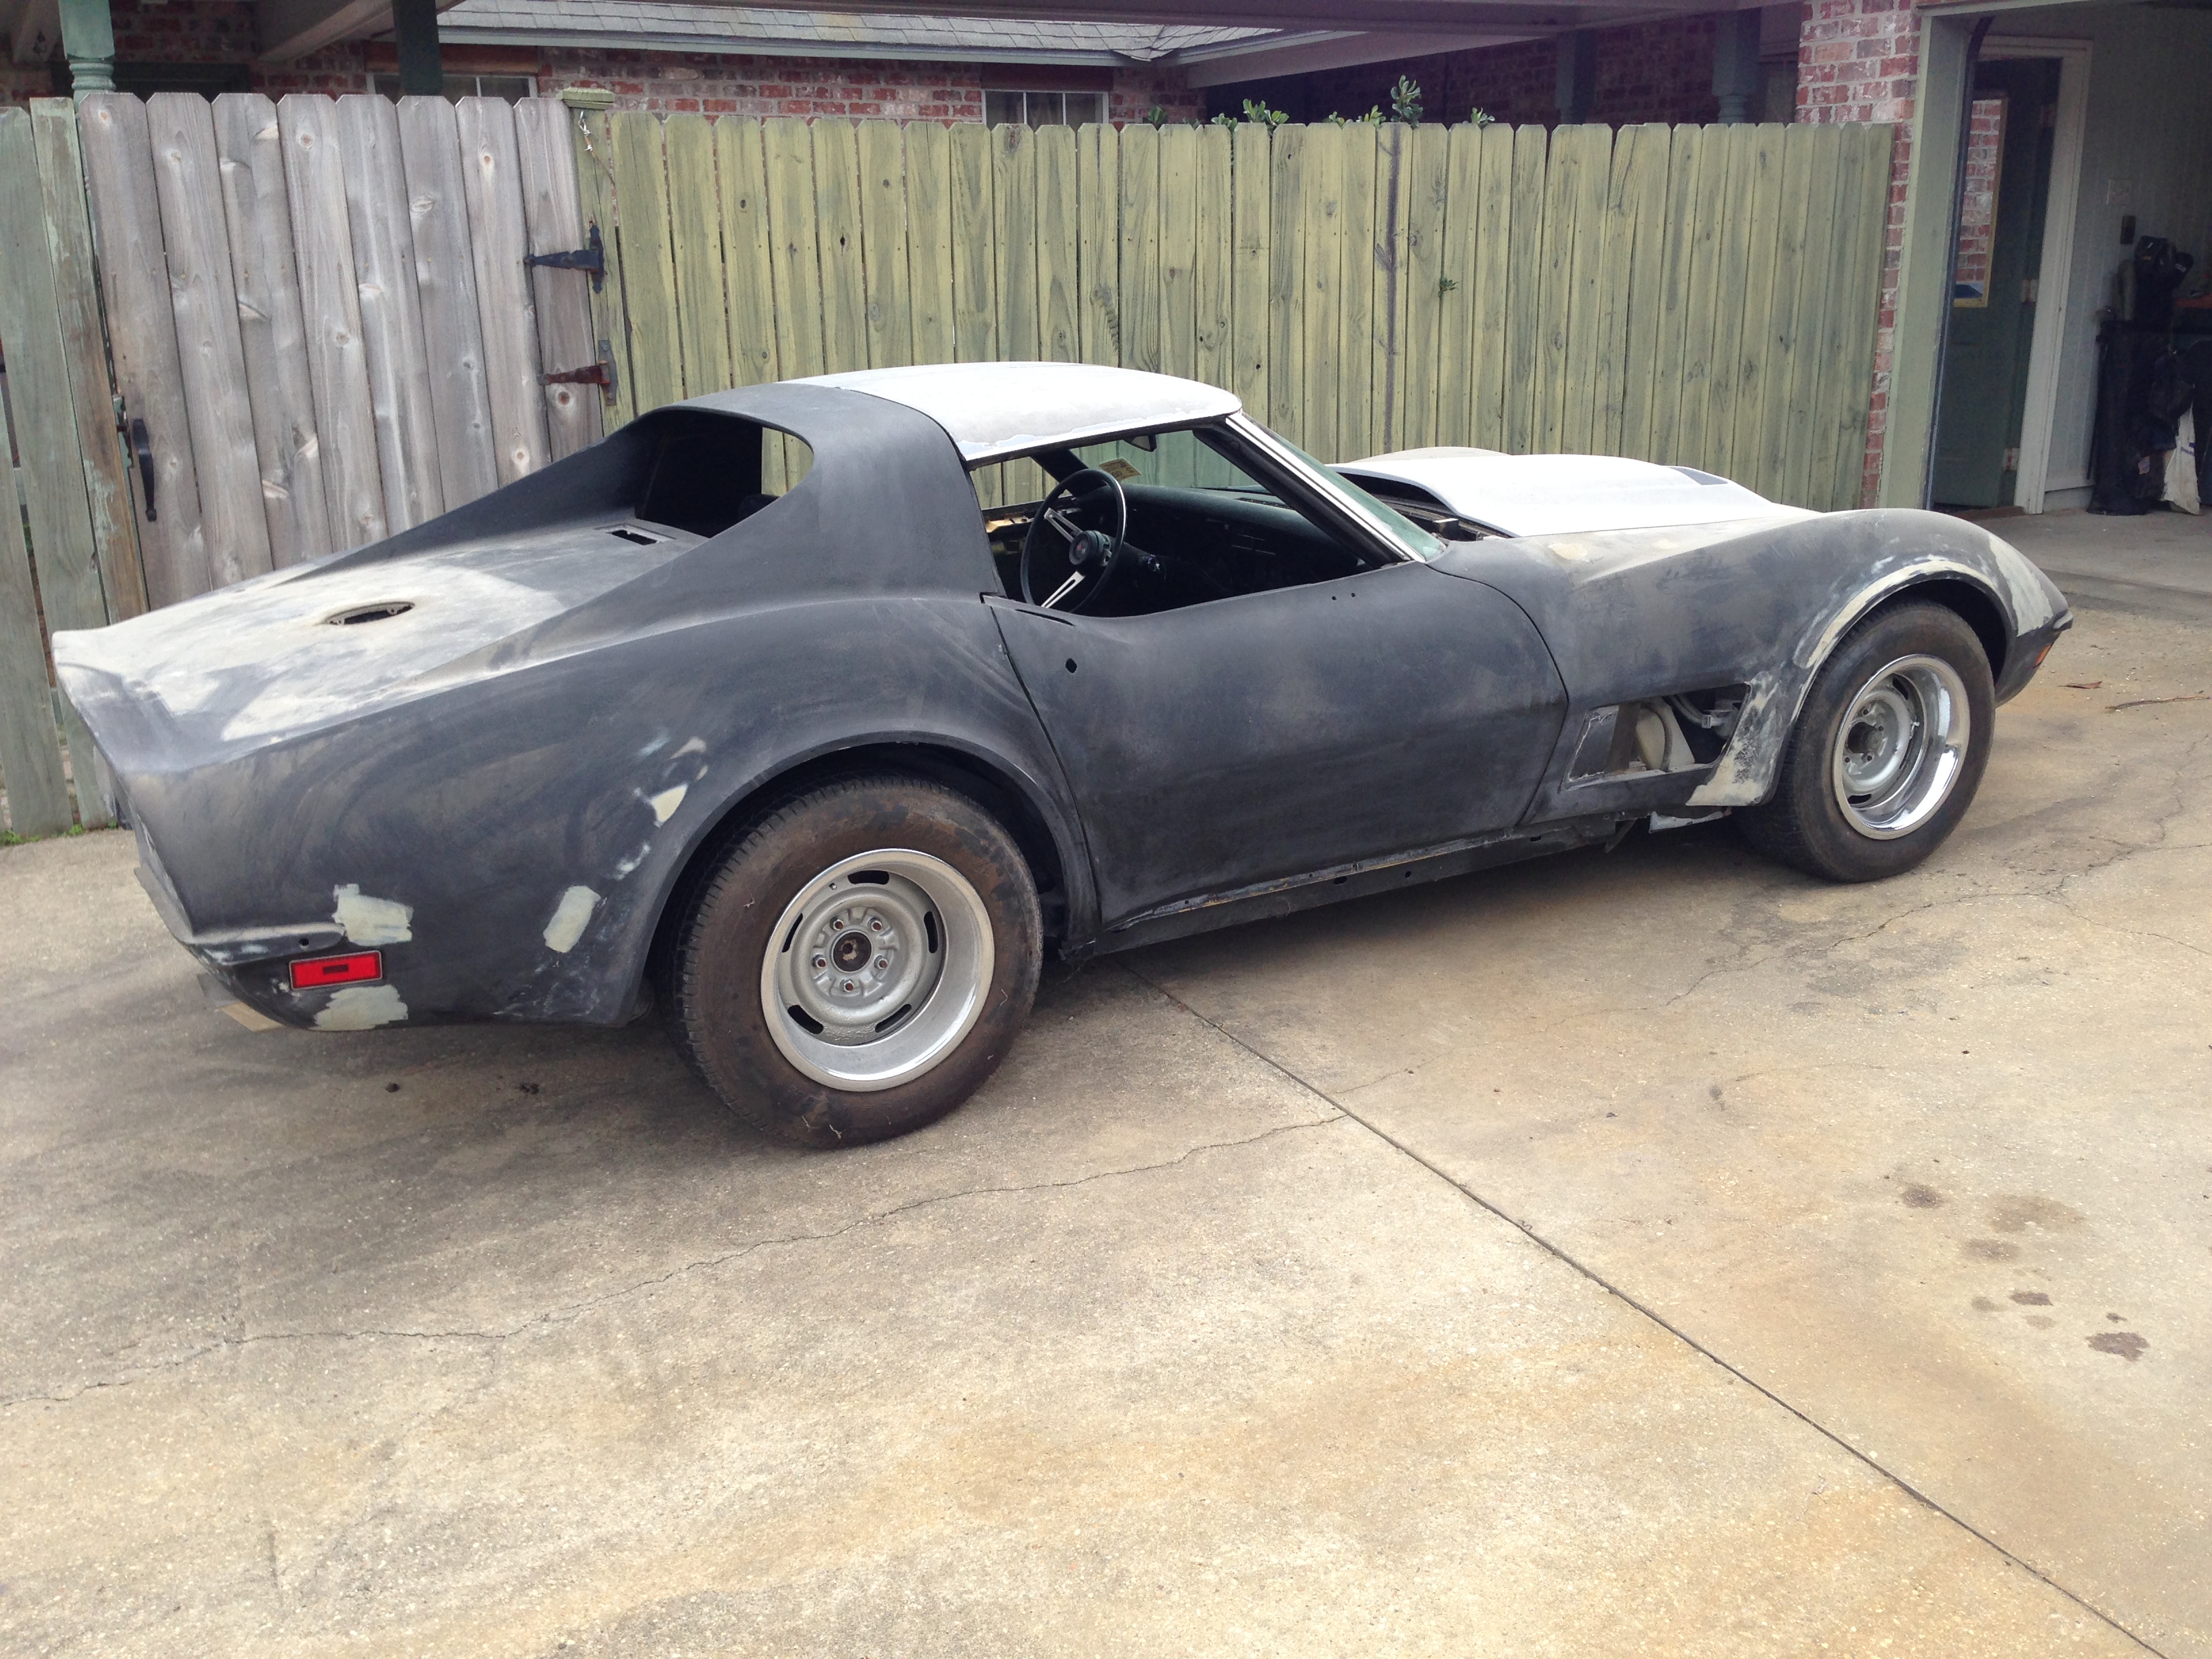
At the latter part of last year I was able to talk one of my old bosses into selling me his 1972 Stingray. He bought the car in 1998 and the last time that he had in inspection tag on it was in 2000 when he parked it to do some minor restoration work to it. He ordered a lot of brand new parts to include a new Ecklers L88 hood and air box, along with new door panels, condenser core and various other assorted goodies. He started by doing a partial disassembly and sanded the entire car down to the fiberglass. At this point he sprayed the car with gelcoat from Ecklers and did some minor body work at which point the car sat for about 12 years. This is a picture of what the car looked like the day I picked it up.
This is what it looked like after a nice bath
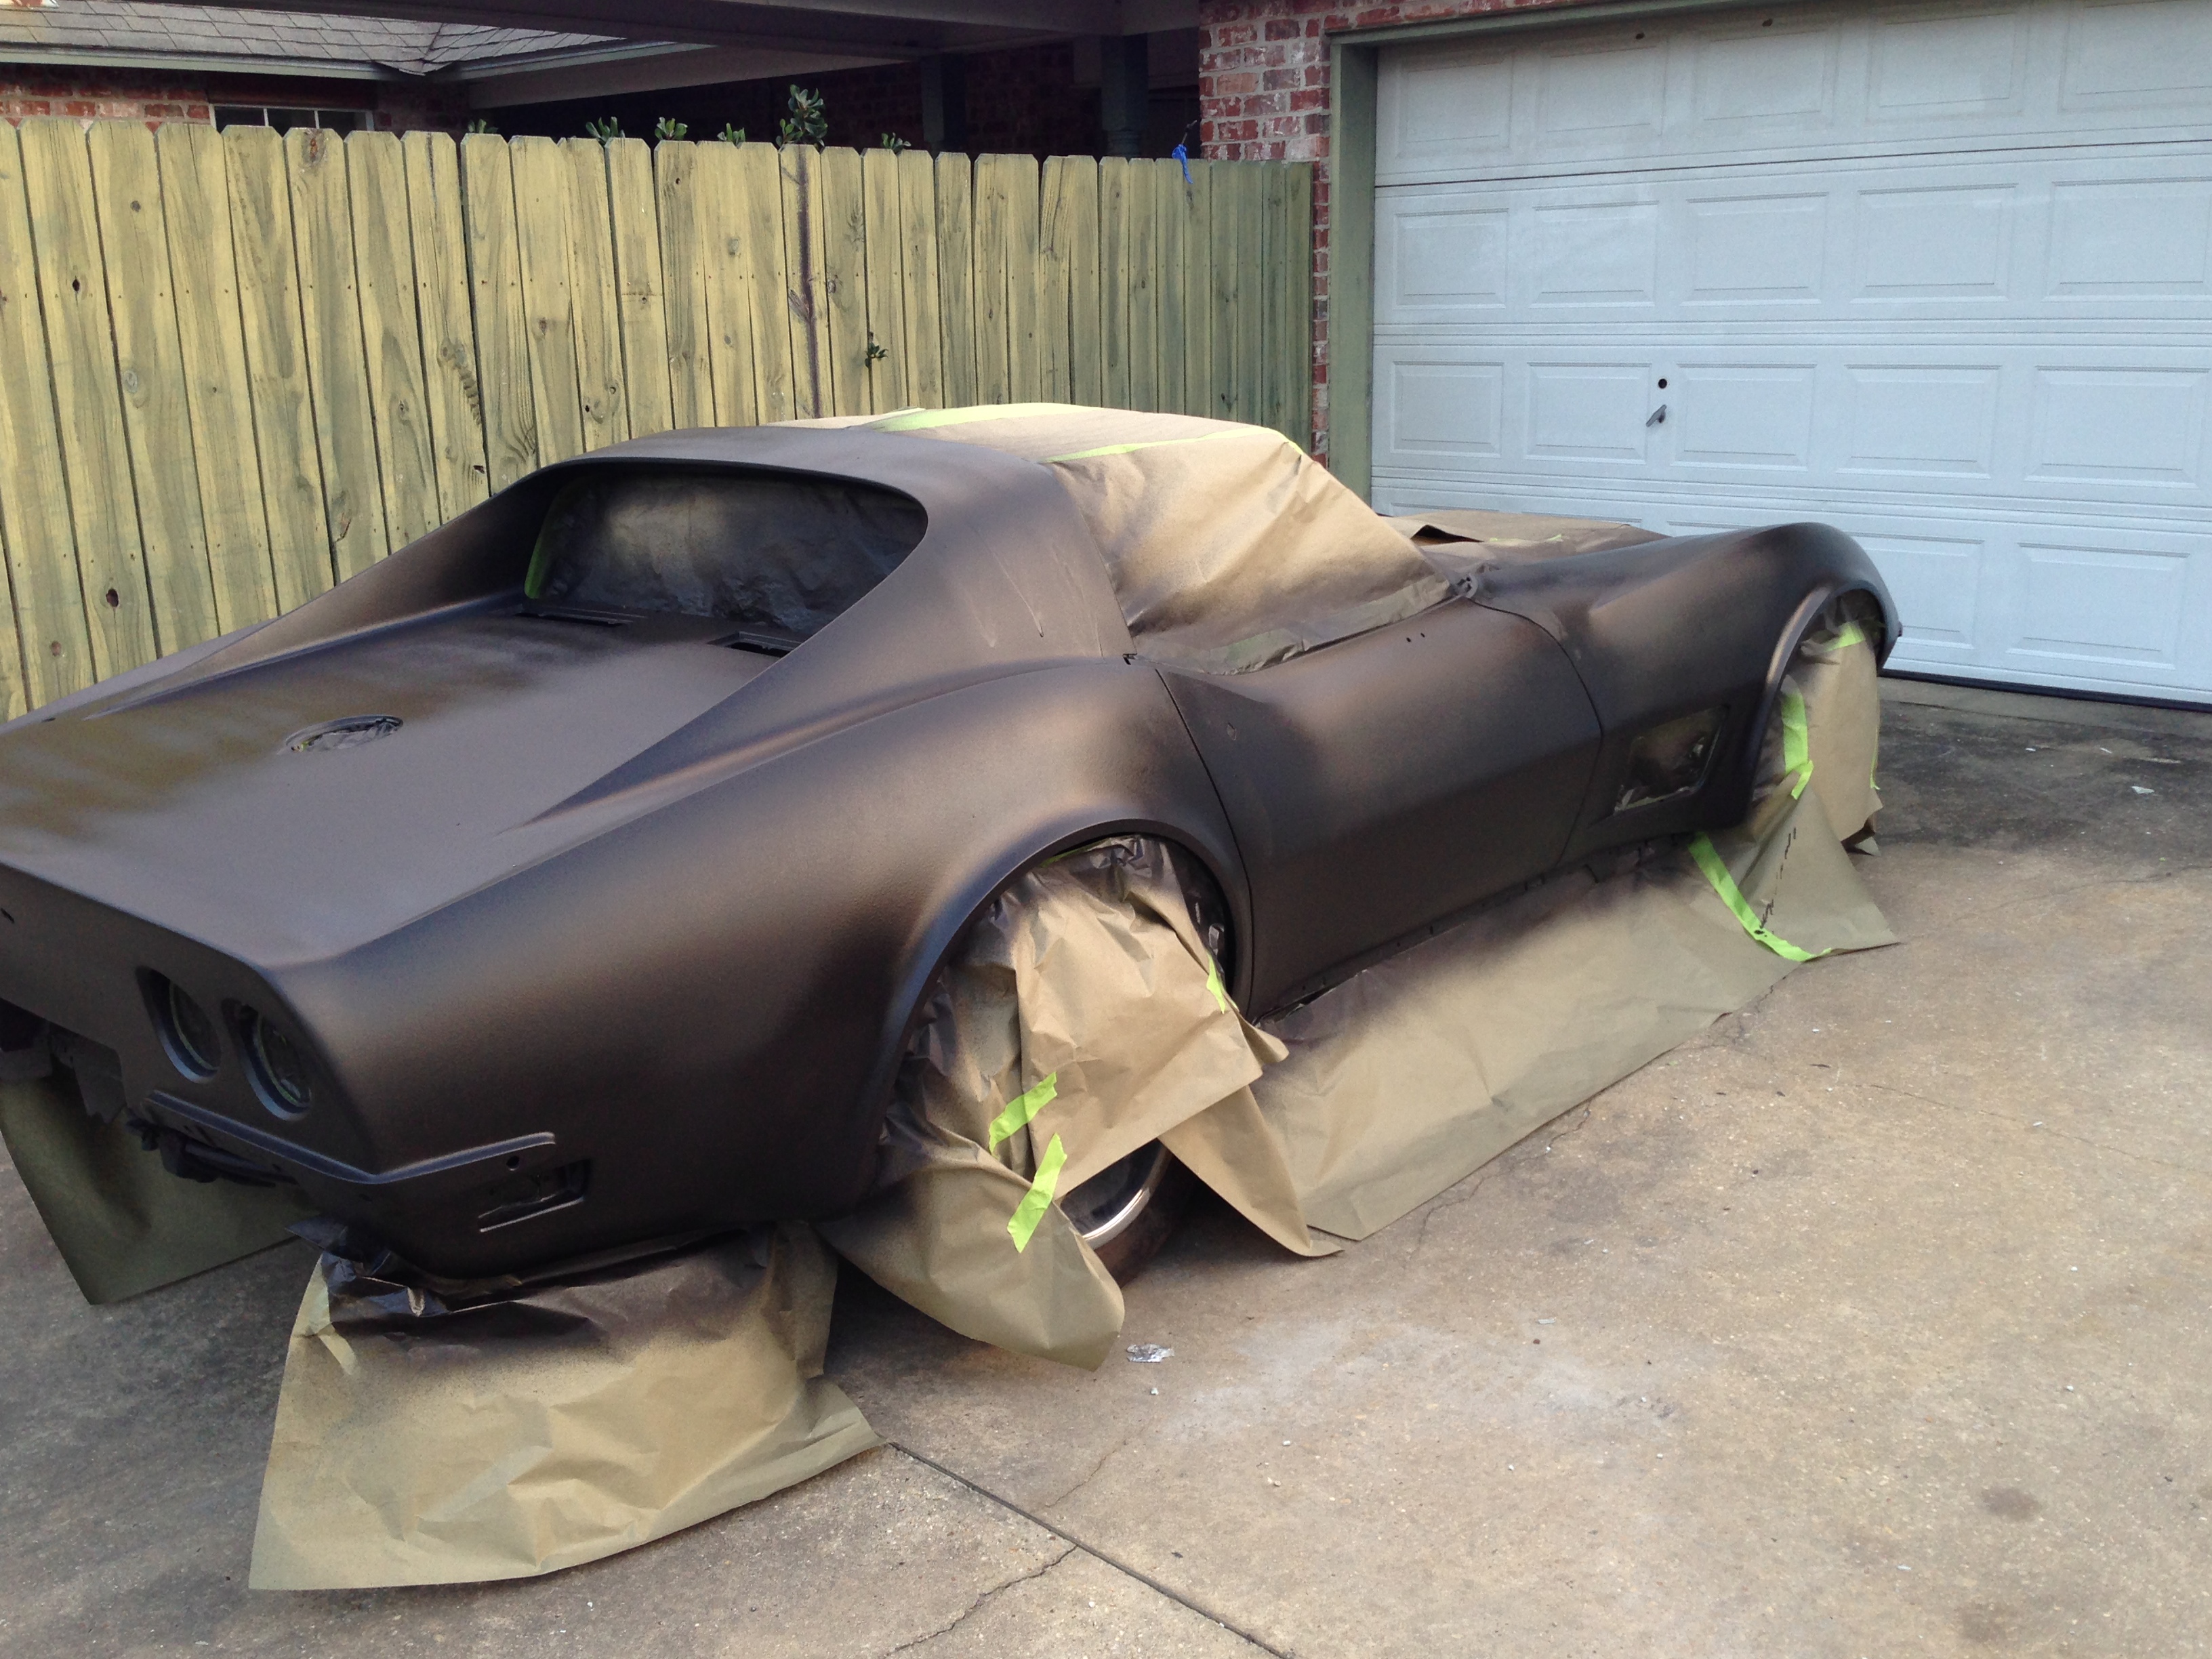
I started the body work and got all the way to applying my first coat of fill primer. This is the first time that she has been one color in 14 years.
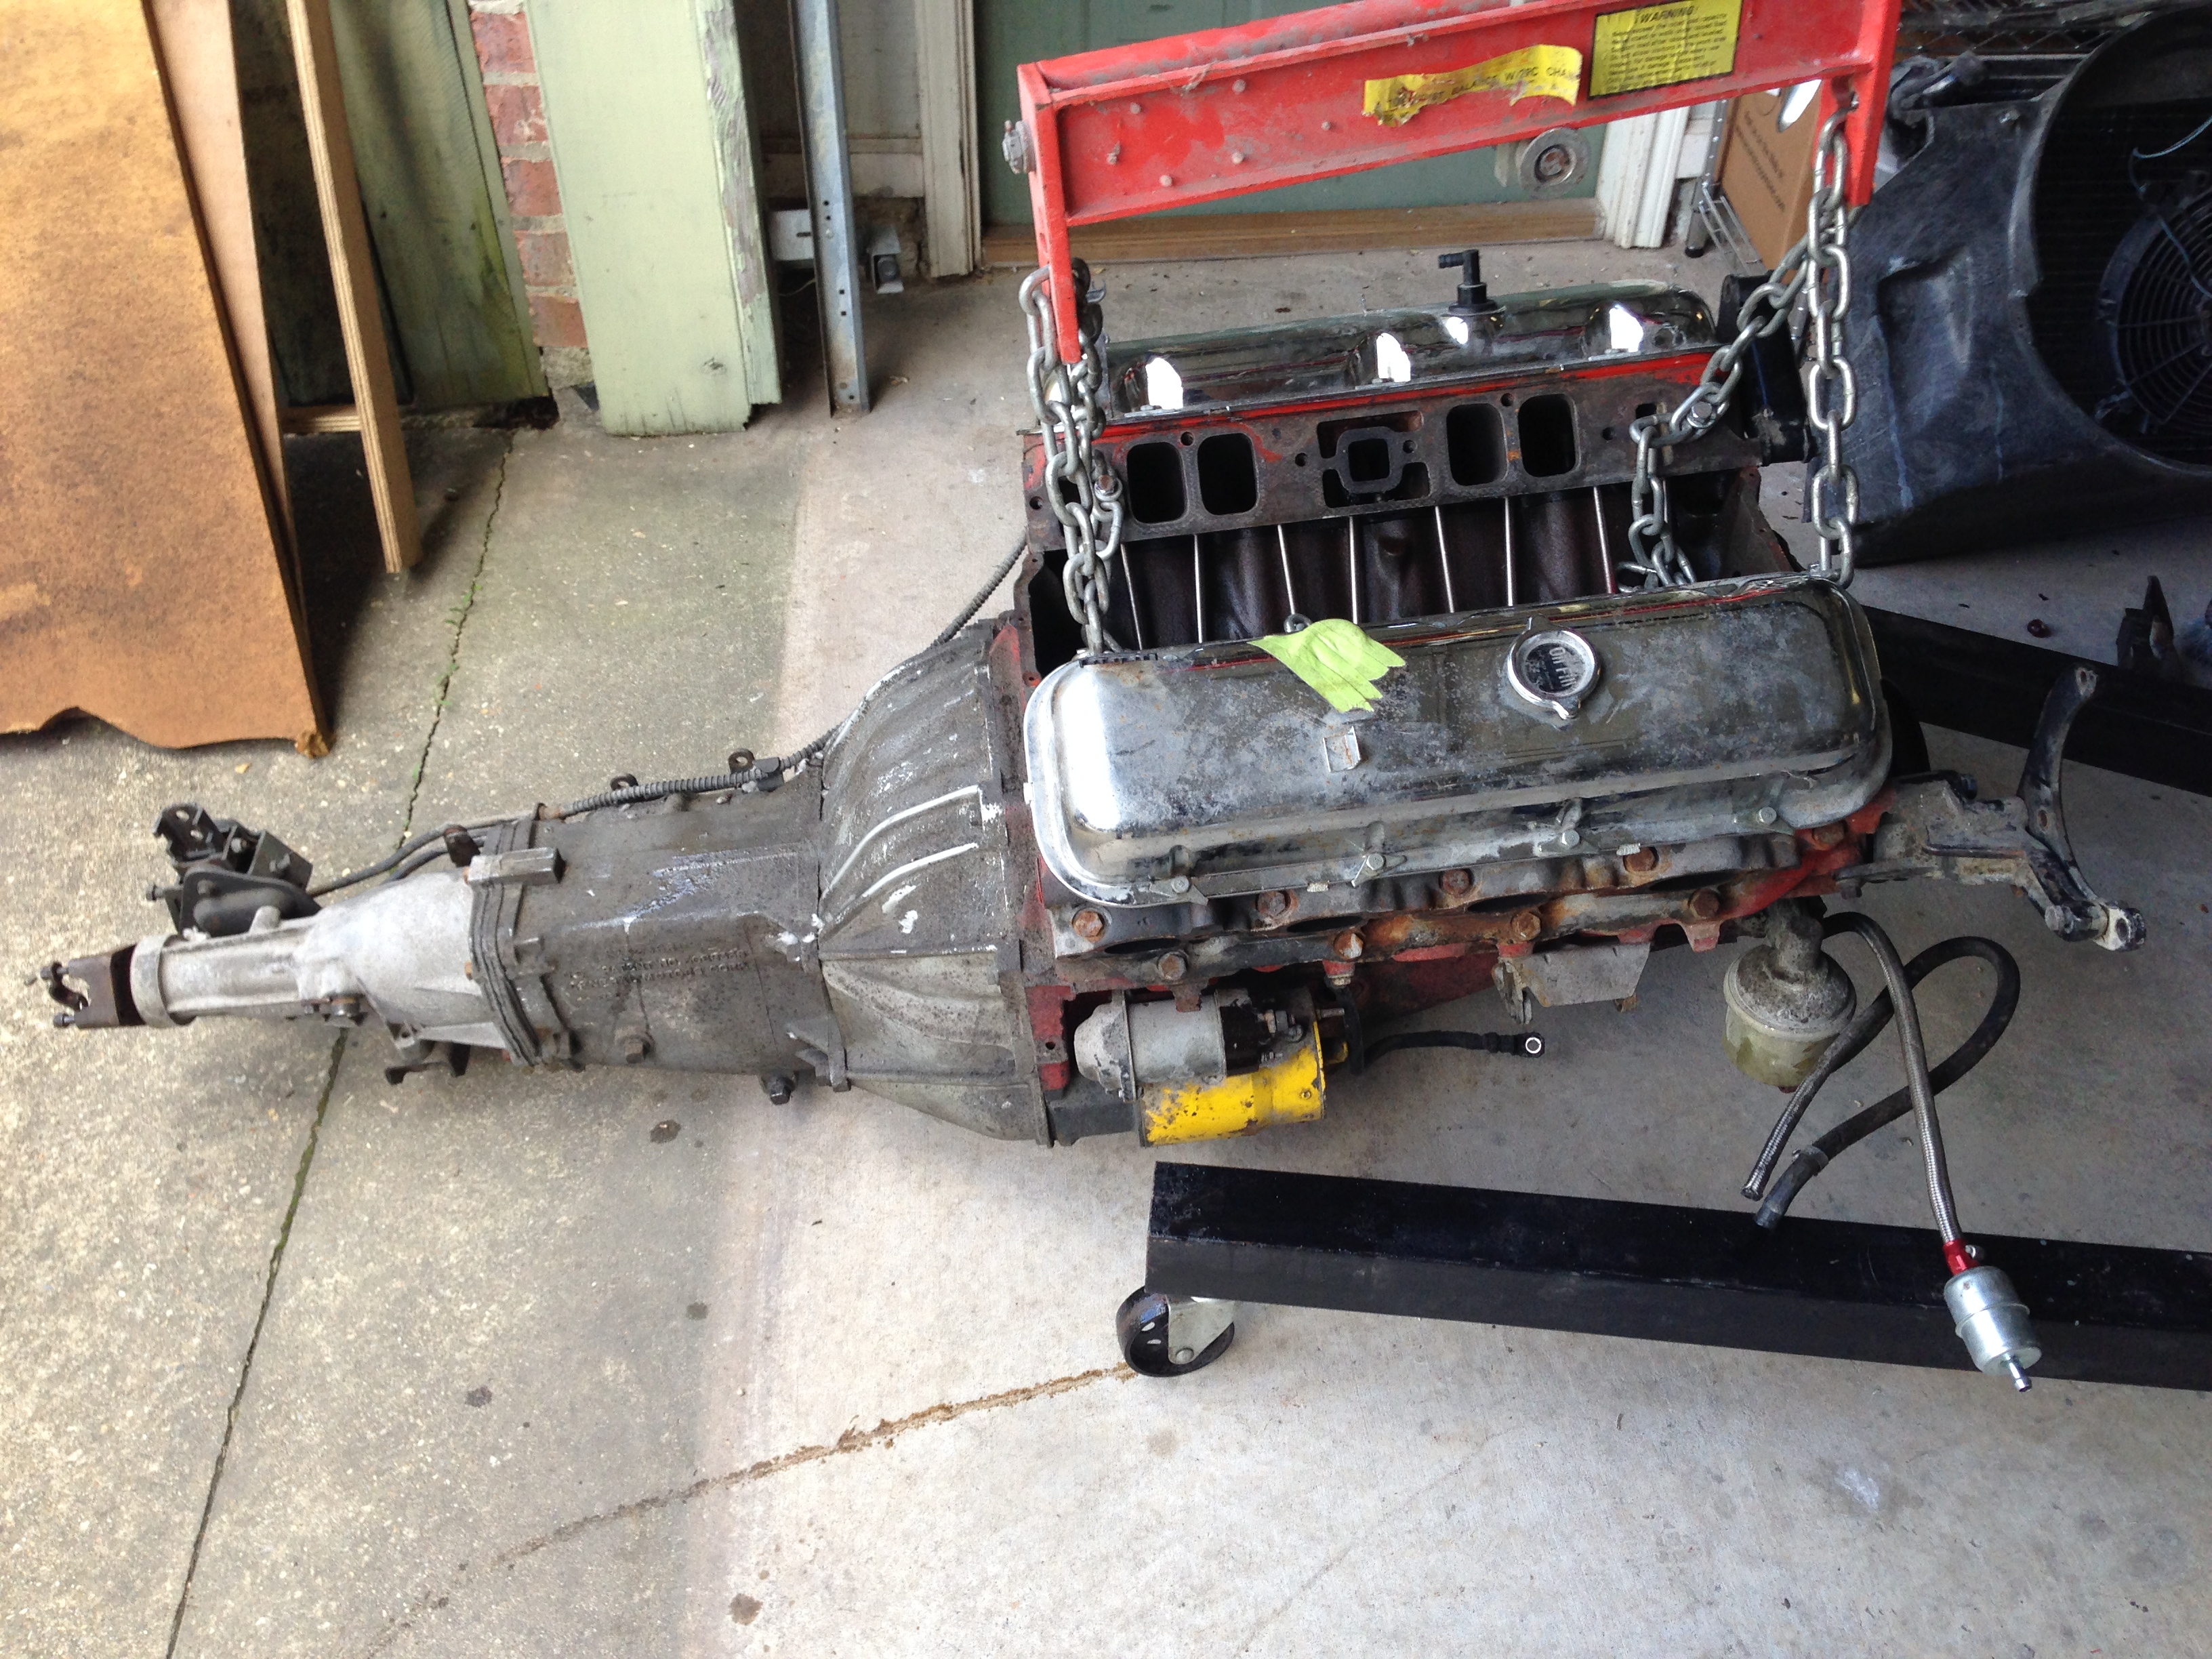
My original intentions were to just finish doing the body work and repaint, but as things went on I fell into the "If I'm doing this then I might as well do this" mode. That all started when I was trying to locate and bond the air box to the underside of the L88 hood. I found that the intake manifold that was on the engine was a very low rise aftermarket unit and that there was about a 3" gap between the drop base of the air cleaner and the air box. Well I had intended on replacing the intake manifold and the iron square port heads that were installed and go to an oval port setup. That ended up leading me to do a complete engine rebuild.
Before
After
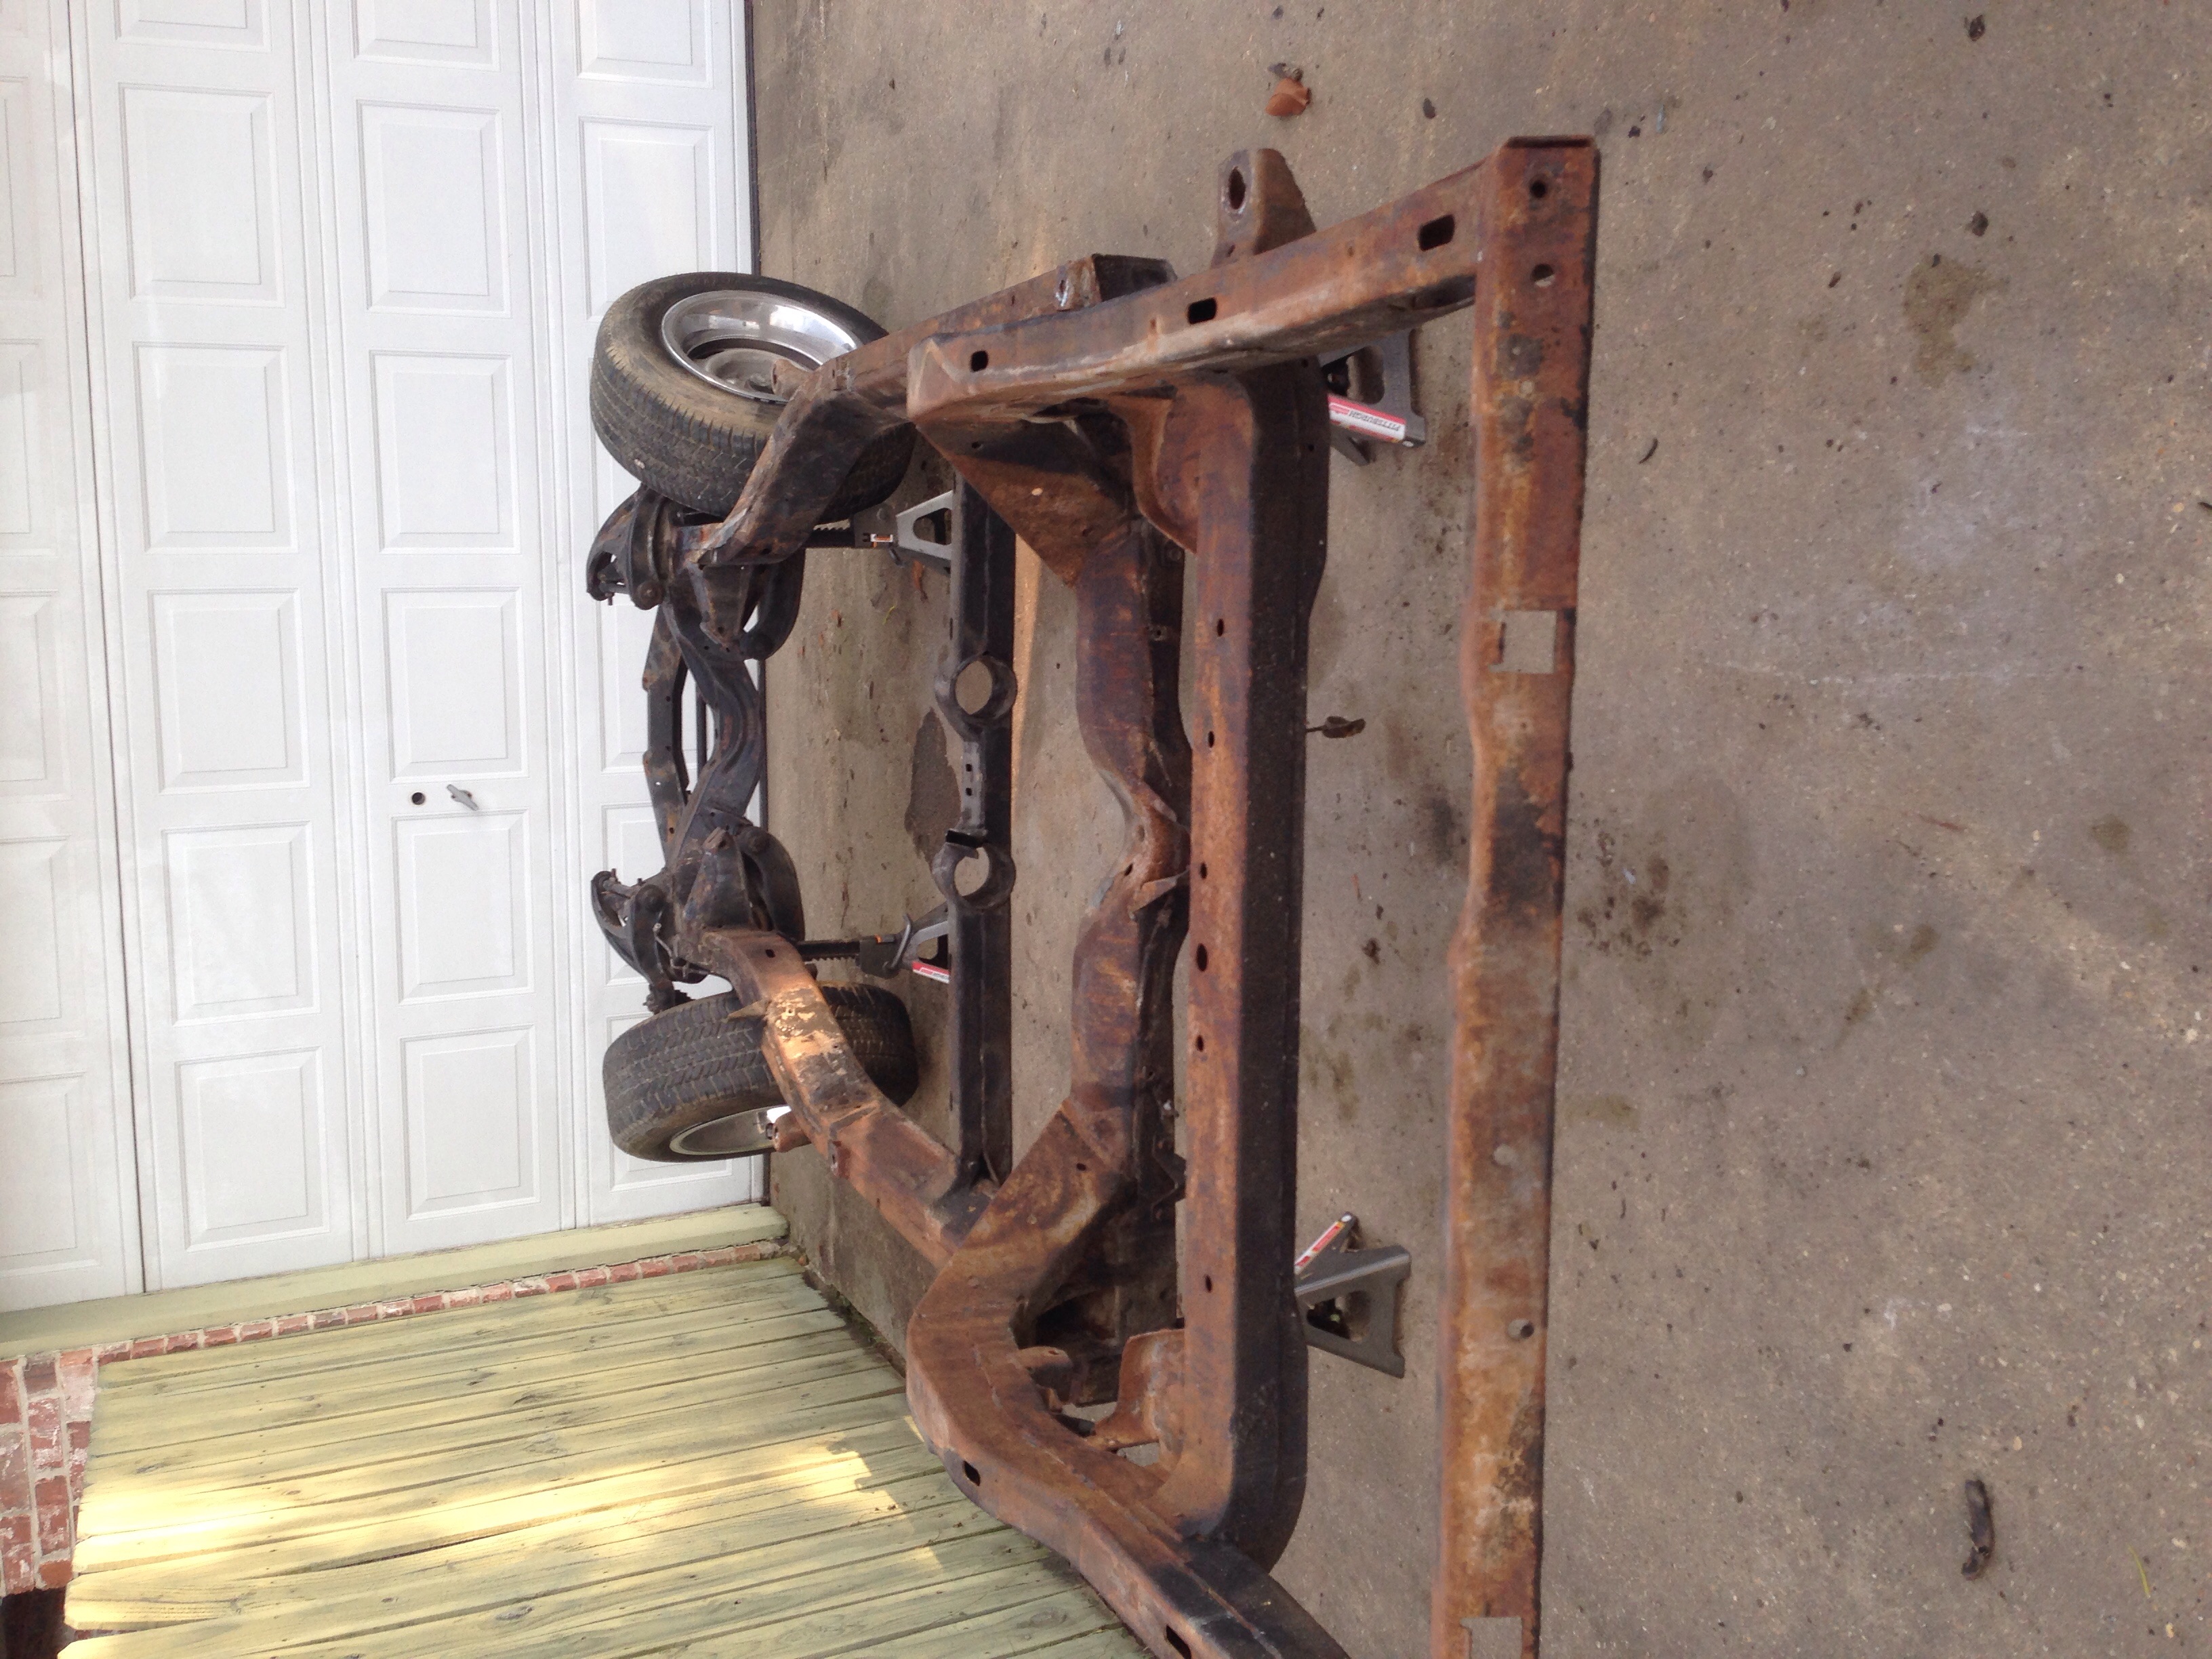
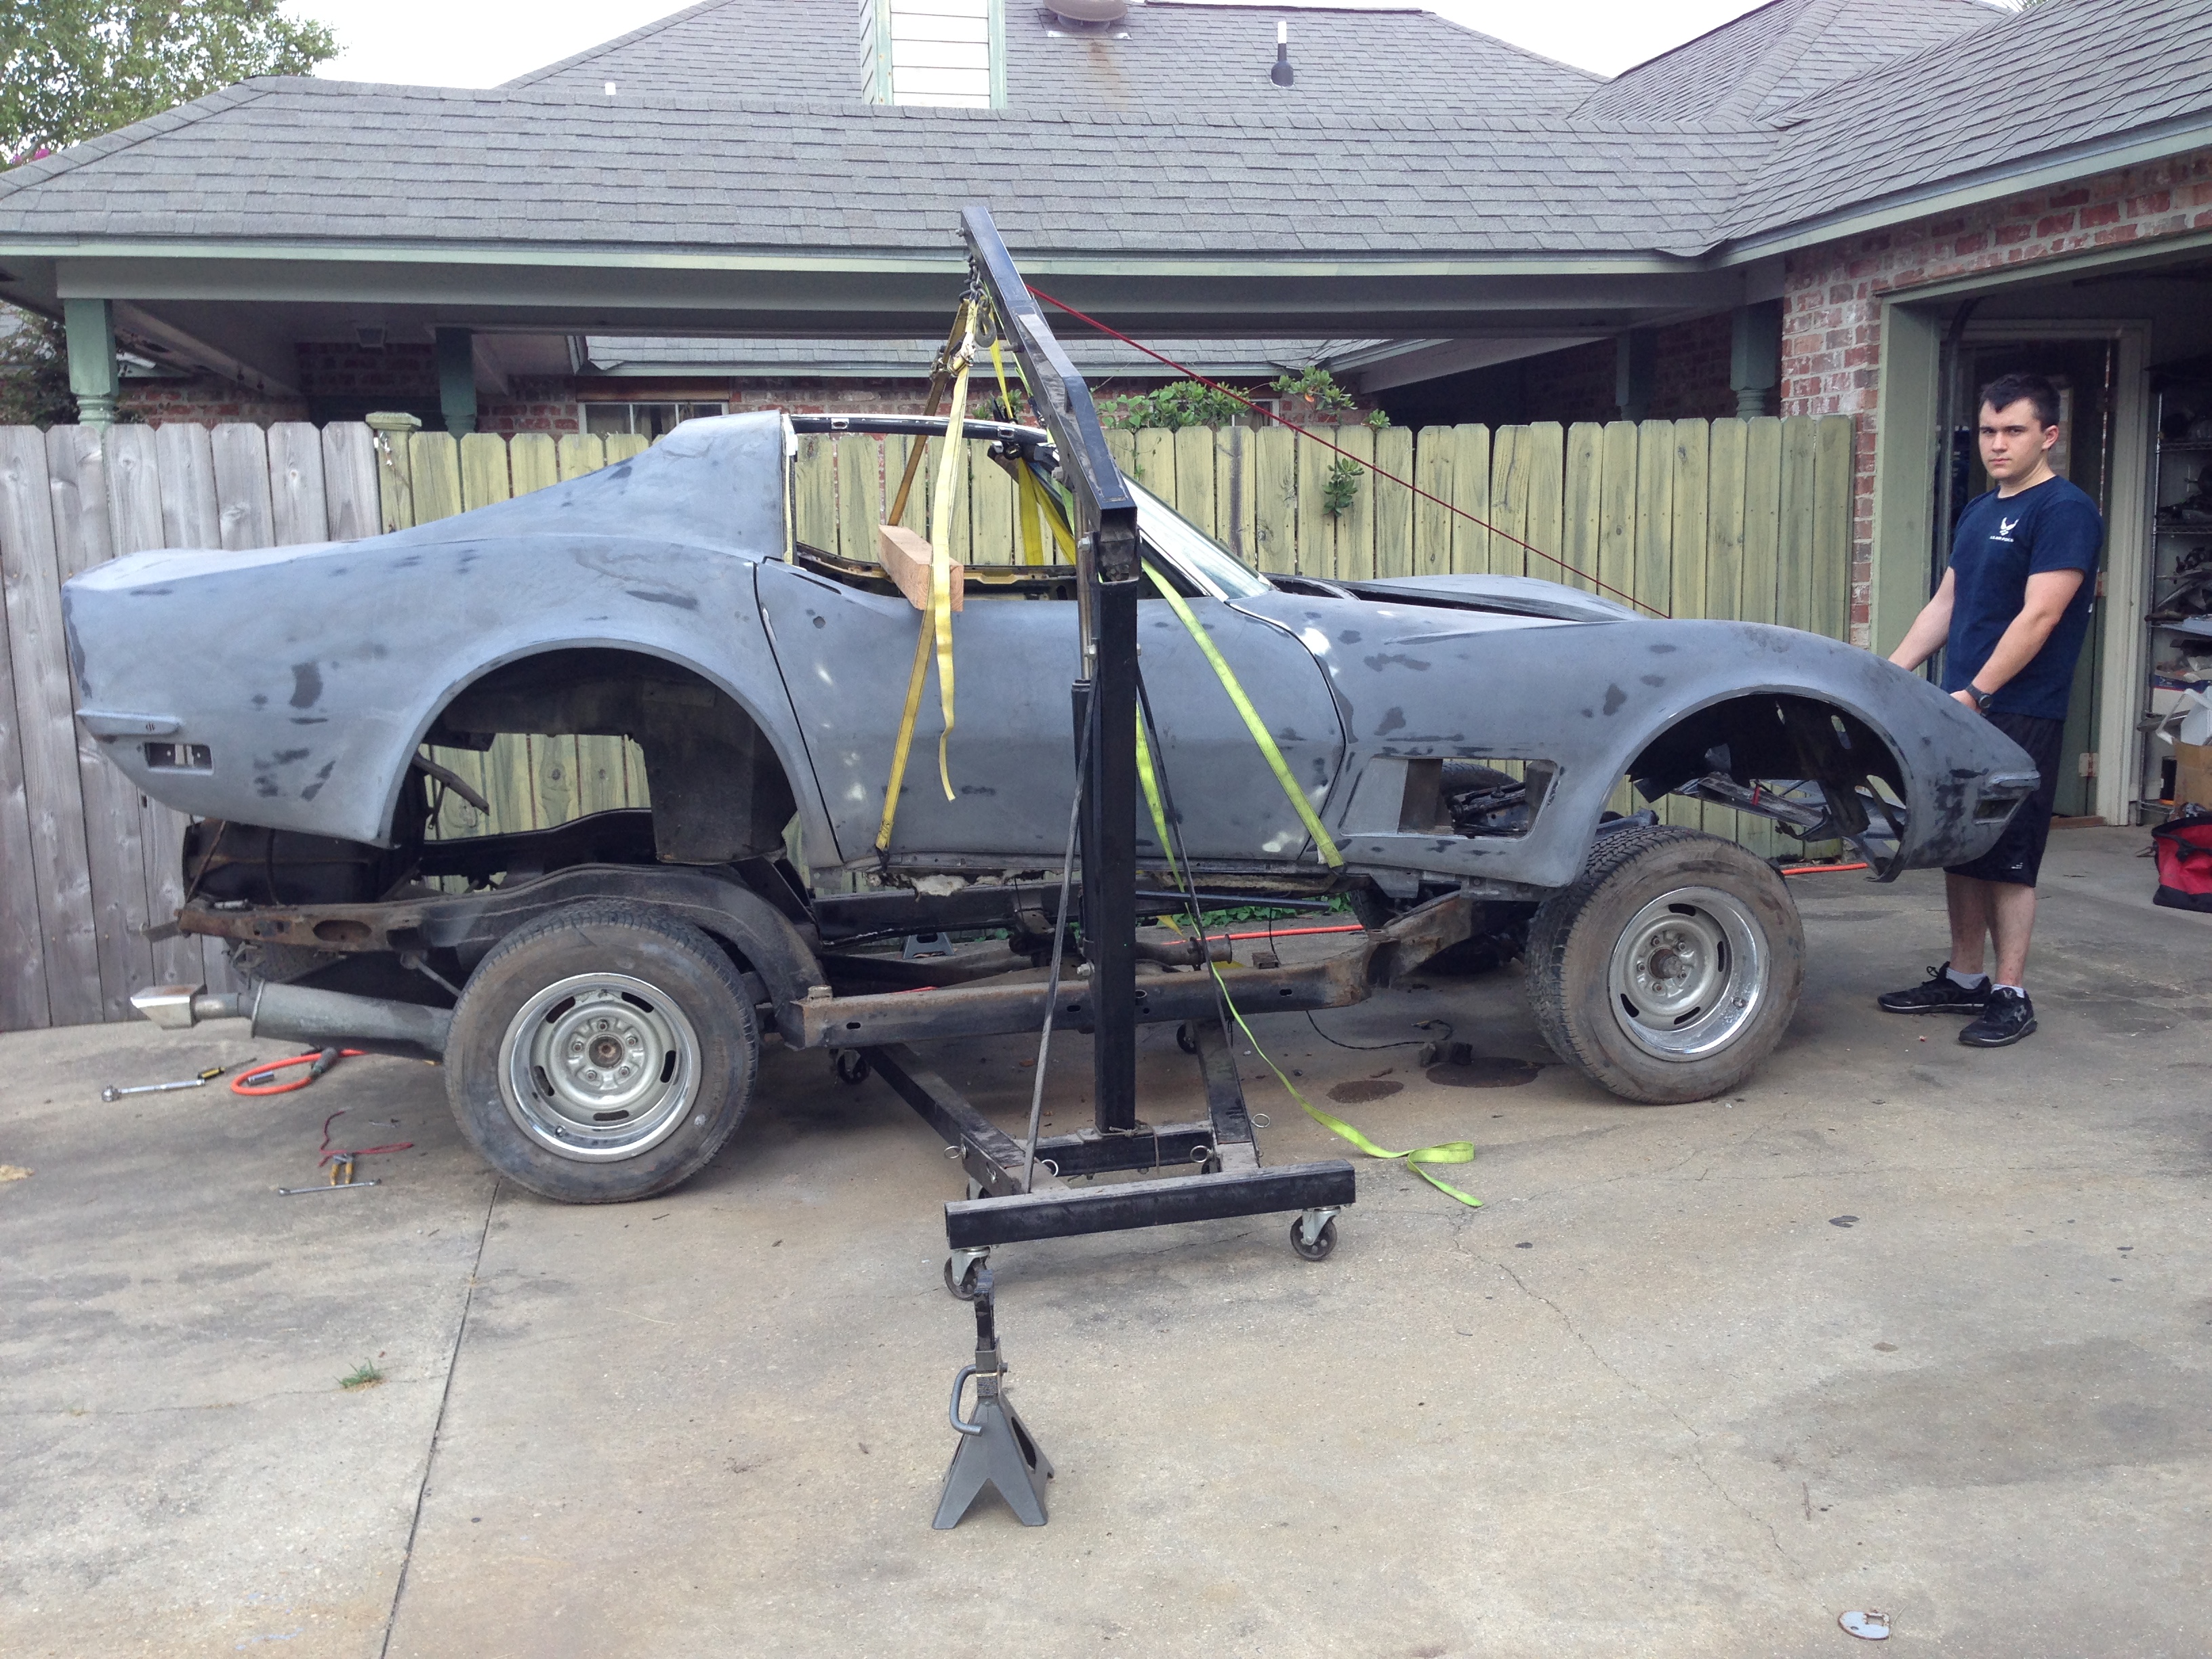
The next thing you know I am looking at this beautiful 427 (bored .070) and thinking that there is no way that I was gonna put it into that eye sore of an engine bay. So I start gutting it to clean and refurbish. Once I finished gutting everything from the engine bay I got a good look at the frame which was coated with surface rust and pealing paint and thought to myself, "well there are just 8 bolts holding the body to the frame" and the next thing you know, the body is removed.
Now I am in the process of taking everything off of the frame and once done my plans are to blast and POR-15 the frame and everything that attaches to it. I talked to a Tech Rep from the POR-15 store and asked about applying a top coat (chassis black) to the frame and he said that it wasn't necessary. Does anyone have any opinions or experience with that as I have read that sunlight will cause the POR-15 to chalk up. Any advice or comments would be appreciated.
Well, looks like you fell in that hole like so many of us. It's the right thing to do and you will have a great looking car when completed. I had my frame powder coated so I have no POR-15 advice but many have used it. What color was the car off the trim tag and are you planning on the same color. Engine and primed body look great. Keep us posted.
R
The color on the trim tag is War Bonnet Yellow, however one of the previous owners had it painted Black. Right now I am undecided on the color but I am leaning towards Black. Before I got into the full blown restoration I was just planning on redoing the paint on the outside and as the door jams were in good shape and already Black I was just gonna go that route. Additionally for Christmas my mom and sister pitched in and bought me a gallon of House of Kolor Gloss Jet Black and I would hate to see it go to waste.
I used the POR-15 on the frame of my 73. Don't know how
sunlight would effect the frame. It's been on mine now for
3 years and I haven't noticed any change. Even used the
silver for the rear end, shafts and springs.
Here are some photos of mine.
I was wondering if you had any pictures of how you fixed your door seams. I have the same problem at the tops of my doors. What you used etc.
Thanks!
R
I used the POR-15 on the frame of my 73. Don't know how
sunlight would effect the frame. It's been on mine now for
3 years and I haven't noticed any change. Even used the
silver for the rear end, shafts and springs.
Here are some photos of mine.
Donnie
Donnie,
VERY NICE WORK!!!!
***PROFESSIONAL ADVICE, OPINION and EXPERIENCE with POR-15***
As for if whether POR-15 will chalk up...it will..but only if it is in exposed to the UV's of the sun....and it takes some time for it to do it. And your frame will rarely ever get direct UV's from the sun. But do what you feel comfortable with. It has a lot to do with what the POR-15 is being subjected to....such as salt, strong degreasers.
When I talk directly with POR-15 tech dept...they recommend that a paint be applied if you have any concerns...so this 'rep'....who ever he/she is...may know something that I don't know due to the possibility that the POR-15 has been re-formulated.
I read that you were planning on blasting the frame....so I assume that this means you are going to blast the frame with some type of media.
So I do not get my head chopped off for mentioning it...because some people who read this may not know....But hopefully you know that you can directly apply POR-15 on CLEAN sandblasted steel. IF the steel has rust on it...it needs to be cleaned with their 'MARINE CLEAN...and then the 'ACID ETCH' needs to be applied. Follow the directions to the letter. I follow the directions...because I did not make the stuff....and I can not afford it to fail due to poor prep work.
And so I do not get someone who comes in saying that they did not use the prep products required and the POR-15 is still holding on well. Good for you....I am truly glad you saved some time and some $$$$. With my luck...the stuff would fall off before the Corvette left the shop and I would be doing it again.
Well this afternoon when I got home I was able to get a little bit of work done. I was able to remove the old exhaust system, fuel lines, fuel tank and the rear end assembly.
One step closer to being able to media blast
PLEASE pay careful attention to the shims in your upper control arm mounting points. You want to make sure that there are shims in ALL FOUR mounting points. And by shims...I personally would like to see at least an easy 1/4". It is obviously OK that the shim packs are different total thicknesses.....but what I DO NOT want to see is NO SHIMS or a 1/64" shim in one or more location....for example. What that tells me is that the frame needs to be stretched back out so shims can back in.
YES...I am aware that the upper control arm shaft can be replaced with the off-set design that compensate for this inherent issue.
Yes I am aware that there is a 'spreader bar' that can be installed that will basically stop any further collapsing of the engine cradle area.
I am just mentioning this so when you get it all done and when it goes on an alignment rack...the shop does not tell you something needs to be repaired that can can effect what you had worked so hard on. I am commenting from personal/professional experience in this area. It seems like a small thing...but can turn into a BIG thing....when you have a car you can NOT align.
Just a quick update, I am almost done stripping the frame of all its attaching parts. With any luck I should be done today. One of my goals is to do something towards the restoration each day, no matter how small my the task is.
well it looks like I am falling short on my goal to do something towards the restoration each day. Yesterday after work I was able to remove the spring and spindle assembly from the front passenger side and my goal for today was to do the same for the drivers side but as luck would have it I ran the spring compressor down too far and messed up the threads and spent all afternoon trying to get the spring compressor apart and then looking for another one at one of the local autoparts stores. Well I was able to find one at about 8:30, so it looks like I will try again tomorrow. I just want to be able to have the frame ready to blast by Saturday morning and hopefully have the POR-15 applied by the following weekend.
Willcox Corvette has the Description on their site for a cheap front spring compressor. It works great and is easy to store when your done. It's a large threaded rod with a couple of washers/nuts and a steel plate for the bottom.
You're doing a great job. Nice work at disassembly, good clean-up, and nice re-finishing.
I would suggest to you that the accessory items (starter, alternator, etc.) likely all need to be refurbished: rebuilt and re-finished. And I would highly recommend that if those items are still the ones that originally came with the car, that you rebuild them rather than replacing them. The original pieces were made to MUCH BETTER standards and are easily rebuilt for much less money than replacing them. And, when done, you still have original pieces and they are ready for another 40 years of service!
I second that, I have tried to keep as much as possible, starter rebuilt by John Pirkle, original alum. radiator fixed, A.I.R system, Correct carb. rebuilt by Lar's. Hopefully it all will last awhile.
R
Designer Imagines A Corvette That Looks More Like a Corvette Than the Corvette
Slideshow: A Jaguar designer's personal project imagines what a modern front-engined Corvette might look like if Chevrolet revisited the golden age of the Stingray.


 [/ATTACH]