When you click on links to various merchants on this site and make a purchase, this can result in this site earning a commission. Affiliate programs and affiliations include, but are not limited to, the eBay Partner Network.
I have a 74 T top currently prepping for paint. I want to remove the headlight assembly so it can be painted separately. Can anyone confirm the procedure below?
I think I need to remove 9 bolts to get the assembly out. See photos. 3 bolts for each pivot point (6 bolts total) I guess I'll remove the hood before taking these bolts out. Then the center bolt between headlights and then the 2 bolts on the headlight bracket.
Pivot points 2 locations , 3 bolts each - hood off should make it easier.
Center bolt between high/low beams
2 bracket bolts
I hope with these removed the HL assembly will come out and most of the springs will stay in place. Trying to leave as much in place as possible there will be a lot of stuff to replace after painting: doors/windows/ all door hardware, hood, front and rear bumpers/ t-top trim, rear window and trim and a bunch of other stuff. Im guessing it will take ~ 1 month to get all back together ( Actual time is usually double my estimate). Thanks in advance for any comments.
bg
Oh, and a word to the wise
That headlight warning switch just below where you point out the link bolt between the hi/low beam pots is plastic, poorly designed and VERY easily broken.
And just in case you take them off, the pots are unique and lettered ABCD beside one of the bolt tabs but they go on C B D A from left to right looking at the front of the car.
The lower adjustment bolt (long threaded rod with a hex milled on one end) is frequently fused into the aluminum link and also easy to break/strip
Hi,
I'm not sure but I don't think there's enough room in the headlight opening of the hood surround to slide the 'door' far enough side to side to release the 2 pivot points which would let the door out.
I think this is why people end up removing the entire headlight mechanism from below.
Regards,
Alan
I've never seen a picture of a car being painted with the doors off but the frames and mechanisms in place. The frame is always in place too.
It seems to me I tried taking mine up (to protect the paint) and couldn't manipulate it in any way shape or form to fit through the opening and had to remove the "horse collar" to take it out the bottom.
M
Hi,
I'm not sure but I don't think there's enough room in the headlight opening of the hood surround to slide the 'door' far enough side to side to release the 2 pivot points which would let the door out.
I think this is why people end up removing the entire headlight mechanism from below.
Regards,
Alan
I've never seen a picture of a car being painted with the doors off but the frames and mechanisms in place. The frame is always in place too.
Just doors and frames in place.
Hi Allen , Your car is one of the finest examples of a top notch correct restoration that I have seen so it surprises me to see the conditions that you painted it in . I would have expected to see a high end controlled atmosphere paint booth so for that sir , I take my hat off to you. It just shows what a talented person can do with limited conditions.
Bought my '72 in '95, other than witches hats twice (**** poor quality parts) and a conversion to ONE vac relay up front, they worked fine for some time, until a damn FLORIDA DEER, about the size of a GSD runs out in front one night, and wiped out both lights, I mean busted up good at a silly ~40 mph or so.....
I went the sugar scoop fixed for years, then a Verizon truck backed his hitch into the left front of the vette, and totalled my ~4? y/o repair from the damn deer......
paint job was wiped, being about 25 y/o, so it switched from burgundy to green......
and I got later Camaro bulbs and cut the opening sixe in 1/2 so small holes, and wide open in back of the scoops/trays, plenty of airflow.....
Hi bj1k,
Thanks for the compliment, but remember the car has acrylic lacquer on it! VERY forgiving paint!
Also, please understand that's not me but instead a painter who's never sprayed the new paints so he's not set up with one of those beautiful down draft paint booths shops have now.
I only wish I could paint even 1/2 as well as he can!
Regards,
Alan
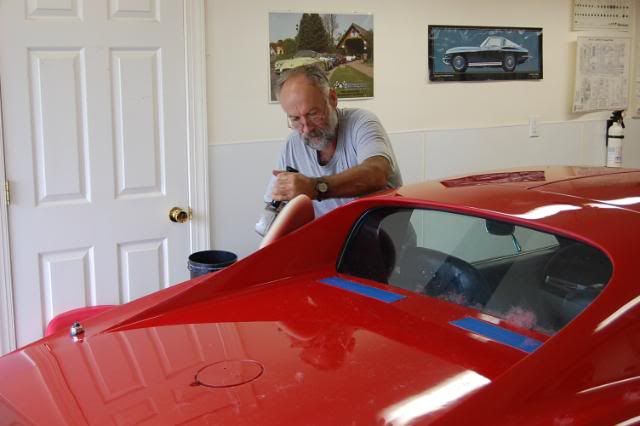
Here he is 6 years later (2011) buffing it for me as I got it ready for Flight Judging during it's 40th year.
Look at the size of the buffer, that WOOL pad, and the size of his forearms!!!!!
YES...as seen in 'Mooser's' link. The headlight doors CAN come out and STILL allow the headlight actuator supports to remain bolted in place. I do it all the time. As long as the Allen set screws loosen and I can slide the collars inwards. They MUST be able to move inwards to get the headlight doors out.
I will write this....IF you are painting a metallic color.....I do not know if I would have the headlight doors sitting on a table away from the front end the entire time. When I do it...I have a set-up that allows me to position the headlight doors close to the front end so when I am spraying it for the final coat to make sure all is correct and matching...they are close enough for me not to worry about the color being off.
Thanks to all who replied. your council is much appreciated. I now have more than enough info to get it done. I want the headlight assembly removed so the small casting area (exposed when headlights are up) above the pivot points get painted. For Mooser: Thanks for the details and link that was some serious headlight restoration! I need to put a mode 5 headlight resto on hold or i'll never get the car to paint shop. For DUB: thanks for the tip on set screws/metallic color match Ill pass on to my painter. For Allen: I need to ponder your post I'm currently fitting front fiberglass bumper and will have ample opportunity to look up at the headlight assembly.
Hi bg,
Because of the 'nature' of acrylic lacquer it's very possible to paint the car with the headlight doors in place (with the mechanisms removed or in place).
From what I see of the cars being painted with contemporary paint it seems many of them are done with the doors removed�.I'm not sure just what the reason for that may be.
Perhaps your painter will have a preference� have you talked to him about it?
Regards,
Alan
Alan, Thanks your suggestion to consult with my painter it was so obvious I overlooked it. He said to leave them on for now and that during the painting process he will remove when needed. I guess he will paint them in place then remove em to get the rest. Now if I can get the front bumper fitted I could be almost ready for paint....
Alan, Thanks your suggestion to consult with my painter it was so obvious I overlooked it. He said to leave them on for now and that during the painting process he will remove when needed. I guess he will paint them in place then remove em to get the rest. Now if I can get the front bumper fitted I could be almost ready for paint....
bg
I KNOW it is ...'to each his/her own'. BUT....
I hate to write this...but there is no way a painter is going to stop DURING a paint job and remove these headlight doors. Fresh basecoat on the panels...I SERIOUSLY doubt it. I paint for a living and there would be no way I would attempt it....and I know how to take these out. Just the dynamics of masking off the front end so I could do this would be so timely that it would not be worth it.
IF anything....which this is something I have done numerous times.....I have the headlight doors out...trim them out along with the inner perimeter of the headlight opening so it is painted. When that basecoat has flashed off...because I am NOT painting the entire headlight door at this time. I would then put them in CAREFULLY. This way.... the back cast area is painted. Lower the doors and mask it off. Paint the car. Clear the car. Then...the next day...I raise the headlight doors and mix up some clear. Knowing that I have not attached the headlight door stop bracket....I REMOVE the pivot bolt and bushing where the linkage bolts to the headlight door. This will allow the door to be raised higher than normal...Depending on how they were put back in and adjusted. I then mask off where I need and apply clear to the cast areas with my air brush due to being such a small area.. And seeing how I am going to sand and buff/polish the exterior...any slight overspray from this process is not a big deal.
OR...hopefully the way he likes to do it works well for him and the end result.
And if you have an issue with the fiberglass bumper...I will be more than glad to pass along a process I use and have used for a very long time to get these fiberglass bumpers to fit and get filled in and look great when completed.
DUB
I think I paraphrased what he said and my post above is not accurate, I will discuss with issue again prior to painting, for now Im not going to mess with the lights as the paint shop will remove. For me the headlights will only be up at night and ill never see the area but it would bother if not painted with full coverage.
Thanks Dub for reality check on paint process, and the bumper fit offer.
I know responding to these posts is time consuming.
For what it is worth....I have seen more than my fair share of 68-82 Corvettes that have been painted and look REALLY good...only to see that when the headlights are raised....that 'area' is not painted....but the headlight bezel is to perfection...and it looks all JACKED-UP .
DUB, I don't want to hijack this thread but I would be interested in your procedure for fitting and filling the glass bumpers. I am going to do this on my 76. Thank you
DUB, I don't want to hijack this thread but I would be interested in your procedure for fitting and filling the glass bumpers. I am going to do this on my 76. Thank you
PM me and I will give you my shop number so you can call and I can talk you through the process.


 and I got later Camaro bulbs and cut the opening sixe in 1/2 so small holes, and wide open in back of the scoops/trays, plenty of airflow.....