
Best resource for Engine compartment restoration information
 02-16-2017, 04:57 PM
#1
Intermediate

Thread Starter

Member Since: Sep 2016
Location: Columbus Ohio
Posts: 29
Likes: 0
Received 0 Likes
on
0 Posts
I am going to be doing an engine compartment restoration. What is the best resource for what each part it to be colored, bare, special finish ect... The car has been touched many times and I suspect the colors of items are currently wrong and I would like them to be correct.
I have ordered a NCRS judging manual for the 1973, is this going to be good enough for what I need?
Thanks
I have ordered a NCRS judging manual for the 1973, is this going to be good enough for what I need?
Thanks
 02-16-2017, 05:05 PM
#2
Team Owner

Member Since: Sep 2006
Location: Westminster Maryland
Posts: 30,173
Likes: 0
Received 2,878 Likes
on
2,515 Posts

Hi CA,
What sort of information are you looking for?
Yes, the NCRS TIM&JG will contain some information you can use.
Seeing pictures of other original and restored 73 engine compartments will also be a help.
Member Tooch1 (Jimmy) is very knowledgeable about 73 cars and I'd think he'd be a help for you too.
He may also be able to give you some other sources of information.
Good Luck!
Regards,
Alan
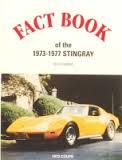
You might also try to find a copy of this book if you don't already have it. I'm not sure if it's still being published but I'd think you can track one down.
Dobbins Vet Vues Fact Book of the 73-77 Stingray.
What sort of information are you looking for?
Yes, the NCRS TIM&JG will contain some information you can use.
Seeing pictures of other original and restored 73 engine compartments will also be a help.
Member Tooch1 (Jimmy) is very knowledgeable about 73 cars and I'd think he'd be a help for you too.
He may also be able to give you some other sources of information.
Good Luck!
Regards,
Alan
You might also try to find a copy of this book if you don't already have it. I'm not sure if it's still being published but I'd think you can track one down.
Dobbins Vet Vues Fact Book of the 73-77 Stingray.
Last edited by Alan 71; 02-16-2017 at 05:13 PM.
02-16-2017, 05:35 PM
#3
Burning Brakes


Hi Chuck,
Nice to hear you have a 73 and are planning an engine compartment restoration: The judging guide is a great resource it will tell you what color and type of finish parts should have had when delivered from the factory. The 73-77Vette Vues text that Alan mentions above is also a good one to find. However, neither has color photos. The Richard Prince Restoration book below is also a really nice reference book, because it does have color photos which may help. The other two LiCastro books would also be great to add to your 73 reference library. However they are rather rare and pricey if you do find them online. I have some photos of my restored engine in my album section on this site. I have a couple showing it as original for ncrs judging. I have a couple with it with some chrome and polished aluminum finned valve covers. I just added a couple without the smog equipment. Take a look! Plus I'll be very happy to help answer any questions you may have if I'm able. There are also other knowledgeable 73 owners on here that will also be glad to help.
Post up some photos of your car when you can!
Thanks,
Jimmy
Last edited by Tooch1; 02-16-2017 at 09:08 PM. Reason: Added info and a photo.
02-17-2017, 11:37 AM
#5
Intermediate
Thread Starter
Member Since: Sep 2016
Location: Columbus Ohio
Posts: 29
Likes: 0
Received 0 Likes
on
0 Posts
The first thing I am looking for is a pictures of the engine compartment without the engine but finished paint so I can identify what parts are painted in what finish and color. This is the one item that is not clear in any pictures of finished engine compartments.
02-17-2017, 01:09 PM
#6
Burning Brakes
All my engine photos are posted in my album on this forum. If you need something else just let me know. Hope they help.
Alan71, may have some pics from his 71 restoration, that will give you a pretty darn good idea. There wasn't much difference between the years as far as hood hinges, fenderwells, and firewall. I never removed my engine during my resto, I just used the J. G. To double check items, and cleaned/ refinished everything as best I could for judging. Most of the engine bay is a satin black/natural fiberglass/natural black plastic or rubber. ( I used Krylon Satin, and John Deere Blitz Black ).Here's the page from the JG they may help until you get yours. I know your anxious to get things right, wait until you get the Judging Manual, so you won't have to do things twice. I see you have an L48. What color is your car? Convertible or Coupe? Options?
Take care!
Tooch
Last edited by Tooch1; 02-18-2017 at 08:24 PM.
02-17-2017, 01:49 PM
#7
Intermediate
Thread Starter
Member Since: Sep 2016
Location: Columbus Ohio
Posts: 29
Likes: 0
Received 0 Likes
on
0 Posts
Jimmy,
The car was originally Elkhart Green with Saddle interior and has been painted a Medium Metallic Red with a black interior conversion. Because of this change I am not looking to make the car more than it is, a driver. But that being said I would like it to look period correct to the non enthusiast.
The sheet you posted is perfect! I will continue to look at pictures and posts to gather information.
I plan on driving it this weekend to enjoy the weather then tear into it Monday to. If i did not have to rebuild the trans already and replace the headers with stock manifolds I would likely go your route and just detail in place. But with those two major items removed it just makes more sense to remove the engine and make the job that much easier.
Thanks for the great resources!
02-18-2017, 08:19 PM
#8
Burning Brakes
Chuck,
Here is a photo of forum member Donnie73's original 73 engine bay without the engine. Doesn't get any better than this. He posted it for me on another thread here about engine firewall plugs..... Like I said, most is satin black,low gloss to a gloss black,original FG, or rubber.
Aren't Alan's photos just simply amazing 😉??
Hope this helps with your restoration!
Tooch
Last edited by Tooch1; 02-20-2017 at 08:40 AM.
02-19-2017, 05:23 AM
#9
Safety Car


engine-compartment-resto-assembly
You'll find many other similar threads here on the forum as a poster above suggested...best source is the forum here. Tooch is a real student of 73 so can help with the technical detail.
Your greatest challenge, as you point out, is to match the shades (black) described with paint on the shelf. Over the decades, gloss has really become gloss but whose gloss do you use? Semi-gloss, flat, etc all have several vendors but the challenge is which to select. You'll find suggestions here on the forum for vendor products to match the color you'll need and what others have found success with to match original shades and gloss sheens.
What you'll want to achieve is a differentiation of black gloss sheens across the engine compartment on brackets, compartment side walls as well as plated nuts and bolts such as black phosphate or black oxide. Eastwood.com is a good source to study and learn the various finishes. As well as spend a lot of $.
Good luck and keep us posted!
 02-20-2017, 08:20 AM
#10
Team Owner
Member Since: Sep 2006
Location: Westminster Maryland
Posts: 30,173
Likes: 0
Received 2,878 Likes
on
2,515 Posts
Hi,
"What you'll want to achieve is a differentiation of black gloss sheens across the engine compartment on brackets, compartment side walls�"
This is one of the reasons that Krylon #1613 (not #51613) can be useful.
Since it's acrylic lacquer, how it's sprayed �wet/dry, heavy/light, affects what the gloss level turns out to be.
Thus it can be useful for parts that were dipped and typically displayed a higher degree of gloss, or for things that were minimally sprayed, as was done with the aprons, and display very little gloss.
Regards,
Alan
02-20-2017, 09:19 AM
#11
Advanced
Would this information also hold true for other model years? Specifically 1969?
Chuck,
All my engine photos are posted in my album on this forum. If you need something else just let me know. Hope they help.
Alan71, may have some pics from his 71 restoration, that will give you a pretty darn good idea. There wasn't much difference between the years as far as hood hinges, fenderwells, and firewall. I never removed my engine during my resto, I just used the J. G. To double check items, and cleaned/ refinished everything as best I could for judging. Most of the engine bay is a satin black/natural fiberglass/natural black plastic or rubber. ( I used Krylon Satin, and John Deere Blitz Black ).Here's the page from the JG they may help until you get yours. I know your anxious to get things right, wait until you get the Judging Manual, so you won't have to do things twice. I see you have an L48. What color is your car? Convertible or Coupe? Options?
Take care!
Tooch
02-20-2017, 09:34 AM
#12
Burning Brakes
Just PM me your home email and I'll be happy to get it to you.
Tooch
02-20-2017, 10:03 AM
#13
Safety Car


Member Since: Apr 2007
Location: PHOENIX AZ. WHAT A MAN WON"T SPEND TO GIVE HIS ASS A RIDE
Posts: 3,678
Received 306 Likes
on
220 Posts
I would suggest that you go to a NCRS meet look and take pictures of the cars being judged. This plus the books will give you a good idea of what factory finish was. Good luck.
02-20-2017, 01:24 PM
#14
Team Owner
For a nice 'driver' car:
Engine compartment surfaces are semi-FLAT or satin black; engine compartment components (that should be black) are semi-GLOSS black.
Regardless of what some home-made sheet in an NCRS manual states, I have never seen GLOSS black on anything in a [new] C3 car.
Wheel wells, wiper bay, interior [black] trim are all semi-flat or satin black (no difference between them except that those terms are used by different paint suppliers).
If your wiring has been painted (or is grimy, dirty), wipe wires down with lacquer thinner dampened cloth. Once all that cr@p has been removed from the insulation, give it a good coating or two of a polymer protectant like Nu-Vinyl or Mequiar's protectant for plastics. Do the same from rubber hoses (including radiator and heater hoses).

My engine compartment doesn't conform to NCRS 'requirements' because I have protected ALL bare metal parts so that they will no longer rust/corrode. I still want the car to appear as 'stock'; but I don't want the grief of cleaning/protecting bare metal parts all the time.
Last edited by 7T1vette; 02-20-2017 at 01:33 PM.
The following users liked this post:
Tooch1 (02-20-2017)
02-20-2017, 04:03 PM
#15
Burning Brakes
Hi 7T1,
Thanks for posting a photo of your engine bay. It looks really nice. I can appreciate all the hard work and effort it takes to get it to look and stay that way.
Tooch
Thanks for posting a photo of your engine bay. It looks really nice. I can appreciate all the hard work and effort it takes to get it to look and stay that way.
Tooch