

LS3 into my 72


Melting Slicks

Joined: Aug 2008
Posts: 2,200
Likes: 3
From: Lehigh county Pennsylvania
I have no intention of planting an LS in my engine bay anytime soon. But I do enjoy your photography and write up.
I don't know why, but I would have thought some enterprising firm would have put together a kit with all the needed parts for this swap, ala the Steeroids kit.
I don't know why, but I would have thought some enterprising firm would have put together a kit with all the needed parts for this swap, ala the Steeroids kit.
Thread Starter
Race Director


Joined: Dec 1999
Posts: 19,610
Likes: 778
From: Forked River NJ
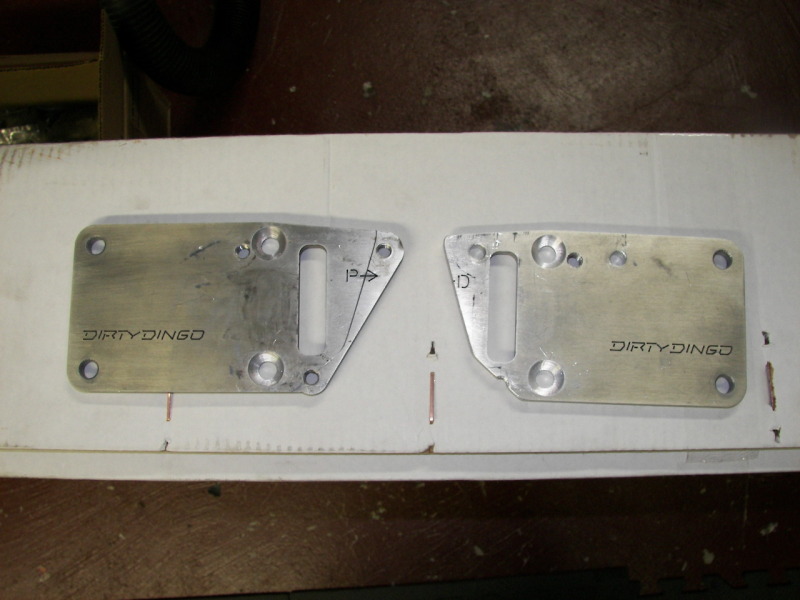
Just a few minor things from this morning. The motor mount plates I had to modify. They were not the correct ones and the spacing was wrong. Rather than buy another set I just used these and redrilled the correct location holes and cut away a small amount of the plate. Not the prettiest piece but they are just motor mounts.
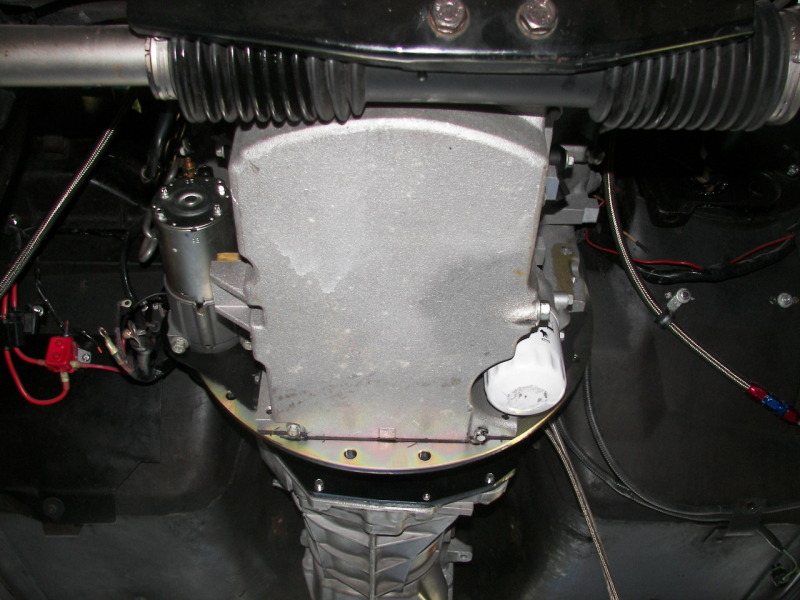
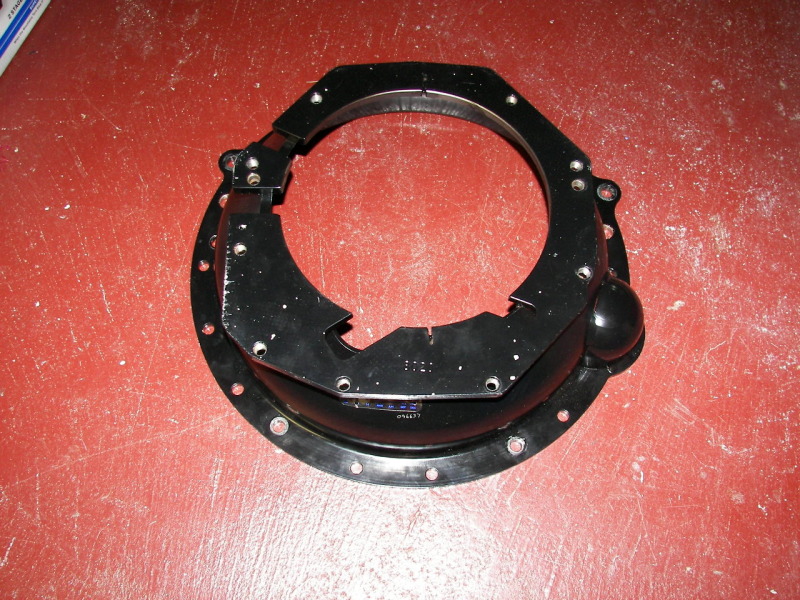
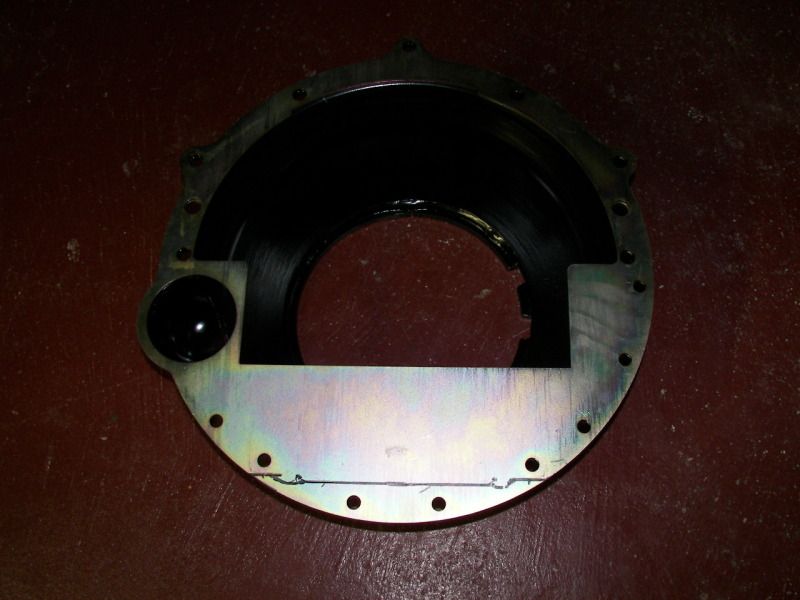
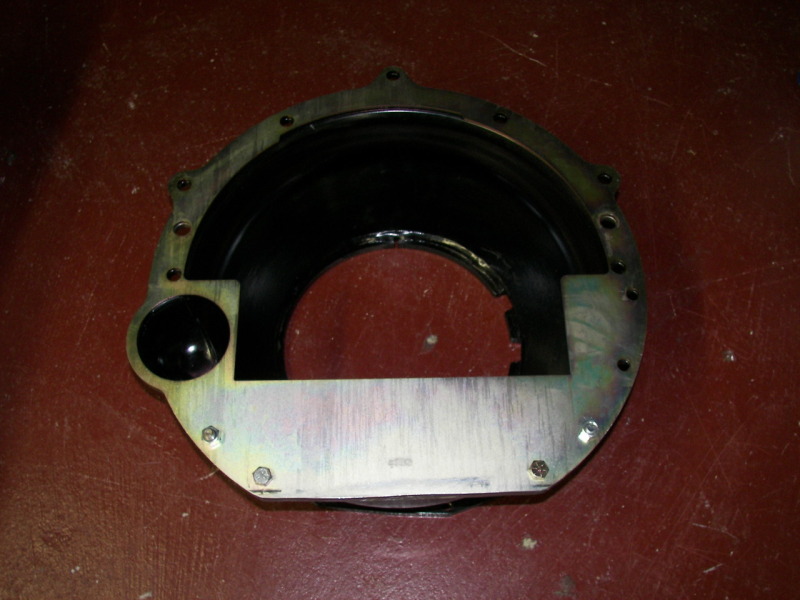
The bottom of the Quicktime bellhousing hangs down pretty low under the oil pan. Looking at it if it ever caught on a speed bump or something in the road it would do some major damage. I marked up the housing where to cut and got out the sawzall and cut the offending part of the bell off. It did not ruin the integrity of the bell but I'm not worried if it blows out the bottom onto the road. I just lost 2 bolt holes at the very bottom. Once I get the motor off the stand I can do any final touch up but it looks to be very close to the bottom of the pan.
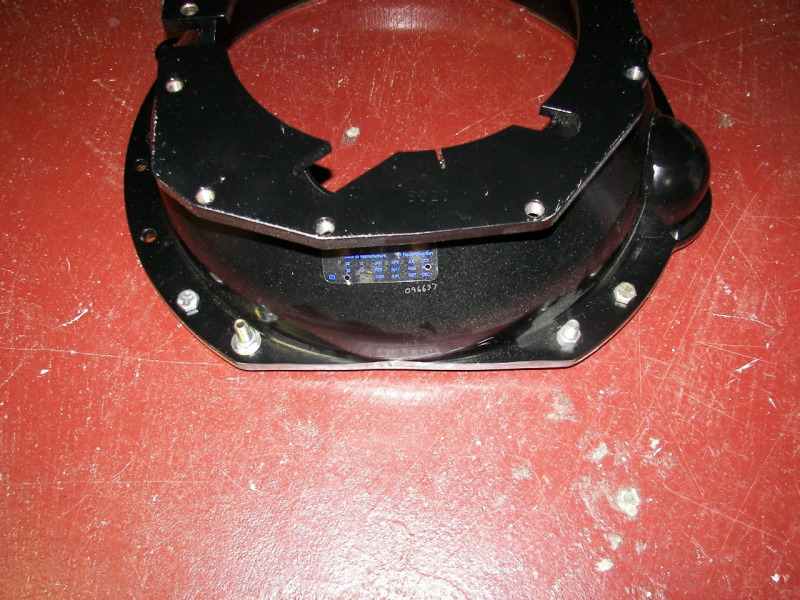
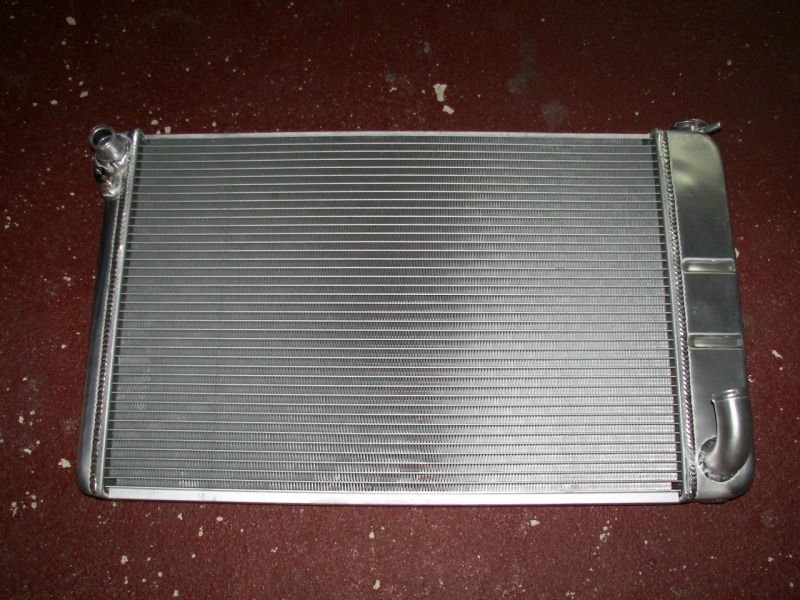
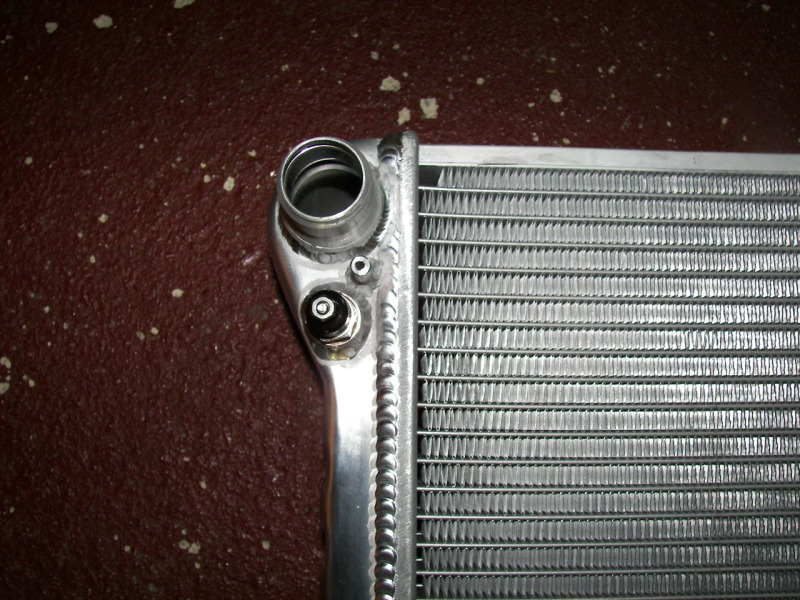
Finally my radiator arrived from Dewitts. All setup with the correct size water neck and steam tube and a spot for the fan sensor. These are almost to pretty to put in the car.
The bottom of the Quicktime bellhousing hangs down pretty low under the oil pan. Looking at it if it ever caught on a speed bump or something in the road it would do some major damage. I marked up the housing where to cut and got out the sawzall and cut the offending part of the bell off. It did not ruin the integrity of the bell but I'm not worried if it blows out the bottom onto the road. I just lost 2 bolt holes at the very bottom. Once I get the motor off the stand I can do any final touch up but it looks to be very close to the bottom of the pan.
Finally my radiator arrived from Dewitts. All setup with the correct size water neck and steam tube and a spot for the fan sensor. These are almost to pretty to put in the car.
Thread Starter
Race Director
Joined: Dec 1999
Posts: 19,610
Likes: 778
From: Forked River NJ
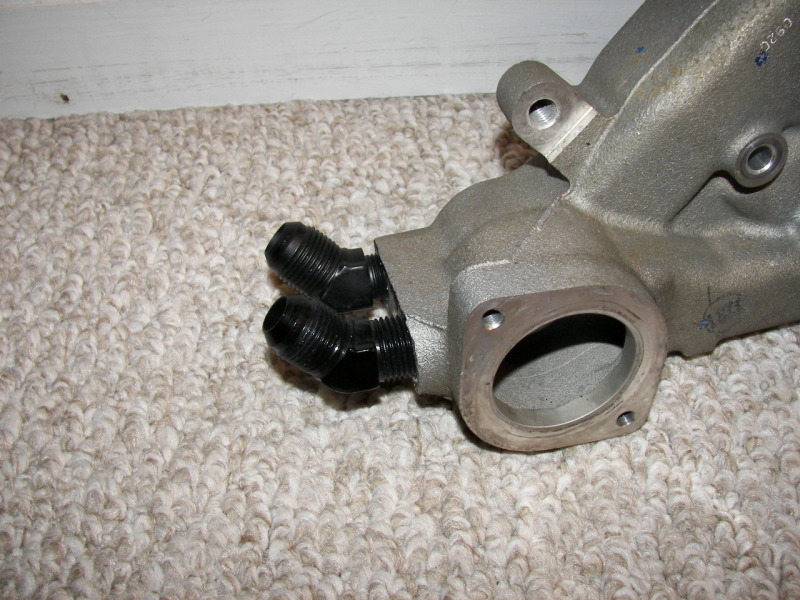
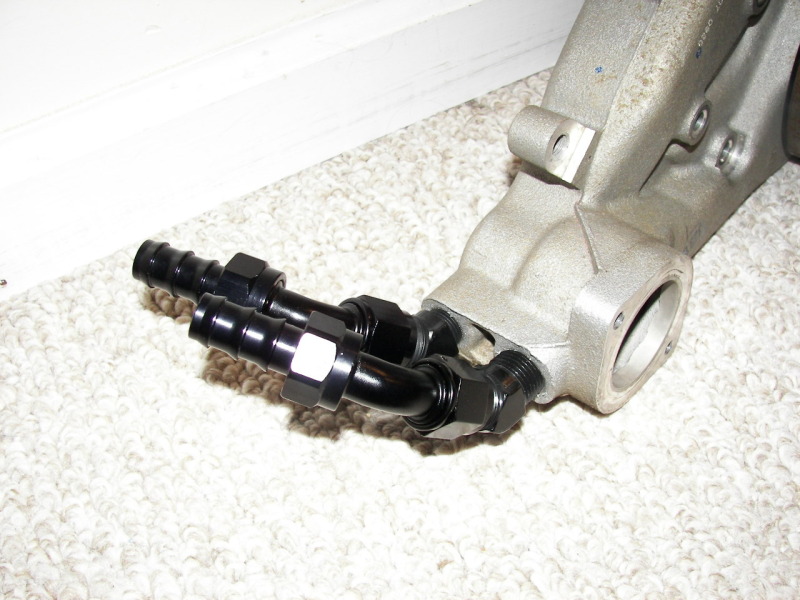
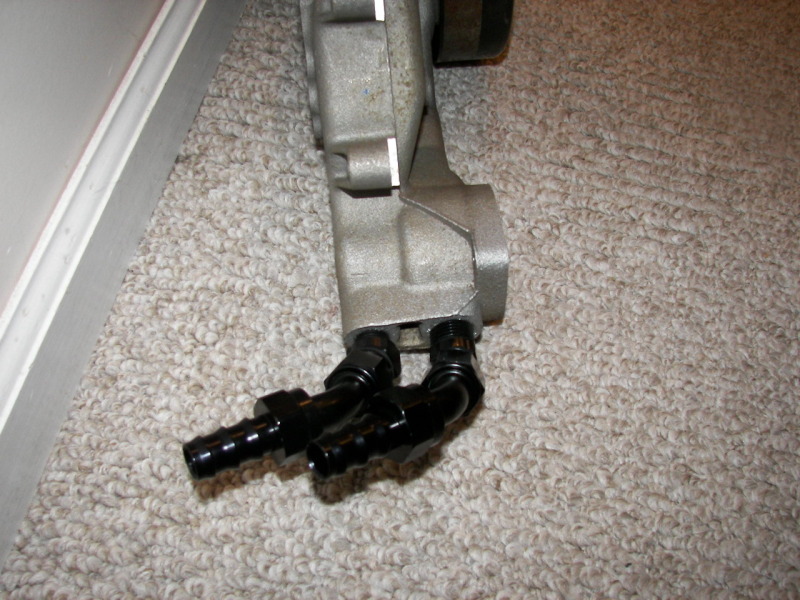
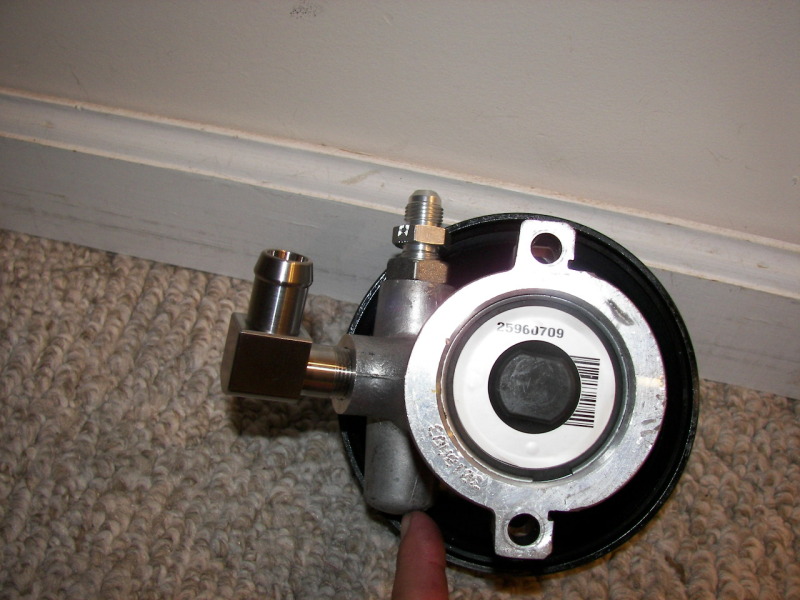
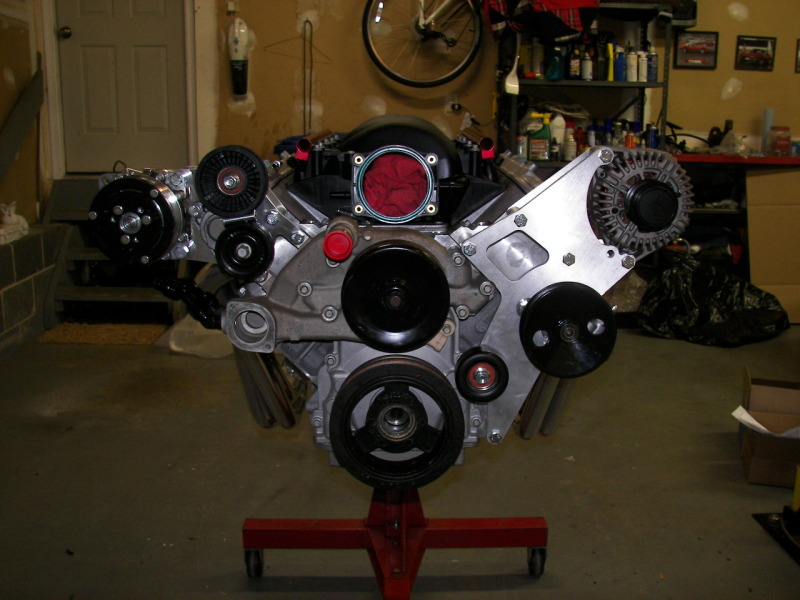
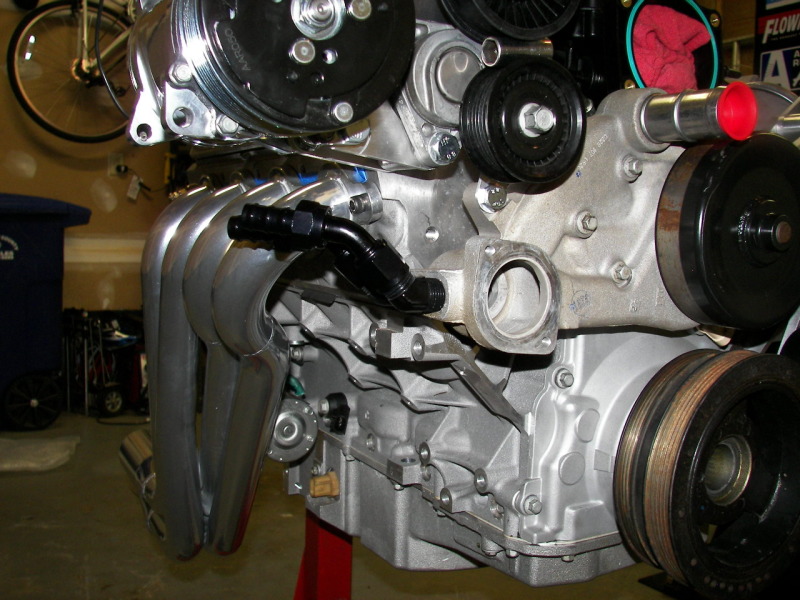
Just a couple of small things I have been working on in the evening. The water pump fittings have to be removed as they will hit the upper control arm mounting. I removed the nipples and threaded the holes. I installed 2 45 degree adapter fittings and then I will use 2 45 degree hose ends for the hot water. These will lead to the Vintage AC unit along the inner fender back to the AC unit.
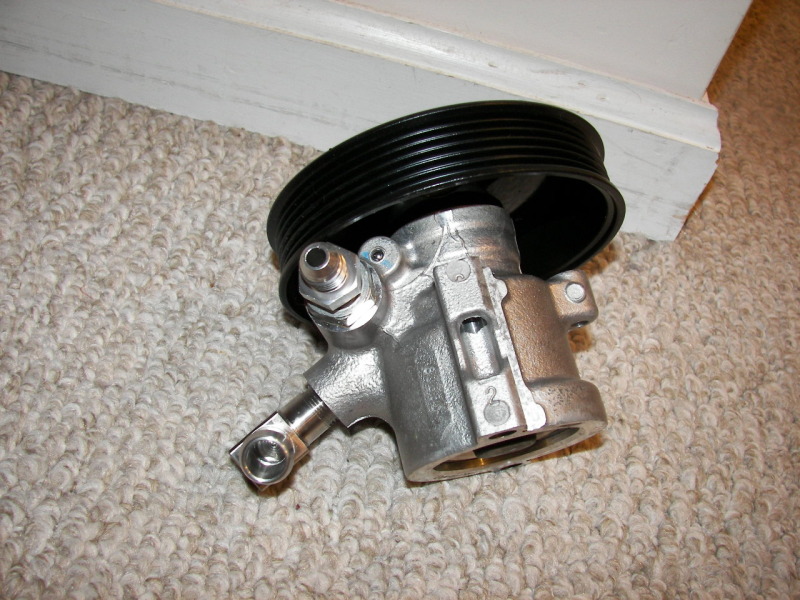
I also needed to rework the power steering pump. As you have seen in previous posts I had to remount this and use a smaller pulley. The new mount brackets clock the pump 180 degrees from the stock location. This is actually good on the pressure side as it puts it straight up vertical. Not so good on the inlet side. It puts the tube dwon about 15 degrees and pointing away. I threaded this hole and installed a 90 degree Stainless steel fitting. This will allow me to run the remote reservoir. I have not decided if I will run the stock Vette one or have a custom one in there.
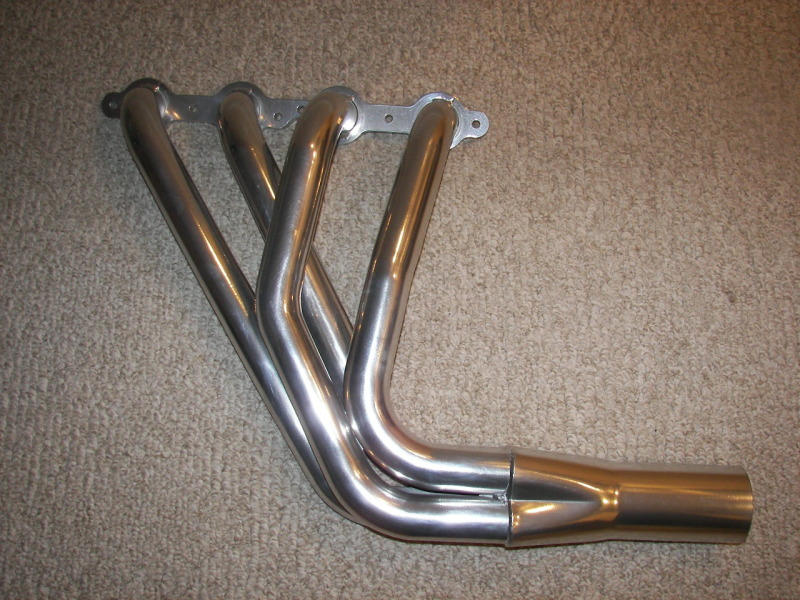
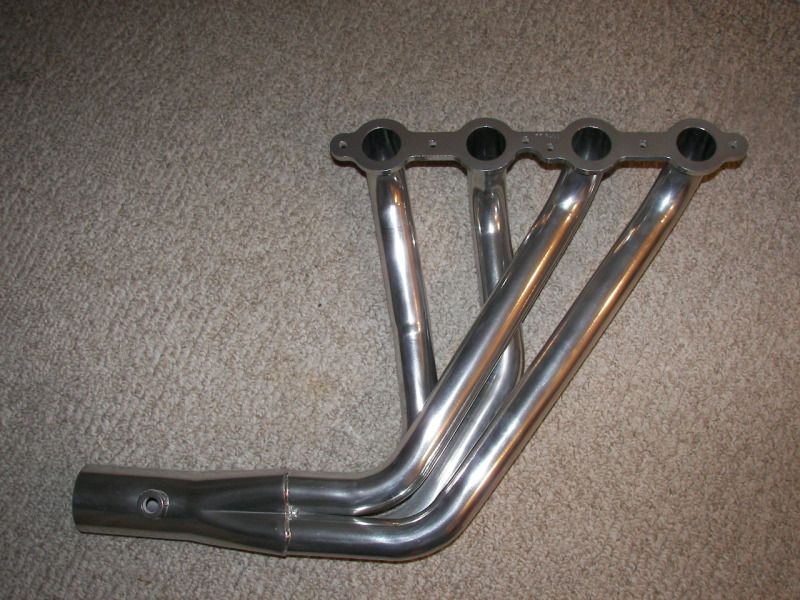
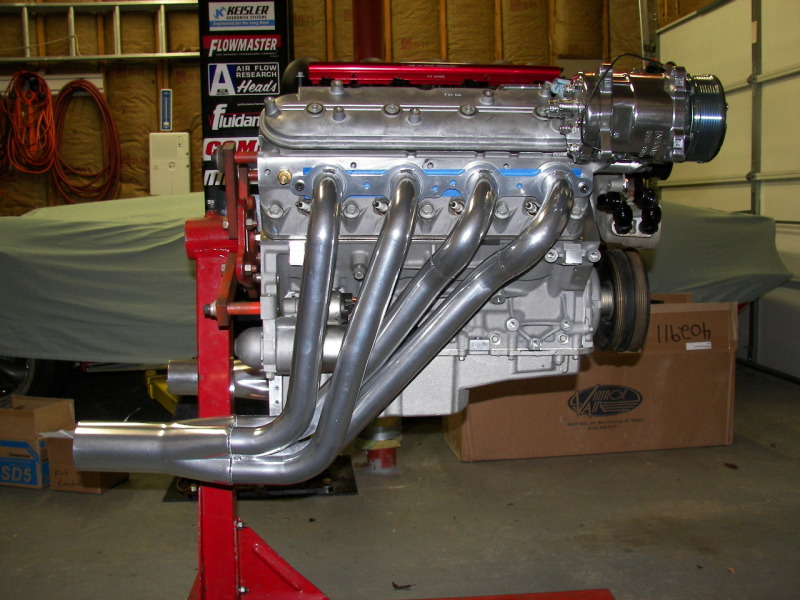
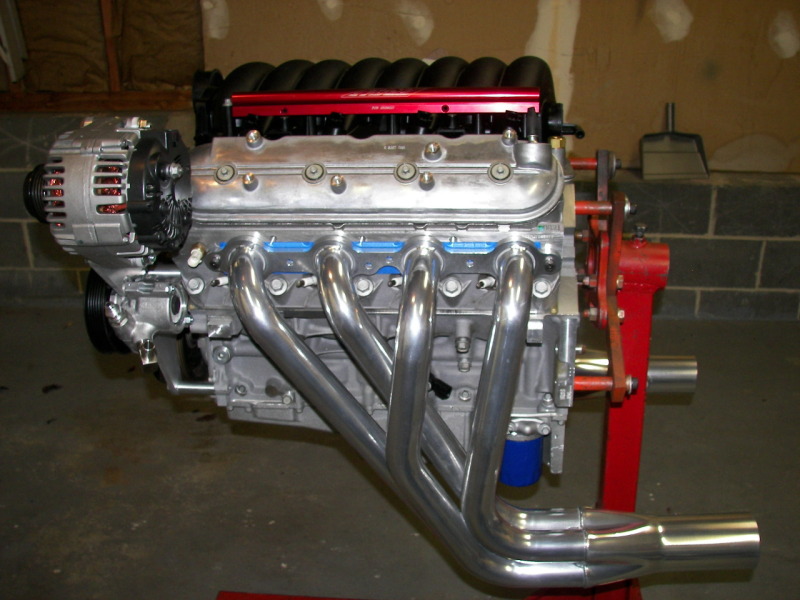
And last the new headers arrived yesterday.

I also needed to rework the power steering pump. As you have seen in previous posts I had to remount this and use a smaller pulley. The new mount brackets clock the pump 180 degrees from the stock location. This is actually good on the pressure side as it puts it straight up vertical. Not so good on the inlet side. It puts the tube dwon about 15 degrees and pointing away. I threaded this hole and installed a 90 degree Stainless steel fitting. This will allow me to run the remote reservoir. I have not decided if I will run the stock Vette one or have a custom one in there.
And last the new headers arrived yesterday.


Thread Starter
Race Director
Joined: Dec 1999
Posts: 19,610
Likes: 778
From: Forked River NJ
Yes the headers are C3 specific. I got them from Josh at Custom Image. I was looking for a set of 1 7/8 but nobody makes them for a C3 and looking at all the data on the C5 and C6 forums the need for the 1 7/8 does not come until you are well up in the HP range or a forced induction. Most guys are seeing only a few HP difference in the mid 500 HP range. Unless I wanted to spend big $$$ for a custom set of 1 7/8 tubes these should do fine.
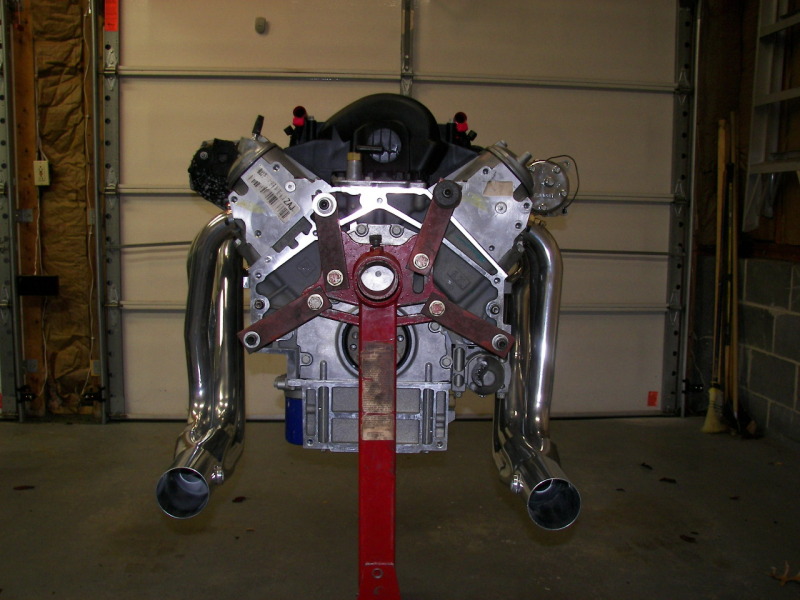
This weekend I am going to bolt everything onto the motor which is on the stand to see how it fits and I'll post a picture.
Working on the fuel system tonight. Getting the fuel pump and fittings all done.
This weekend I am going to bolt everything onto the motor which is on the stand to see how it fits and I'll post a picture.
Working on the fuel system tonight. Getting the fuel pump and fittings all done.
Drifting


Joined: Oct 2008
Posts: 1,496
Likes: 6
From: springfield ohio
Gordonm, nice work. I like what you come up with on the water pump, could you share the part numbers for that setup? The power steering pump turned out nice as well, that's what I was planning to do with mine and running a stainless canister off to the side or mounted to the accessory bracket, not sure yet. Those headers look like the ones I picked up from Vette aid, which I believe are the ones that Josh designed. I under stand that right now Vette Aid has a limited supply of the 1 7/8 headers for $900.
I hope to have my LS dropped in this weekend. Right now I am cleaning up the engine bay and spraying in Lizard skin on the fire wall and floor boards. I will be replacing the battery cable as soon as my order comes in, hopefully tomorrow.
Riggs
I hope to have my LS dropped in this weekend. Right now I am cleaning up the engine bay and spraying in Lizard skin on the fire wall and floor boards. I will be replacing the battery cable as soon as my order comes in, hopefully tomorrow.
Riggs
Thread Starter
Race Director
Joined: Dec 1999
Posts: 19,610
Likes: 778
From: Forked River NJ
Gordonm, nice work. I like what you come up with on the water pump, could you share the part numbers for that setup? The power steering pump turned out nice as well, that's what I was planning to do with mine and running a stainless canister off to the side or mounted to the accessory bracket, not sure yet. Those headers look like the ones I picked up from Vette aid, which I believe are the ones that Josh designed. I under stand that right now Vette Aid has a limited supply of the 1 7/8 headers for $900.
I hope to have my LS dropped in this weekend. Right now I am cleaning up the engine bay and spraying in Lizard skin on the fire wall and floor boards. I will be replacing the battery cable as soon as my order comes in, hopefully tomorrow.
Riggs
I hope to have my LS dropped in this weekend. Right now I am cleaning up the engine bay and spraying in Lizard skin on the fire wall and floor boards. I will be replacing the battery cable as soon as my order comes in, hopefully tomorrow.
Riggs
Here is the 3/8 to 10AN fitting
http://www.summitracing.com/parts/EAR-AT982311ERL/
1/2 to 10 AN fitting
http://www.summitracing.com/parts/EAR-AT982310ERL/
I am using 10 AN lines for both hoses to and from the heater core on the Vintage Ac system. This will look clean and provide plenty of flow. I also used 10 AN 45 fittings coming off the adapters. I am using a Twist lock hoses for the fuel and water lines. Braided lines are a PIA to assemble and for fuel they also stink (smell) so I am using the twist lock on everything.
Josh does not have any 1 7/8 headers for the C3 right now. He said maybe down the road he will.
Last edited by Gordonm; Oct 20, 2011 at 09:30 PM.

Melting Slicks

Joined: Sep 2004
Posts: 2,655
Likes: 19
I saw you were planning on Vintage AC too. I went with them on my LS swap too, they're great!!! They refunded for the SBC brackets I didn't use and other swapped other parts.
Just a suggestion, get a trinary switch to control 1 fan. It's nearly impossible to get AC functions to work thru the ecu.
Nevermind, just saw you got the bracket already......
Just a suggestion, get a trinary switch to control 1 fan. It's nearly impossible to get AC functions to work thru the ecu.
Nevermind, just saw you got the bracket already......
Last edited by Garys 68; Oct 20, 2011 at 10:04 PM.
Thread Starter
Race Director
Joined: Dec 1999
Posts: 19,610
Likes: 778
From: Forked River NJ
I saw you were planning on Vintage AC too. I went with them on my LS swap too, they're great!!! They refunded for the SBC brackets I didn't use and other swapped other parts.
If you nave not purchased yet, see if they'll swap out the standard parts for the Kwik bracket, and get the trinary switch.
When I did mine, the Kwik bracket had just come out and I had just finished making my own version.
If you nave not purchased yet, see if they'll swap out the standard parts for the Kwik bracket, and get the trinary switch.
When I did mine, the Kwik bracket had just come out and I had just finished making my own version.

Thread Starter
Race Director
Joined: Dec 1999
Posts: 19,610
Likes: 778
From: Forked River NJ
I ordered mine with the Kwik brackets and the Trinary switch. I don't think they gave me any credit for the brackets that were not in the kit or the switch in the kit. I have not opened all the packages yet but it sure was not a bargain. They just added the cost of the switch and brackets and the polished compressor to the original cost of the kit.
Melting Slicks
Joined: Sep 2004
Posts: 2,655
Likes: 19
I'm running one fan off the ecu. The other runs off an adjustable radiator temp sensor AND the trinary switch. Works great and is easily adjustable. The ecu will continue to run the fan after shutoff if the temp is too high. Kind of a nice feature.

Drifting
Joined: Feb 2005
Posts: 1,798
Likes: 13
From: Southeastern VA
 Seriously, your making excellent progress, it's not hard...just really time consuming
R/
Jeff
Drifting

Joined: Nov 2007
Posts: 1,513
Likes: 34
From: columbus ohio
gordon
just came over from c2 for a look. my builder went with the vintage
air system also. the trinary switch if mandatory for ac. i know nothing
about this switch or the engine swap. i had the hot cam put in the ls3
and it sounds like a sbc. also my vette is a stock 63 with the stock frame.
you will not need any more hp with a stock setup. i put a rs500 tranny
in with a 3.36 rear. just cruising in second, and then dropping the pedal
breaks the tires way loose. also, my temp gauge reads 180 with the
dewitt m24 radiator. i hope it is reading low since these engines should
be around 190 to 200. the fans kick on when i drive the vehicle around
and stop and idle for the mail box. the fans are set for 190. best of luck
jim
ps ya doing fine work.


Race Director


Joined: Feb 1999
Posts: 19,659
Likes: 34
From: Lenoir City Tennessee
Ci 6, 8 & 10 Veteran
St. Jude Donor '05-'06-'07-'08-'09-'10-'11-'12-'13-'14-'15
I love the water pump setup Gordon. I am seeing so many things going on with the newer LS swaps its going to make me pull mine and redo a bunch of stuff that can be done better. You and Riggs have given me several ideas that I would like to incorporate into mine. It never ends. 