
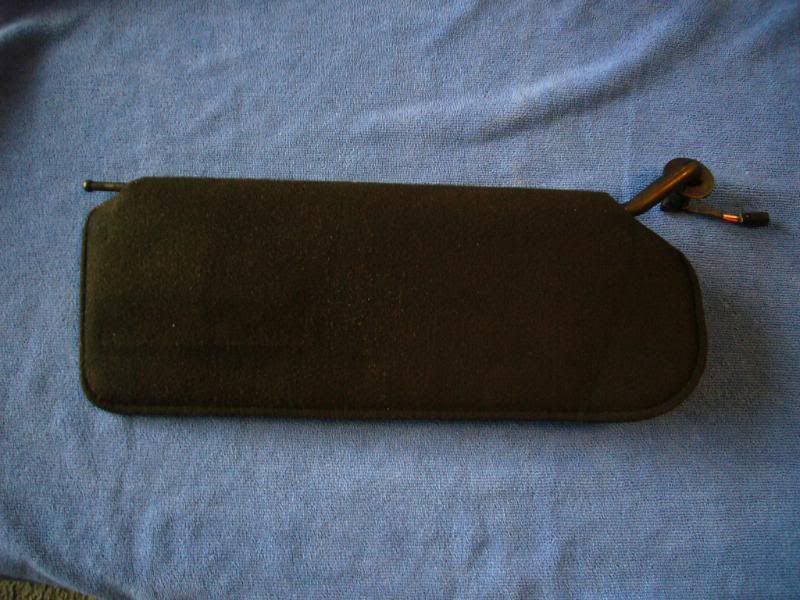
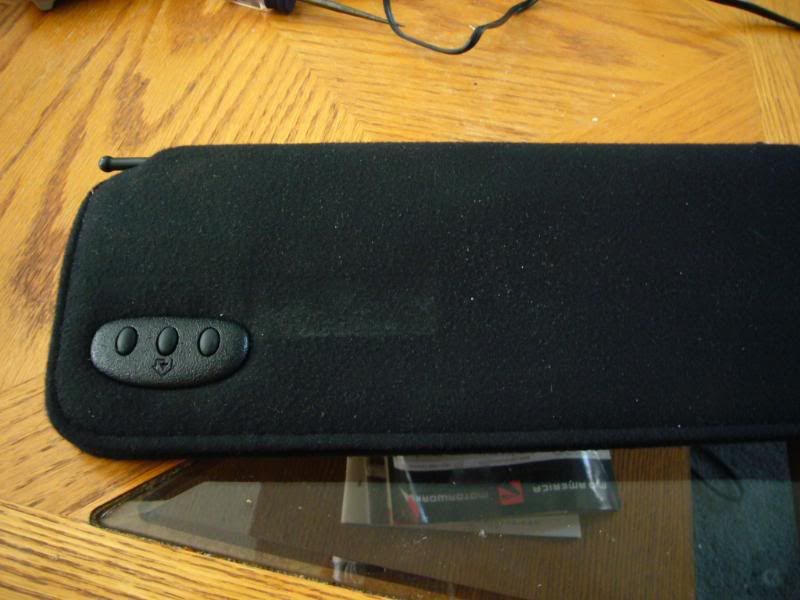
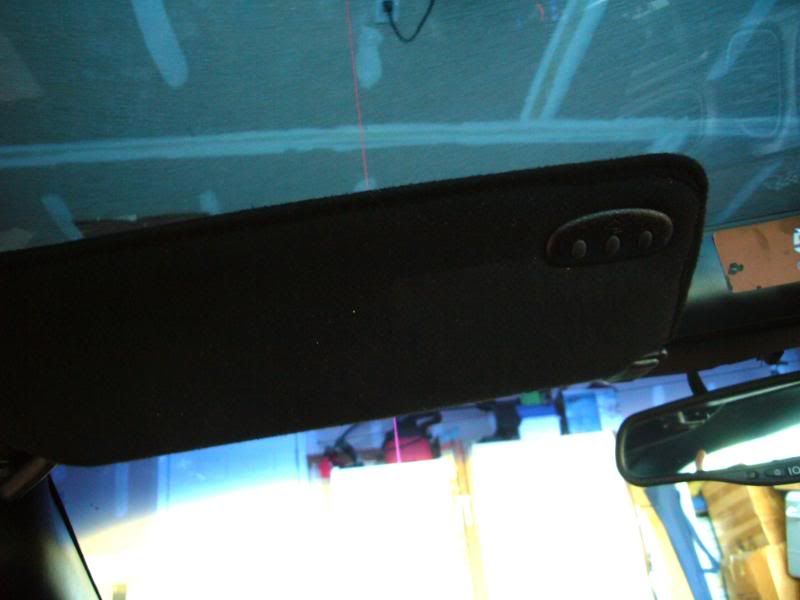
Installed my Homelink module in my visor


 07-11-2009, 12:20 PM
#42
Pro


Good Luck
HomeLink Training Instructions
Process: Program a garage door opener
Vehicle: 2003 Chevrolet Corvette
HomeLink Location: Visor
Garage Door Opener: Craftsman
Before you begin, please verify the number of LED lights you have. If you have 3 LED lights, one above each button, your unit is not HomeLink. Please contact your vehicle dealer for training assistance. If you have 1 LED light above the center button, your unit is HomeLink and you may proceed to the instructions below.
CAUTION!
Before programming HomeLink to a garage door opener or gate operator, make sure that people and objects are out of the way of the device to prevent potential harm or damage. Your motorized garage door or gate will open and close while you are programming HomeLink. Do not program HomeLink if people or pets are in the path of the door or gate. A moving garage door or gate can cause serious injury or death to people and pets or damage to objects.
Vehicle exhaust contains carbon monoxide, a dangerous gas. Do not run the vehicle's engine while programming HomeLink. Exhaust gas can cause serious injury or death. When programming a garage door opener, it is advised to park outside of the garage.
Do not use HomeLink with any garage door opener that lacks safety stop and reverse features as required by U.S. federal safety standards (this includes any garage door opener model manufactured before April 1, 1982). A garage door that cannot detect an object signaling the door to stop and reverse - does not meet current U.S. federal safety standards.
If programming a garage door opener or gate, it is advised to unplug the device during the HomeLink programming and also if performing the "cycling" process to prevent possible motor burn-up.
NOTE: Some vehicles may require the ignition to be turned on or to the second (or “accessory” or ACC) position for training and/or operation of HomeLink. It is also recommended that a new battery be replaced in the hand held transmitter of the device being trained to HomeLink for quicker training and accurate transmission of the radio frequency.
1. For first time training, press and hold the two outer HomeLink buttons, releasing only when the HomeLink indicator light begins to flash after 20 seconds. (Do not perform this step when training the additional HomeLink buttons.)
2. Position the hand-held transmitter 1-3 inches away from the HomeLink surface (located on your visor), keeping the HomeLink indicator light in view.
3. Using both hands, simultaneously press and hold both the desired HomeLink button and hand held transmitter button. DO NOT release until the HomeLink indicator light flashes slowly and then rapidly. When the indicator light flashes rapidly, both buttons may be released. (The rapid flashing indicates successful training.)
Note: Some garage door openers may require you to replace step 3 with the “cycling” procedure noted in the “View Canadian Instructions” section.
4. Press and hold the trained HomeLink button and observe the indicator light.
•If the indicator light is solid/continuous, training is complete and your device should activate when the HomeLink button is pressed and released.
•If the indicator light blinks rapidly for 2 seconds and then turns a solid/continuous light, proceed with the following training instructions for a rolling code device. A second person may make the following steps quicker and easier. Please use a ladder or other device. Do not stand on your vehicle to perform the next steps.
5. At the garage door opener receiver (motorhead unit) in the garage, locate the “learn” or “smart” button (usually near where the hanging antenna wire is attached to the unit). If there is difficulty locating the training button, reference the garage door opener’s manual or contact us.
6. Press and release the “learn” or “smart” button (the name and color of the button may vary by manufacturer). NOTE: Once the button is pressed, there are 30 seconds in which to initiate the next step.
7. Return to the vehicle and firmly press and hold the trained HomeLink button for two seconds and release. Repeat the “press/hold/release” sequence up to 3 times to complete the training process.
HomeLink should now activate your device.
Retain the original hand-held transmitter of the RF device you are programming for use in other vehicles, as well as for future HomeLink programming. It is also suggested that upon the sale of the vehicle, the programmed HomeLink buttons be erased for security purposes. To erase the programmed buttons, perform the procedure shown in step number 1.
**To train additional HomeLink buttons, begin with step two.
EDIT-- one other thing I would add is that if visor light is powered constant as opposed to powered with key on and you use the wiring to power the homelink, it will also be always available to use even without a key. What that means is that anyone could walk up to your car if it is parked in the driveway of your house,and either break in to the car or reach in if the top is down or the windows open or door unlocked, and open your garage door. That is why the oem installations usually power the homelink only when the key is on.
Last edited by bestvettever; 07-11-2009 at 12:46 PM.
07-12-2009, 11:53 PM
#43
Safety Car

Member Since: Aug 2004
Location: Southwest Kansas
Posts: 4,772
Received 550 Likes
on
291 Posts
2022 Corvette of the Year Finalist -- Unmodified
2021 C6 of the Year Winner - Unmodified

Guys, is there a way to check the Home-link unit? I got it all wired in and there appears to be no power at the unit. I have checked the wiring from the plug where the visor attaches to the wiring harness back to the plug on the Home-link unit for continuity and I have good connections, but I don't get any lights to come on the unit when trying to program. The lights in the visor work so there is pwer that far. Is there a way to power this thing by battery?
07-13-2009, 12:09 AM
#44
Melting Slicks


Have you tried plugging the visor in and checking the Homelink plug for voltage? If you do have voltage at the plug then I would think the Homelink unit might be bad. You sure you spliced in before the mirror switch? The one that turns the mirror lights off when the mirror cover is shut?
07-13-2009, 12:34 AM
#45
Burning Brakes

Just installed mine about a week ago and LOVE it!! I bought it on ebay and printed off a bunch of directions I found here and it went very well. I dont have any pics yet but man is it convenient.
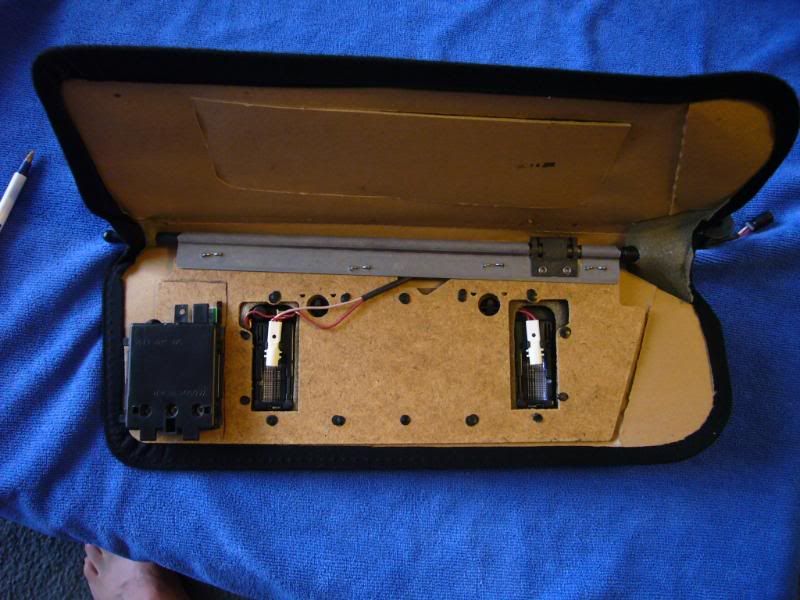
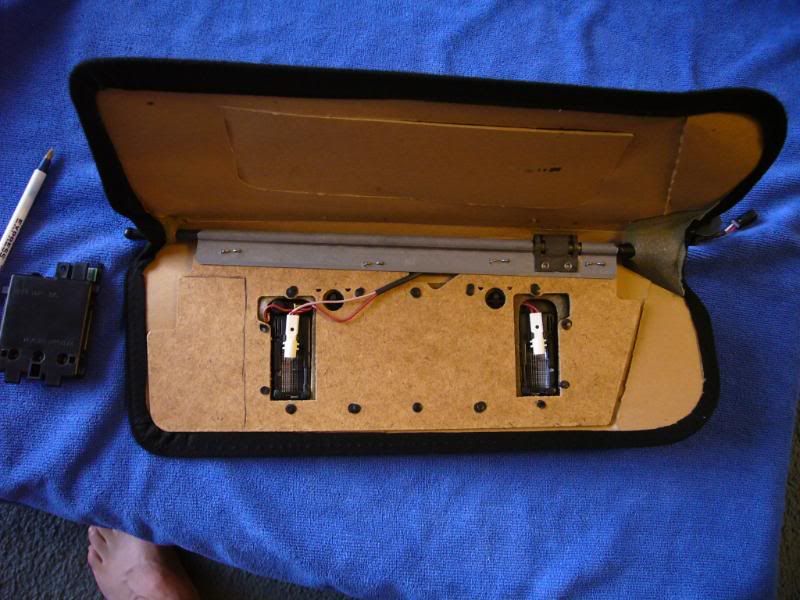
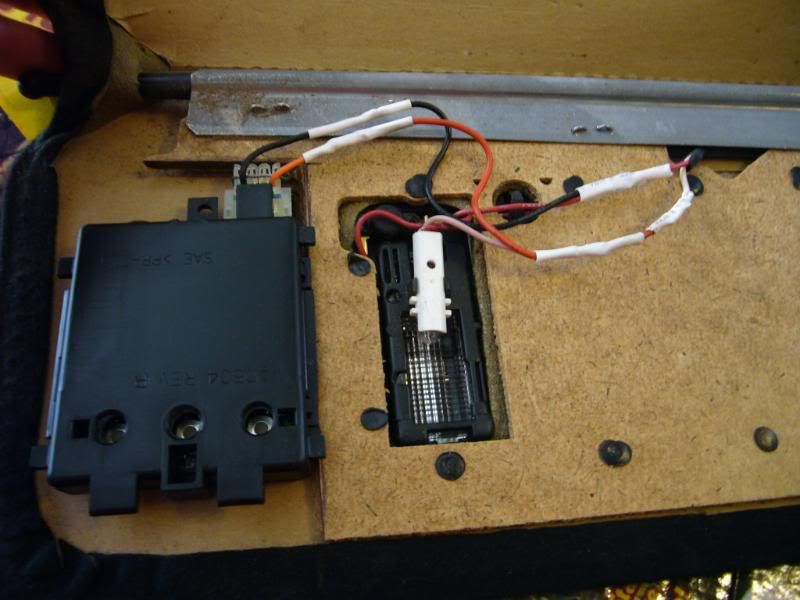
One thing to point out is that the polarity does make a difference for the homelink module.
When I wired it up I left the wires loose coming from the homelink to the butt connectors that went to the mirror wiring.
I brought the whole mirror assembly out to the car and plugged it back into the connector. First the Mirror light lit up but the Homelink light did not come on when I pressed any of the three buttons.
I then switched the wires and shoved them back into the butt connectors and sure enough the Mirror lights came on PLUS the homelink light lit up when I pressed the button. Bingo!!
Had an local place sew it up and everything works great!!
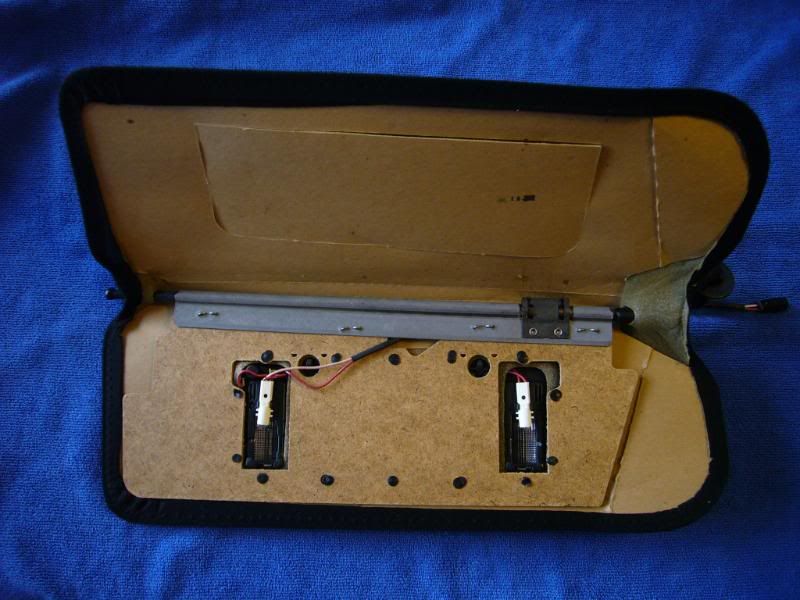
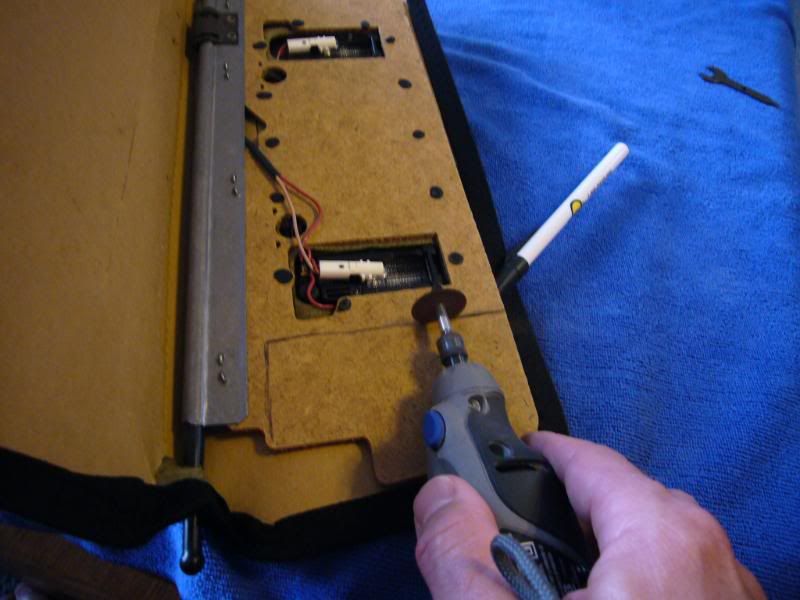
Tell you what though. The scariest part for sure is when you have your whole visor on your desk and you start cutting the threads and opening it up. Kind of felt like a doctor. LOL. Almost as bad is cutting the outside. Trying to make sure you dont cut too much and place the whole just right is a little nerve racking.
For sure this is one great DIY mod!!
One thing to point out is that the polarity does make a difference for the homelink module.
When I wired it up I left the wires loose coming from the homelink to the butt connectors that went to the mirror wiring.
I brought the whole mirror assembly out to the car and plugged it back into the connector. First the Mirror light lit up but the Homelink light did not come on when I pressed any of the three buttons.
I then switched the wires and shoved them back into the butt connectors and sure enough the Mirror lights came on PLUS the homelink light lit up when I pressed the button. Bingo!!
Had an local place sew it up and everything works great!!
Tell you what though. The scariest part for sure is when you have your whole visor on your desk and you start cutting the threads and opening it up. Kind of felt like a doctor. LOL. Almost as bad is cutting the outside. Trying to make sure you dont cut too much and place the whole just right is a little nerve racking.
For sure this is one great DIY mod!!
07-13-2009, 08:35 AM
#46
Safety Car
Member Since: Aug 2004
Location: Southwest Kansas
Posts: 4,772
Received 550 Likes
on
291 Posts
2022 Corvette of the Year Finalist -- Unmodified
2021 C6 of the Year Winner - Unmodified
I spliced in just like the picture shows here, but I'll plug it in and check for voltage at the plug. Polarity...hmmm, I can swap the wires and check that too. Thanks guys.

 07-13-2009, 09:35 AM
#47
Safety Car
Member Since: Aug 2004
Location: Southwest Kansas
Posts: 4,772
Received 550 Likes
on
291 Posts
2022 Corvette of the Year Finalist -- Unmodified
2021 C6 of the Year Winner - Unmodified
I checked the voltage and was getting 12.2. So I figured it must be the polarity...I switched the wires around and it worked right off. Thanks guys...
07-13-2009, 10:20 AM
#48
Melting Slicks
 07-13-2009, 11:43 PM
#51
Safety Car
Member Since: Aug 2004
Location: Southwest Kansas
Posts: 4,772
Received 550 Likes
on
291 Posts
2022 Corvette of the Year Finalist -- Unmodified
2021 C6 of the Year Winner - Unmodified
That's three of us today. Anyone interested in doing this? I bought a couple extra units...thinking I'd do it for my other vehicles and I end up not having power to the visors, so I have 2 extra units I'll sell. One is for a rolling code and the other is not. I'll take $15 for the non (black) and $20 for the rolling code unit (tan facia, but can be painted)
09-24-2010, 10:54 AM
#54
Tech Contributor


I have received my home link that I got off of E-Bay for$20.00, It was from a Town car, Took it apart but the home link button pad will not come off, It has two legs that snap down on to the main controller, If I try to force it apart it will not snap back together,, any Ideas? Has any body else had this problem???
10-15-2010, 12:40 PM
#55
Pro
Member Since: Dec 2009
Location: Sub-Tropical Retirement Zone
Posts: 593
Likes: 0
Received 1 Like
on
1 Post

Keith (RLYSLO), even though you fired this thread up twenty-two months ago� make no mistake about it� this thread is an archived jewel. The comments / explanations, links and photos made the whole process of the HomeLink transmitter install super easy. Thanks man.
Bruce (rpm462), your excellent photos urged me to try the excellent HomeLink mod / addition to my sunvisor. Thanks, Bruce.
With a gifted older generation HomeLink transmitter (one centered light with no little house logo) from Jack (convertible lover) all the way out there in California I attempted and finished the installation only to be able to go as far as clearing the memory and not being able to program my rolling coded garage door or our community�s front gate. Thanks for your effort, Jack. It is appreciated.
Don (Tulsa Vet Guy), If you haven�t already, I found that by squeezing a letter opener under the button control panel as close to the attachment extensions as possible and by twisting the letter opener the control panel will pop up with a minimum of effort.
~~~~~~~~~~~~~~~~~~~~~~~~~~~~~~~~~~~~~~~~ ~~~~~~~~~~~
The local junkyard allowed me to conduct a search of late model GM and Ford vehicles for the driver�s side sunvisor I was looking for. Fortunately I found it in what I think was a late model Lincoln Continental.
Total cost for the junkyard HomeLink sunvisor� $10.00! I was happy and would be even happier if the HomeLink transmitter module worked.
The transmitter swap (older to newer generation) was as easy as unplugging the front-wired clip and re-plugging it into the newer transmitter.
After securing the second newer generation HomeLink transmitter (one centered light in the middle of a little house logo) in the visor and slowly hand sewing the visor for the second time� I found clearing the memory for training / programming and finally programming both the front gate and garage door in the HomeLink transmitter was super easy and all of the buttons work!

Confirmed: This newer generation HomeLink transmitter throws out a more powerful signal from a greater distance than the two remotes I was using.
This has got to be one of the least expensive / super easy / most useful interior modifications that you will use �every� day!
Semper Fi!
Huurraah!
Bob
Bruce (rpm462), your excellent photos urged me to try the excellent HomeLink mod / addition to my sunvisor. Thanks, Bruce.
With a gifted older generation HomeLink transmitter (one centered light with no little house logo) from Jack (convertible lover) all the way out there in California I attempted and finished the installation only to be able to go as far as clearing the memory and not being able to program my rolling coded garage door or our community�s front gate. Thanks for your effort, Jack. It is appreciated.
Don (Tulsa Vet Guy), If you haven�t already, I found that by squeezing a letter opener under the button control panel as close to the attachment extensions as possible and by twisting the letter opener the control panel will pop up with a minimum of effort.
~~~~~~~~~~~~~~~~~~~~~~~~~~~~~~~~~~~~~~~~ ~~~~~~~~~~~
The local junkyard allowed me to conduct a search of late model GM and Ford vehicles for the driver�s side sunvisor I was looking for. Fortunately I found it in what I think was a late model Lincoln Continental.
Total cost for the junkyard HomeLink sunvisor� $10.00! I was happy and would be even happier if the HomeLink transmitter module worked.
The transmitter swap (older to newer generation) was as easy as unplugging the front-wired clip and re-plugging it into the newer transmitter.
After securing the second newer generation HomeLink transmitter (one centered light in the middle of a little house logo) in the visor and slowly hand sewing the visor for the second time� I found clearing the memory for training / programming and finally programming both the front gate and garage door in the HomeLink transmitter was super easy and all of the buttons work!
Confirmed: This newer generation HomeLink transmitter throws out a more powerful signal from a greater distance than the two remotes I was using.
This has got to be one of the least expensive / super easy / most useful interior modifications that you will use �every� day!
Semper Fi!
Huurraah!
Bob
12-16-2010, 08:44 PM
#56
8th Gear


Member Since: Dec 2009
Location: Renton WA
Posts: 8
Likes: 0
Received 0 Likes
on
0 Posts
I did mine about 6 months ago with your great directions as a guide. A local upholstery shop sewed it back together and there is no trace it was altered. Works great, thanks!
02-12-2011, 10:17 AM
#57
Burning Brakes

Member Since: Nov 2008
Location: Arden NC
Posts: 764
Likes: 0
Received 0 Likes
on
0 Posts
First of all I want to say thanks to everyone that contributed to this awesome thread!
I have a few questions before I set out to do this myself.
1.) Is there a way to identify if the Homelink module has the rolling code capability? I don't want to get burned by not doing my research.
2.) Are you guys doing the sewing or are you depending on other people? I'm not afraid to try it, I just don't want to screw it up.
Thanks!!!!
02-12-2011, 10:42 AM
#58
Pro
Member Since: Dec 2009
Location: Sub-Tropical Retirement Zone
Posts: 593
Likes: 0
Received 1 Like
on
1 Post
I'm pretty sure that the HomeLink module with the little house logo has the newer generation transmitter that will register the newer more secure rolling codes.
Some that have completed this mod have had their upholstery shop sew the visor up for small $ but I chose to sew mine myself using black nylon thread.
To make it the perfect low $ mod I even was able to locate a sunvisor with the proper transmitter from a local "Get your own parts" salvage yard making this mod total out to a whopping $10 for me!
Good luck.
Bob
02-12-2011, 07:55 PM
#59
Safety Car
Member Since: Aug 2004
Location: Southwest Kansas
Posts: 4,772
Received 550 Likes
on
291 Posts
2022 Corvette of the Year Finalist -- Unmodified
2021 C6 of the Year Winner - Unmodified
My wife used our sewing machine to sew mine back up (it's not an upholstery machine either). Looks just fine.
02-13-2011, 09:34 AM
#60
Burning Brakes
Member Since: Nov 2008
Location: Arden NC
Posts: 764
Likes: 0
Received 0 Likes
on
0 Posts
Alright, I feel good about starting this now.
I also did a lot of research on google. Lot's of people are doing this. I had no idea it would be this simple.
Thanks BobAruba and Teebee for the replies.
I also did a lot of research on google. Lot's of people are doing this. I had no idea it would be this simple.
Thanks BobAruba and Teebee for the replies.