Tech Tuesday: C6 Brakes

Brakes
Why Mod?
The answer to this should be obvious. By upgrading your brakes you can stop more quickly, in a shorter distance and decrease fade in racing or heavy, continued use applications (ie canyon runs).
The brake system is composed of the master cylinder, brake fluid, brake lines, discs, calipers, pads and occasionally cooling ducts. And as with other modifications you can spend a lot or a little. A set of pads won’t be too expensive, but if you choose to replace the entire system, you’ll be looking at a couple thousand dollars at least.
What are the negatives? Changing the pads to a more performance oriented pad can result in squealing, increased brake dust (which dirties your wheels more quickly) and decreased pad wear life. Additionally, if you’re unsure of what you’re doing realize that making a mistake on the brake system could cause you and others serious harm.
The most basic change is replacing the pads and is described by CF member, Grenik, below:
First, we are not going to be disconnecting any brake lines or have to deal with any fluids. I would love to see some detailed pics of that process, but this is not it. This is just the pads.
We jacked up the car as described in many posts here. We experienced the same issues as most everyone that tries to jack their car for the first time; the floor jack does not fit under the front of the car well. As described in other posts, we pulled up on some wood and were able to get the jack under the car. I purchased BMW pucks for my 3 ton aluminum jack stands. Jacked the car up (font and back) and got it on the stands. We took off all the wheels, loosening the lug nuts before jacking the car.
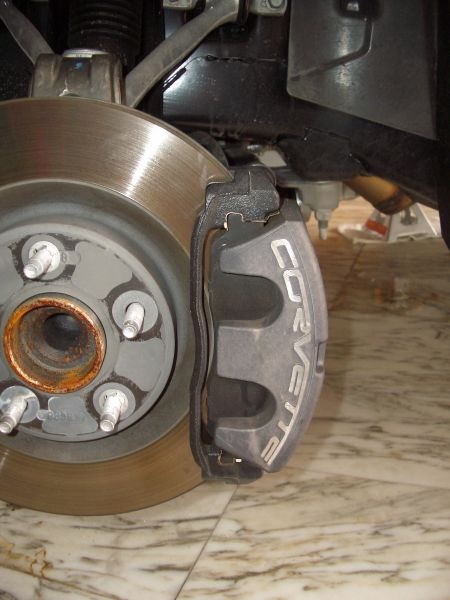
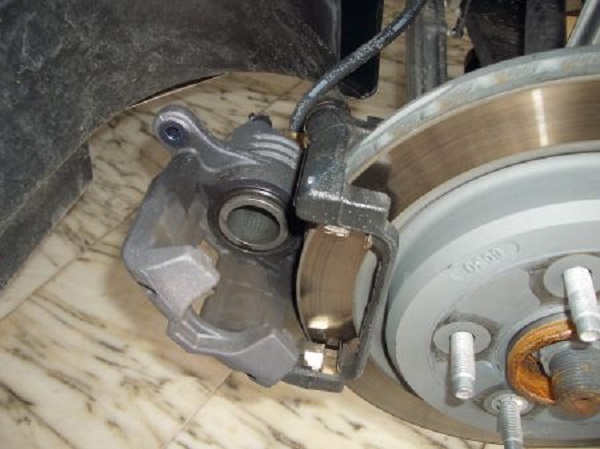
Here is the rotor and caliper for the front drivers side.
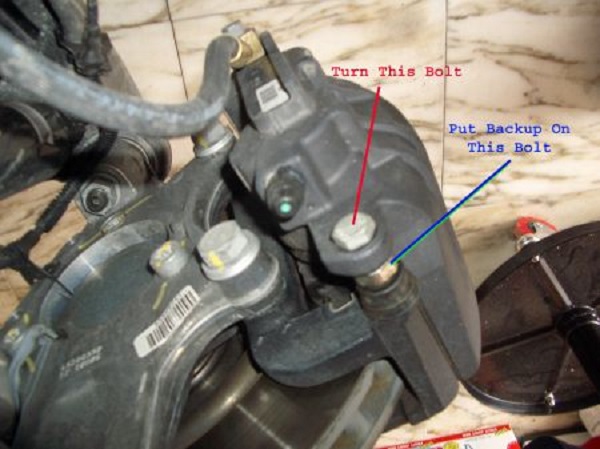
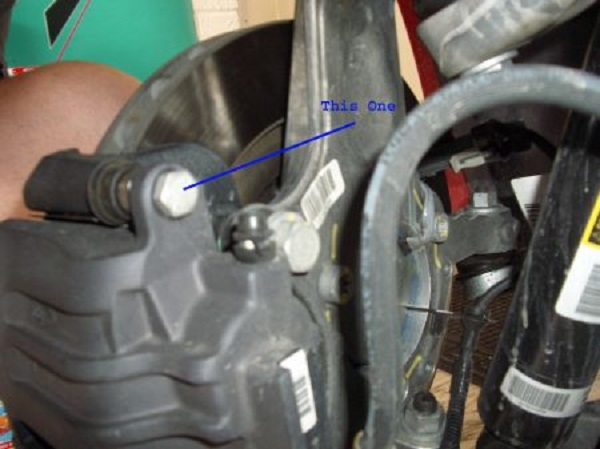
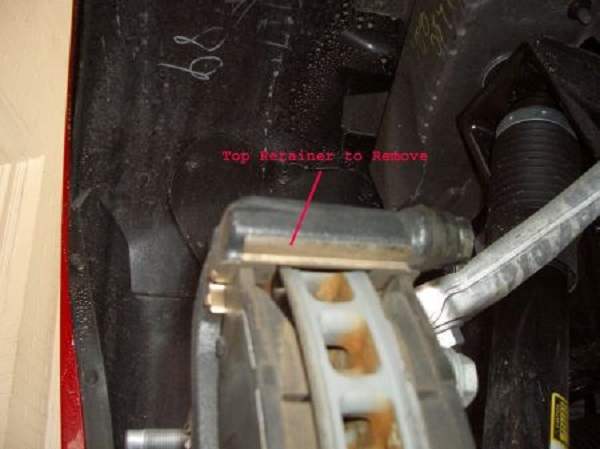
Find the bolt at the top and back of the caliper. You will remove this bolt, but you need to use a backup wrench on the part just in front of that bolt. The bolt is 5/8 that you have to remove. The bolt that you put the backup on is larger (I used an adjustable wrench, so I am not sure the exact size). I labeled the bolts in the pictures below.
This picture is with my head in the wheel well looking almost straight down the back of the caliper. The white/tan marbled surface in the background is the floor, not the ceiling.
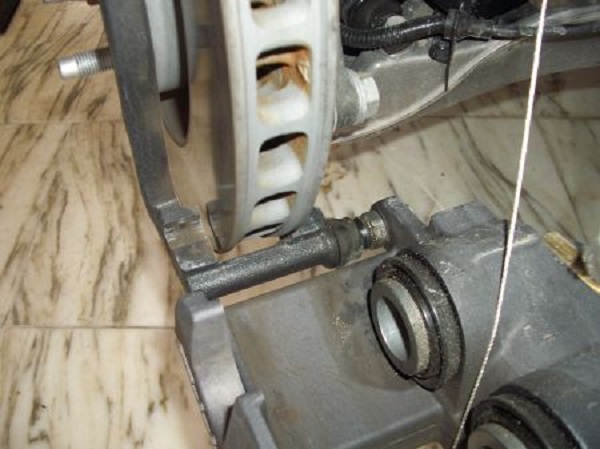
This picture is with the camera back behind the wheel and taking the picture toward where I am sitting. Basically taken from the middle of the car looking left. What appears to be up in this picture is actually up.
Remove the bolt shown above by keeping a backup wrench where shown and turning against it. Do not remove any lines, hoses, etc.
With the bolt removed, push the grey caliper (the part that says Corvette on it) to the right and it should pivot downwards. It will swing down until it reaches the limit of the hose it is connected to. Since I did not like putting a lot of pressure on this hose (and I did not plan to replace it), I tied it up.
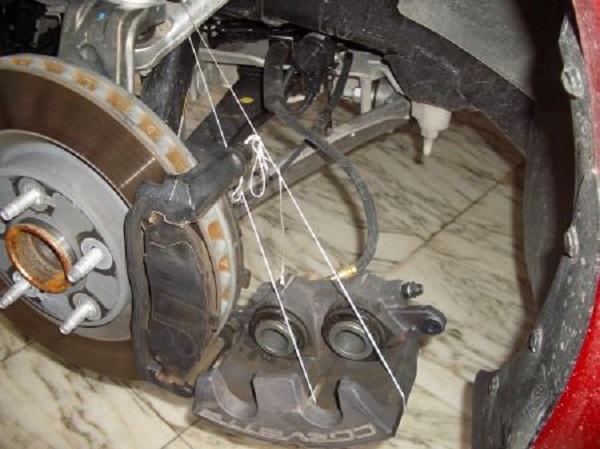
This keeps the part out of the way, but does not put stress on the hose.
If the caliper does not just swing out of the way, you can use a C-clamp to pinch the pads from both sides and compress them against the wheel. I had no problems with the front brakes, but had problems with one of the rears.
Now, the pads will just pull out perpendicular to the rotor. Mine popped right out, but I only had a few thousand miles on them.

Note which piece comes from the front and which from the back. They are not identical.
There is a “clip” that holds the pads at the top and the bottom. There have been posts about the need to replace these clips. My understanding is that Chevy says to. I had new ceramic brake pads and they came with the clips, so I replaced them.
The top and bottoms clips are shown:

Clips have been removed:
Put your new clips in where you removed the old ones. The top and bottom were identical, so no getting them messed up. It took some playing with them to get them to snap into place.
Put your new pads into place in the front and the back. Swing the caliper back up and into position. Mine passed by the new pads without a problem.
The back are basically the same, except the shape is a little different.
Also, the hose does not allow much room to move the caliper out of the way. I was forced to put a little more stress on the hose and did not tie it up like I did the back one.
Removal and installation was the same. My only problem was on the back passenger side. When I was swinging down the caliper, the round silver cylinder would not pass by a small, metal projection on the back of the pad. I ended up using a regular screw driver as a wedge and pushed a little on the cylinder to move it back enough to let it pass by. I had to do this to remove and install. I did not have to put a lot of force on it, but it took some pushing.
If all you are doing is replacing the pads, you are done. Just reinstall the wheels, torque down the lugnuts and tighten them again once the wheels are on the ground. Once you reassemble everything, MAKE SURE YOU PUMP UP THE BRAKES, before you drive on them. Make sure nothing is binding or sticking.
For people who believe in “bedding in” their brakes, click here.
Want to learn how to bleed your brakes? Click here.
You must be logged in to post a comment.