


1971 Journey

Thread Starter
Melting Slicks


Joined: Apr 2010
Posts: 2,794
Likes: 1,195
From: Canberra Australia
2025 C3 of the Year Finalist - Modified
That’s what I am hoping for Bill
Will certainly post how it progresses.
I was reminded as I removed the semi coilovers just how far they were would up to get to the ride height I wanted. True coil overs a different but I am hoping with this setup they will be close to zero preload to be at a good height.
May still have to try a few spring rates but could get lucky with the 500 lbs i initially ordered.
Thread Starter
Melting Slicks
Joined: Apr 2010
Posts: 2,794
Likes: 1,195
From: Canberra Australia
2025 C3 of the Year Finalist - Modified
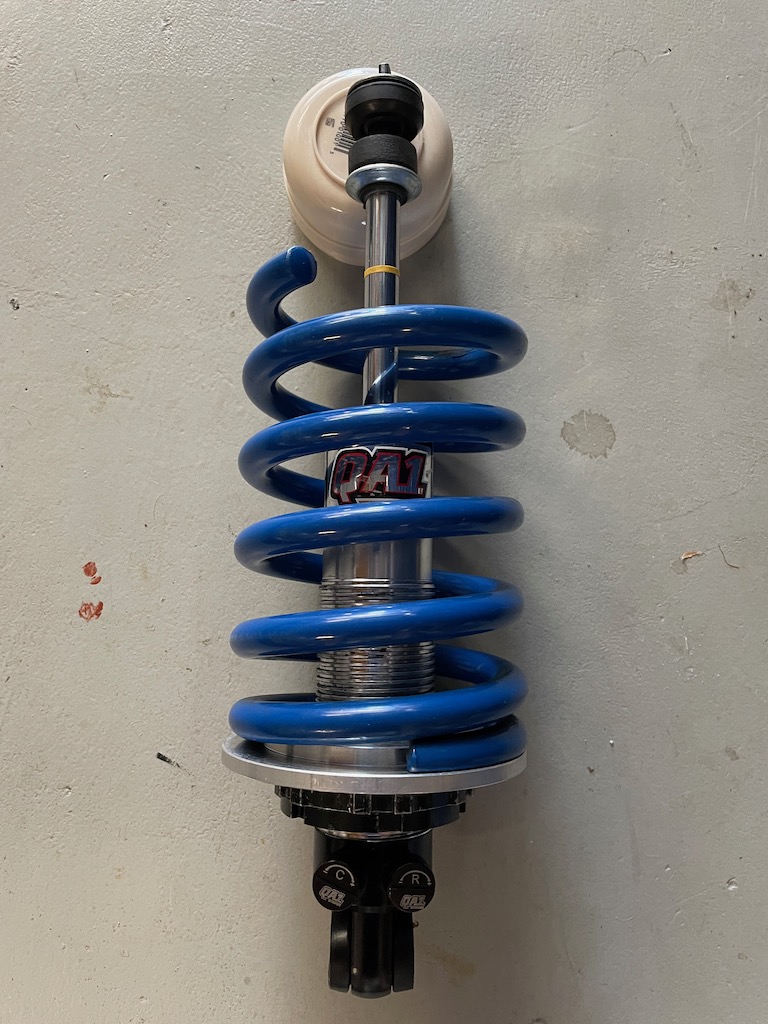
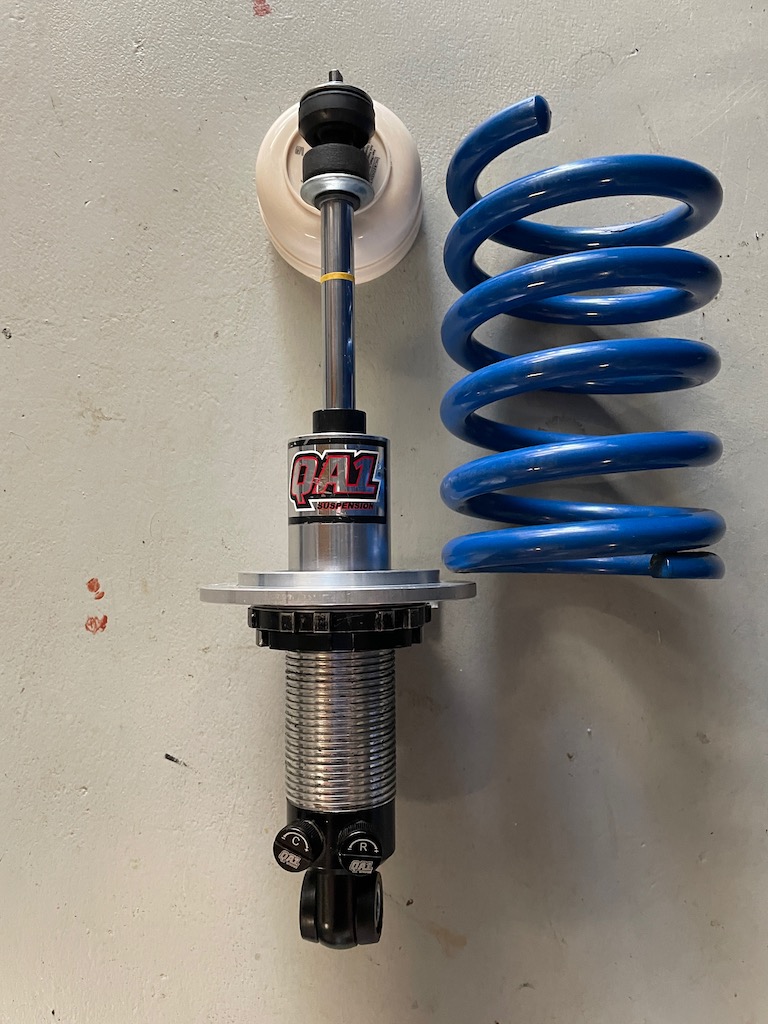
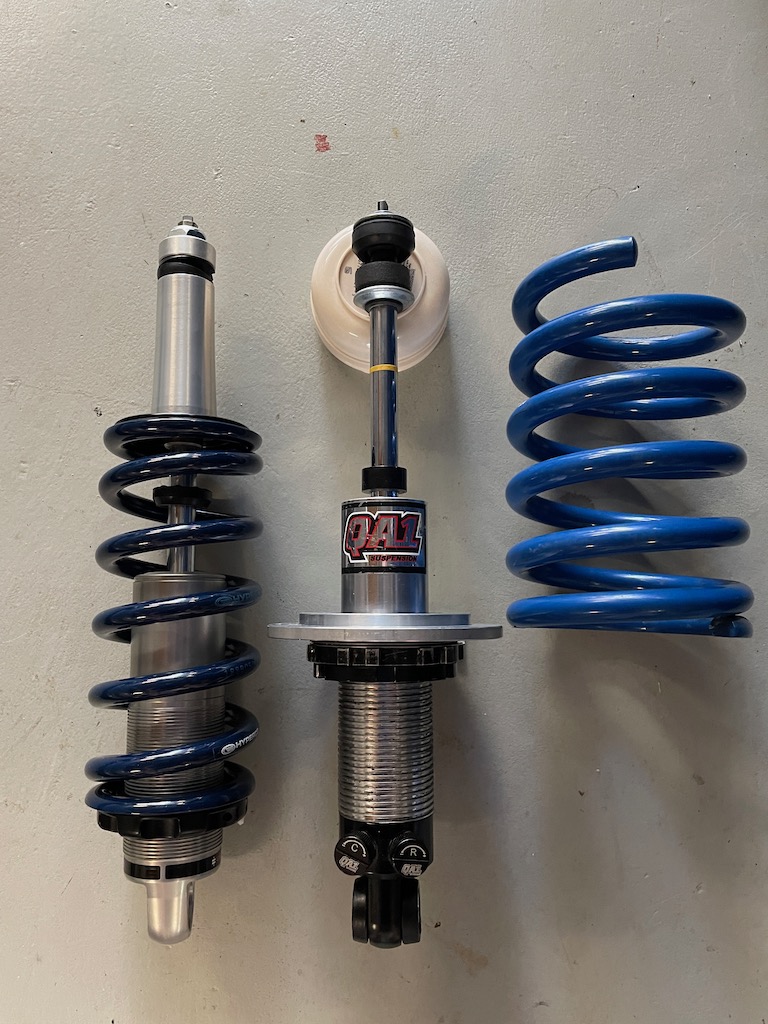
So lets start with a comparison on the existing QA1 with the ridetech.
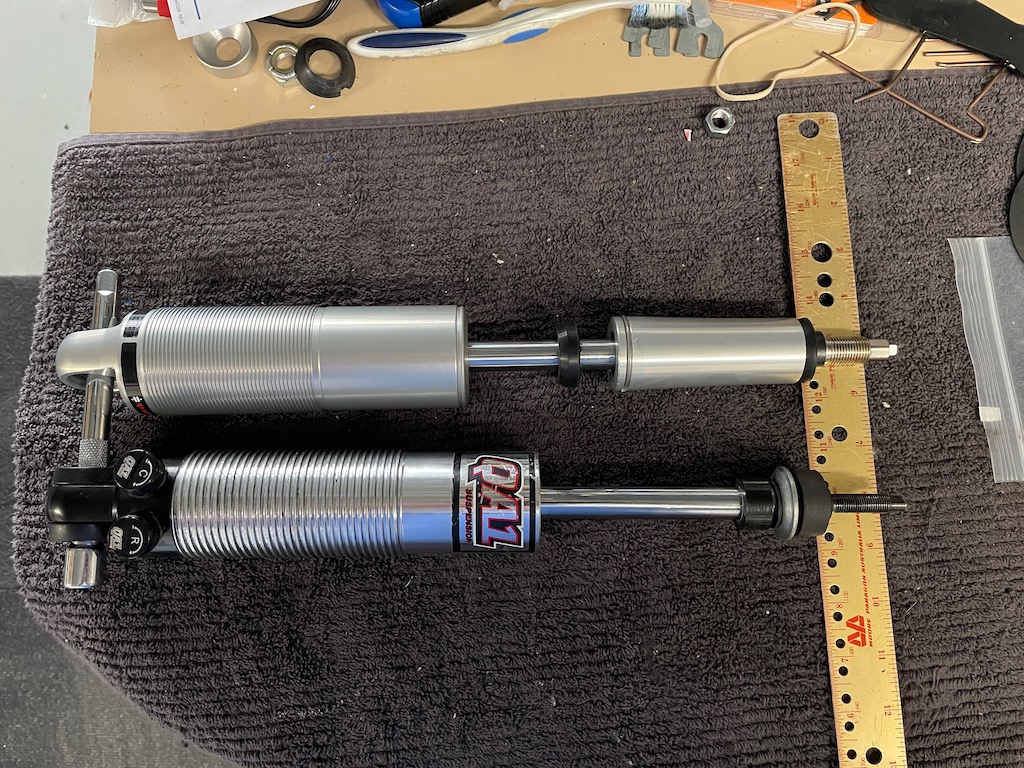
Fairly close to being the same expanded length.
While the ridetech I have chosen does not compress as small as the QA1, the QA1 could never go near full compression. It’s hard to say how much compression was available. There was a 5-6cm gap between where the shock bolts in at the top and the the spring seat. Also the lower perch sat 7cm up the threaded body then there is the perch etc. The spring would have been binding before getting anywhere near it.
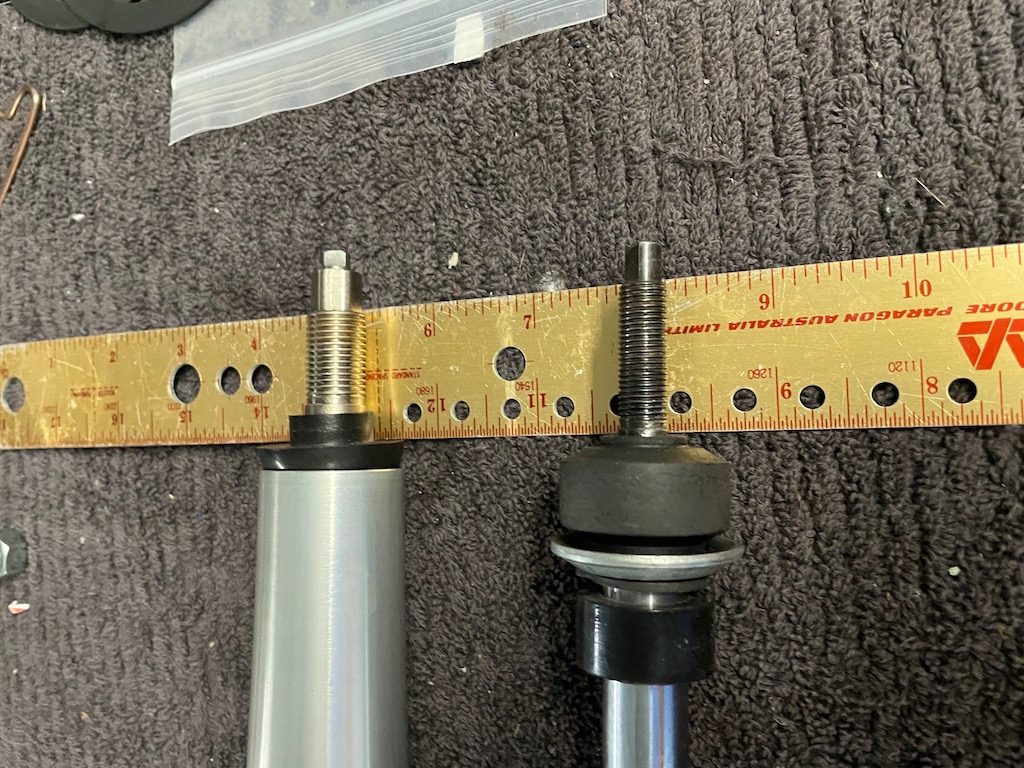
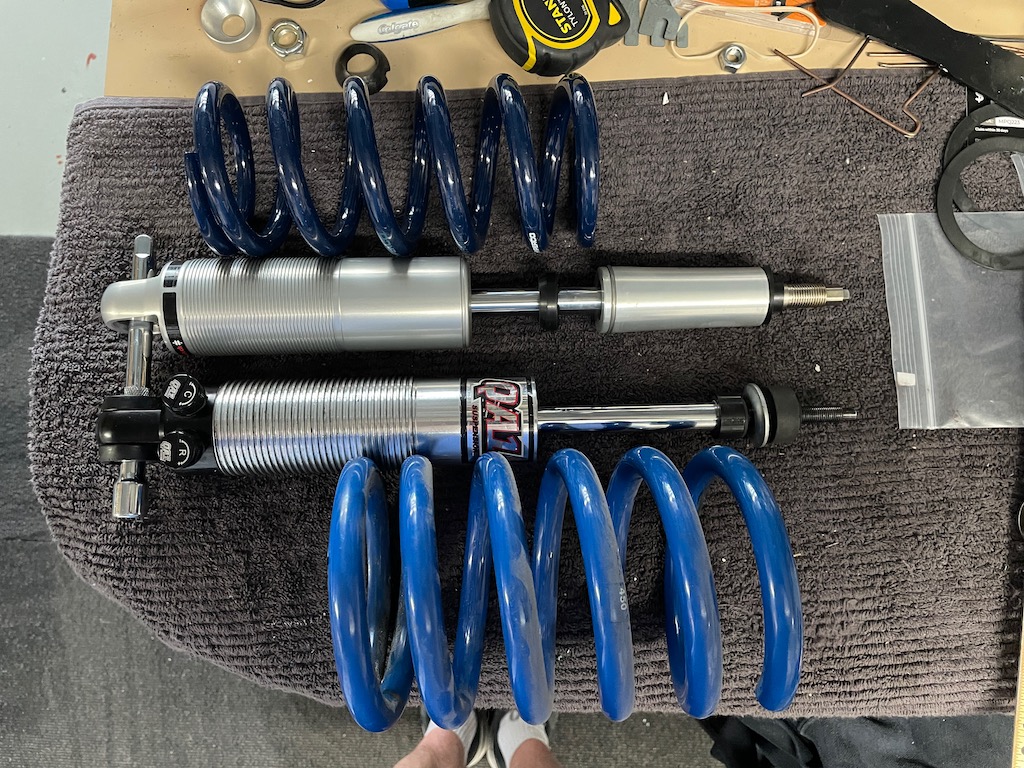
Spring position comparison, both 8".
Fairly close to being the same expanded length.
While the ridetech I have chosen does not compress as small as the QA1, the QA1 could never go near full compression. It’s hard to say how much compression was available. There was a 5-6cm gap between where the shock bolts in at the top and the the spring seat. Also the lower perch sat 7cm up the threaded body then there is the perch etc. The spring would have been binding before getting anywhere near it.
Spring position comparison, both 8".
Last edited by CraigH; Nov 16, 2023 at 04:49 AM.
Thread Starter
Melting Slicks
Joined: Apr 2010
Posts: 2,794
Likes: 1,195
From: Canberra Australia
2025 C3 of the Year Finalist - Modified
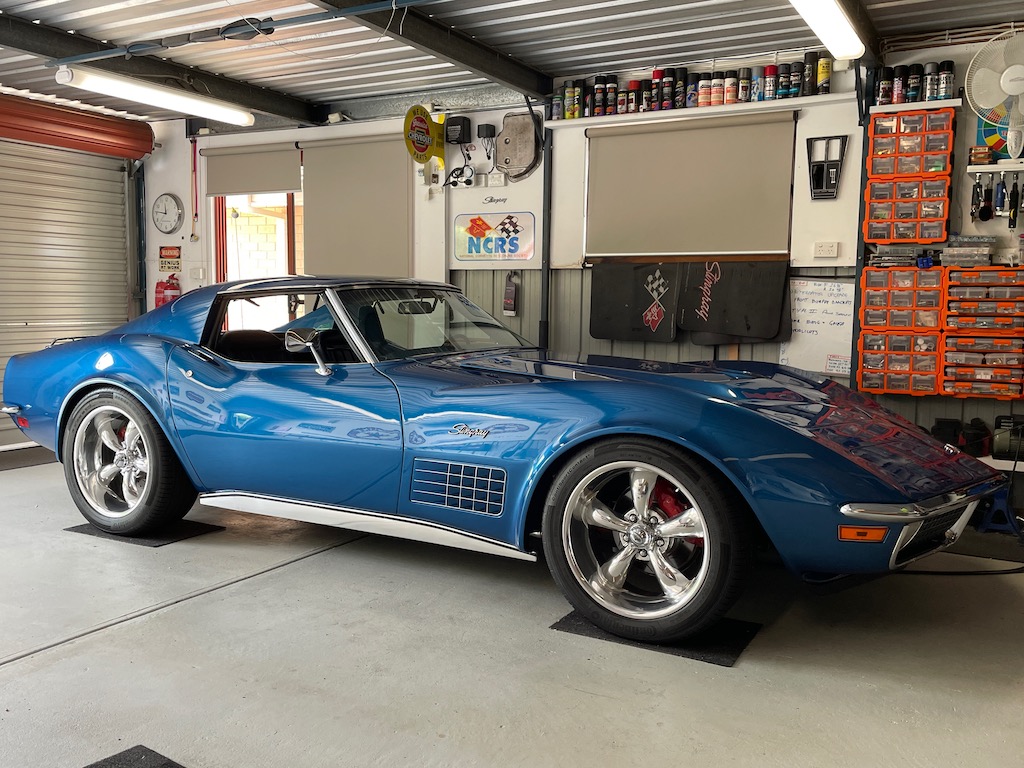
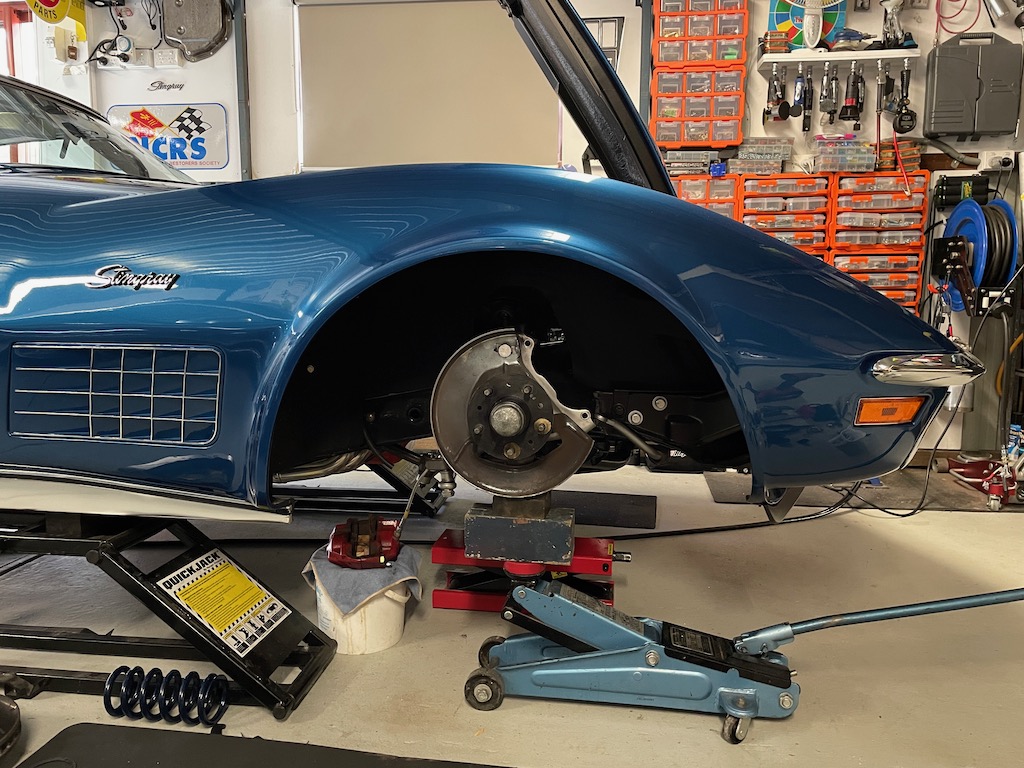
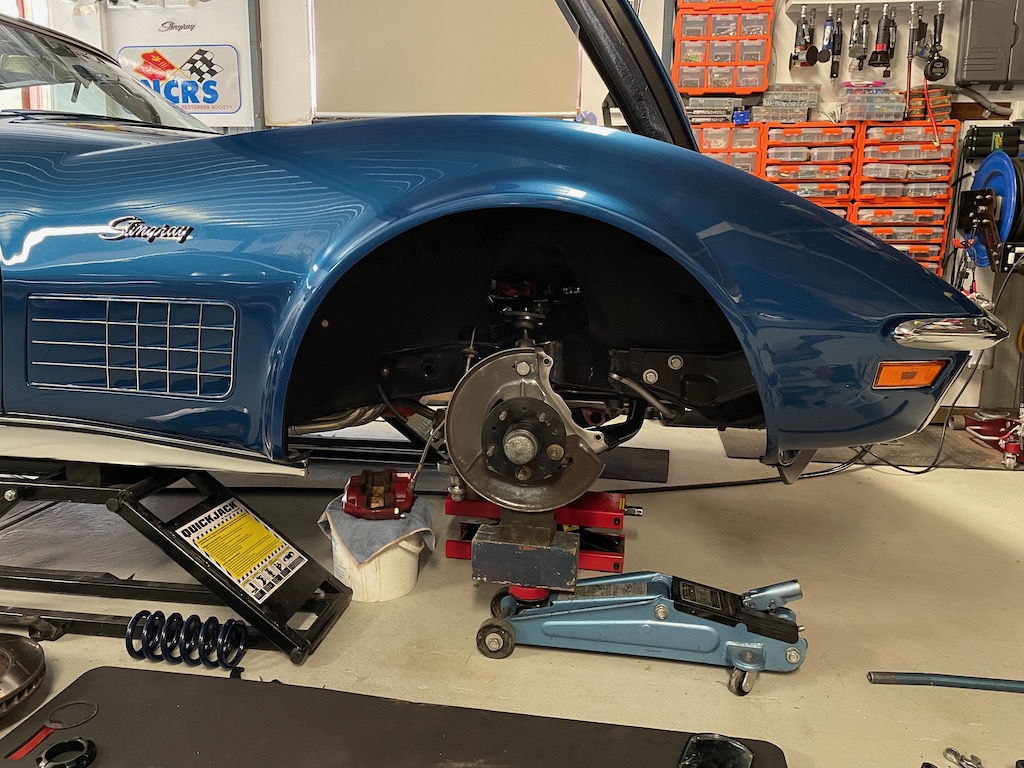
So this is the ride height I like. At this level I want it to be smooth, controlled and also comfortable.
As far as my rear setup goes It ticks all the boxes (heavily documented in the build thread), but my front was not fully there.
To achieve this I initially used semi-coilovers with stock upper and lower arms.
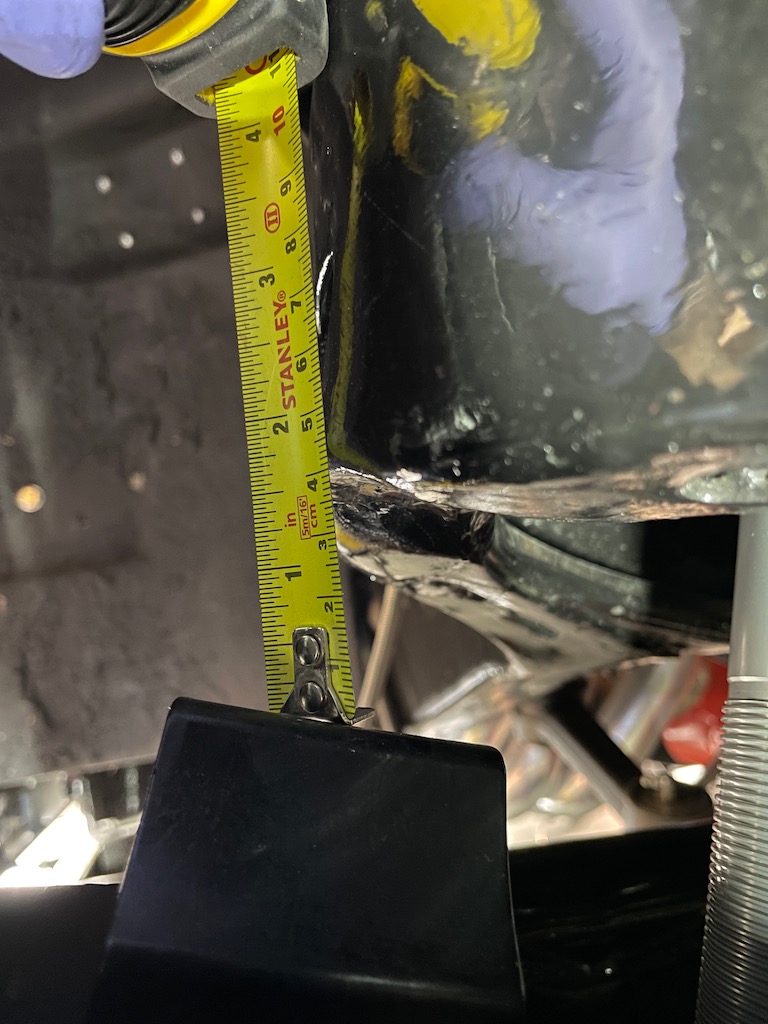
What I found was that the lower perch on the coil-over was wound completely to the bottom to achieve this sort of ride height.
In this situation the setup was like this. The yellow tape shows approximately where the spring would seat in the upper pocket.
I then swapped to upper and lower tubular arms from Global West. These gave great caster and are very robust.
The lower arm gives a revised damper mounting point that is lower than stock and gives extended travel.
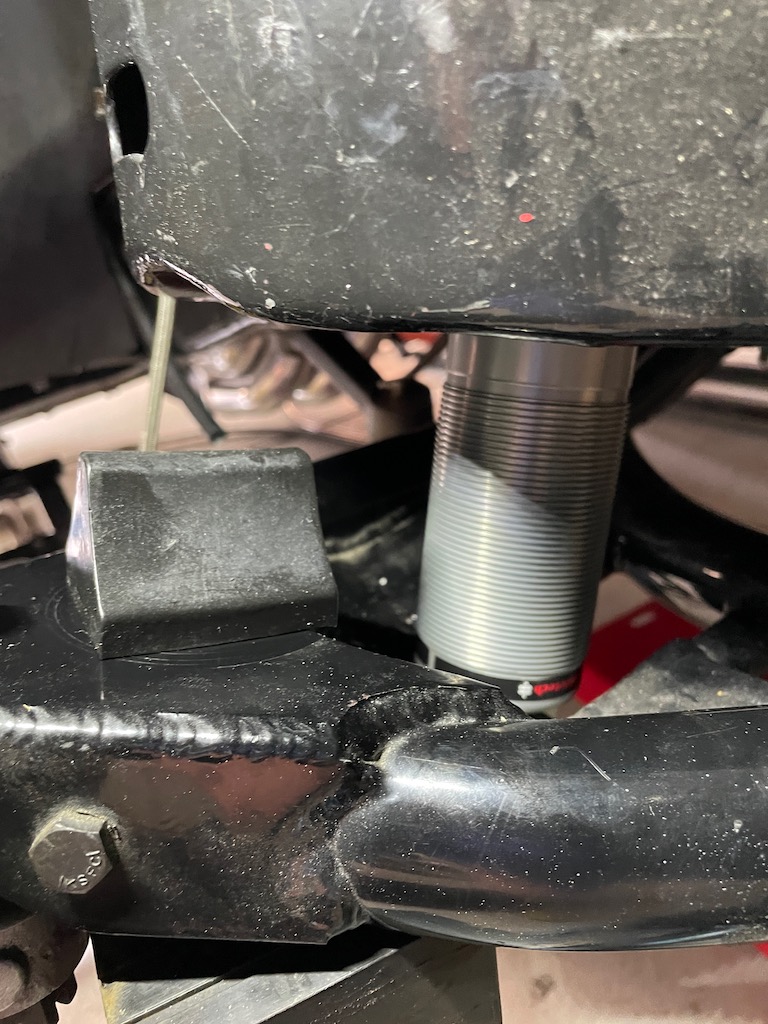
In this situation the extra length meant the lower perch on the damper body had to be wound way up to achieve the ride height in the picture above.
As can be seen in the picture below to get the spring to fit between the lower perch and the upper pocket (yellow tape) required a fair amount of preload on the spring.
This option would certainly have been better with a longer damper.
So neither were optimal for where the shock sat at ride height for compression and extension.
I have lived with the front setup on version 2 for a fair number of years and have been happy, but, I want to see if the true coil-over model works better.
So this gets to my third setup that will hopefully put the damper closer to mid travel.
It also allows free movement of the damper with suspension movement as the spring is not bound to the upper pocket.
It also gives me more spring rate options and a fairly easy swap process.
Well that's the plan, we will see how it pans out :-)
As far as my rear setup goes It ticks all the boxes (heavily documented in the build thread), but my front was not fully there.
To achieve this I initially used semi-coilovers with stock upper and lower arms.
What I found was that the lower perch on the coil-over was wound completely to the bottom to achieve this sort of ride height.
In this situation the setup was like this. The yellow tape shows approximately where the spring would seat in the upper pocket.
I then swapped to upper and lower tubular arms from Global West. These gave great caster and are very robust.
The lower arm gives a revised damper mounting point that is lower than stock and gives extended travel.
In this situation the extra length meant the lower perch on the damper body had to be wound way up to achieve the ride height in the picture above.
As can be seen in the picture below to get the spring to fit between the lower perch and the upper pocket (yellow tape) required a fair amount of preload on the spring.
This option would certainly have been better with a longer damper.
So neither were optimal for where the shock sat at ride height for compression and extension.
I have lived with the front setup on version 2 for a fair number of years and have been happy, but, I want to see if the true coil-over model works better.
So this gets to my third setup that will hopefully put the damper closer to mid travel.
It also allows free movement of the damper with suspension movement as the spring is not bound to the upper pocket.
It also gives me more spring rate options and a fairly easy swap process.
Well that's the plan, we will see how it pans out :-)
Last edited by CraigH; Nov 17, 2023 at 01:10 AM.
Thread Starter
Melting Slicks
Joined: Apr 2010
Posts: 2,794
Likes: 1,195
From: Canberra Australia
2025 C3 of the Year Finalist - Modified
Today I checked how the suspension articulated with the damper at max and minimum.
This had it on the bumpstop at full drop and also at full compression.
My top bumpstop is a bit longer than normal as its limited by the lower starting point.
Full Compression
Full drop
So to better visualise it....
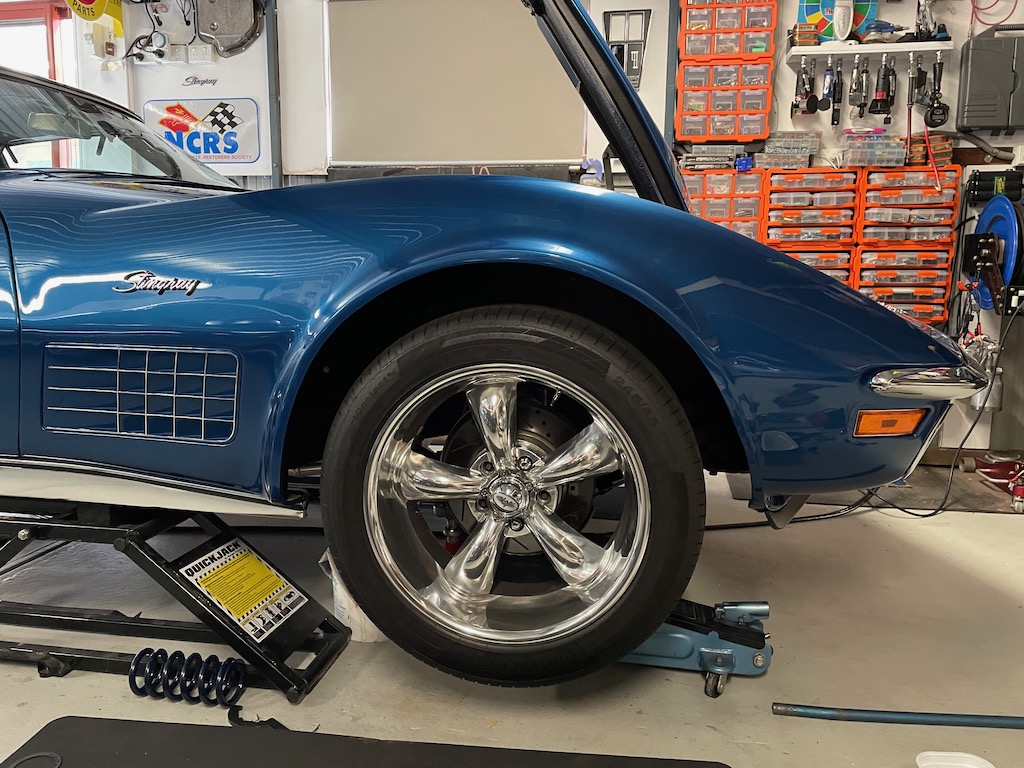
Full Compression
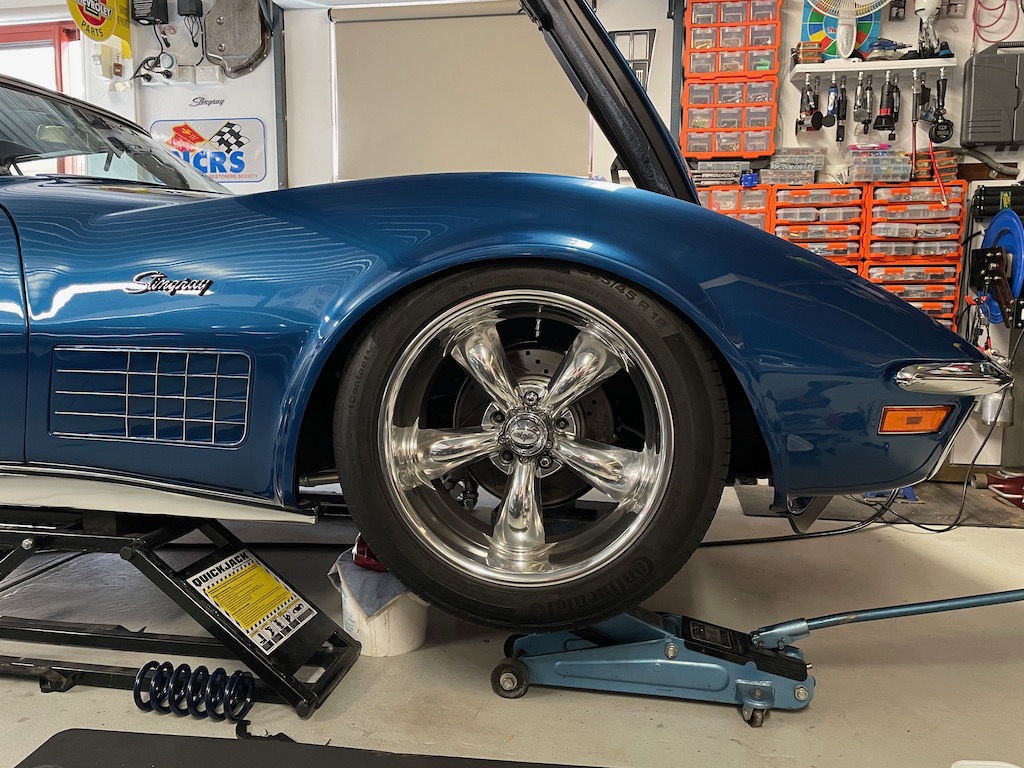
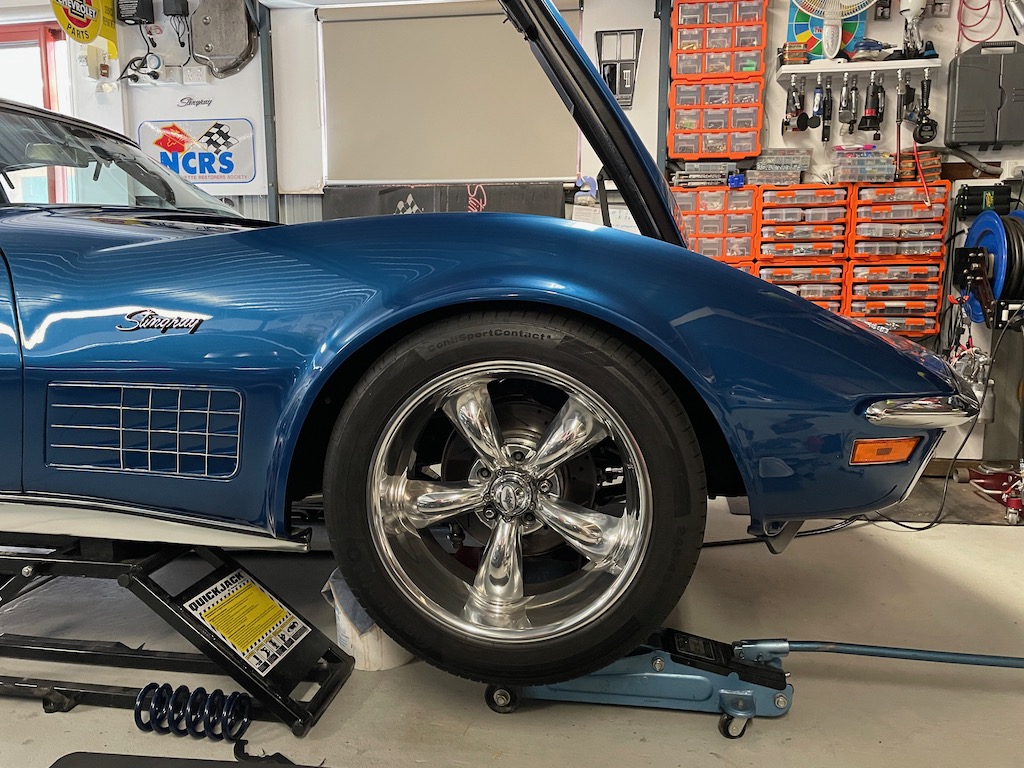
Approximate Ride Height
Full Drop
At full compression there seems to be no rubbing but I need to do a bit more checking.
So my calculations for this damper size seem to be about right. Full drop is almost identical to what I had before but I have more compression available to use.
Next to see where the 500lb spring puts the suspension with weight on it and if i have enough adjustment to get to a desired ride height.
This had it on the bumpstop at full drop and also at full compression.
My top bumpstop is a bit longer than normal as its limited by the lower starting point.
Full Compression
Full drop
So to better visualise it....
Full Compression
Approximate Ride Height
Full Drop
At full compression there seems to be no rubbing but I need to do a bit more checking.
So my calculations for this damper size seem to be about right. Full drop is almost identical to what I had before but I have more compression available to use.
Next to see where the 500lb spring puts the suspension with weight on it and if i have enough adjustment to get to a desired ride height.
Thread Starter
Melting Slicks
Joined: Apr 2010
Posts: 2,794
Likes: 1,195
From: Canberra Australia
2025 C3 of the Year Finalist - Modified
The QA1’s are the stock length as sold originally by Speed Direct and now many others.
The Ridetech is a shorter damper body than what Ridetech normally provide in their kit.
I started looking at QA1 options with Dan from Vansteel using their coil over drop bracket but the shorter QA1 did not have enough shock travel.
After looking at the Ridetech damper measurements I thought they may have had an option that would work so I took the measurements from the Global West Arms and my desired ride height range and we decided on a damper that would hopefully work.
The stock Ridetech damper they use in their kit does not allow the ride height range I was after. Well it does but at the ride height needed the damper is out of compression and has heaps of extension available 😀
Last edited by CraigH; Nov 18, 2023 at 02:49 PM.
Old Pro Solo Guy


Joined: Dec 2017
Posts: 8,094
Likes: 4,449
From: Marlton NJ
Yep. Similar issues with my QA1s. Not enough compression travel in the rear, even in 100% stock form. They will bottom out before they even touch the bump stops, and I would rather trim the bump stops, and lower slightly.. The available shorter bodies are way too short. Arrggh....
Have you measured the actual compression when you drive? Front or rear or both?
Have you measured the actual compression when you drive? Front or rear or both?
Corvette Stories
The Best of Corvette for Corvette Enthusiasts

Top 10 Most Expensive Corvettes Ever Sold on Bring A Trailer
Brett Foote
10 Things Every Corvette Owner Needs (2026 Edition)
Michael S. Palmer
8 Most "Only Corvette Owners Understand" Quirks and Problems
Pouria Savadkouei
10 Reasons the C6 Z06 is Still A Performance Benchmark After 20 Years
Joe Kucinski
How Much Horsepower Every Corvette Engine "LOST" in 1972
Joe Kucinski
Top 10 DOs and DON'Ts for Protecting Your Convertible Top!
Michael S. Palmer
Top 10 Most Explosive Corvettes Ever Made: Power-to-Weight Ratio Ranked!
Joe Kucinski
150 hp to 1,250 hp: Every Corvette Generation Compared by the Specs That Matter
Joe Kucinski
8 Coolest Corvette Pace Cars (and Replicas) of All Time
Verdad Gallardo
Thread Starter
Melting Slicks
Joined: Apr 2010
Posts: 2,794
Likes: 1,195
From: Canberra Australia
2025 C3 of the Year Finalist - Modified
Yep. Similar issues with my QA1s. Not enough compression travel in the rear, even in 100% stock form. They will bottom out before they even touch the bump stops, and I would rather trim the bump stops, and lower slightly.. The available shorter bodies are way too short. Arrggh....
Have you measured the actual compression when you drive? Front or rear or both?
Have you measured the actual compression when you drive? Front or rear or both?
As for the front I will put the 500lb springs in and see where it sits and how much adjustment I get. Hopefully it will be good or I will be ordering some softer or harder springs to get it to sit well at close to zero preload. 😀
Then will do some road testing and see if I get near the bump stops.
With my second setup I believe the spring was fully compressing before it hit the bump stop, on a large bump. I did some measurements and the new setup has more articulation than the second semi coilover setup.
Thread Starter
Melting Slicks
Joined: Apr 2010
Posts: 2,794
Likes: 1,195
From: Canberra Australia
2025 C3 of the Year Finalist - Modified
Thread Starter
Melting Slicks
Joined: Apr 2010
Posts: 2,794
Likes: 1,195
From: Canberra Australia
2025 C3 of the Year Finalist - Modified
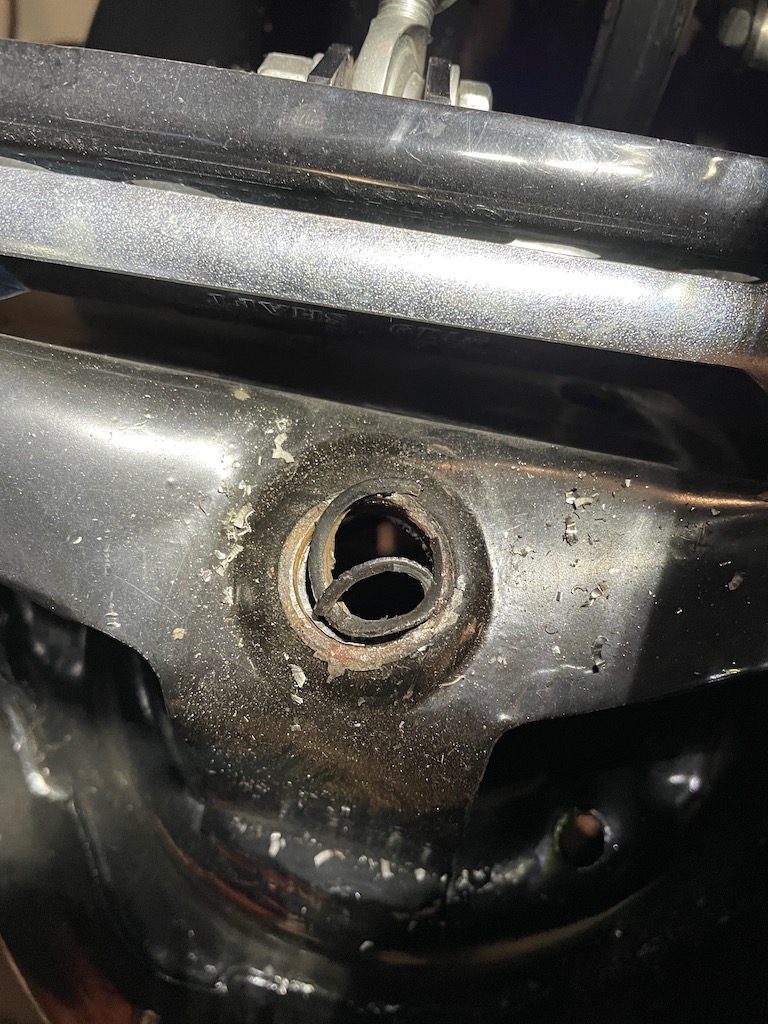
So to start at the beginning for the Ridetech install.
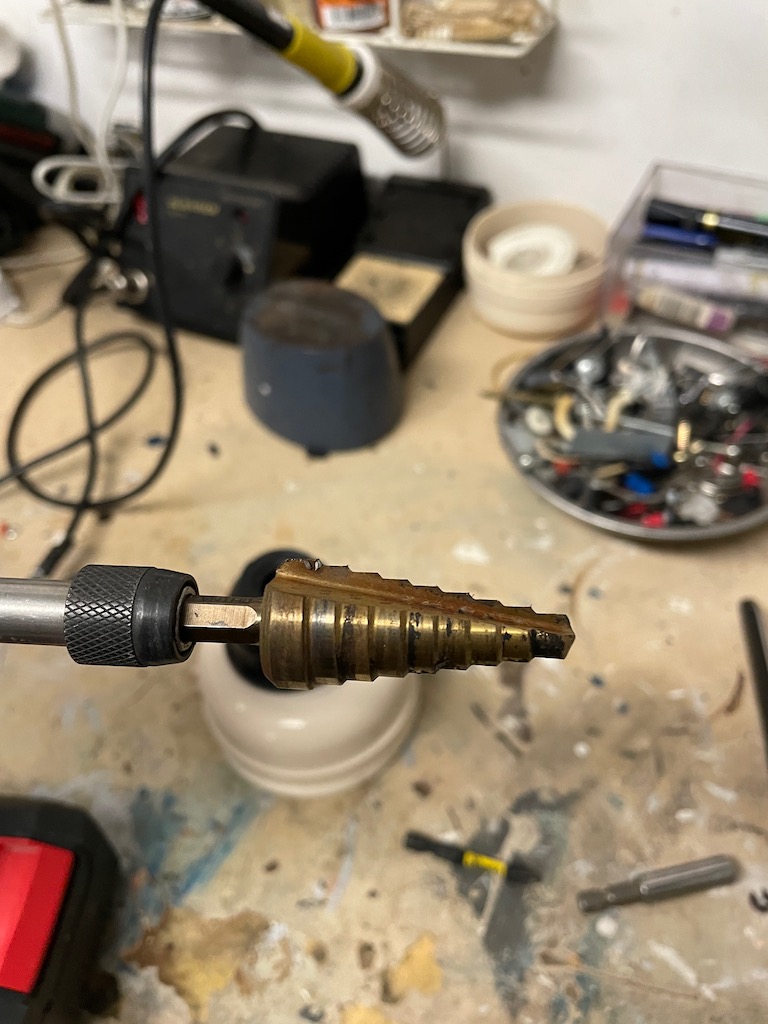
You need to enlarge the hole where the shock top mounts to 3/4"
In fact the hole is 3/4" already but has a pressed in seat for the shock rubbers.
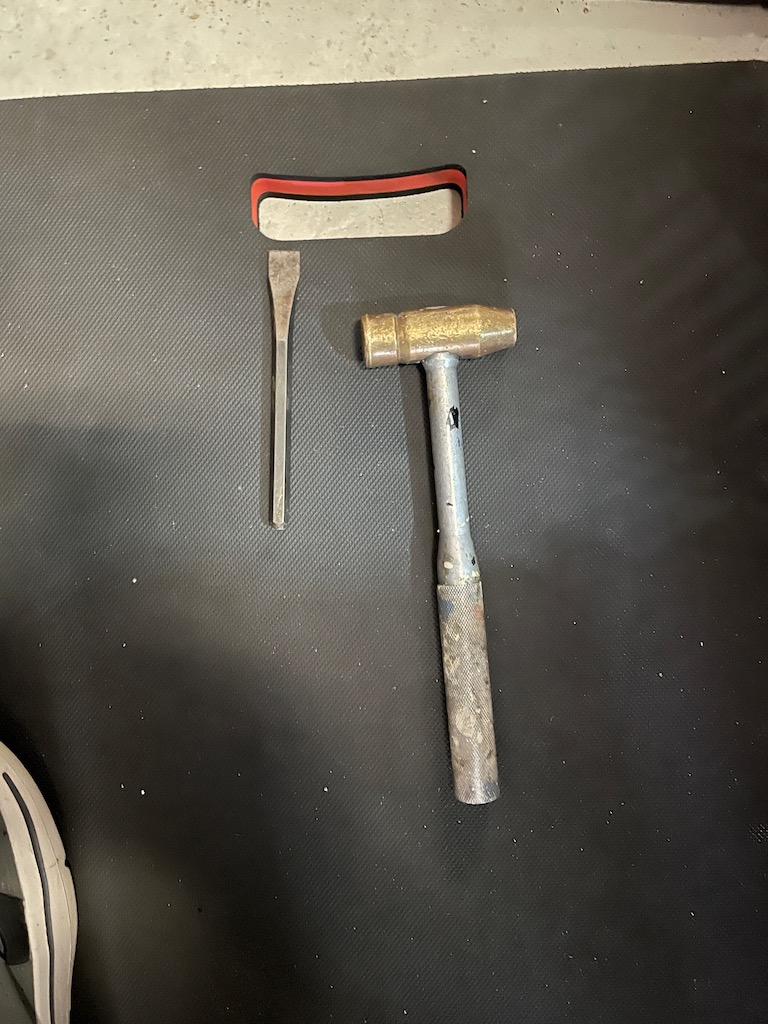
Using a stepper piece start hitting the hole, then complete the removal with metal chisel
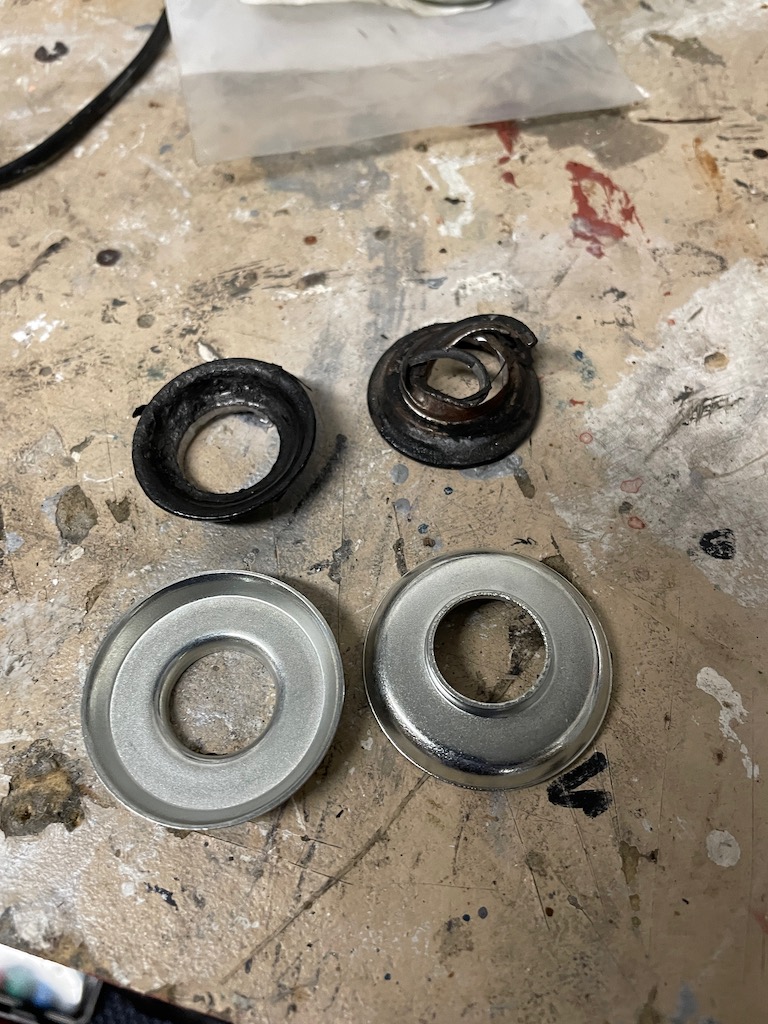
These are the removed parts. Could be reverted easily with parts like those below from a Landrover.
You need to enlarge the hole where the shock top mounts to 3/4"
In fact the hole is 3/4" already but has a pressed in seat for the shock rubbers.
Using a stepper piece start hitting the hole, then complete the removal with metal chisel
These are the removed parts. Could be reverted easily with parts like those below from a Landrover.
Last edited by CraigH; Nov 28, 2023 at 06:17 AM.
Thread Starter
Melting Slicks
Joined: Apr 2010
Posts: 2,794
Likes: 1,195
From: Canberra Australia
2025 C3 of the Year Finalist - Modified
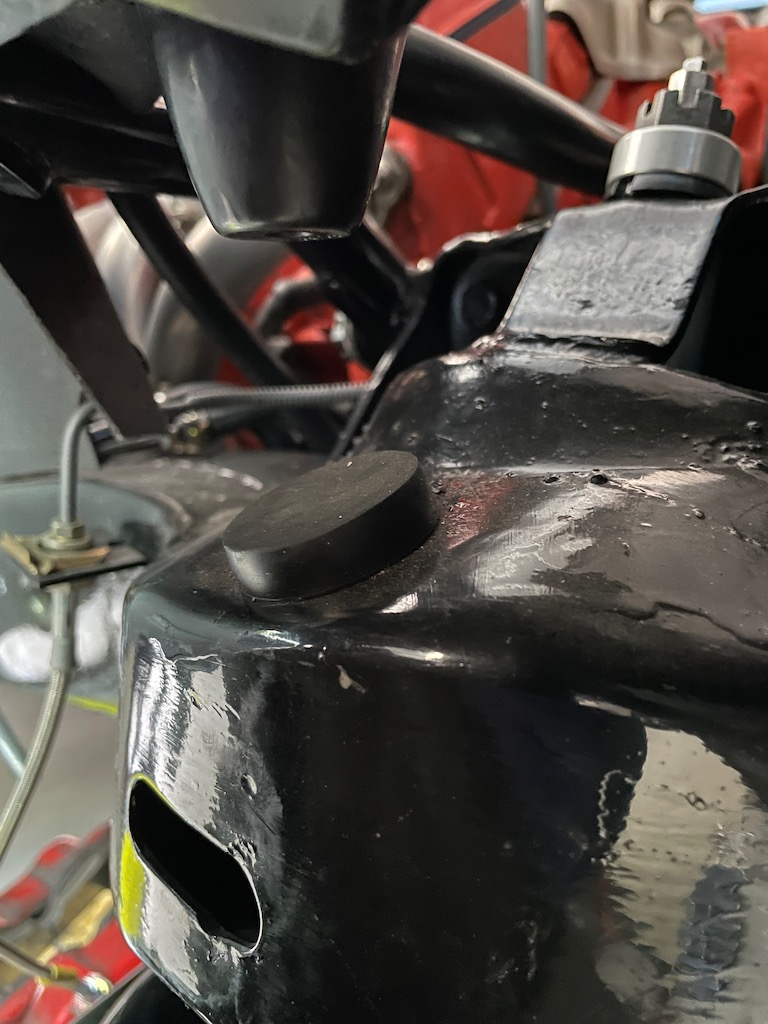
Now we have a 3/4" hole we have room for the delrin swivel parts that go either side of the mounting pad.
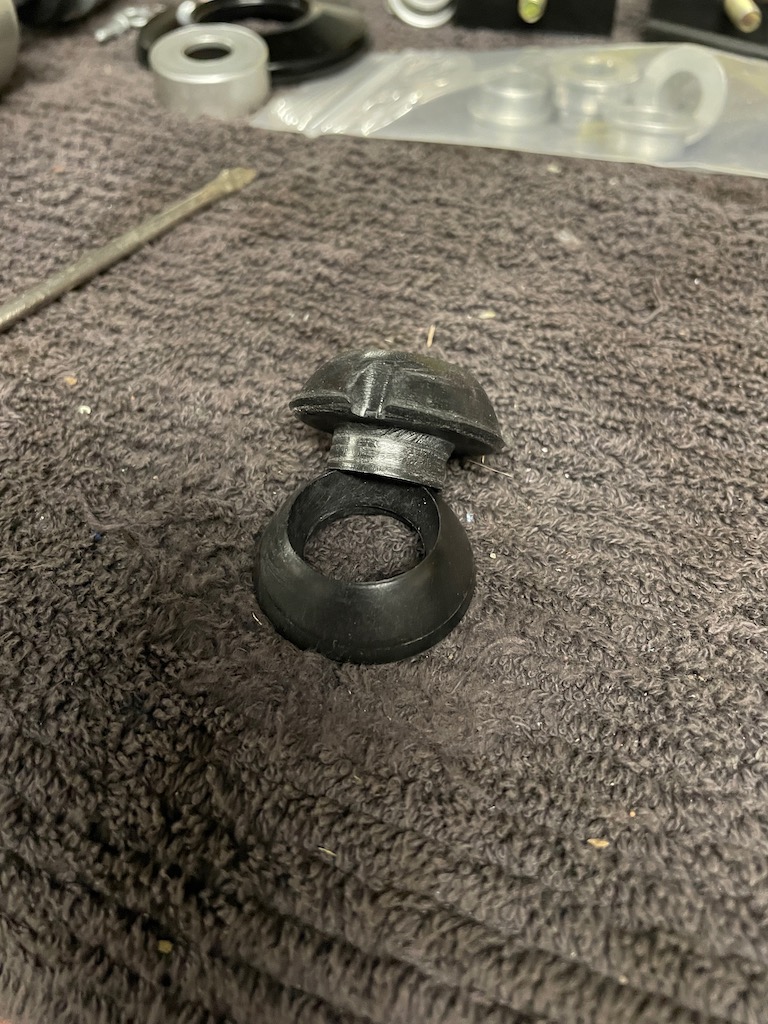
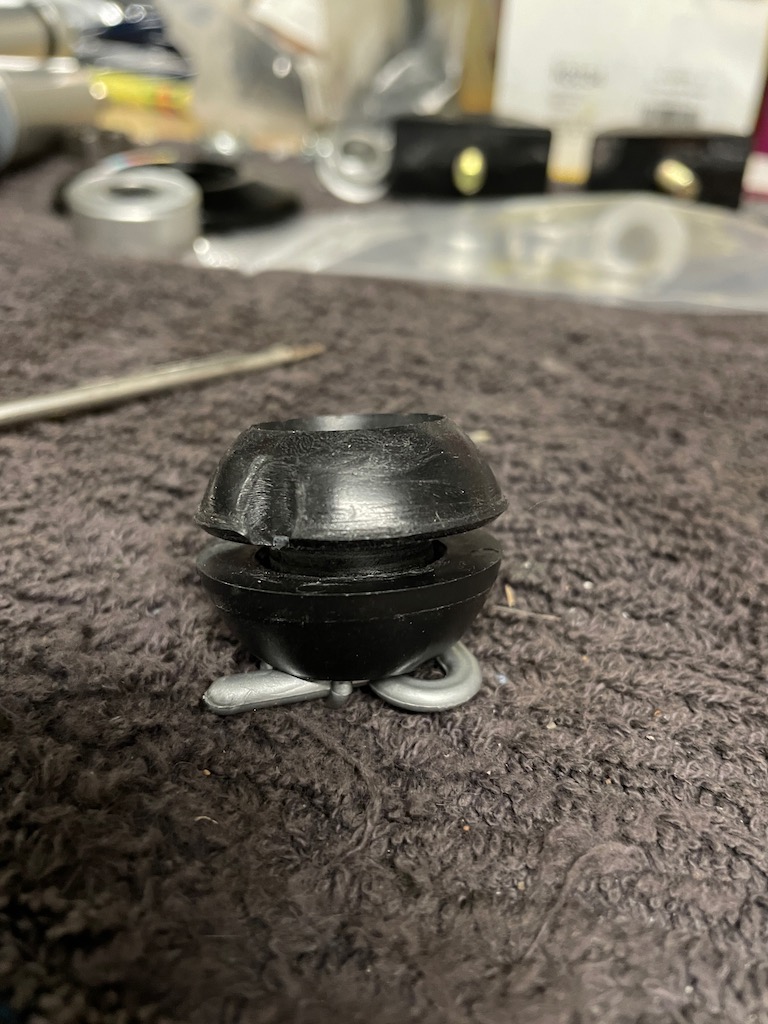
They go on the top of the damper body and allow adjustment to various angles and some movement while extending etc
They go on the top of the damper body and allow adjustment to various angles and some movement while extending etc
Old Pro Solo Guy
Joined: Dec 2017
Posts: 8,094
Likes: 4,449
From: Marlton NJ
Great work Craig!
You are being a trendsetter here on coil-overs.
FYI I have a spreadsheet that calculates suspension movement.
In a corner a C3 with a handling package should only tilt 1.2 degrees and the suspension only move 0.7" into bump. At 1.0G. at the B-J.
The CG is so low it really does not roll very much.
Movement at the shock or bump stop would be less, so more like 0.4"
The rest of the clearance is for road bumps.
BTW Your bump stops do not look OEM.
Poly? Brand?
Thread Starter
Melting Slicks
Joined: Apr 2010
Posts: 2,794
Likes: 1,195
From: Canberra Australia
2025 C3 of the Year Finalist - Modified
Great work Craig!
You are being a trendsetter here on coil-overs.
FYI I have a spreadsheet that calculates suspension movement.
In a corner a C3 with a handling package should only tilt 1.2 degrees and the suspension only move 0.7" into bump. At 1.0G. at the B-J.
The CG is so low it really does not roll very much.
Movement at the shock or bump stop would be less, so more like 0.4"
The rest of the clearance is for road bumps.
BTW Your bump stops do not look OEM.
Poly? Brand?
You are being a trendsetter here on coil-overs.
FYI I have a spreadsheet that calculates suspension movement.
In a corner a C3 with a handling package should only tilt 1.2 degrees and the suspension only move 0.7" into bump. At 1.0G. at the B-J.
The CG is so low it really does not roll very much.
Movement at the shock or bump stop would be less, so more like 0.4"
The rest of the clearance is for road bumps.
BTW Your bump stops do not look OEM.
Poly? Brand?
Have seen your great spreadsheet but got a little lost. When ordering these parts I think I got the motion ratio a bit wrong so may need to go up from 500 to 550 lb springs to minimise the preload. Some testing will help me see how well the 500�s cope.
The bump stops on the arms are the Global West items and probably poly. The short stop on the frame is a cut down stock bump stop.

Thread Starter
Melting Slicks
Joined: Apr 2010
Posts: 2,794
Likes: 1,195
From: Canberra Australia
2025 C3 of the Year Finalist - Modified
 )
)
Instructor

Joined: Aug 2015
Posts: 187
Likes: 15
From: New York
Good question, I mounted the resister on the bottom on mine to hide it so it was less visible. As for the hose I think it�s actually not a drain but a cooling tube that puts airflow into the blower motor. I mounted it in a similar way to factory adding the nipple fitting to the AC Delete cover.
What size hole did you drill for the resistor and what kind of bit did you use? It looks like my 1.5� spade bit is a little too small.
Thread Starter
Melting Slicks
Joined: Apr 2010
Posts: 2,794
Likes: 1,195
From: Canberra Australia
2025 C3 of the Year Finalist - Modified
The pictures of your AC delete cover were very helpful. I just started swapping over parts onto mine. The black satin spray paint I used is scratching too easily. Maybe that�s why others on the forum have recommended staying away from enamel.
What size hole did you drill for the resistor and what kind of bit did you use? It looks like my 1.5� spade bit is a little too small.
What size hole did you drill for the resistor and what kind of bit did you use? It looks like my 1.5� spade bit is a little too small.
Have used satin enamel on most of the engine bay glass and it has stood up really well. I do understand what you mean about being able to scratch it but I have not seen it become an issue with the one I used.
Thread Starter
Melting Slicks
Joined: Apr 2010
Posts: 2,794
Likes: 1,195
From: Canberra Australia
2025 C3 of the Year Finalist - Modified
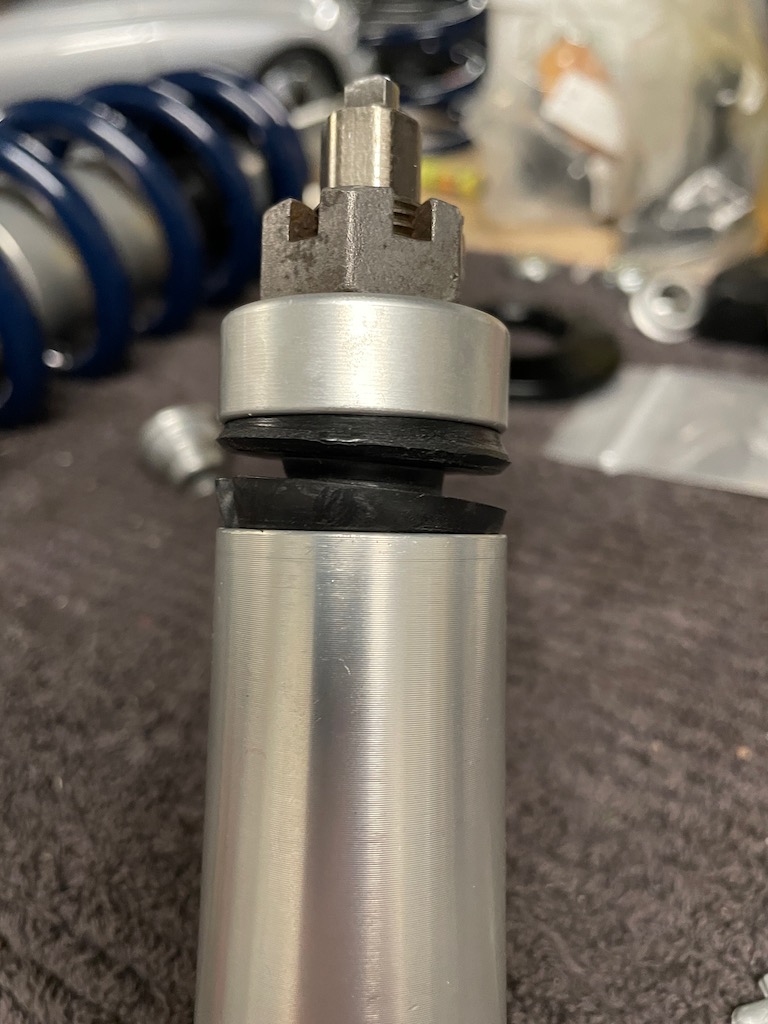
The Ridetech coil-over swivel mount comes through the mount hole as below..
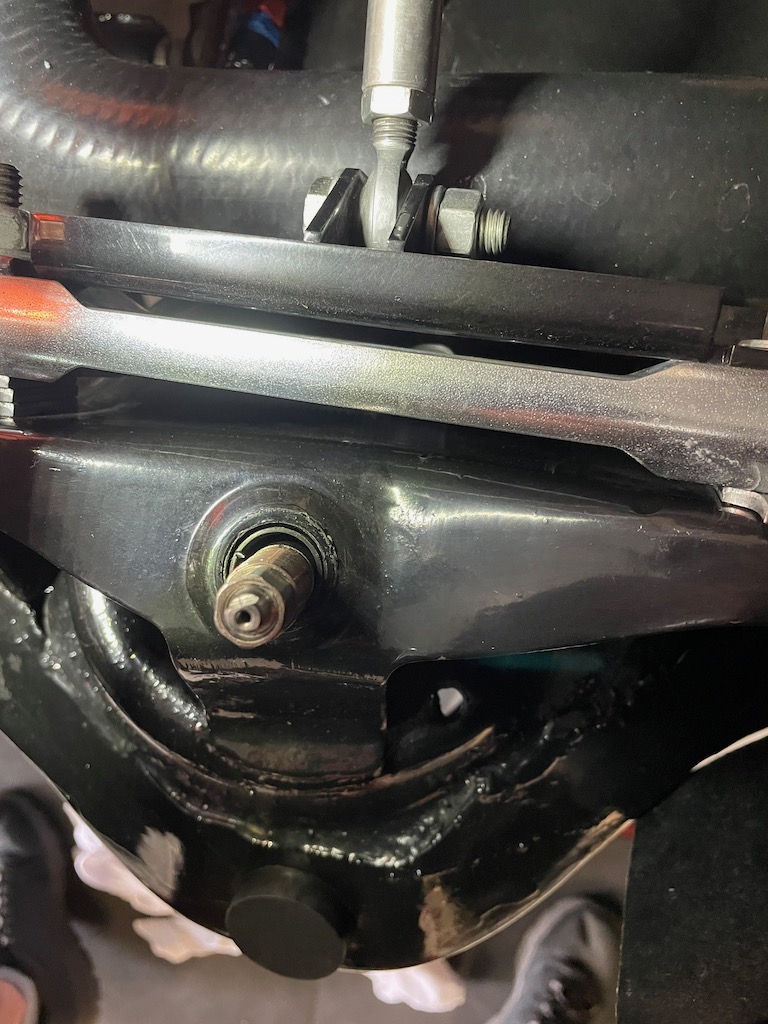
You then have to add the top delrin swivel piece and cover then tighten the locking nut without the centre rotating.
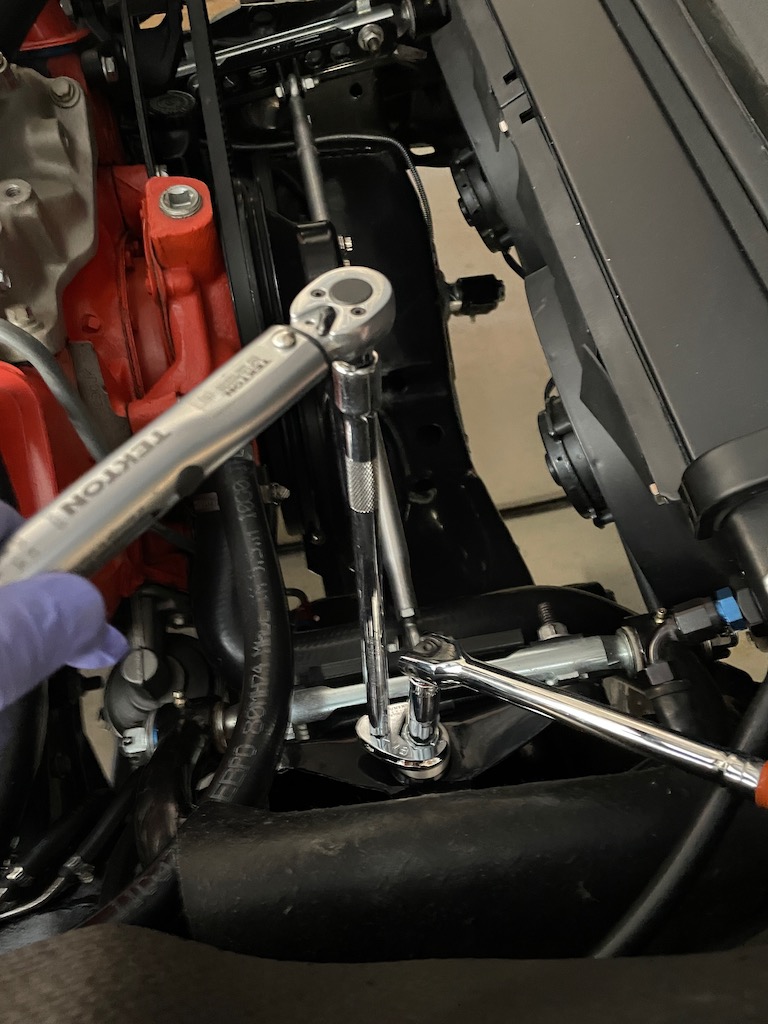
The Ridetech doco describes how to tighten the top nut that holds the coil-over in place......
"Install the Nylok Nut(3) onto the shock stud and lightly tighten. The needs to be some resistance on the ball but not tight enough that it will not rotate freely. Reinstall the adjuster ****(5) using the screw (6) that was removed during step 1"
Ok so that was too vague for me so I did some research and in other kits it advised 80 inch pounds. So I did that and it is tight but pivots freely.
Video that shows how it pivots....Ridetech10-1.mp4
You then have to add the top delrin swivel piece and cover then tighten the locking nut without the centre rotating.
The Ridetech doco describes how to tighten the top nut that holds the coil-over in place......
"Install the Nylok Nut(3) onto the shock stud and lightly tighten. The needs to be some resistance on the ball but not tight enough that it will not rotate freely. Reinstall the adjuster ****(5) using the screw (6) that was removed during step 1"
Ok so that was too vague for me so I did some research and in other kits it advised 80 inch pounds. So I did that and it is tight but pivots freely.
Video that shows how it pivots....Ridetech10-1.mp4
Last edited by CraigH; Dec 14, 2023 at 01:20 AM.