When you click on links to various merchants on this site and make a purchase, this can result in this site earning a commission. Affiliate programs and affiliations include, but are not limited to, the eBay Partner Network.
WOW! That's a Huge turnout for a Cars and Coffee event! But looking at the photos, looks like they let in late model cars.
Yes there was everything from classics, exotics, Japanese racers, euros, bikes and your every present Holden and Ford etc …late models. Even a few C8’s.
Ranging from stock to some amazing moded cars and some engine bays you could eat off.
Have done a couple more events with my 71 fitted with its classic look 15”s.
Had lots of good feedback, except for the president of our local club who told me it looks terrible and I should change them. 😀😁. Apparently he is not a fan of the narrow tyre setup that came stock back then.
I am going to say the more I have driven with the Vitour Galaxy tyres the more I am a fan. Even though they are only 215 the grip level is great and they are so compliant.
I am going to swap back to the 18”s for a while (not because of the negative comment) but just for the more restomod look.
Have done a few software adjustments to my Arduino cooling fan control setup, bringing them on a bit earlier to smooth out any temp fluctuations. Works a treat but managed to fry a few outputs on my Arduino when I shorted a pins used on the display. Oh well luckily I had a second full setup that i use for testing.😀. They a so cheap I just ordered a couple of spares to have around.
I'm running the 255/60-15's on mine Craig. Must say other than the country of origin. I am very happy with them. I find the Galaxy's Much , much better that the Coopers and light years better than the BF Goodrich's.
Ride quality, stick, rain traction. You name it.
As per fan control, just been using my EFI ECU for that combined with a trienary switch on the air-con high pressure line for the last several years. Really works the treat. And keeps it pretty simple. More than one way to skin a cat I guess.
Yes compared to what is often the default like Cooper or BFG it�s chalk and cheese.
Re the fan control I wanted to use PWM to control the speed of the fans, not just the start stop. Was a fun little project starting with the code posted by DblTrbl a few years back then letting scope grow as I learned more 😀
The 15s look great and for our Corvettes the wheels that "belong" on them are few and far between. The classic rallys and American Racing Torq Thrusts are a favourites. As for size it is a personal choice really but there are some decent tyre choices at 15s as well.
The 15s look great and for our Corvettes the wheels that "belong" on them are few and far between. The classic rallys and American Racing Torq Thrusts are a favourites. As for size it is a personal choice really but there are some decent tyre choices at 15s as well.
Hi Primoz,
Yes I think the 15�s look great too but I thought the comment was a bit strange. I think he likes the larger sizes from later models. I was trying to recreate something similar to how it shipped. I am happy with my two sets of rims, gives the 71 two distinct looks.
So I jacked up the Vette to change the wheel set over to my 18’s and I got side tracked on cleaning the wheel arches, suspension etc, …..
then I got sidetracked on some work on my Monaro (filters, plugs etc)…..
Then I got sidetracked back to the Vette on stripping off all the existing hybrid ceramic, and now I have started doing a three step polish, glaze and carnuba wax with Mothers products.
Strange how easily I get off the track, at least the suspension is clean 😂
I think you need to come up to Queensland and do all of this to a certain red car, just to be certain of course! And then we can put the red car out in the sun and really get a good idea!
So back in 2022 when I first got my Galaxy Vitour tyres azza2u asked me a question about dimensions (height width etc) and I thought my 215’s were similar to my old Michelins……
Tyre Heights - in theory
215/70-15 26.9” stock size
245/50-18. 26.7”
255/45-18. 27”
I chose. 245 and 255 in 18” so front was slightly smaller and rear slightly bigger than stock.
While I have all my rims lined up in garage I noticed……..
….from left 255/45-18, then 245/45-18 then 215/70-15.
The Vitour 215 Galaxy is actually shorter then the 245, so azza2u was on the money.
Now this also explains why I have had way more exhaust scrapes while running the 15”s… with the 18”s it did not happen very often at all.
So, now I am thinking if I want a set of 15”s to use more often, without scraping the exhaust, with my suspension setup, I will need to get the Galaxy 225/70 to get the height I need …. Theoretical difference in height between 215-225-235 should be about .5” between each step….
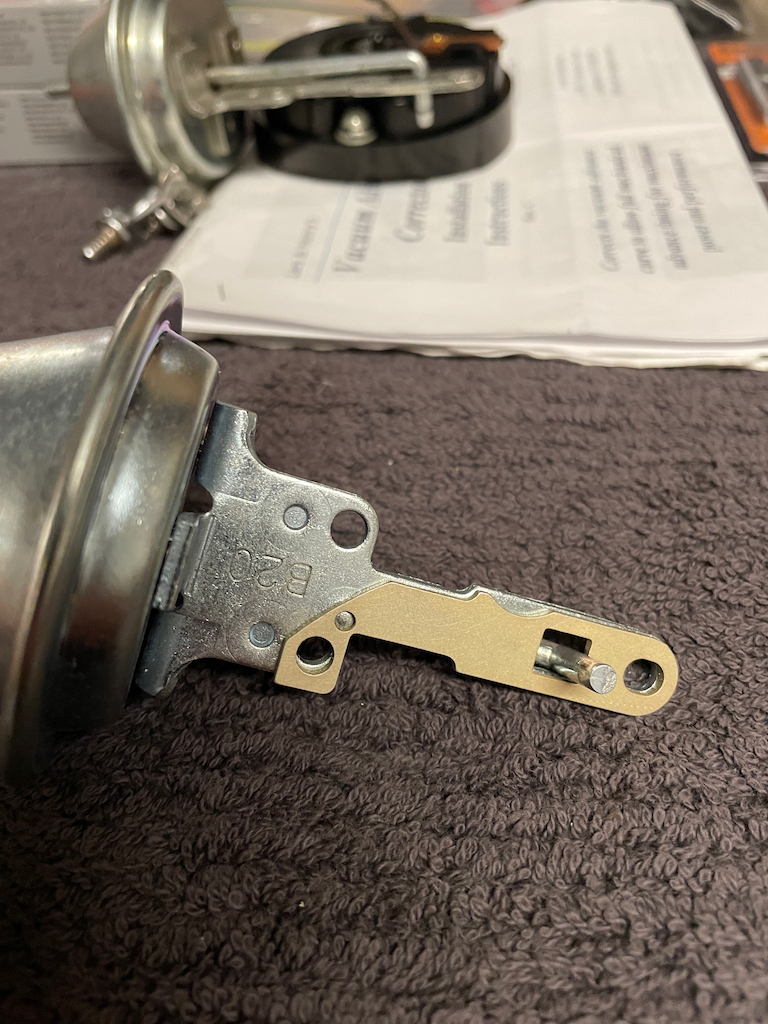
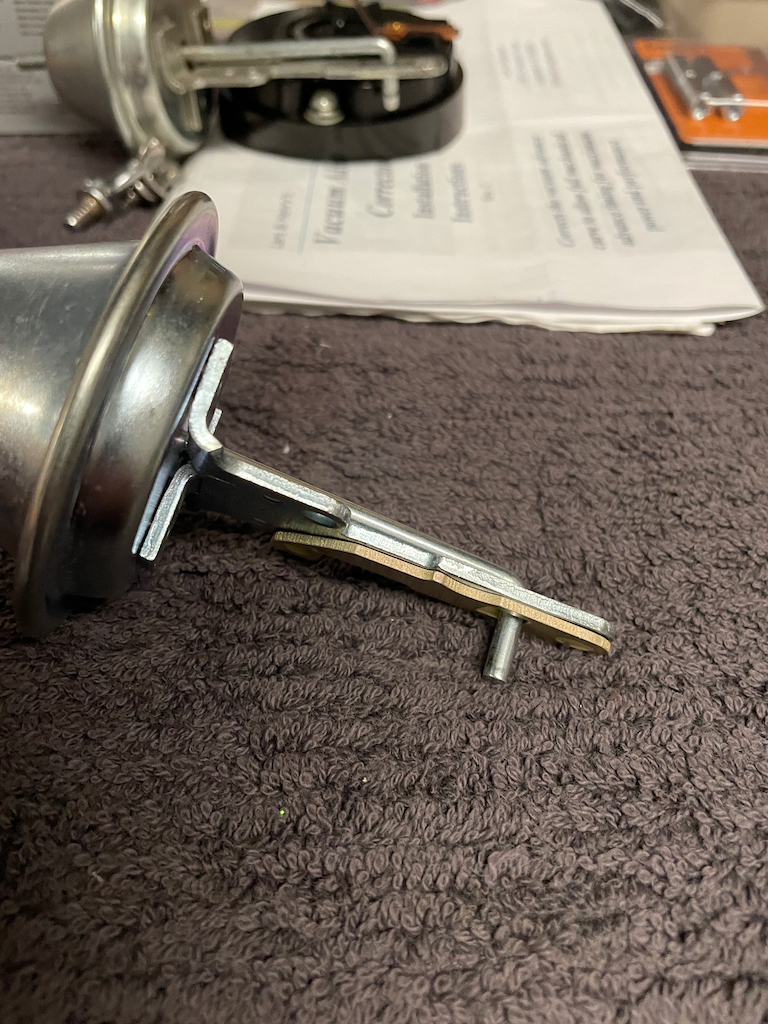
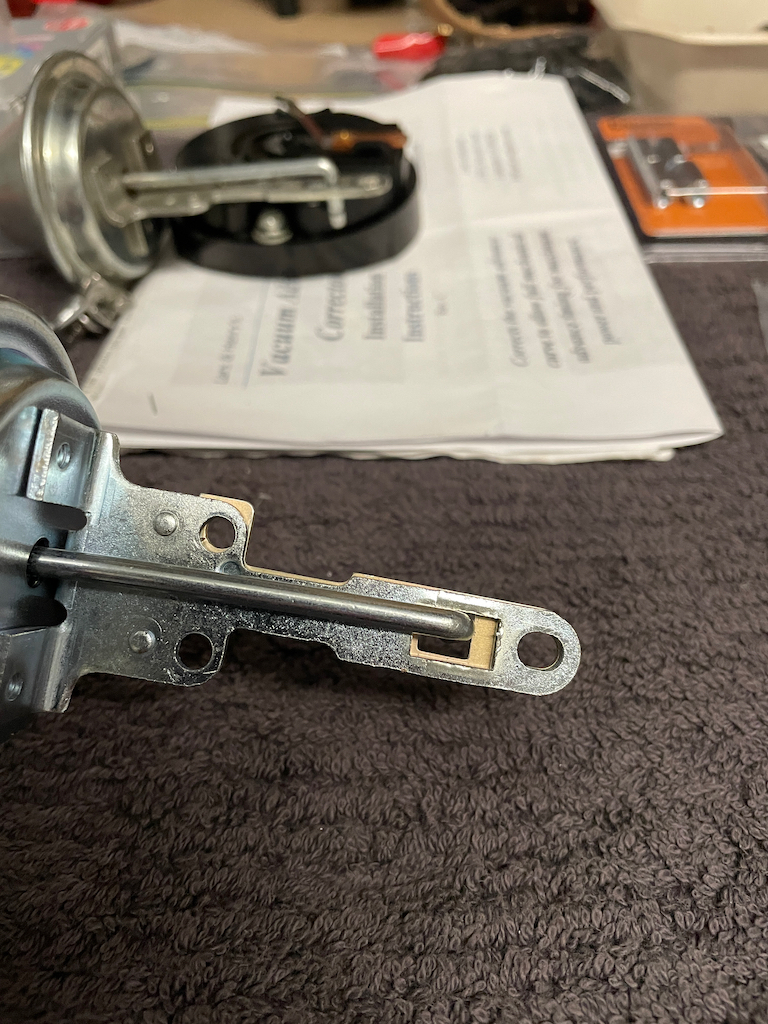
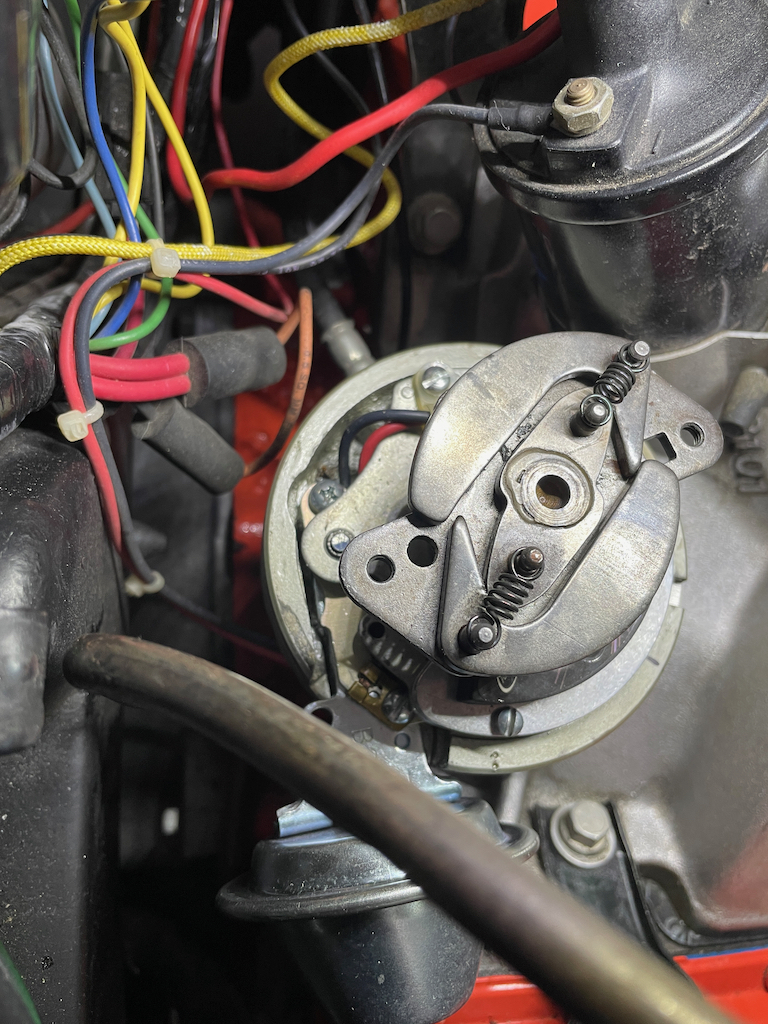
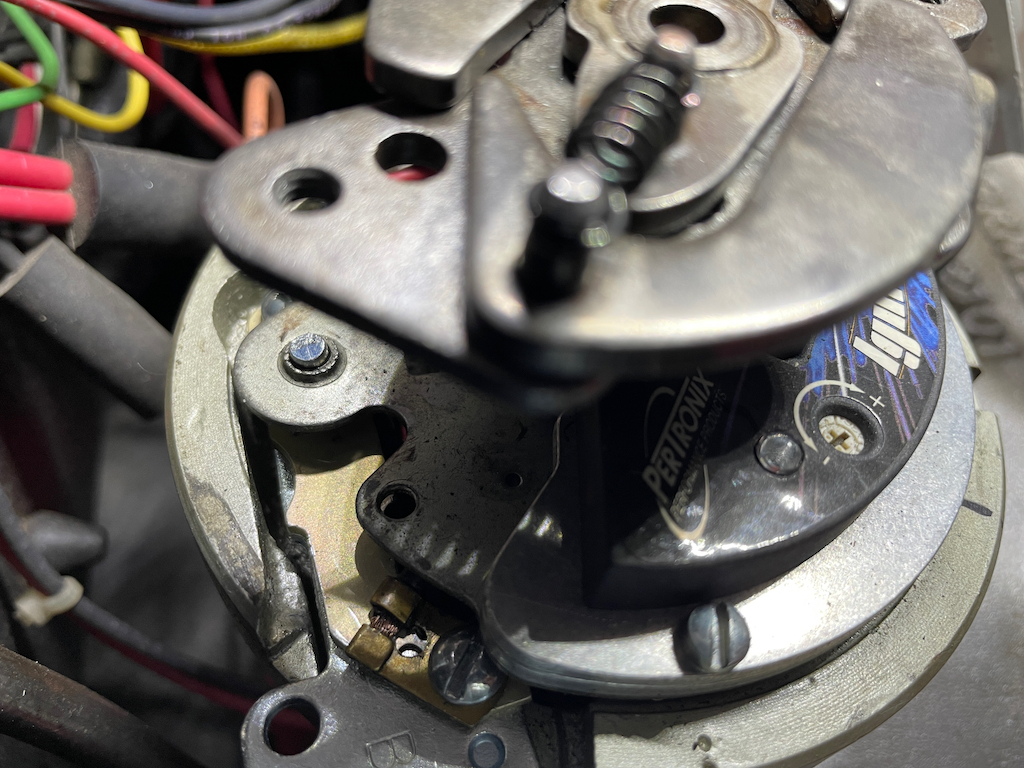
Finally got around to fitting the advance limiter from Lars.
The idea is to limit the vacuum advance to around 12 degrees.
Well made and clicks into place being held against the factory bumps on the advance assembly.
What I did not realise, but becomes more obvious from below, is that it fixes initial position solidly, as well as controls total movement. Most cans have the initial position such that the advance can possibly move back beyond its initial start point temporarily as there is no hard stop. This design provides both fixed start and stop.
Mounted in distributor
So I have not played with timing yet but I currently have about 16 initial and 28 with vacuum appled so its keeping it to 12 degrees.
Designer Imagines A Corvette That Looks More Like a Corvette Than the Corvette
Slideshow: A Jaguar designer's personal project imagines what a modern front-engined Corvette might look like if Chevrolet revisited the golden age of the Stingray.