


1971 Journey
Race Director


Joined: Mar 2016
Posts: 14,407
Likes: 8,212
From: Napa Valley California

Thread Starter
Melting Slicks


Joined: Apr 2010
Posts: 2,795
Likes: 1,196
From: Canberra Australia
2025 C3 of the Year Finalist - Modified
Thread Starter
Melting Slicks
Joined: Apr 2010
Posts: 2,795
Likes: 1,196
From: Canberra Australia
2025 C3 of the Year Finalist - Modified
Just checked it out and the event starts at 9am.
Have been before, it’s just next to the advanced driving training facility.
We have a couple of people coming to look at a car we have for sale during the day but will try and make it.
Have been before, it’s just next to the advanced driving training facility.
We have a couple of people coming to look at a car we have for sale during the day but will try and make it.
Drifting

Joined: Aug 2015
Posts: 1,939
Likes: 477
From: NSW, Australia
C3 of Year Finalist (track prepared) 2019
Cool. Come and say hello if you get the chance! Figured it was worth a mention given I'm not in your neck of the woods too often (I live a bit north of Newcastle).
Thread Starter
Melting Slicks
Joined: Apr 2010
Posts: 2,795
Likes: 1,196
From: Canberra Australia
2025 C3 of the Year Finalist - Modified
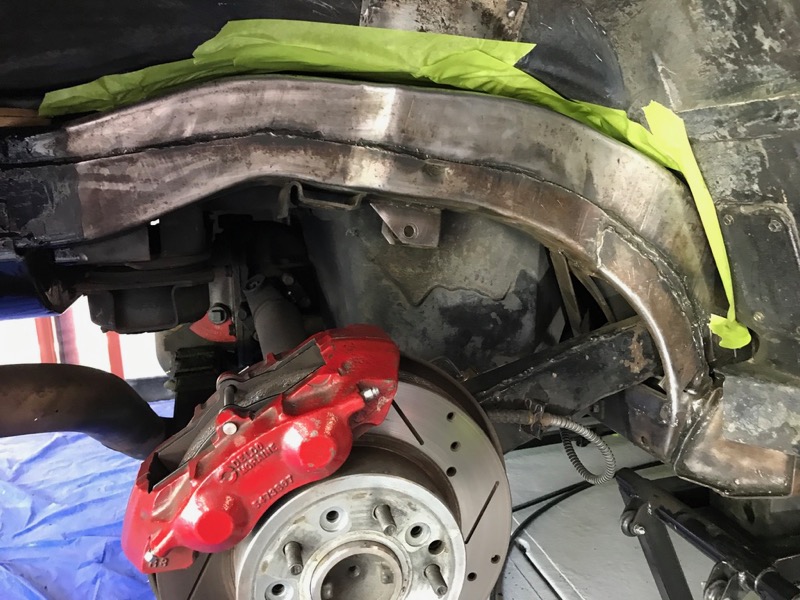
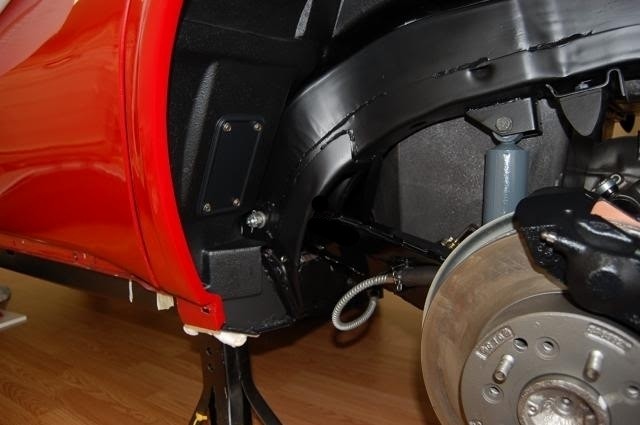
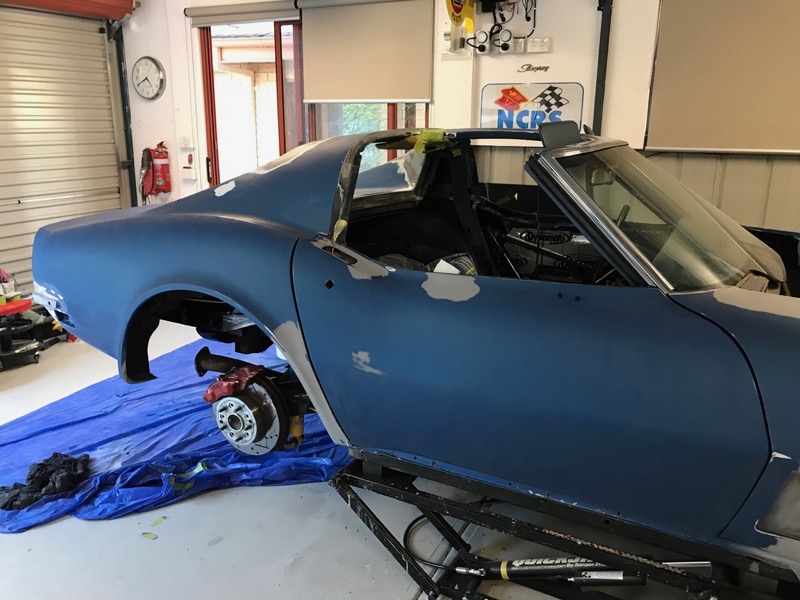
A bit more work on the inner arch and frame. Getting ready for welder to come over then I can do some more.
Just doing what I can now as i will strip all suspension etc later and complete the job.
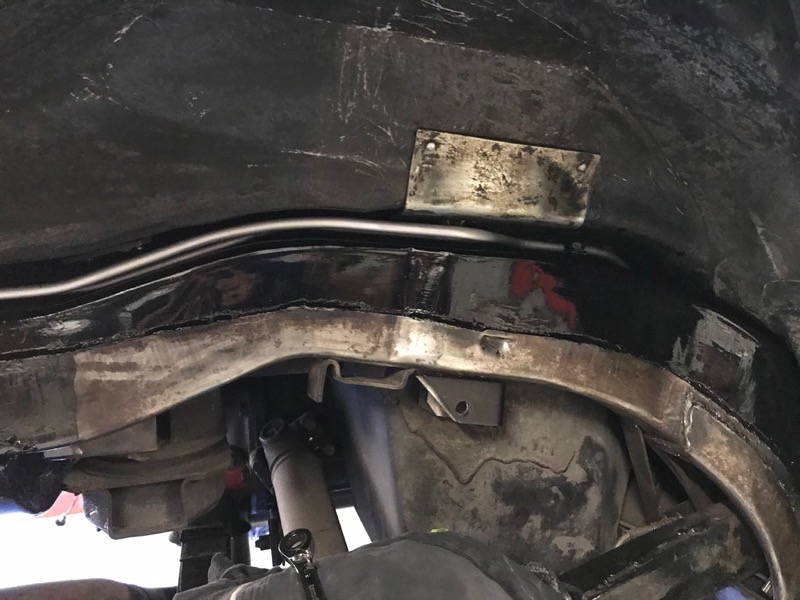
Just doing what I can now as i will strip all suspension etc later and complete the job.
Last edited by CraigH; Apr 10, 2023 at 06:16 AM.
Thread Starter
Melting Slicks
Joined: Apr 2010
Posts: 2,795
Likes: 1,196
From: Canberra Australia
2025 C3 of the Year Finalist - Modified
Dropped out to the hillclimb to catch up with Metalhead while he was here.
Perfect timing he was lined up ready to go.
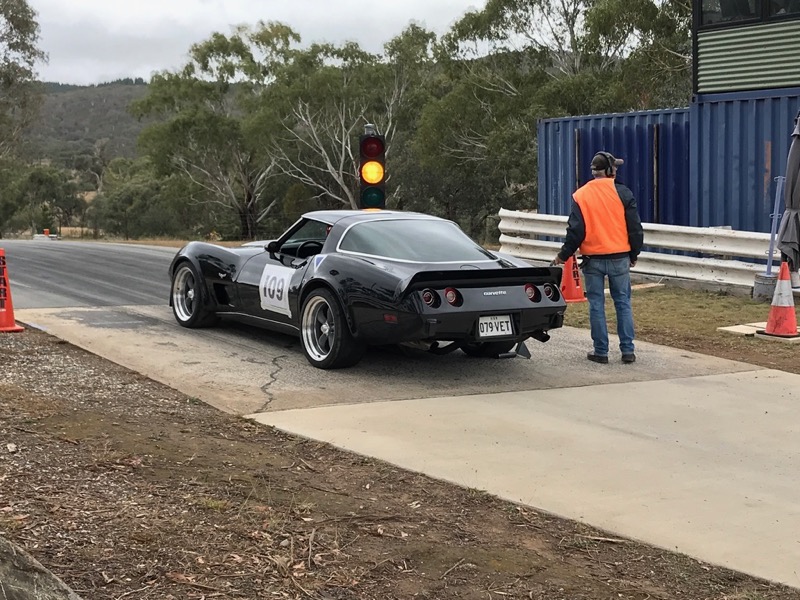
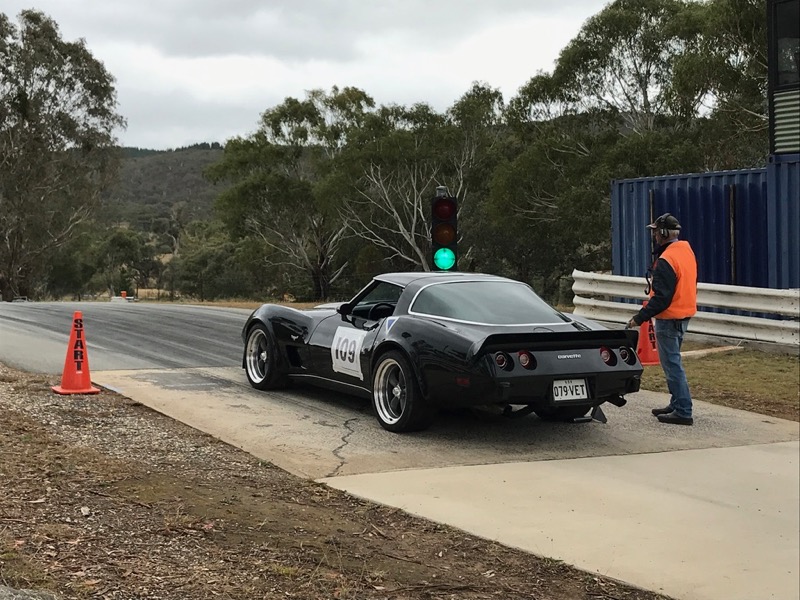
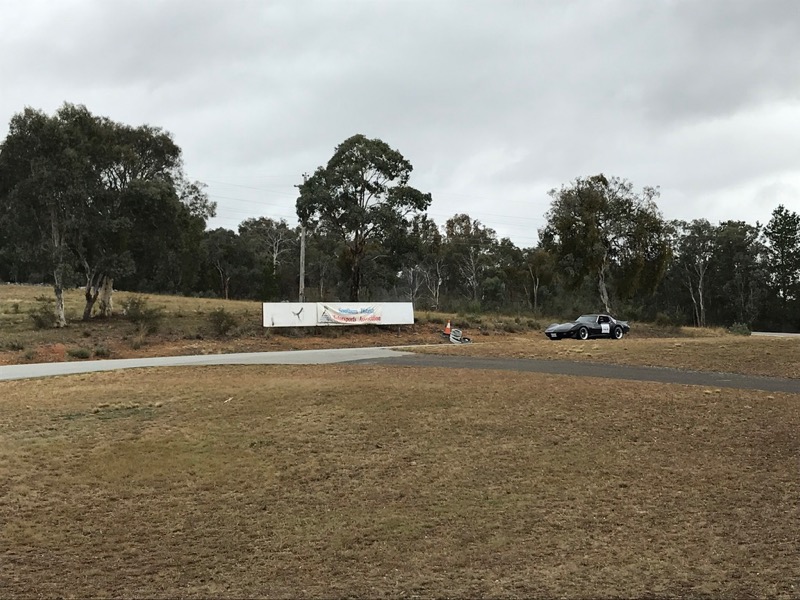


His Vette looked too good to be pounding round the track
Sat nice and controlled all around the circuit, suspension well sorted Andrew.
Perfect timing he was lined up ready to go.
His Vette looked too good to be pounding round the track
Sat nice and controlled all around the circuit, suspension well sorted Andrew.
Last edited by CraigH; Apr 10, 2023 at 06:16 AM.
Corvette Stories
The Best of Corvette for Corvette Enthusiasts

Top 10 Most Expensive Corvettes Ever Sold on Bring A Trailer
Brett Foote
10 Things Every Corvette Owner Needs (2026 Edition)
Michael S. Palmer
8 Most "Only Corvette Owners Understand" Quirks and Problems
Pouria Savadkouei
10 Reasons the C6 Z06 is Still A Performance Benchmark After 20 Years
Joe Kucinski
How Much Horsepower Every Corvette Engine "LOST" in 1972
Joe Kucinski
Top 10 DOs and DON'Ts for Protecting Your Convertible Top!
Michael S. Palmer
Top 10 Most Explosive Corvettes Ever Made: Power-to-Weight Ratio Ranked!
Joe Kucinski
150 hp to 1,250 hp: Every Corvette Generation Compared by the Specs That Matter
Joe Kucinski
8 Coolest Corvette Pace Cars (and Replicas) of All Time
Verdad GallardoTeam Owner


Joined: Sep 2006
Posts: 31,285
Likes: 4,375
From: Westminster Maryland
Hi Craig,
Have you considered using a finish with a little less sheen on the frame?
Something with less sheen tends to hide the truth about what the surface of the frame typically is.
Regards,
Alan
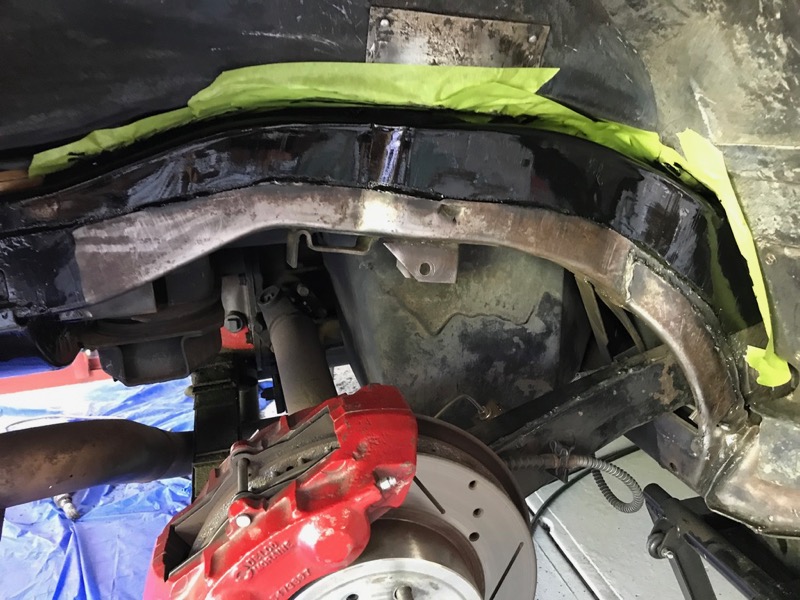
Krylon #1613 Semi-Flat.
Have you considered using a finish with a little less sheen on the frame?
Something with less sheen tends to hide the truth about what the surface of the frame typically is.
Regards,
Alan
Krylon #1613 Semi-Flat.
Thread Starter
Melting Slicks
Joined: Apr 2010
Posts: 2,795
Likes: 1,196
From: Canberra Australia
2025 C3 of the Year Finalist - Modified
All the brackets attached to it are satin black.

Drifting
Joined: Jul 2012
Posts: 1,255
Likes: 297
From: Slovenia, EU
2017 C3 of Year Finalist
Hi Craig!
One quick question: I'm planning on changing the brake lines on my car as you did and I'm wondering. Does the brake fluid leak from the masterr cylinder if you don't plug the holes where the brake lines going to distribution valve are attached? Did you hhad to bleed the master cylinder affter attaching new brake lines?
Thanks for all the inspiration that your work and your posts give me! Keep it up!
Thread Starter
Melting Slicks
Joined: Apr 2010
Posts: 2,795
Likes: 1,196
From: Canberra Australia
2025 C3 of the Year Finalist - Modified
Hi Craig!
One quick question: I'm planning on changing the brake lines on my car as you did and I'm wondering. Does the brake fluid leak from the masterr cylinder if you don't plug the holes where the brake lines going to distribution valve are attached? Did you hhad to bleed the master cylinder affter attaching new brake lines?
Thanks for all the inspiration that your work and your posts give me! Keep it up!
One quick question: I'm planning on changing the brake lines on my car as you did and I'm wondering. Does the brake fluid leak from the masterr cylinder if you don't plug the holes where the brake lines going to distribution valve are attached? Did you hhad to bleed the master cylinder affter attaching new brake lines?
Thanks for all the inspiration that your work and your posts give me! Keep it up!
I plugged the master cylinder when I changed the lines as i did not want it to seeps fluid and brake fluid is nasty stuff on paint etc. I had some plastic plugs that screw into the 2 holes after the lines were removed.
After anything like this I bleed the brakes as there will be air in the systems.
Drifting
Joined: Aug 2015
Posts: 1,939
Likes: 477
From: NSW, Australia
C3 of Year Finalist (track prepared) 2019
Damn it was freezing on Sunday though, not sure how you stand the weather... Car was playing up worse after you left, running really rich and way down on power, seems I have a cracked header causing the o2 sensor to read lean and the fuel injection to dump way too much fuel in. Great little track though. I'll have to come down earlier next time, or take Monday off, so I've time to catch up and see your car.
Thread Starter
Melting Slicks
Joined: Apr 2010
Posts: 2,795
Likes: 1,196
From: Canberra Australia
2025 C3 of the Year Finalist - Modified
That’s a shame about the header, but you still came 4th. Great effort.
It was a little colder than normal but it will be nice in January. Lucky there is no event in winter here then . Certainly welcome to come over and have a look at the Vette. I may even have it back on the road by then ��. If the parking was a little less setup for mountain goats I would bring the Vette out to the track.
It was a little colder than normal but it will be nice in January. Lucky there is no event in winter here then . Certainly welcome to come over and have a look at the Vette. I may even have it back on the road by then ��. If the parking was a little less setup for mountain goats I would bring the Vette out to the track.
Thread Starter
Melting Slicks
Joined: Apr 2010
Posts: 2,795
Likes: 1,196
From: Canberra Australia
2025 C3 of the Year Finalist - Modified
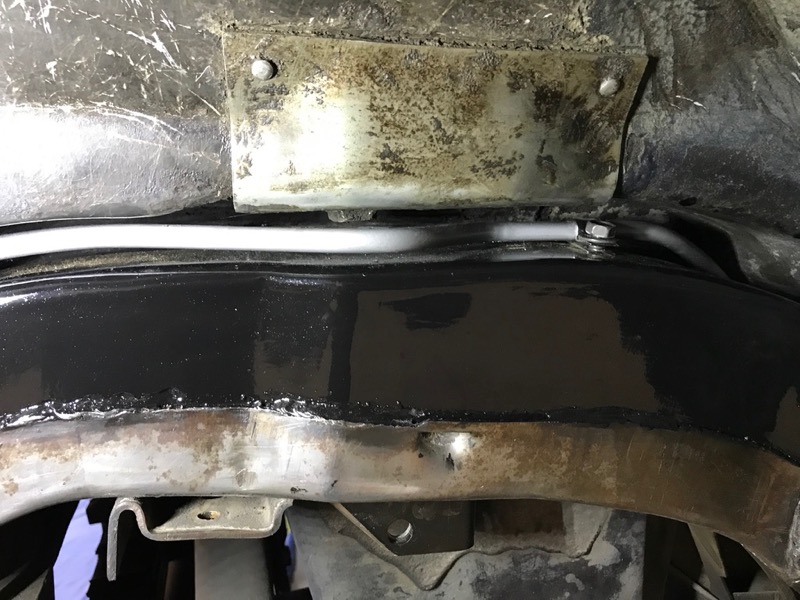
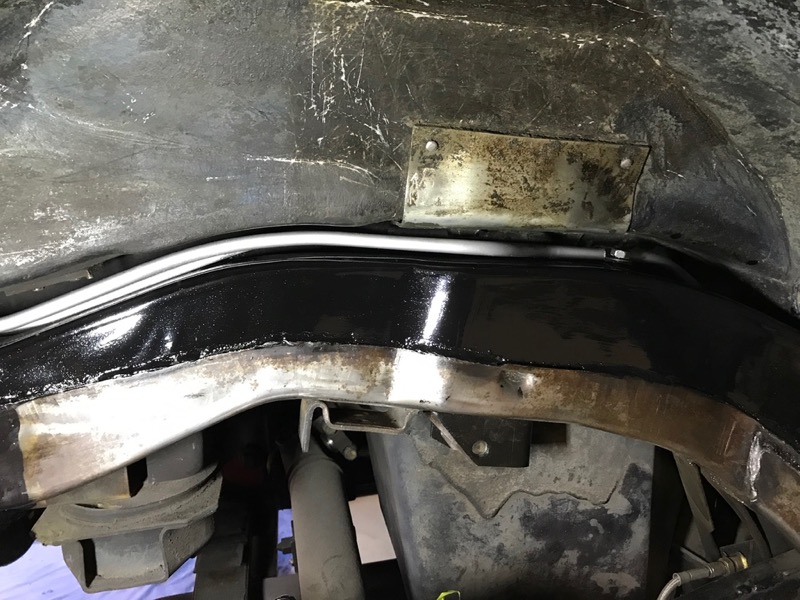
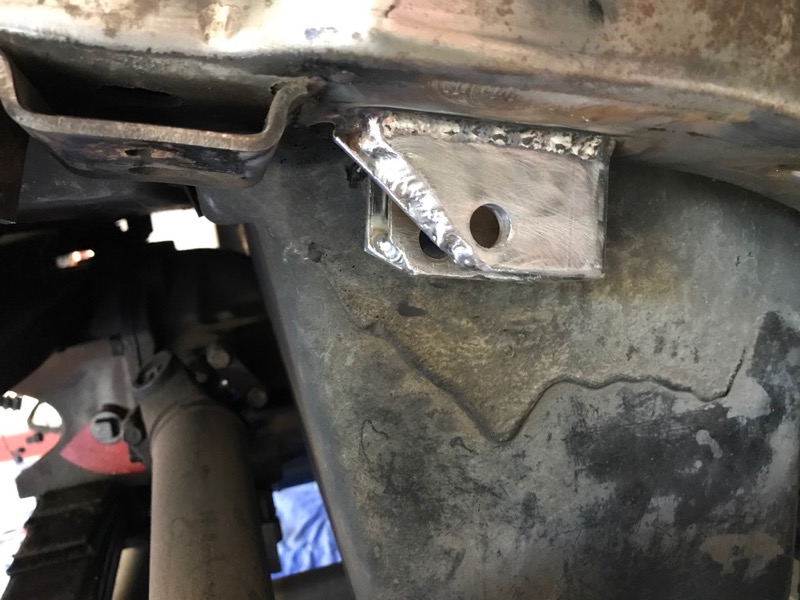
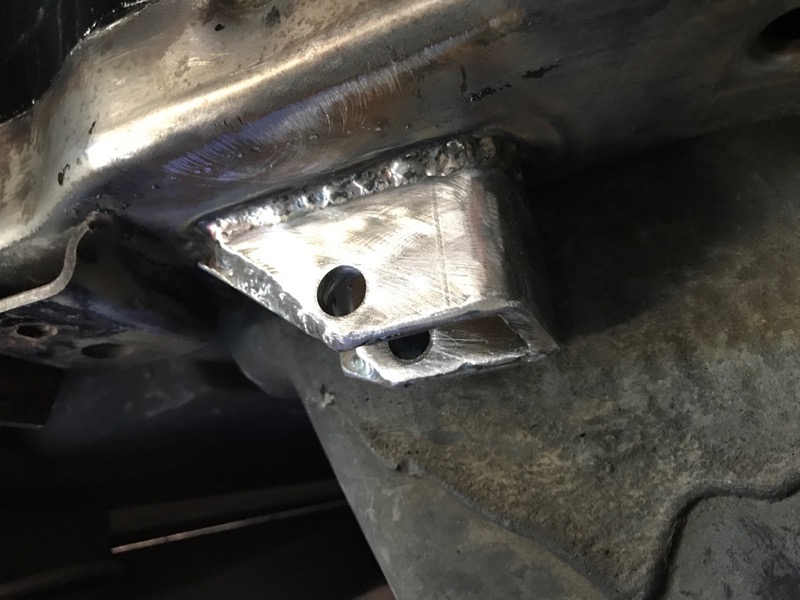
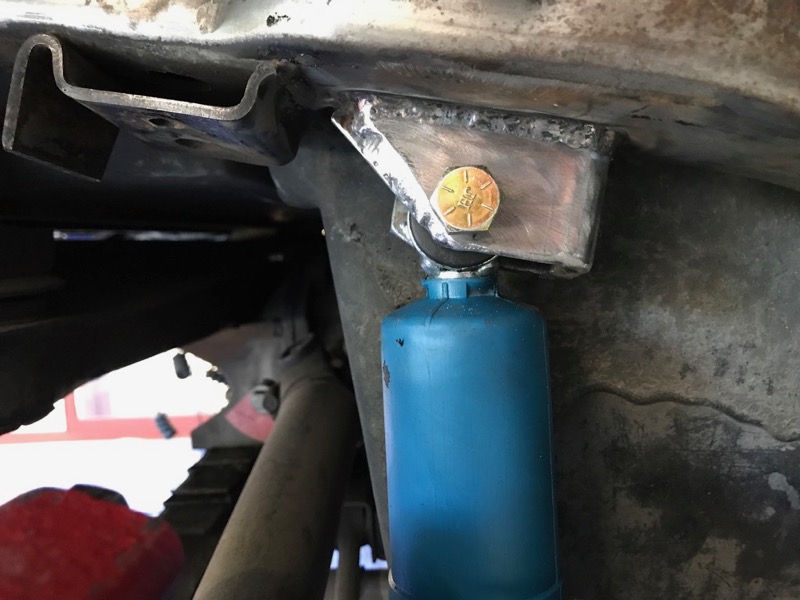
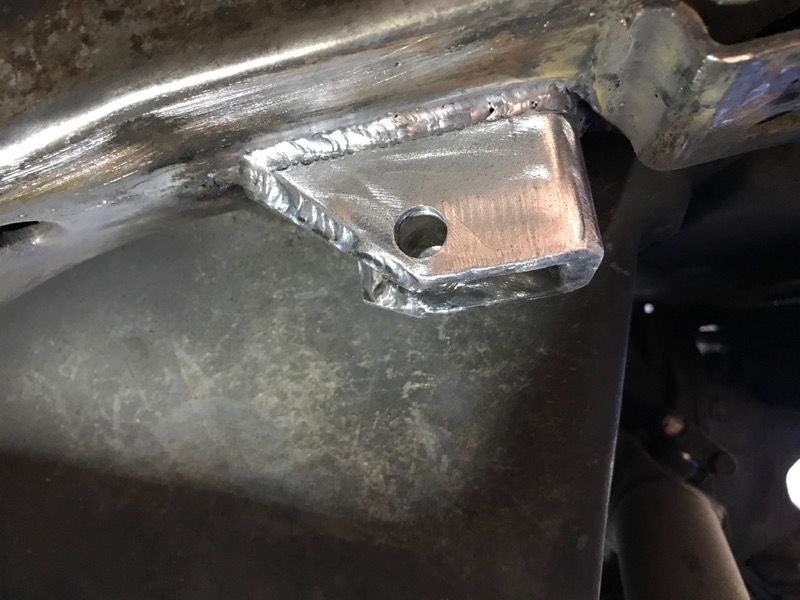
I got someone in to weld the upper shock mount reinforcement pieces from VanSteel.
He used a TIG to do the work.
Now uses a 1/2" bolt for the shock mount.
He used a TIG to do the work.
Now uses a 1/2" bolt for the shock mount.
Last edited by CraigH; Apr 10, 2023 at 06:15 AM.
Thread Starter
Melting Slicks
Joined: Apr 2010
Posts: 2,795
Likes: 1,196
From: Canberra Australia
2025 C3 of the Year Finalist - Modified
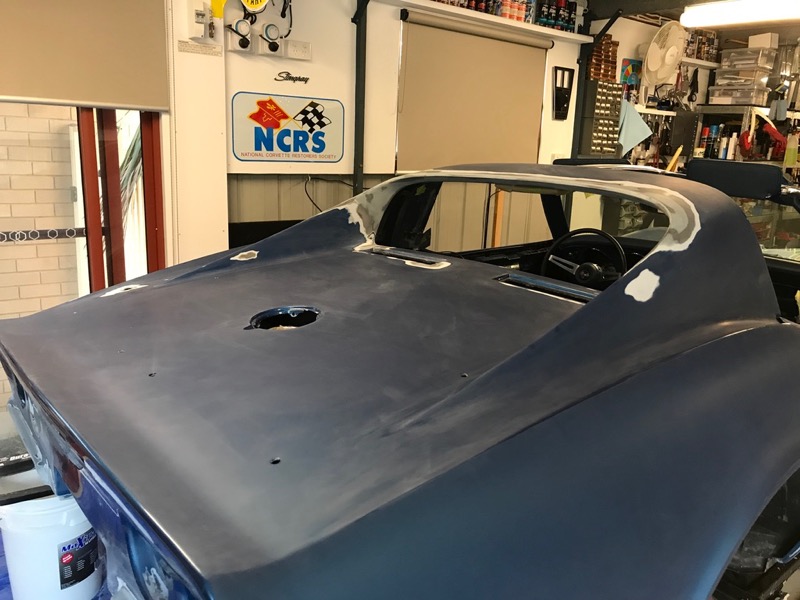
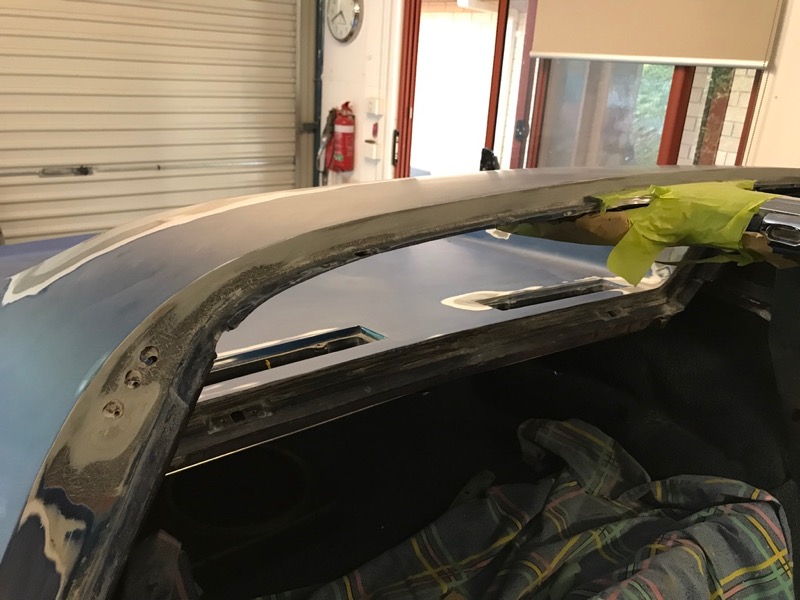
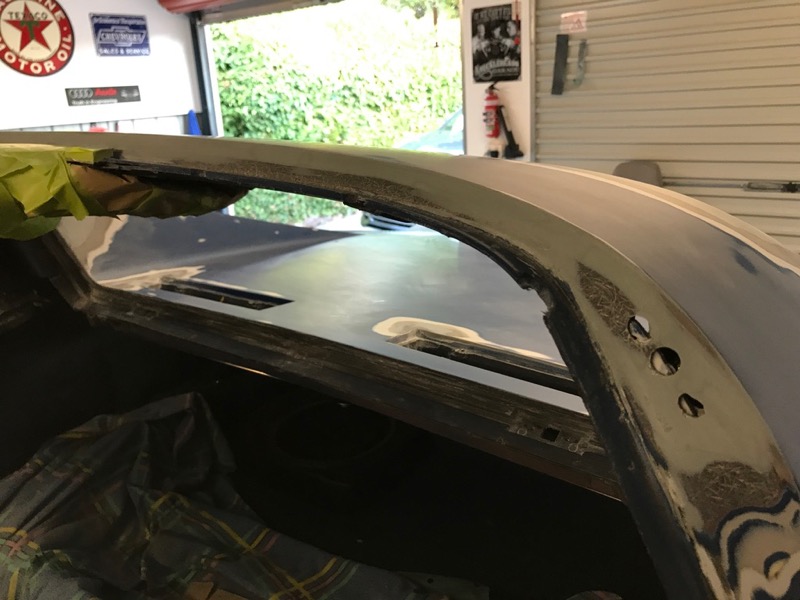
Had to strip the stainless of my Tops so I could prep them for painting
First remove the weatherstrip from the side channel as the holes don't line up with the bolt heads below.
Then remove 4 small Phillips headed bolts holding the side channel in place
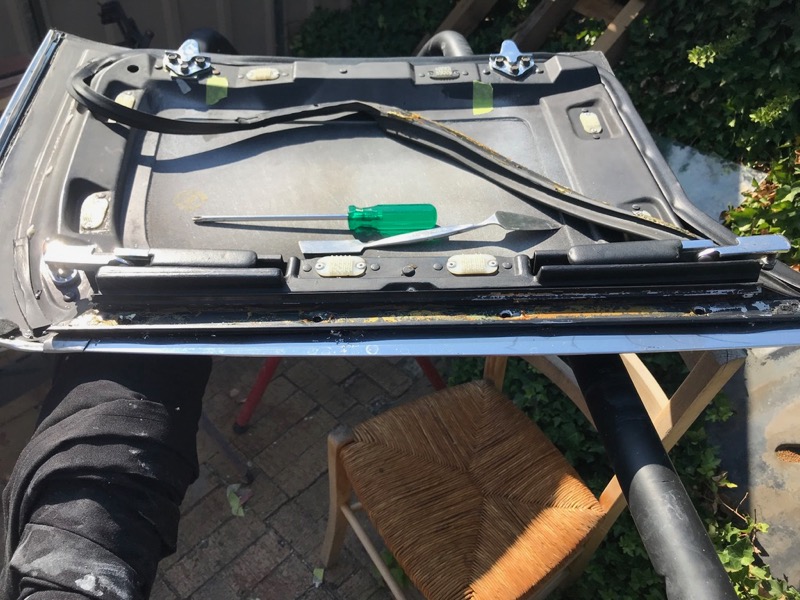
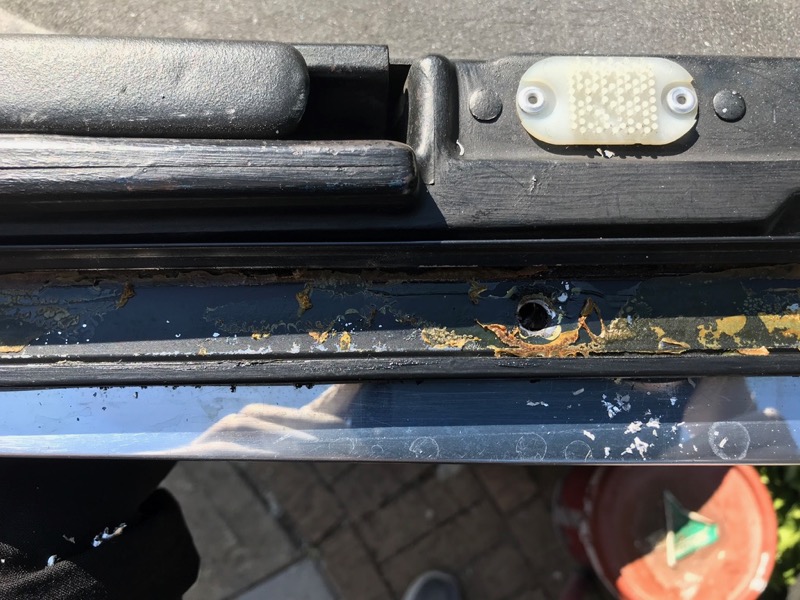
Then drill out all the rivets holding the stainless trim below.
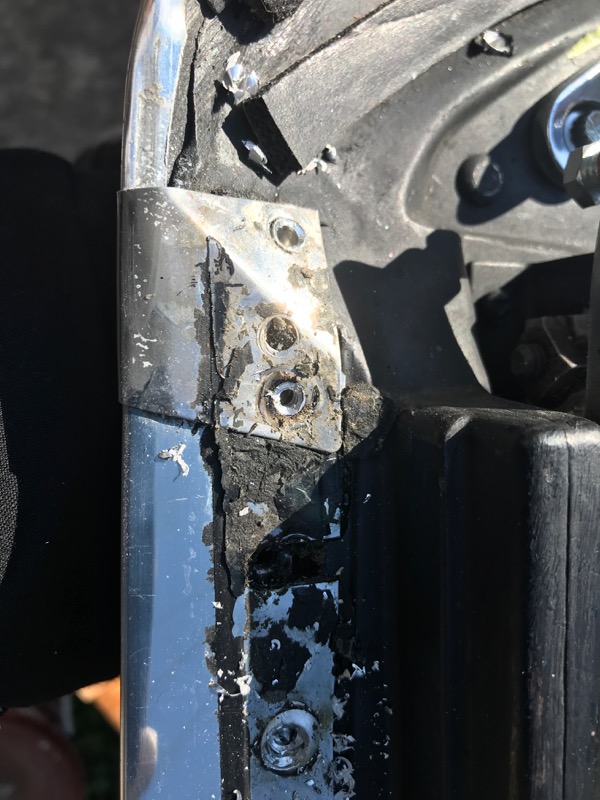
The joining piece comes out easily.
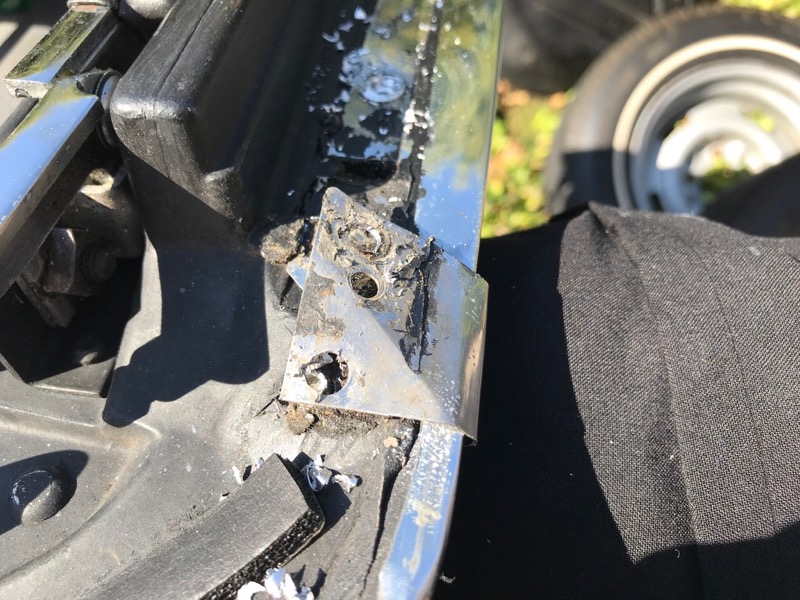
But the side piece is held in with some form of sealant. Possibly dumdum or a tape type sealant.
Slowly work the from curved trim off.
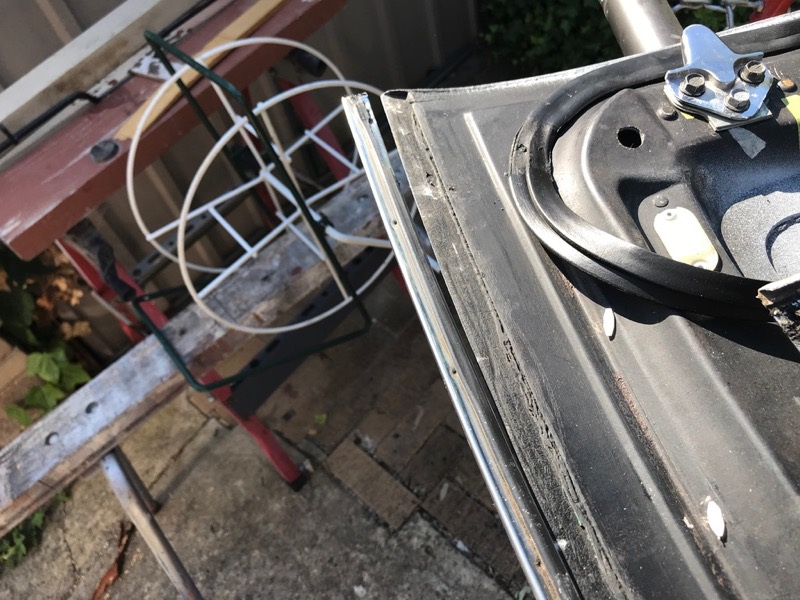
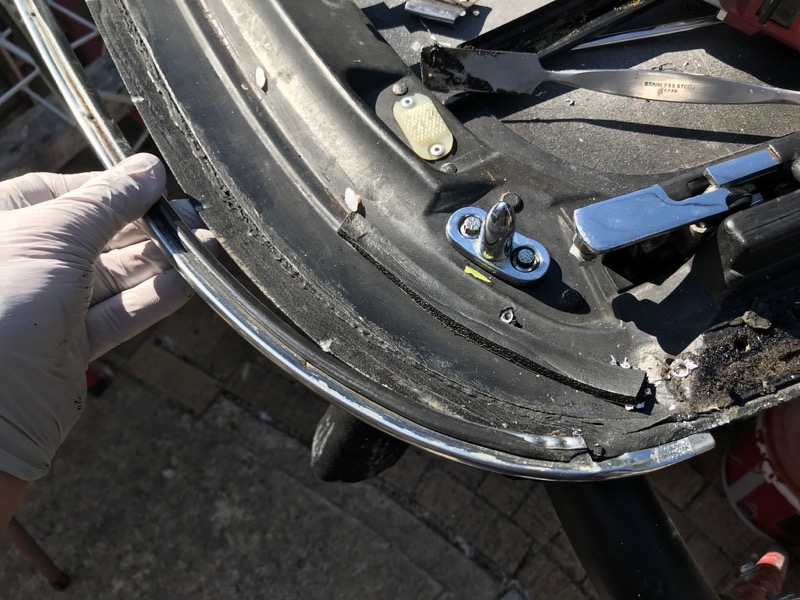
And clean all the sealant off with prepsol.
First remove the weatherstrip from the side channel as the holes don't line up with the bolt heads below.
Then remove 4 small Phillips headed bolts holding the side channel in place
Then drill out all the rivets holding the stainless trim below.
The joining piece comes out easily.
But the side piece is held in with some form of sealant. Possibly dumdum or a tape type sealant.
Slowly work the from curved trim off.
And clean all the sealant off with prepsol.
Last edited by CraigH; Apr 10, 2023 at 06:15 AM.
Thread Starter
Melting Slicks
Joined: Apr 2010
Posts: 2,795
Likes: 1,196
From: Canberra Australia
2025 C3 of the Year Finalist - Modified
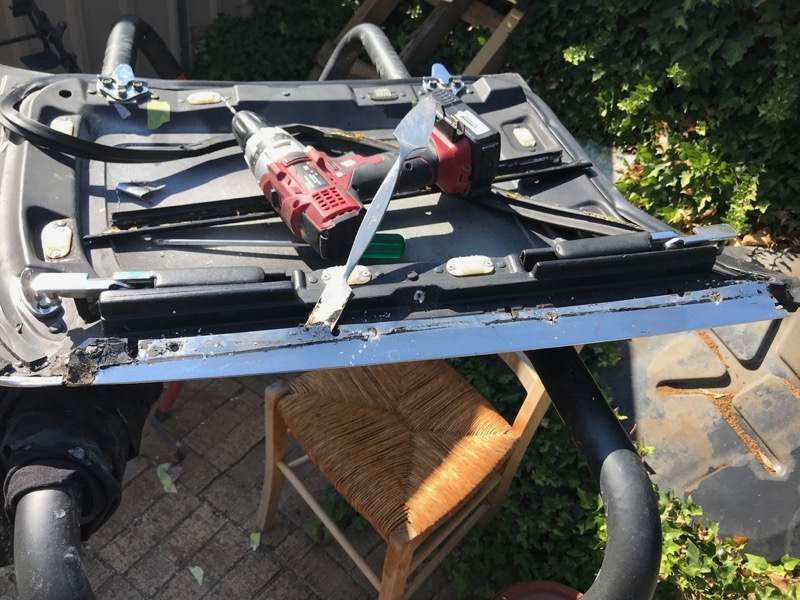
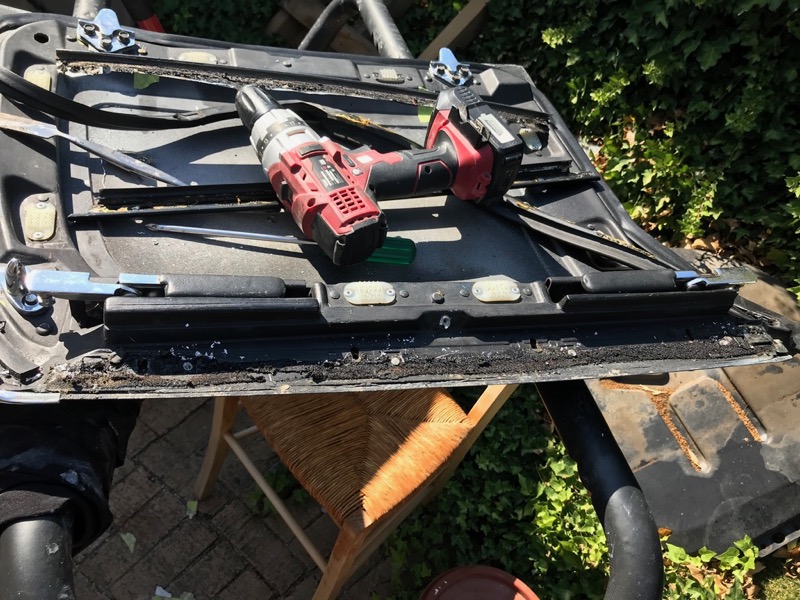
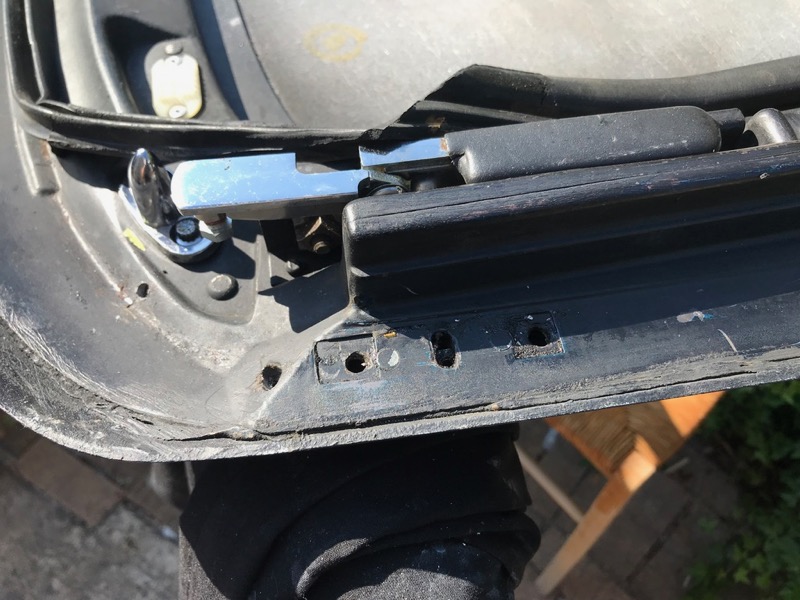
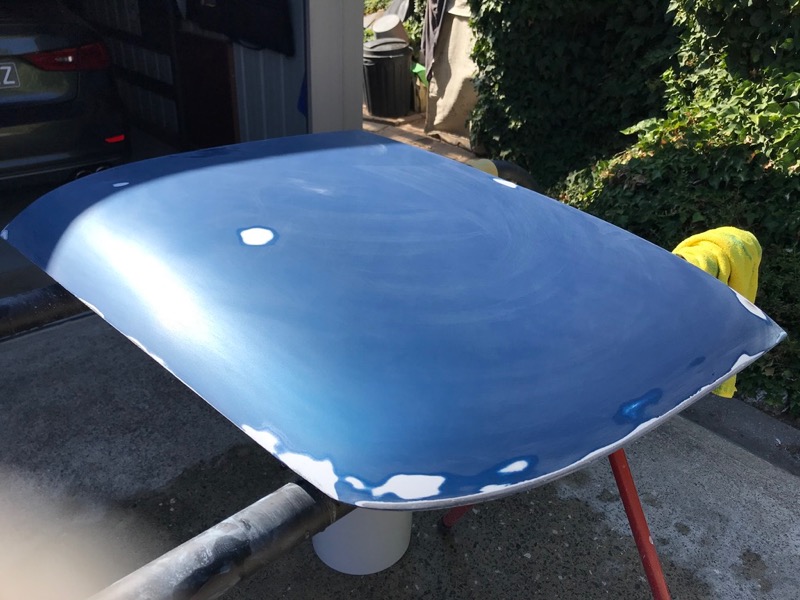
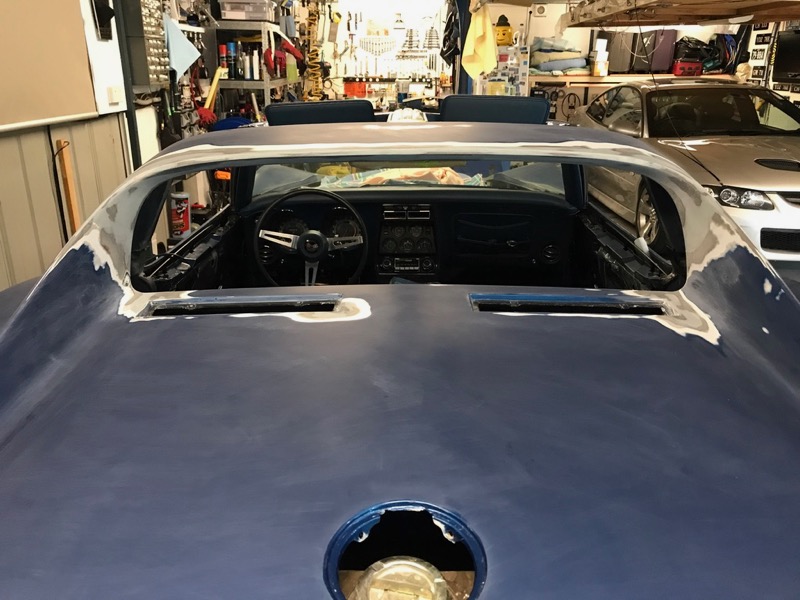
Now to prep the Tops for paint.
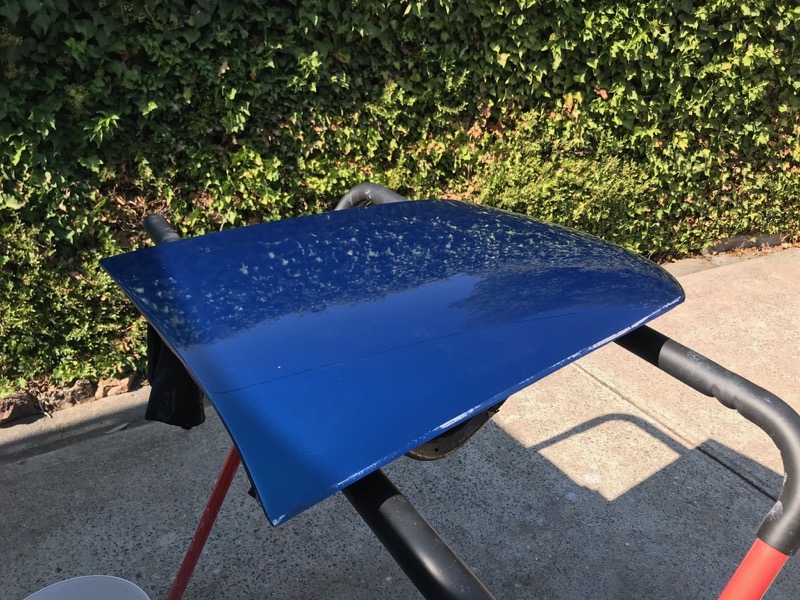
Fully clean all wax etc off with prepsol (wax & grease remover)

Aim is to prep for paint and get rid of any orange peel etc and have a nice flat surface. Using a good sized block will show where highs and lows are
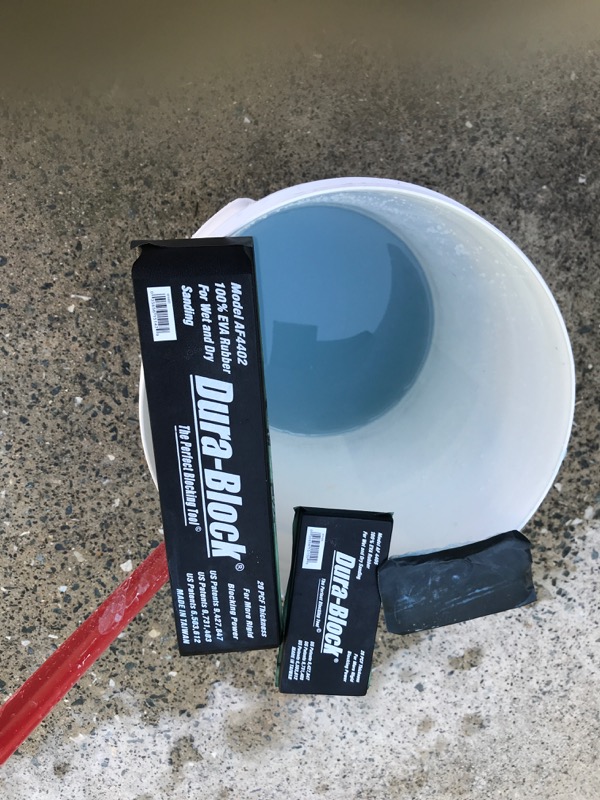
Keep working it till its all flattened out. And work any problem areas with smaller blocks.
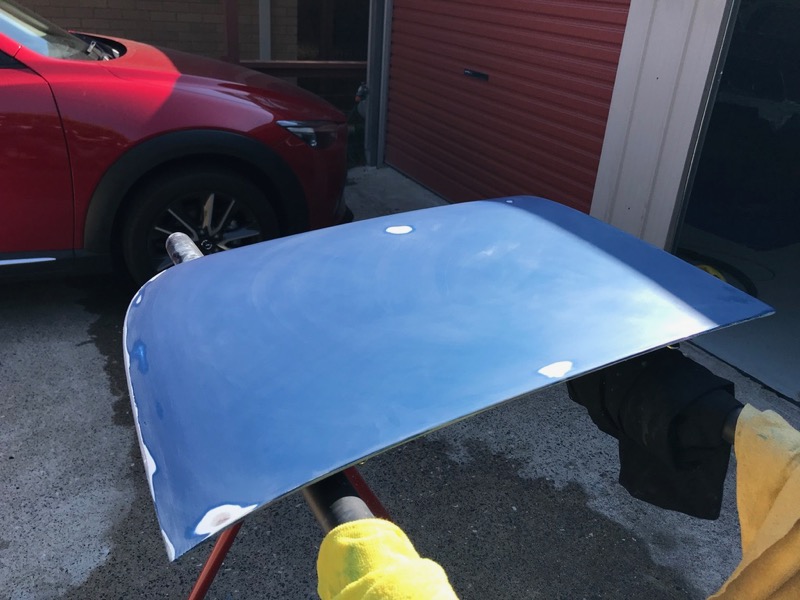
Other side
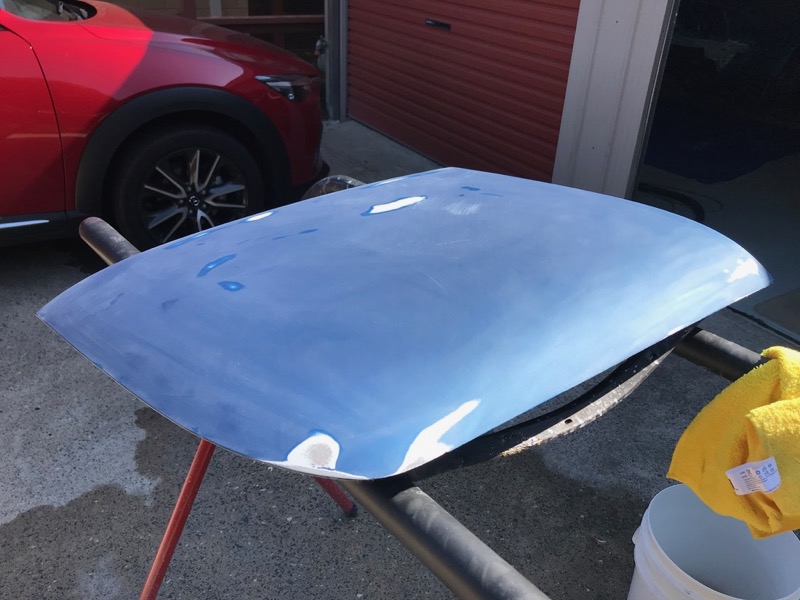

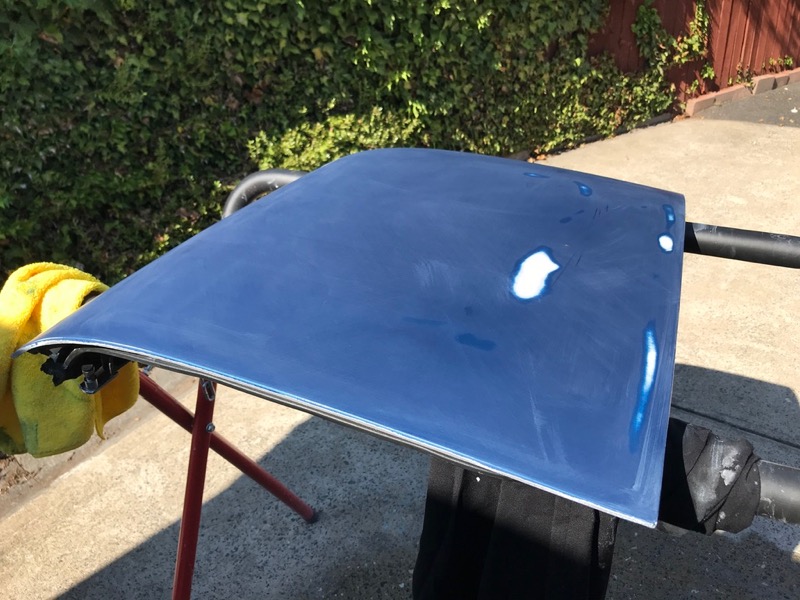
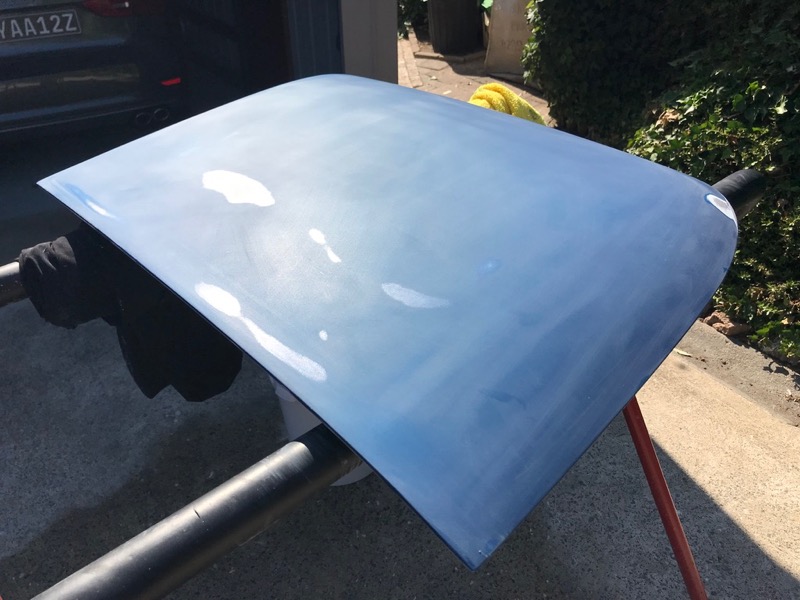
This was done with 400 Wet & Dry. Will move to 600 next.
Fully clean all wax etc off with prepsol (wax & grease remover)
Aim is to prep for paint and get rid of any orange peel etc and have a nice flat surface. Using a good sized block will show where highs and lows are
Keep working it till its all flattened out. And work any problem areas with smaller blocks.
Other side
This was done with 400 Wet & Dry. Will move to 600 next.
Last edited by CraigH; Apr 10, 2023 at 06:15 AM.
Thread Starter
Melting Slicks
Joined: Apr 2010
Posts: 2,795
Likes: 1,196
From: Canberra Australia
2025 C3 of the Year Finalist - Modified
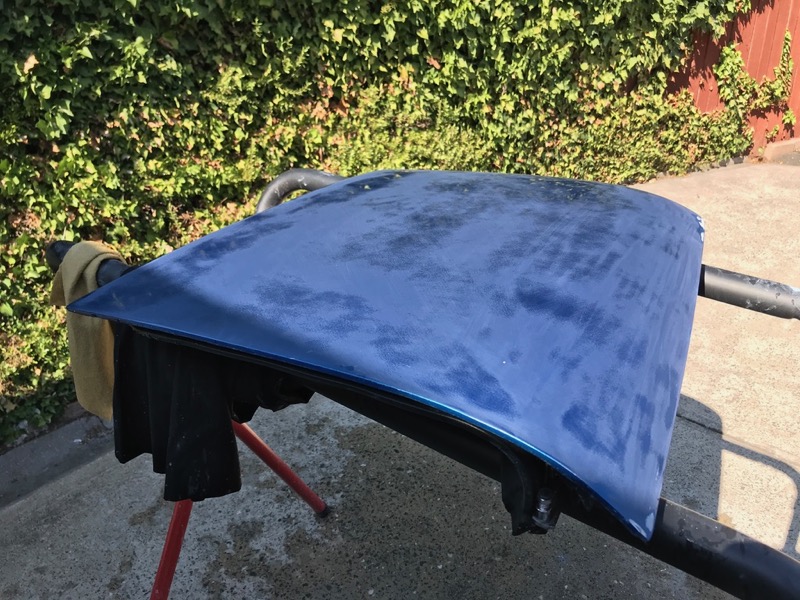
Some time spent sanding, both dry and wet. (dry around any repairs and wet for the remainder of the panels)
Over the halo and all repairs 220 then 320 dry
The rear deck and rear side panels 400 wet
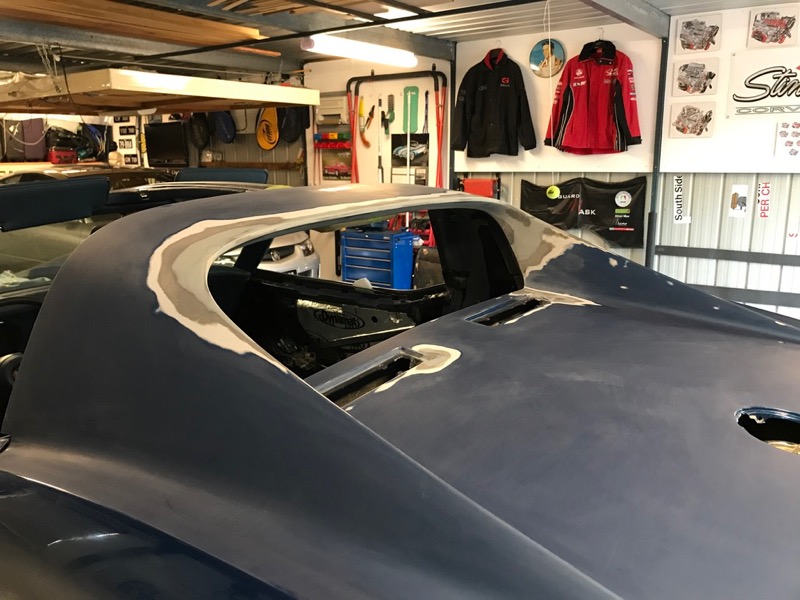
Rear guard and door 400 wet then 600 wet

Still need to do some minor work on a couple of repairs. then more sanding of other rear guard and rear light panel.
Can then go to Peter and get the repairs shot in sealer and epoxy filler then be sanded and blended ready for his part of the job.
Getting closer.
Over the halo and all repairs 220 then 320 dry
The rear deck and rear side panels 400 wet
Rear guard and door 400 wet then 600 wet
Still need to do some minor work on a couple of repairs. then more sanding of other rear guard and rear light panel.
Can then go to Peter and get the repairs shot in sealer and epoxy filler then be sanded and blended ready for his part of the job.
Getting closer.
Last edited by CraigH; Apr 10, 2023 at 06:15 AM.
Team Owner
Joined: Sep 2006
Posts: 31,285
Likes: 4,375
From: Westminster Maryland
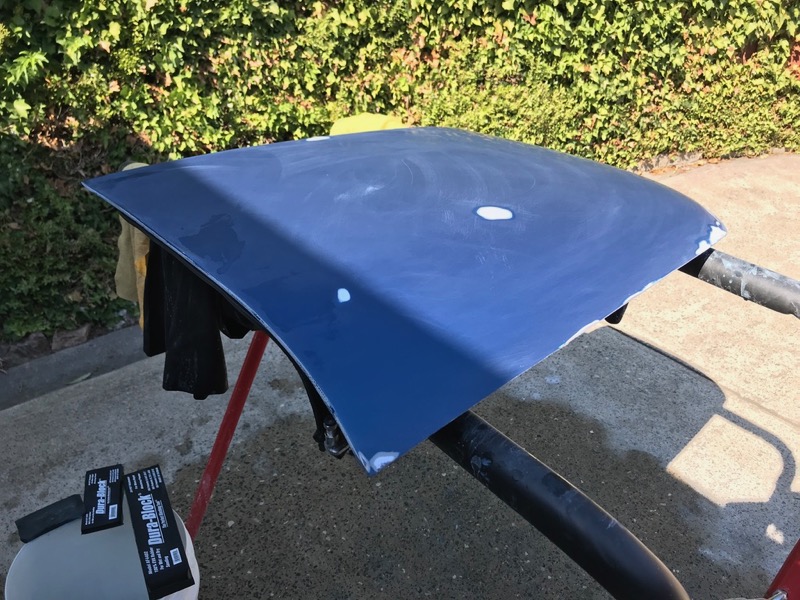
Hi Craig,
Do you have any concern that all these layers of materials may show through your new paint after it settles down?
This looks like a lot going on in a small area?
Regards,
Alan

Do you have any concern that all these layers of materials may show through your new paint after it settles down?
This looks like a lot going on in a small area?
Regards,
Alan
Thread Starter
Melting Slicks
Joined: Apr 2010
Posts: 2,795
Likes: 1,196
From: Canberra Australia
2025 C3 of the Year Finalist - Modified
That area will be sanded more though to feather it out then be sealed etc and sanded again.
Last edited by CraigH; Apr 23, 2018 at 05:13 PM.