


1971 Journey

Thread Starter
Melting Slicks


Joined: Apr 2010
Posts: 2,795
Likes: 1,196
From: Canberra Australia
2025 C3 of the Year Finalist - Modified
So, are you saying that by changing out the springs from the 9 inch to the 8 inch, plus the additional work you did, you achieved a total of 1/2 inch lower stance in the rear?
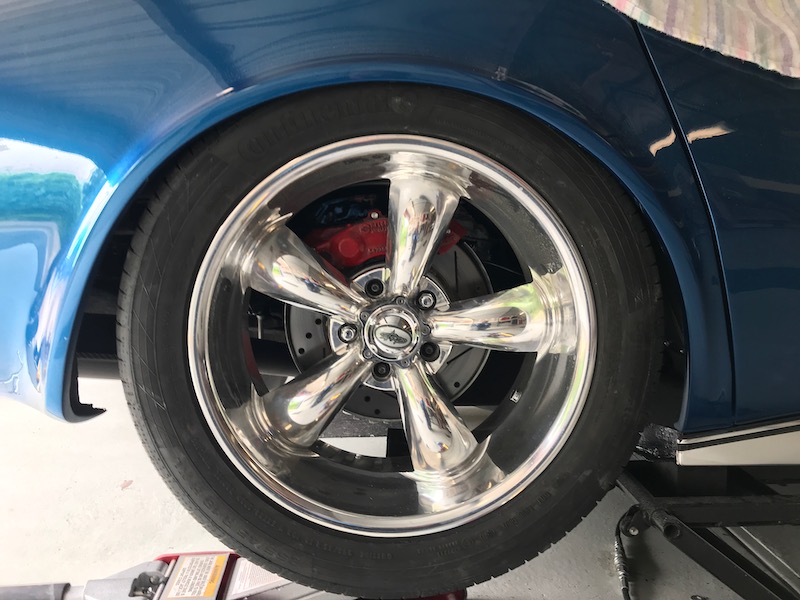
Are you concerned about any contact between the top of the tire and the lip of the wheel well?
The stance is very nice.
I might need to contact Dan.
Thanks for costing me more $$$$$$
Are you concerned about any contact between the top of the tire and the lip of the wheel well?
The stance is very nice.
I might need to contact Dan.
Thanks for costing me more $$$$$$
I had a good talk with Dan this morning and he said that their couplers have one side machined down to 2.5mm so you can minimise the contact between coupler and base. However the Eibach coupler is thinner in the middle. He also said most people ran the spring on bottom but because they use the 5.5 mm bearing plates and with the reduced coupler they avoid the issue.
He also said the QA1 shock assemblies have varied a bit over time on the tophat height etc.
In fact he said before QA1 made 2.25” ID coilovers they machined down the QA1 2.5" versions to fit they're applications.
I am not sure if top or bottom mount of the helper is preferred but I will do some more research. The top certainly has more scope for further adjustment.
All this for a few mm's of adjustment to get the stance....hmm is it worth it :-)
Once I get my Faulkner springs along with some more top assemblies i may do some more experiments with machining down parts.
Last edited by CraigH; Nov 14, 2020 at 03:01 PM.
Thread Starter
Melting Slicks
Joined: Apr 2010
Posts: 2,795
Likes: 1,196
From: Canberra Australia
2025 C3 of the Year Finalist - Modified
yes what�s legal here makes for a rather high rear end to get the pipes under the diff...luckily we don�t have yearly inspections.....if we did i could always just wind it up a bit :-)
Thread Starter
Melting Slicks
Joined: Apr 2010
Posts: 2,795
Likes: 1,196
From: Canberra Australia
2025 C3 of the Year Finalist - Modified
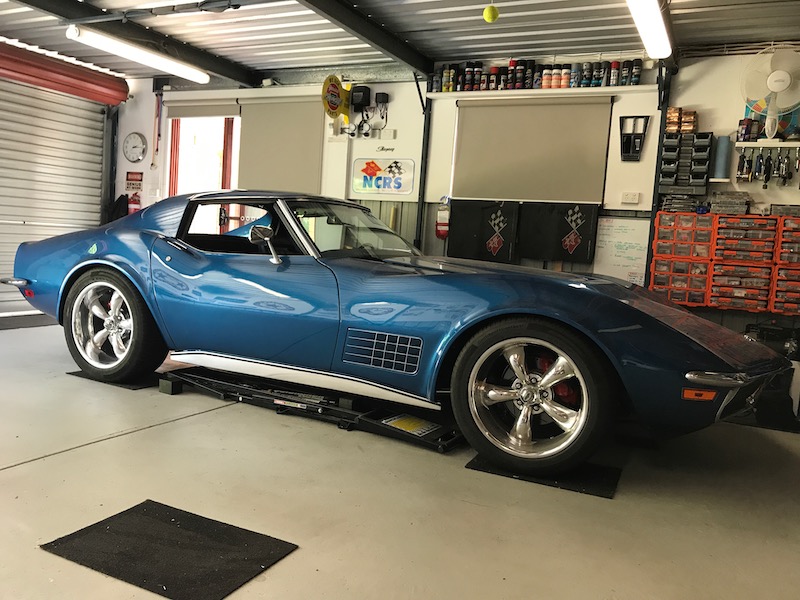
So I did some experiments on how low I could go in the back.
Removed the coilover and then raised the trailing arm.
When I found it fouled the lip on the guard I ground it down so I could get maximum drop without any rubbing.
When I say maximum I mean no bump stops and the trailing arm hitting the bump stop bracket.
In real usage it would never get near that but I wanted to test it.
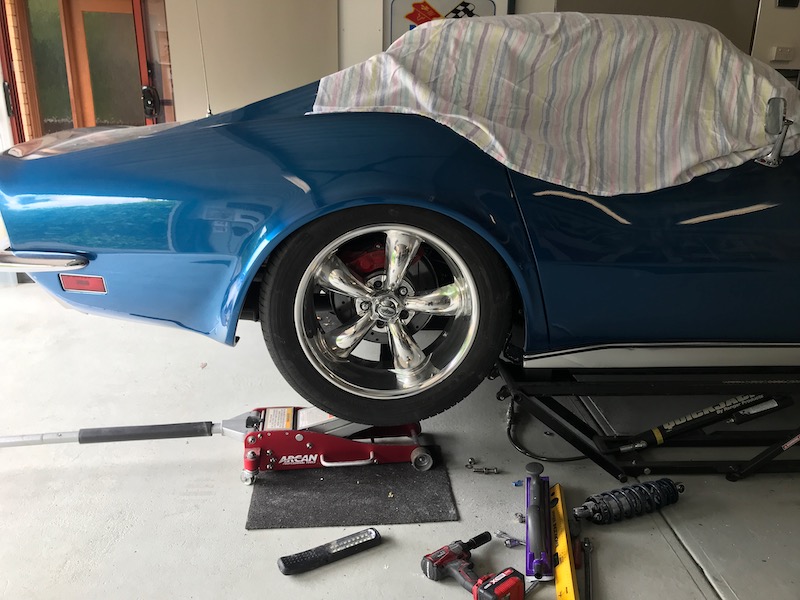
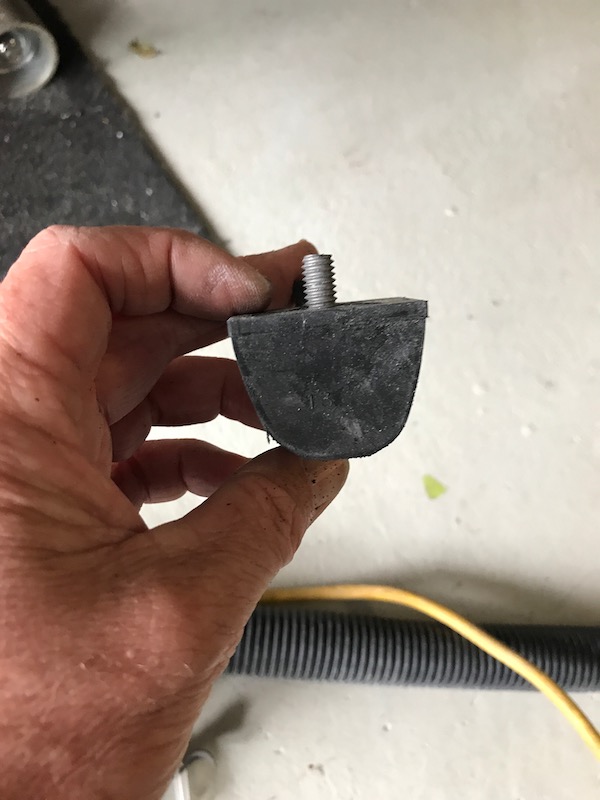
I took 1cm off the bump stop to give me some extra travel before fitting it again.
And adjusted the rear height to a nice low but workable level along with raising the front slightly to match.
Removed the coilover and then raised the trailing arm.
When I found it fouled the lip on the guard I ground it down so I could get maximum drop without any rubbing.
When I say maximum I mean no bump stops and the trailing arm hitting the bump stop bracket.
In real usage it would never get near that but I wanted to test it.
I took 1cm off the bump stop to give me some extra travel before fitting it again.
And adjusted the rear height to a nice low but workable level along with raising the front slightly to match.
Last edited by CraigH; Apr 10, 2023 at 07:05 AM.
Thread Starter
Melting Slicks
Joined: Apr 2010
Posts: 2,795
Likes: 1,196
From: Canberra Australia
2025 C3 of the Year Finalist - Modified
I gave the 71 its first real wash in over 12 months.
Carports come in handy when it's sunny.
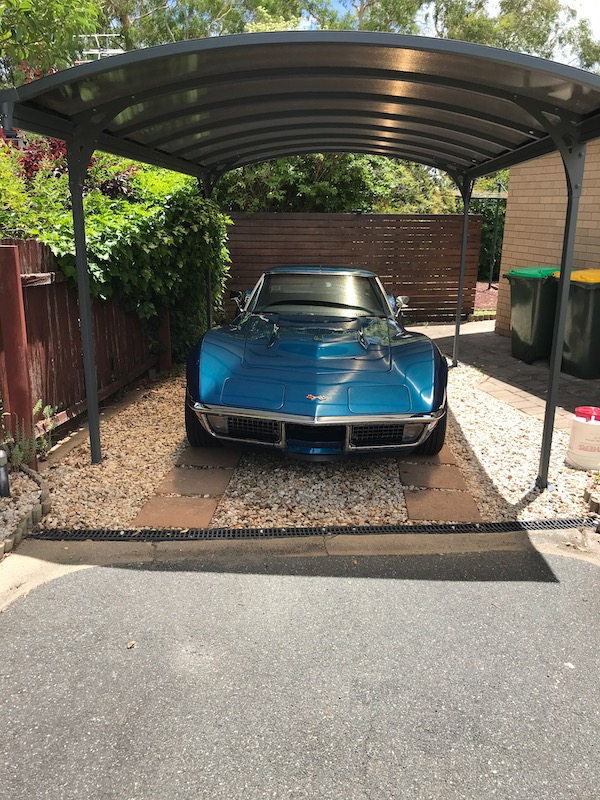
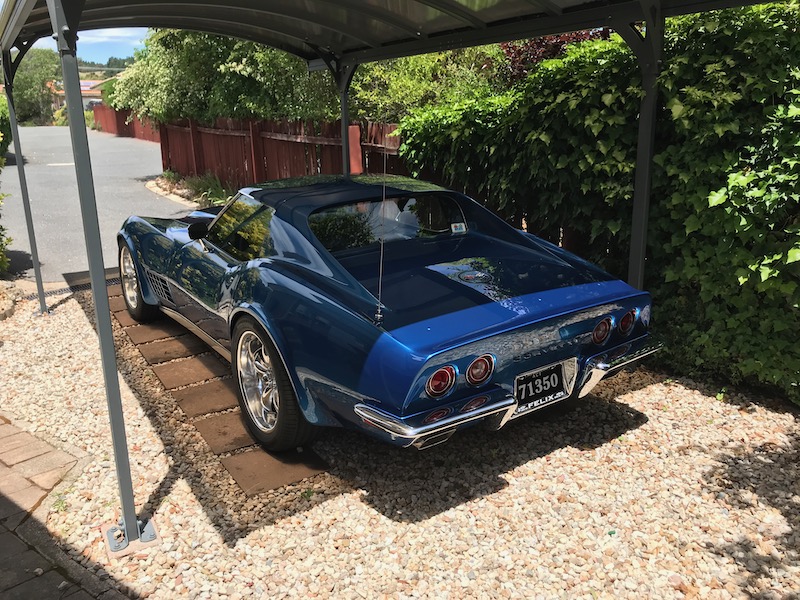
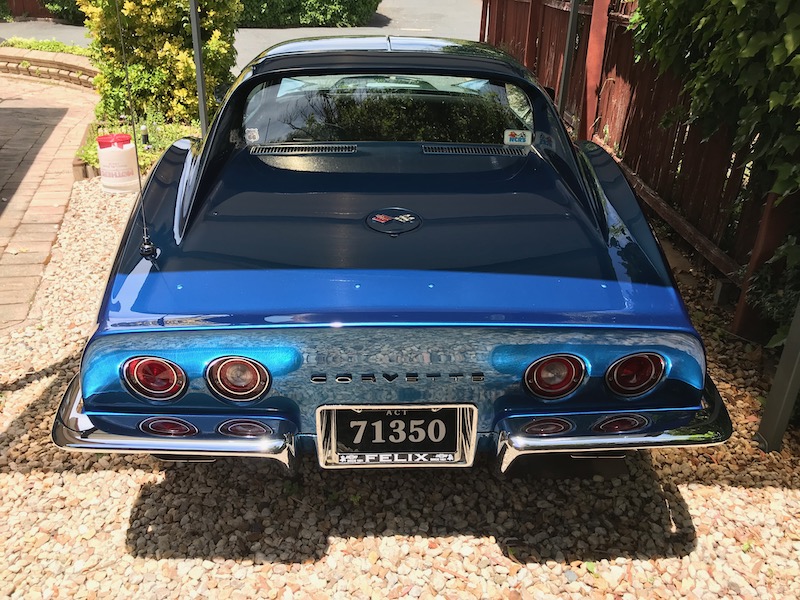
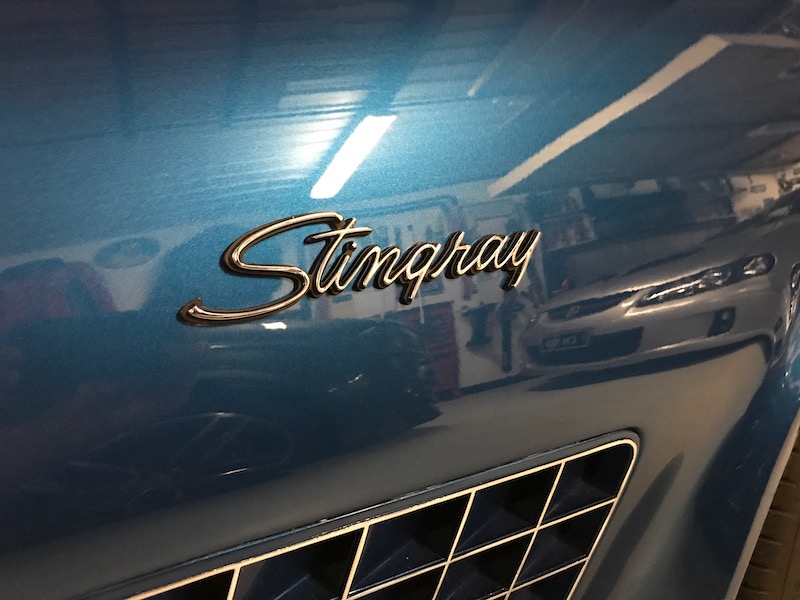
Fitted the Stingray guard emblems so it looks more finished. They needed a bit of bending and tweaking to sit perfectly flat. I also worked the paint behind them before final fit.
Entire car will need a finishing go over with a DA and fine correction polish then wax, but that's still a while off :-)
Carports come in handy when it's sunny.
Fitted the Stingray guard emblems so it looks more finished. They needed a bit of bending and tweaking to sit perfectly flat. I also worked the paint behind them before final fit.
Entire car will need a finishing go over with a DA and fine correction polish then wax, but that's still a while off :-)
Last edited by CraigH; Apr 10, 2023 at 07:05 AM.
Thread Starter
Melting Slicks
Joined: Apr 2010
Posts: 2,795
Likes: 1,196
From: Canberra Australia
2025 C3 of the Year Finalist - Modified
Corvette Stories
The Best of Corvette for Corvette Enthusiasts

Top 10 Most Expensive Corvettes Ever Sold on Bring A Trailer
Brett Foote
10 Things Every Corvette Owner Needs (2026 Edition)
Michael S. Palmer
8 Most "Only Corvette Owners Understand" Quirks and Problems
Pouria Savadkouei
10 Reasons the C6 Z06 is Still A Performance Benchmark After 20 Years
Joe Kucinski
How Much Horsepower Every Corvette Engine "LOST" in 1972
Joe Kucinski
Top 10 DOs and DON'Ts for Protecting Your Convertible Top!
Michael S. Palmer
Top 10 Most Explosive Corvettes Ever Made: Power-to-Weight Ratio Ranked!
Joe Kucinski
150 hp to 1,250 hp: Every Corvette Generation Compared by the Specs That Matter
Joe Kucinski
8 Coolest Corvette Pace Cars (and Replicas) of All Time
Verdad Gallardo
Drifting


Joined: Jul 2012
Posts: 1,255
Likes: 297
From: Slovenia, EU
2017 C3 of Year Finalist
Craig I think that I already asked you but I will ask again.
How did you find the right interior paint colour to dye the interior?
Someone before me changed the interior in my car to light saddle from original royal blue (same as yours) and I would like to change it back.
And also, if you don't mind, I have saved every one of the photos from this thread (your build) because your work is a huge wealth of knowledge for me.
I just finished building my garage and just have to transport my vette here and then I will start/finish my build. And then I will bother you with more questions for my 71 build.
Last edited by Primoz; Dec 6, 2020 at 12:02 PM.
Thread Starter
Melting Slicks
Joined: Apr 2010
Posts: 2,795
Likes: 1,196
From: Canberra Australia
2025 C3 of the Year Finalist - Modified
Craig I think that I already asked you but I will ask again.
How did you find the right interior paint colour to dye the interior?
Someone before me changed the interior in my car to light saddle from original royal blue (same as yours) and I would like to change it back.
And also, if you don't mind, I have saved every one of the photos from this thread (your build) because your work is a huge wealth of knowledge for me.
I just finished building my garage and just have to transport my vette here and then I will start/finish my build. And then I will bother you with more questions for my 71 build.
How did you find the right interior paint colour to dye the interior?
Someone before me changed the interior in my car to light saddle from original royal blue (same as yours) and I would like to change it back.
And also, if you don't mind, I have saved every one of the photos from this thread (your build) because your work is a huge wealth of knowledge for me.
I just finished building my garage and just have to transport my vette here and then I will start/finish my build. And then I will bother you with more questions for my 71 build.
Since then i have tinted it a bit as it seemed to change a bit over years of sitting in the can.
Questions always welcome...hopefully I will have some answers as well :-)

Thread Starter
Melting Slicks
Joined: Apr 2010
Posts: 2,795
Likes: 1,196
From: Canberra Australia
2025 C3 of the Year Finalist - Modified

Thread Starter
Melting Slicks
Joined: Apr 2010
Posts: 2,795
Likes: 1,196
From: Canberra Australia
2025 C3 of the Year Finalist - Modified
I spent a day or two getting the vacuum systems back on line in the Vette. Has been disconnected during all the repair and paint process.
Was fairly frustrating but found some great gems of knowledge from Dub and others around reproduction vacuum relays etc etc while researching.
The key one was that reproduction relays have a spring that is much stronger than original versions. This can contribute to winking lights and wiper door pop on startup..
So I jumped into some parts boxes and found my older relays that were replaced. When I first reworked the vacuum system.
Some simple tests and oh yes the spring tension is much stronger on the new ones and when the engine first starts it means the control signal (white stripe tube) can be too slow to build pressure and ensure they stay shut.
I saw on ebay an original 71 set of relays in Australia so grabbed them yesterday and will do some more testing of then and my old ones and then probably restore the best originals.
Sorry no pictures just thoughts.
Last edited by CraigH; Dec 11, 2020 at 04:40 AM.
Melting Slicks


Joined: Oct 2010
Posts: 2,276
Likes: 337
From: "ɹǝpunuʍop", Adelaide, South Australia
does it fall under "standard", "personal" or "modified", I wouldn't want to compete against you....

at this stage i'll be driving over again so hope to see it in person again.
Last edited by riverracer au; Dec 11, 2020 at 04:42 AM.
Thread Starter
Melting Slicks
Joined: Apr 2010
Posts: 2,795
Likes: 1,196
From: Canberra Australia
2025 C3 of the Year Finalist - Modified
Have not thought what category to choose as i have no registered yet.
Looking forward to it though...see you there :-)
Racer


Joined: Nov 2010
Posts: 310
Likes: 25
From: Brisbane Australia
I'd love to come see it at the nationals too having followed from the ACA days, but not sure my 68 would make it. Your front end semi coil overs are helping me make it one step closer though.
Melting Slicks
Joined: Oct 2010
Posts: 2,276
Likes: 337
From: "ɹǝpunuʍop", Adelaide, South Australia
 my '72 to Perth couple years ago, great road trip fun.