When you click on links to various merchants on this site and make a purchase, this can result in this site earning a commission. Affiliate programs and affiliations include, but are not limited to, the eBay Partner Network.
So I did a bit more reading (should have done this before my last US order)
Type I
Pumps have either a 5/8” keyed shaft or a 3/4” press fit shaft.
Press-fit shafts have a 3/8”-16 tapped center shaft.
Type II
All Type II power steering pumps have a 0.665” shaft diameter except for the 6175ALD-6, 6175ALP-6, 6175ALB-6 and the 6175AL-6 LS pumps, which have a 19mm shaft diameter.
All Type II pumps require a press-on pulley and have a 3/8”-16 tapped center shaft.
I found this pulley on Summit that may work.
Racing Automotive Group PSP050 - Racing Automotive Group Power Steering Pump Pulleys
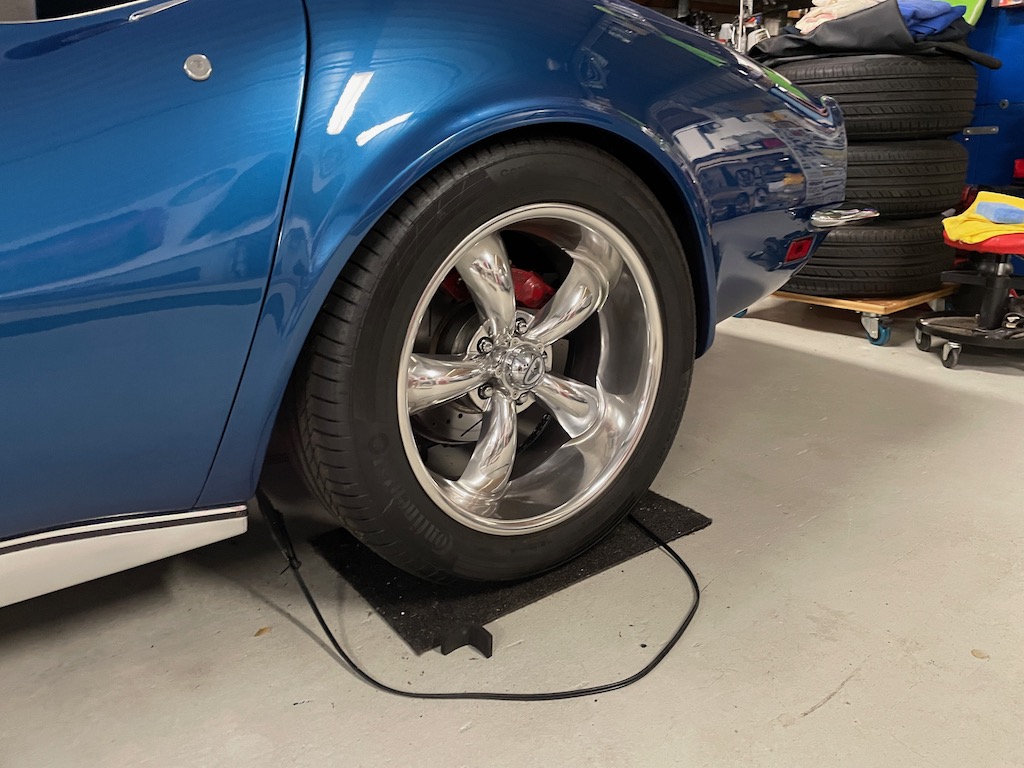
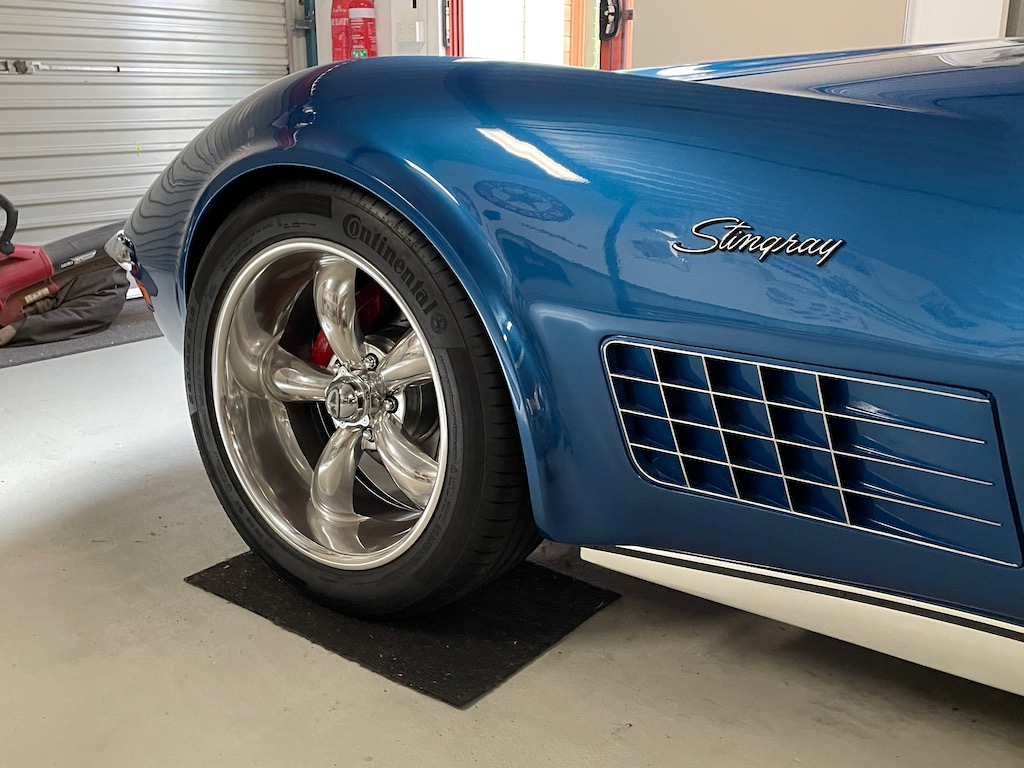
The Vitour Galaxy tyres are H rated and come in a good range of sizes. Modern tread design as well.
I went with 215/70R15 as this is about a classic look. I have my 18�s if I want wider.
I have done a quick drive after fitting them up and I can say they are very smooth and give a very good feel.
I put the Vitour Galaxy's on my 68 last year and agree they are a great tyre for the price although I would be interested in your experience with the size of the tyres. I found the 255/60R15s I put on seem to actually have both a narrower contact patch as well as a slightly smaller diameter than the same sized 15 year old Goodyear Eagle GTIIs I took off.
I put the Vitour Galaxy's on my 68 last year and agree they are a great tyre for the price although I would be interested in your experience with the size of the tyres. I found the 255/60R15s I put on seem to actually have both a narrower contact patch as well as a slightly smaller diameter than the same sized 15 year old Goodyear Eagle GTIIs I took off.
My 215/70’s looked very similar in width and height to the Michelins that came off. But there can certainly be variations between brands and some brands have a more square tread block than others.
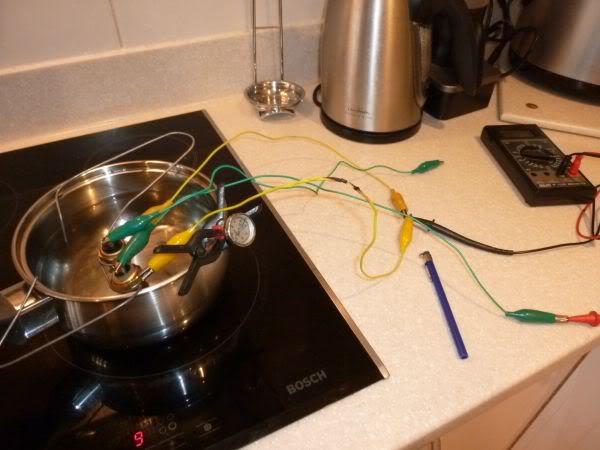
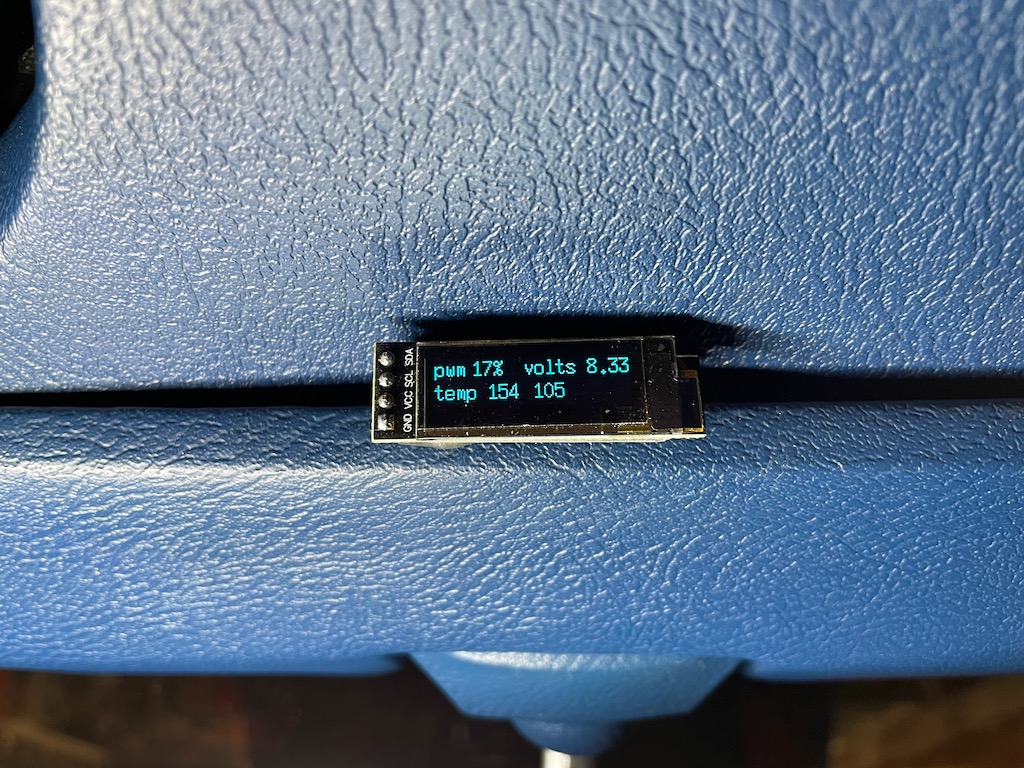
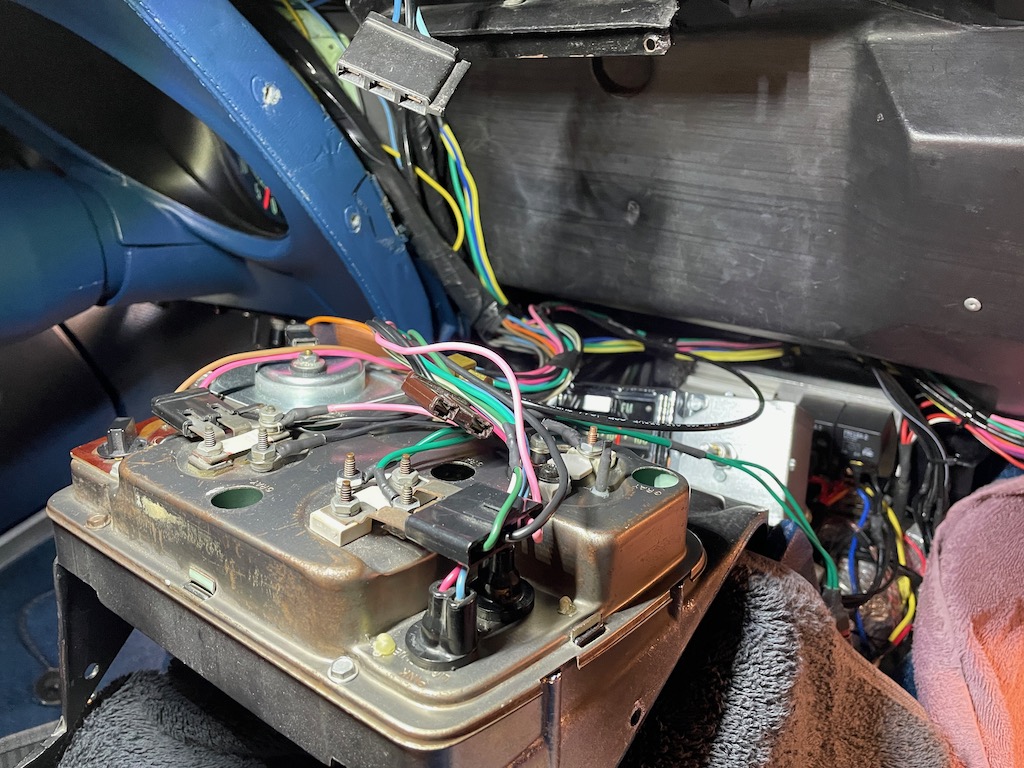
A few years back I tested a number of temperature sender brands to find one that produced the correct resistance at each temperature. (or at least close)
In the end I settled on the WT-203Z as being the closest by a long way.
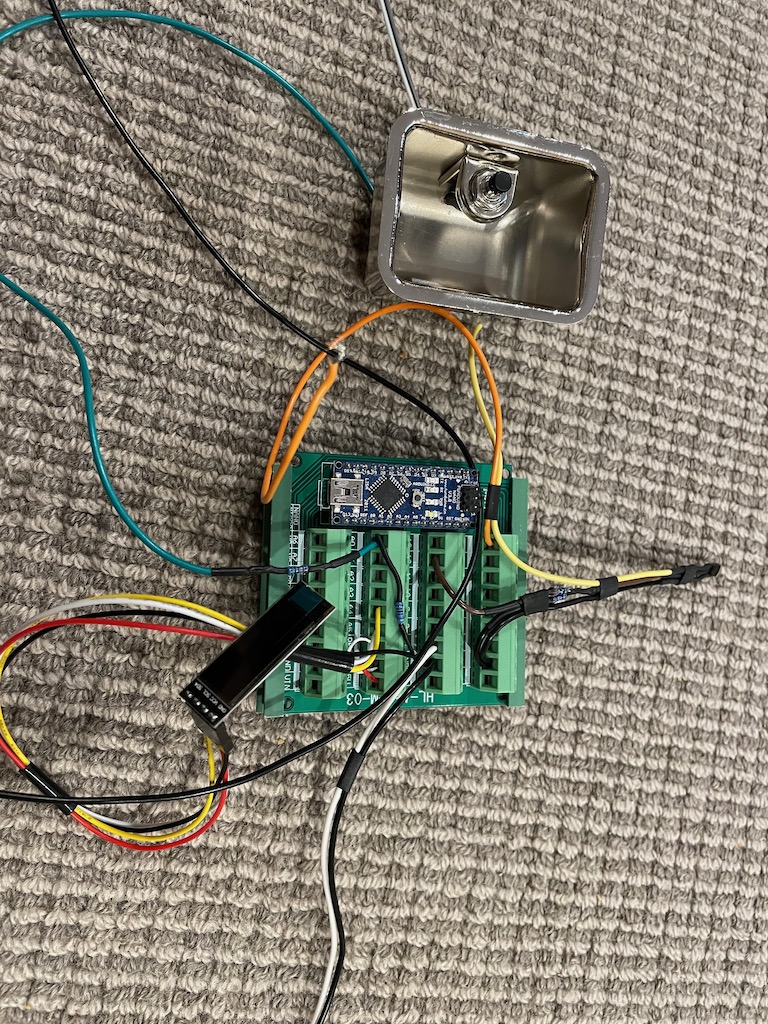
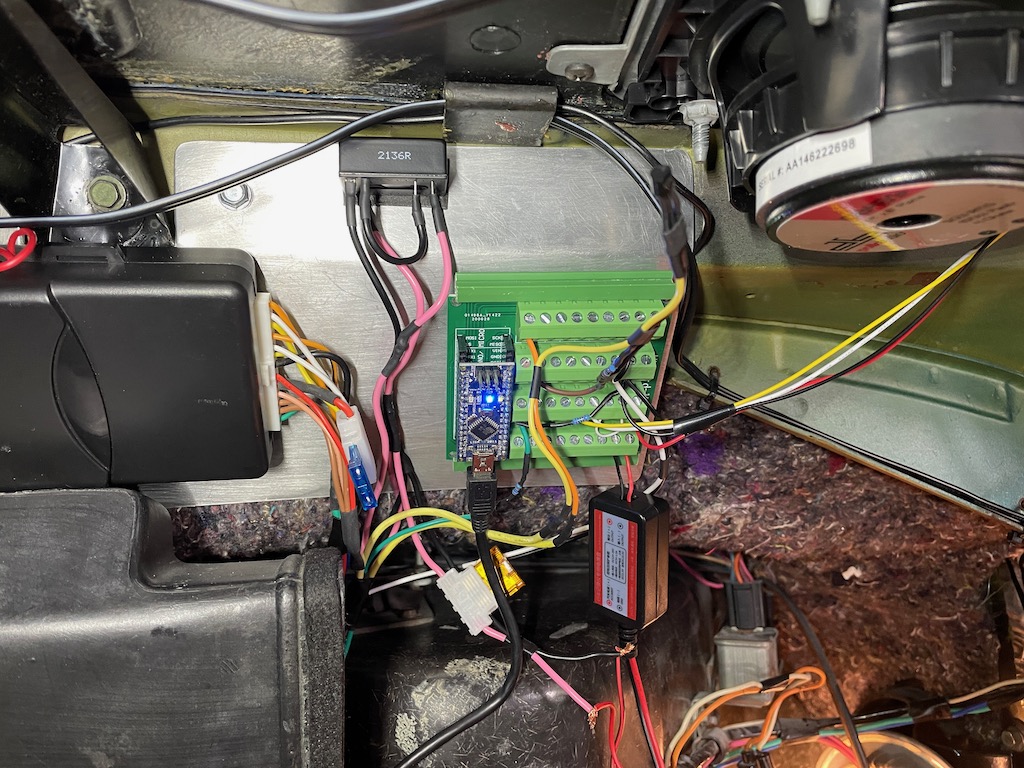
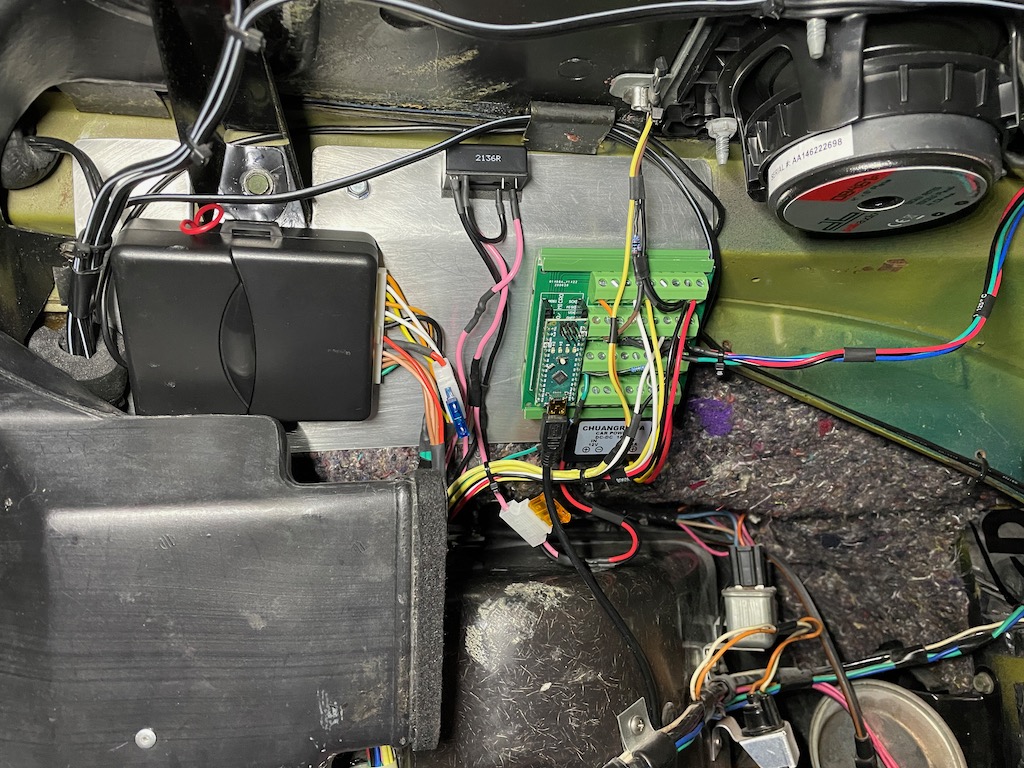
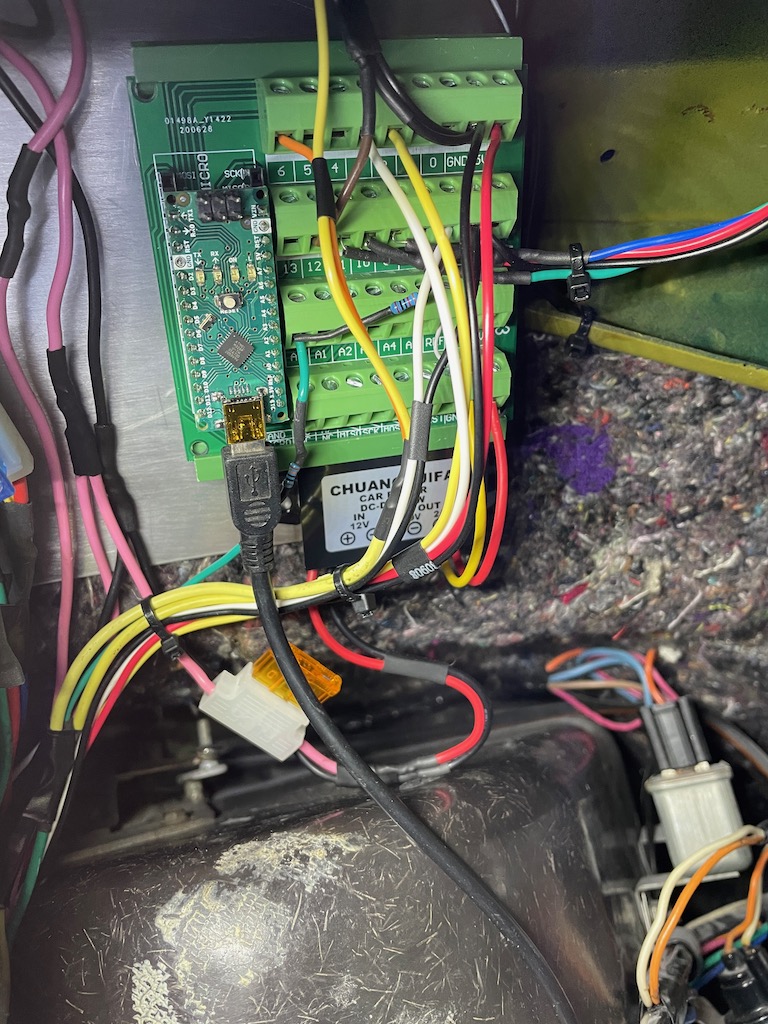
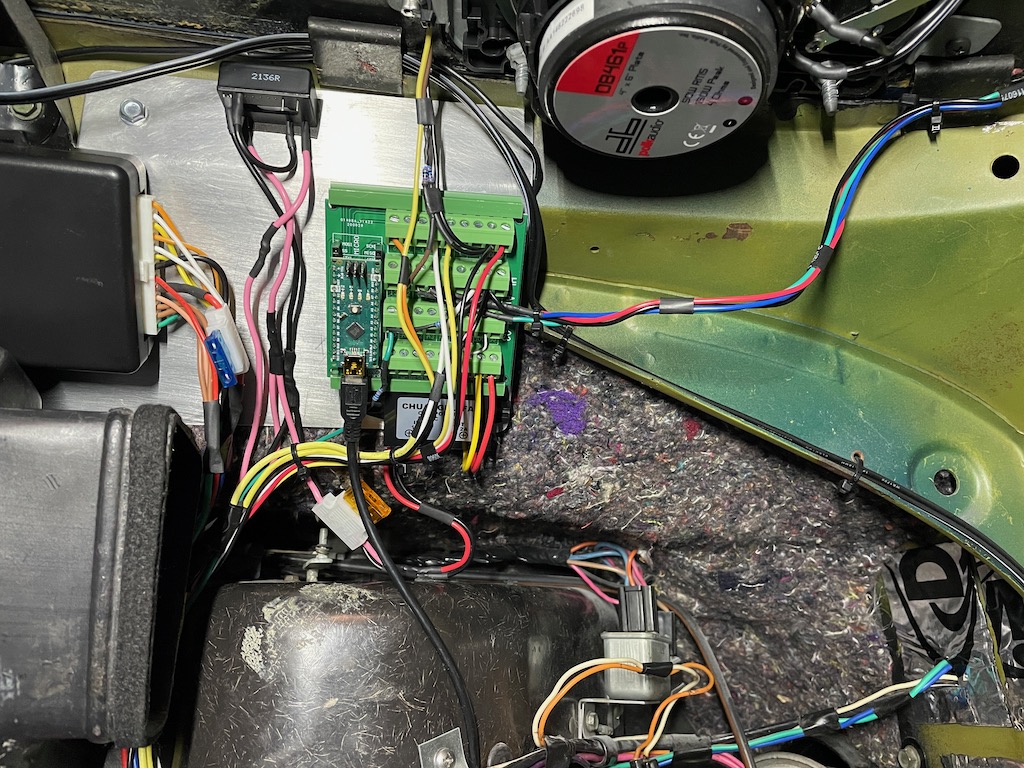
- Arduino Nano running the code
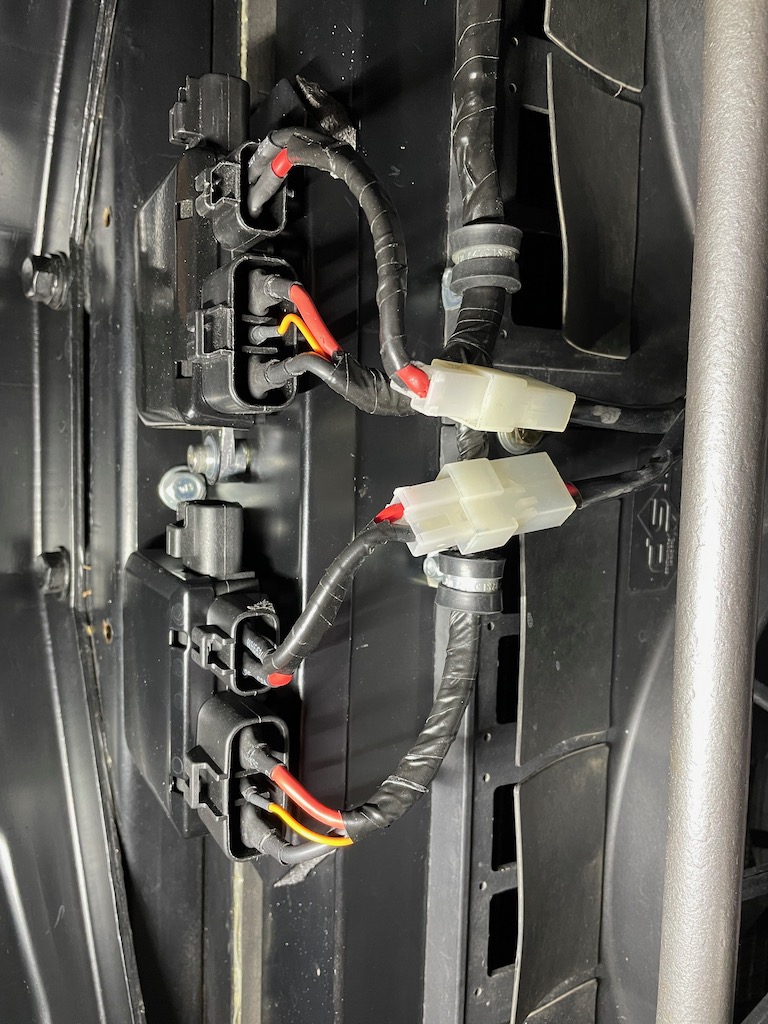
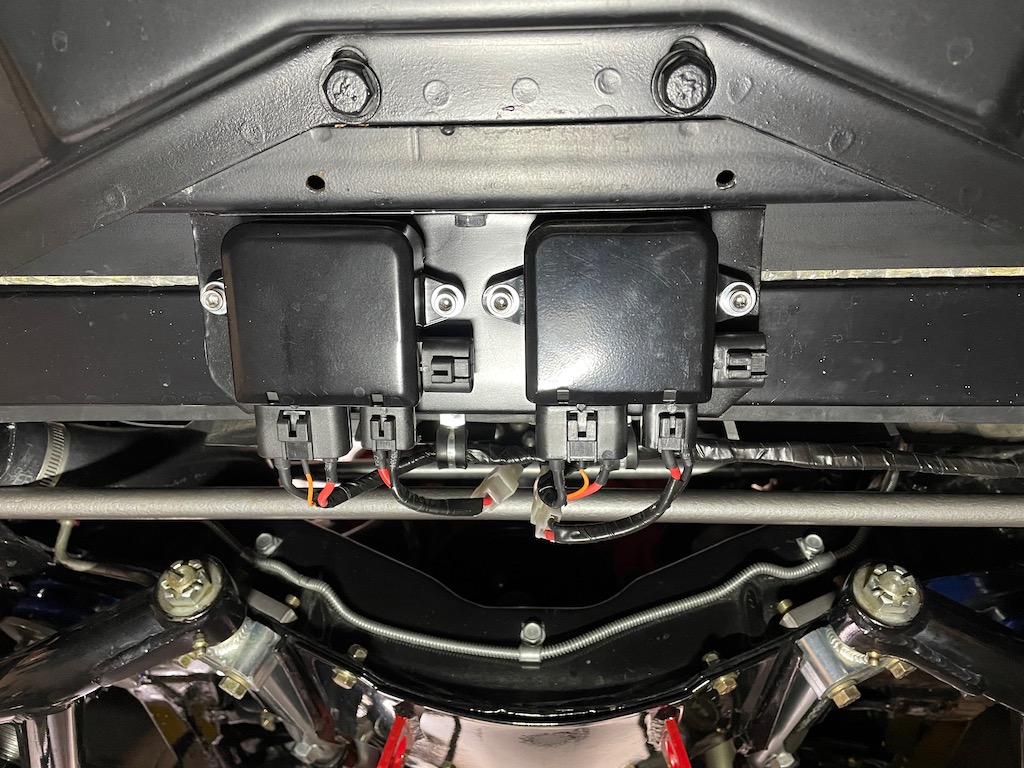
- uses Mazda/Mitsubishi PWM controllers on fans
- uses factory temperature sender
- reads the voltage on the sender (changes as senders resistance changes with temperature)
- sets start point for minimum fan speed at a given voltage (temperature)
- sets full on point for maximum fan speed at a given voltage (temperature)
- has an RGB LED that shows Blue---Green--Red based on the fan speed
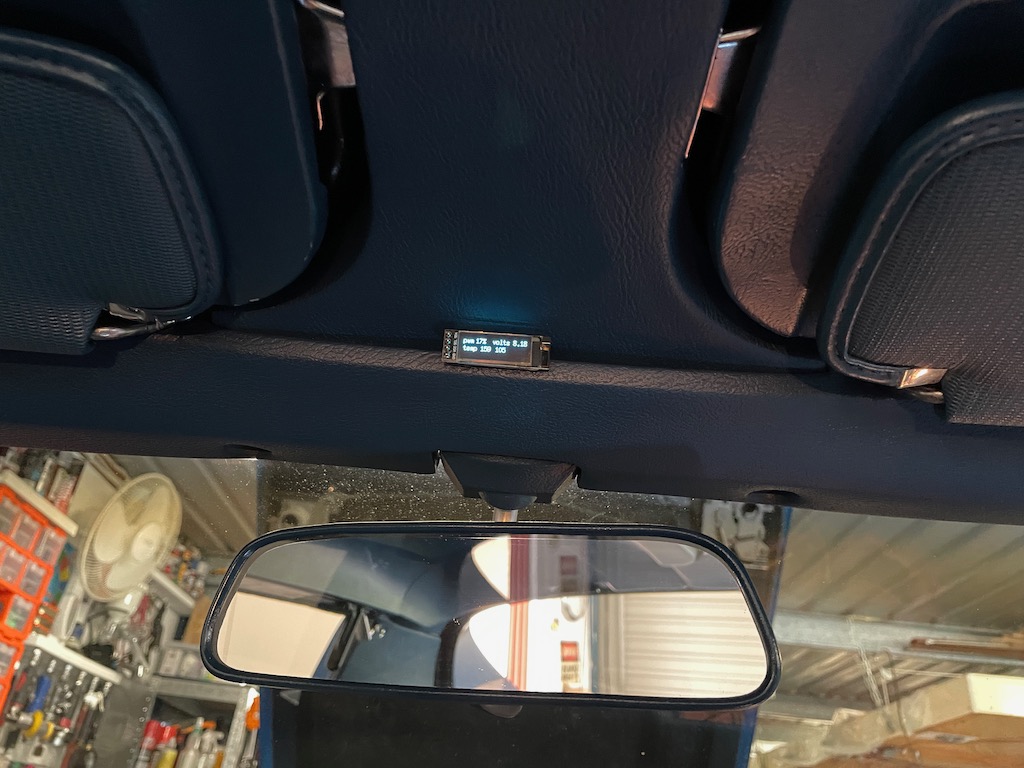
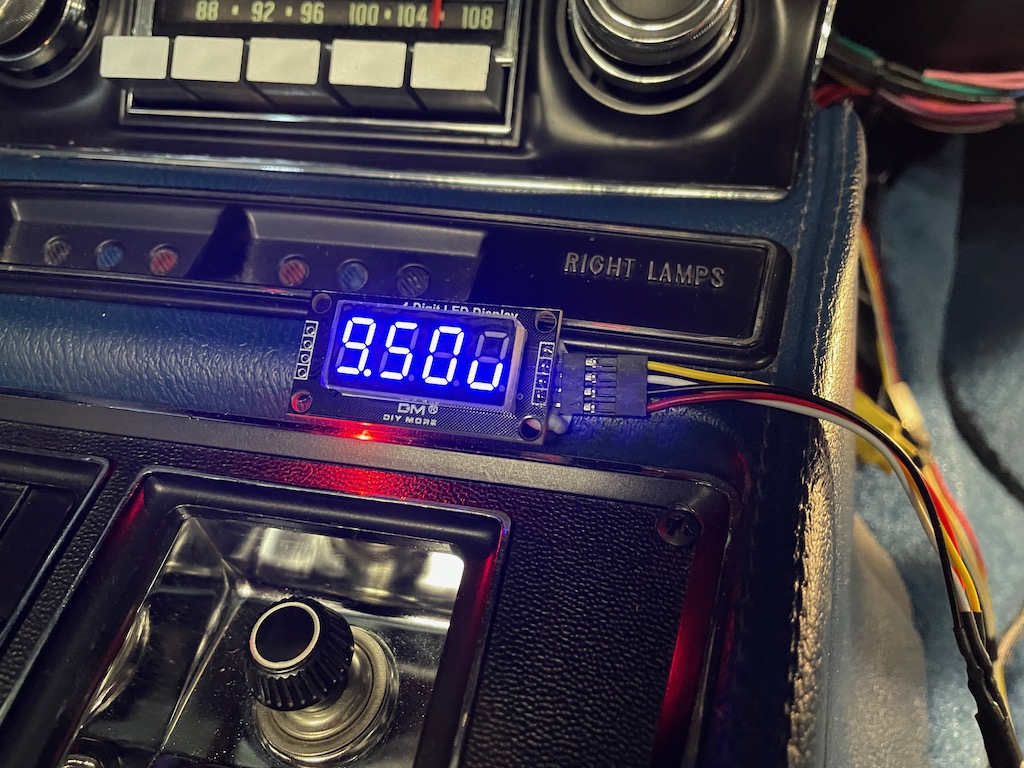
- has a 4 digit LED screen that displays sender Voltage, PWM signal to fan (0-255), % of PWM between min and max.
- has single button in ash tray that can increase, decrease fan speed, set to mim, max or auto speed, change data on display and turn display off.
The display is probably only needed during testing and getting your voltage trigger points correct so I have it on a plug for easy removal.
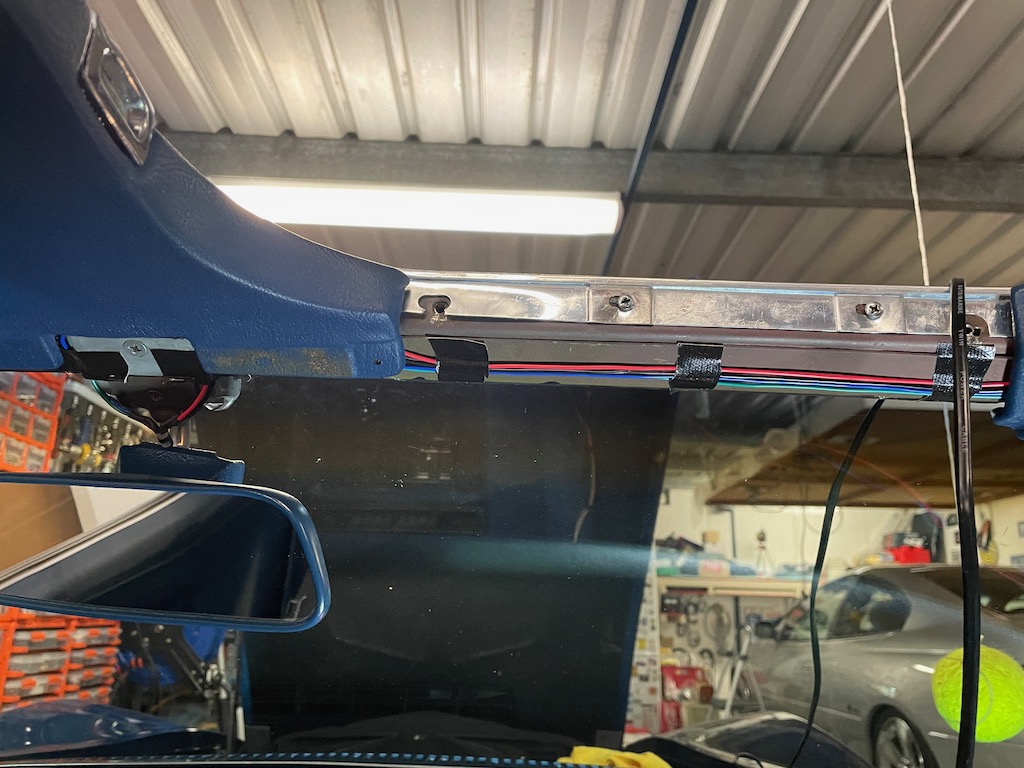
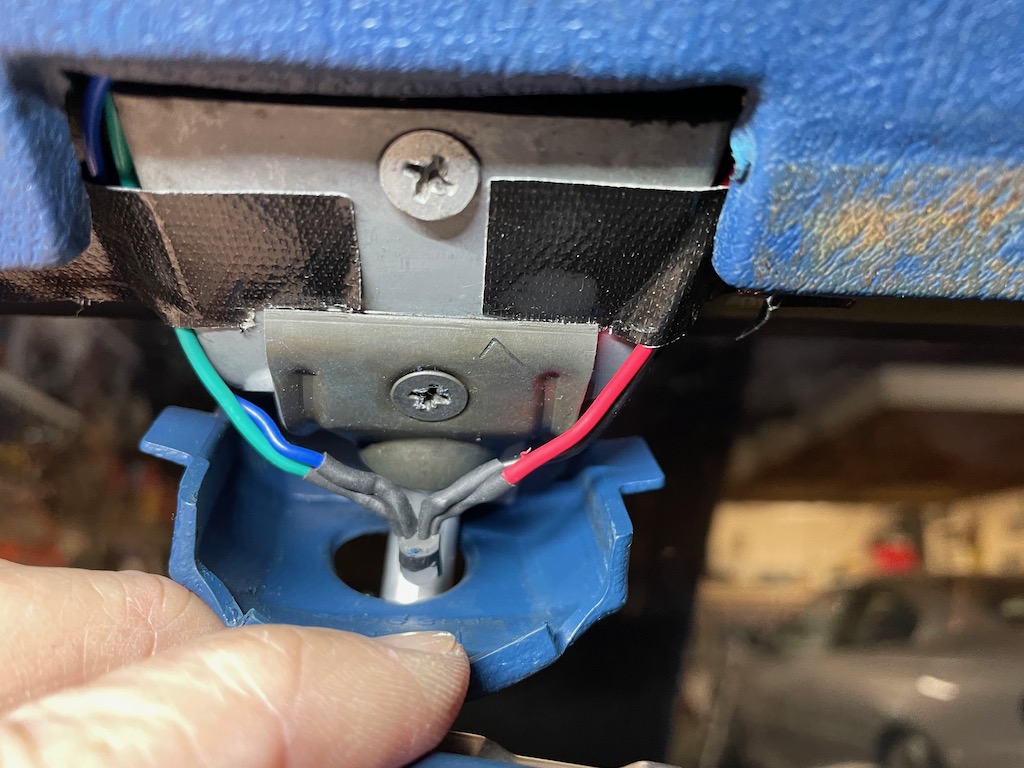
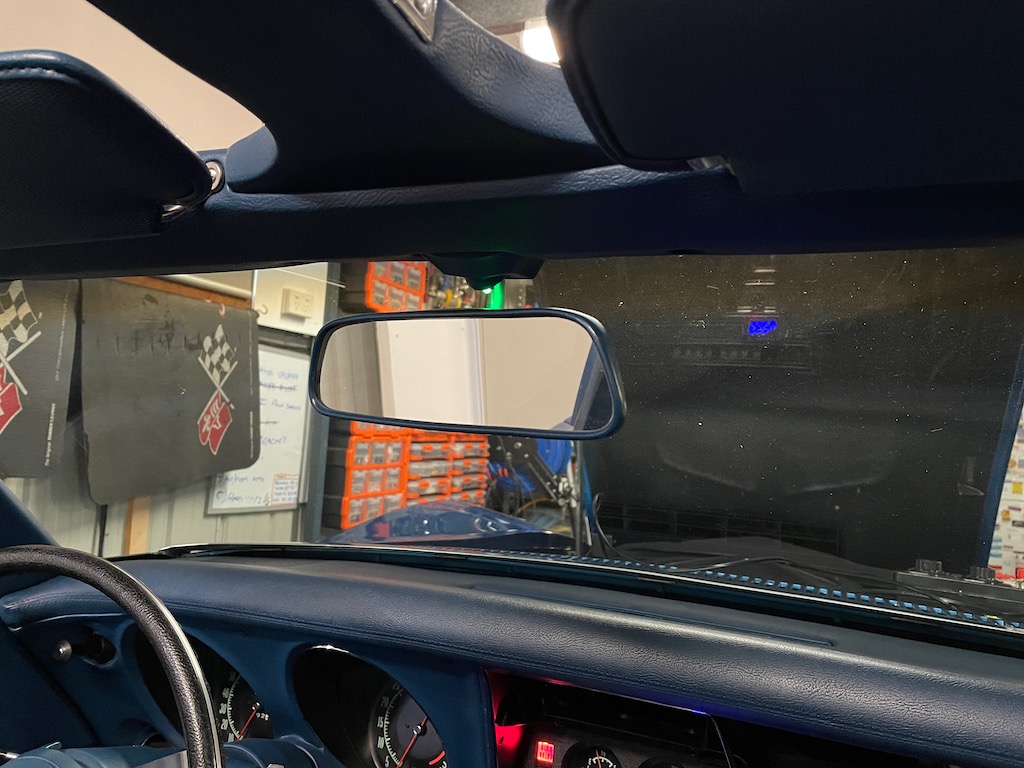
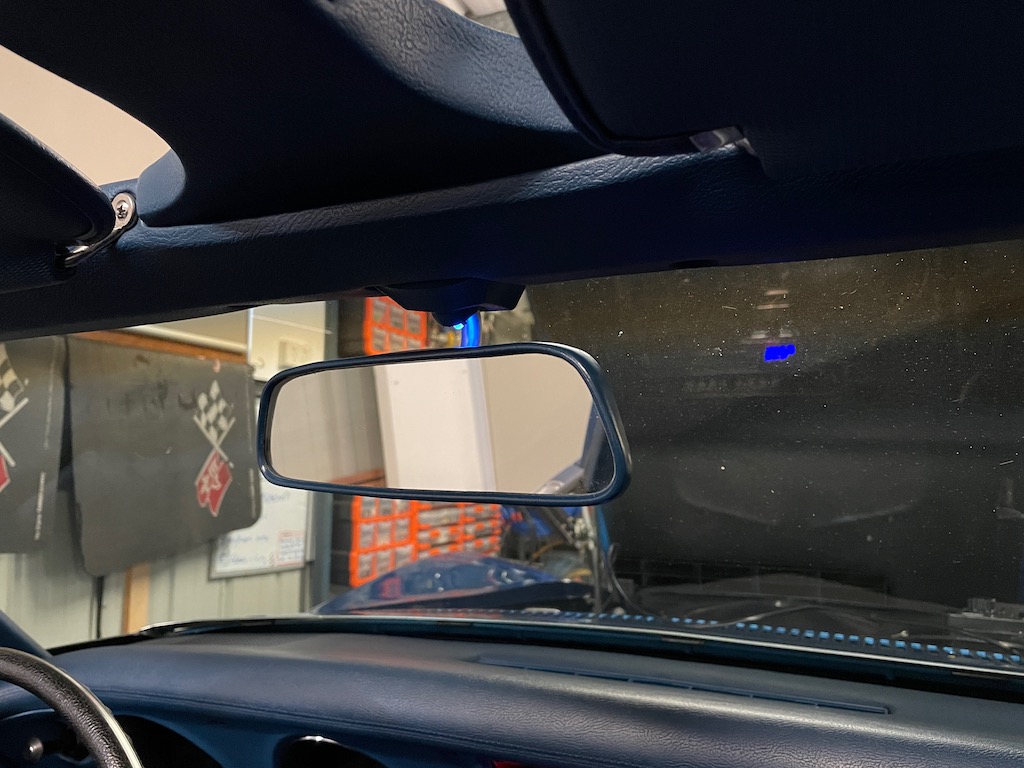
The LED on the mirror just glows to show fan speed and its brightness is set in code.
Has been a bit of fun to learn to programme again.
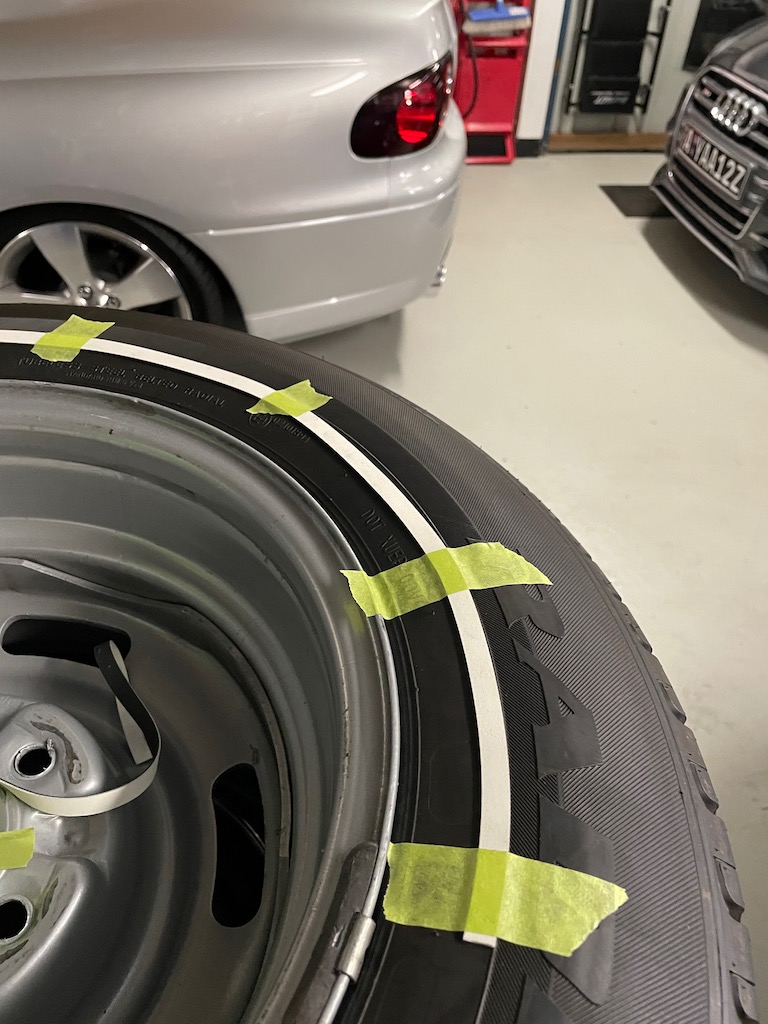
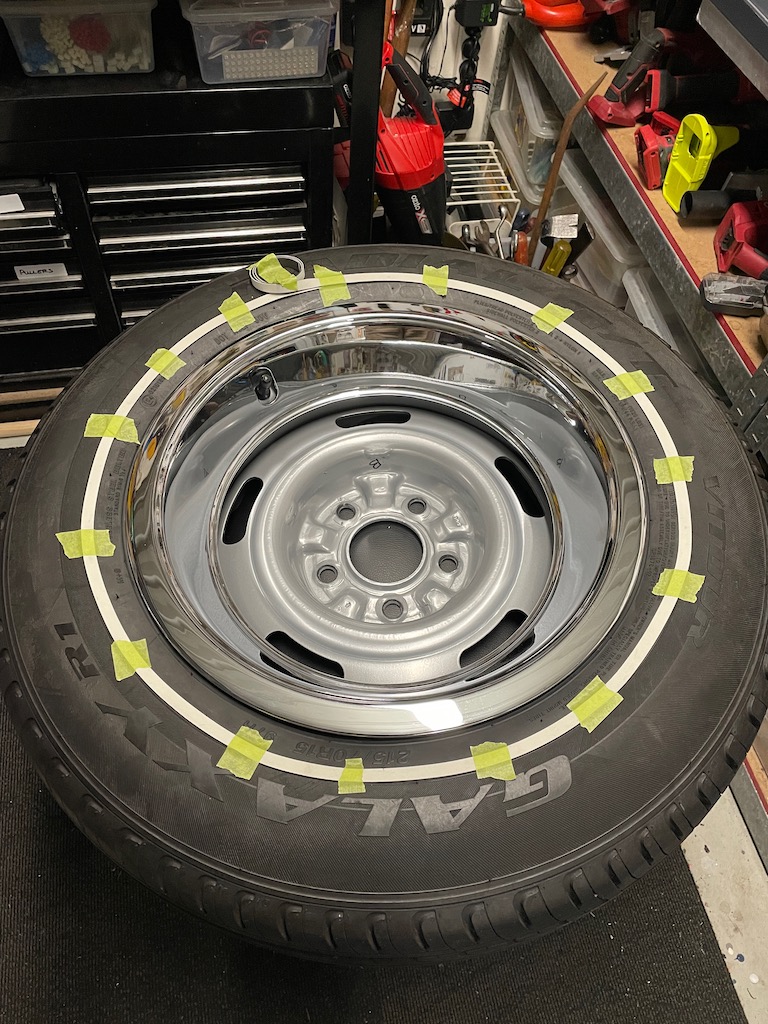
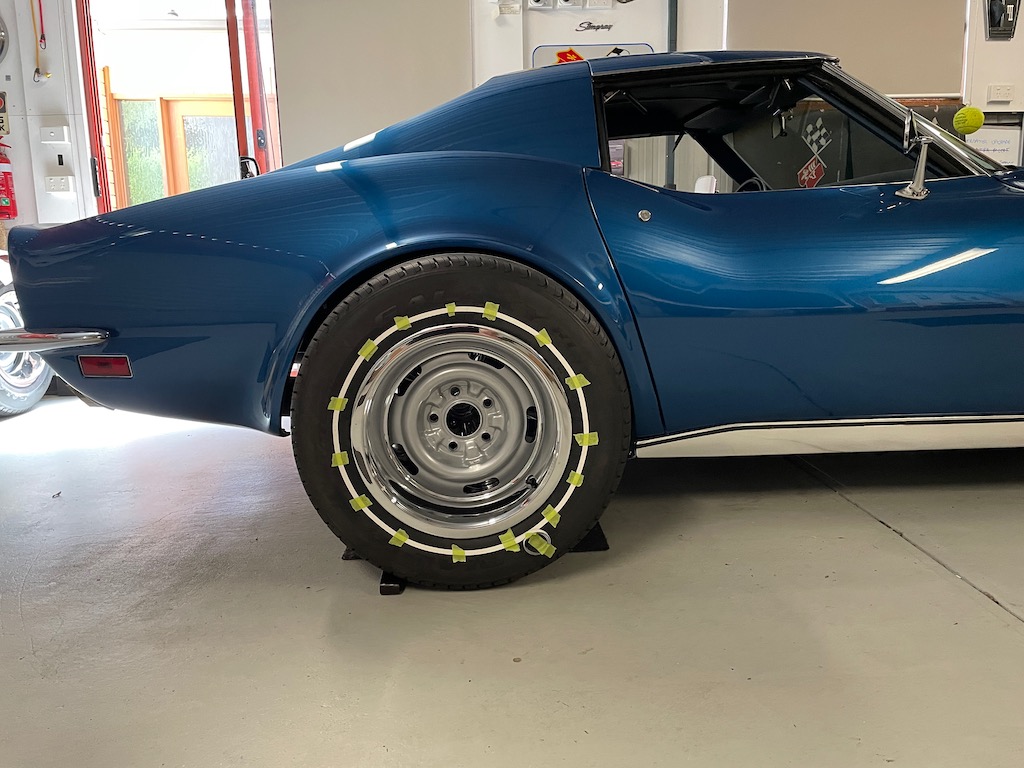
So I decided for my 15" rims and tires I would go back to a thin white stripe.
I had purchased a set of Vatour Galaxy's that are amazing, especially considering the price.
We swapped the raised white letters to inside and following similar to Rescue Rogers I am using Treadwear stripes.
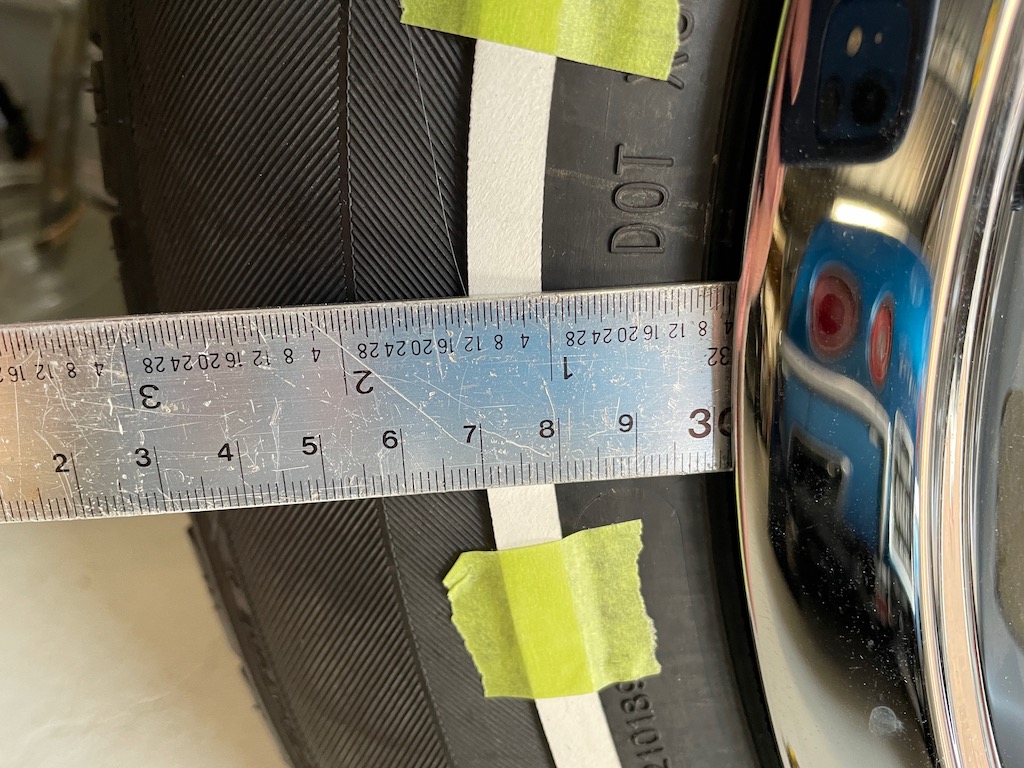
In this case 3/8" white.
Here is my original set of Michelins
There is a convenient line to follow in the Vitour tire.
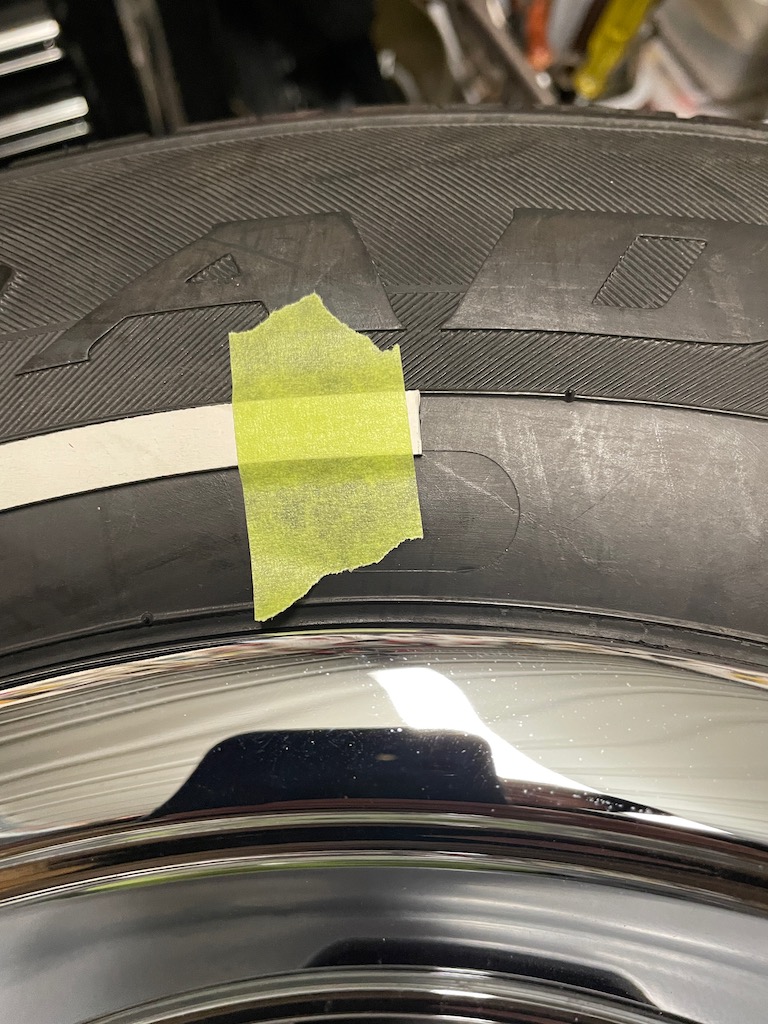
I read the NCRS guide and it said one of the factory brand tires used had the stripe starting 1" from the rim. I know I am not following NCRS but it was agood starting point.
After test fitting the stripe I thought, would it look better inside the line or out so I moved half of the stripe to the other side of the line.
I think I like it closer to the trim ring but can't make up my mind.
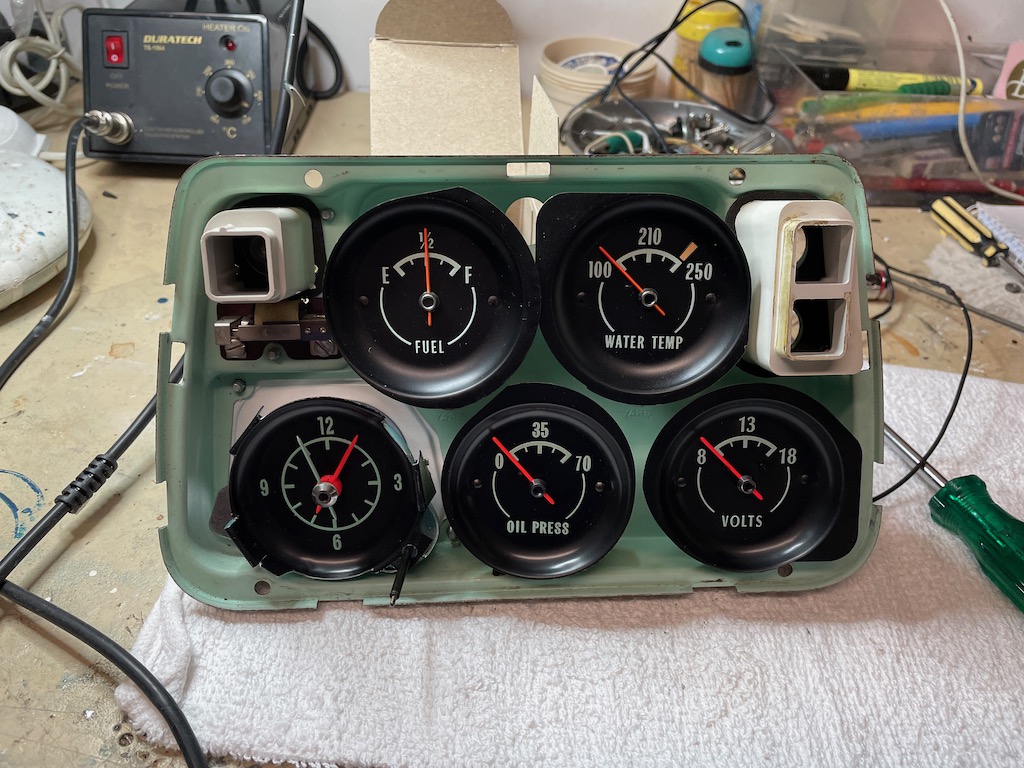
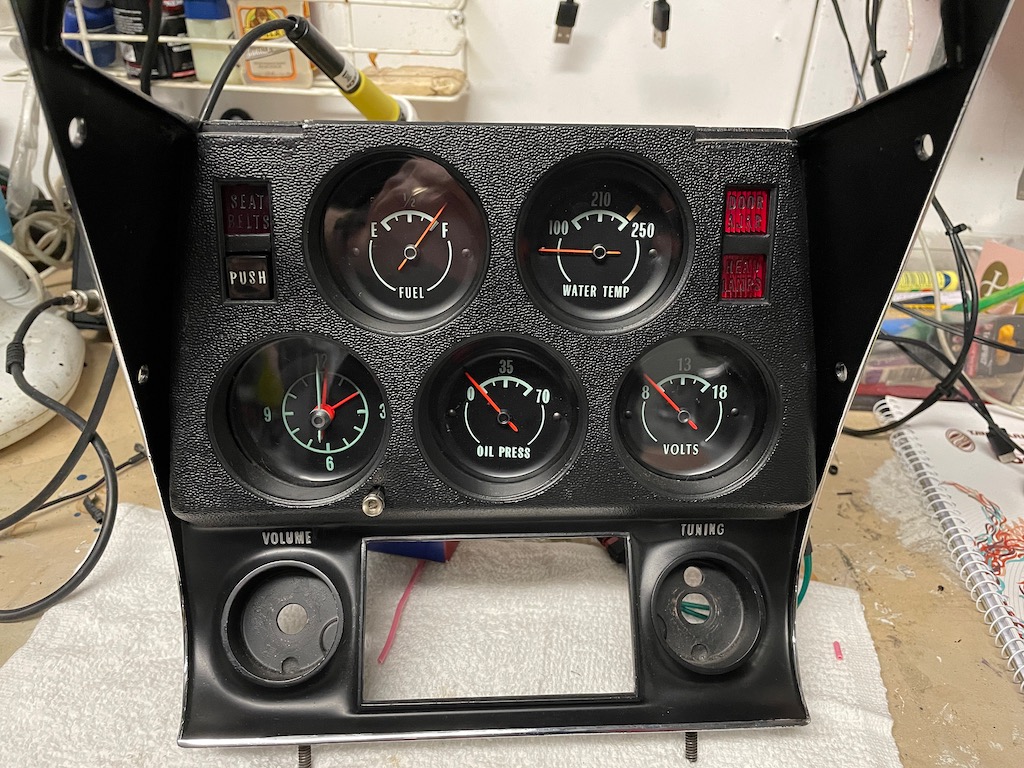
Have been fairly busy on other things recently like paintings around the house, Christmas prep etc but have progressed on a couple of fronts.
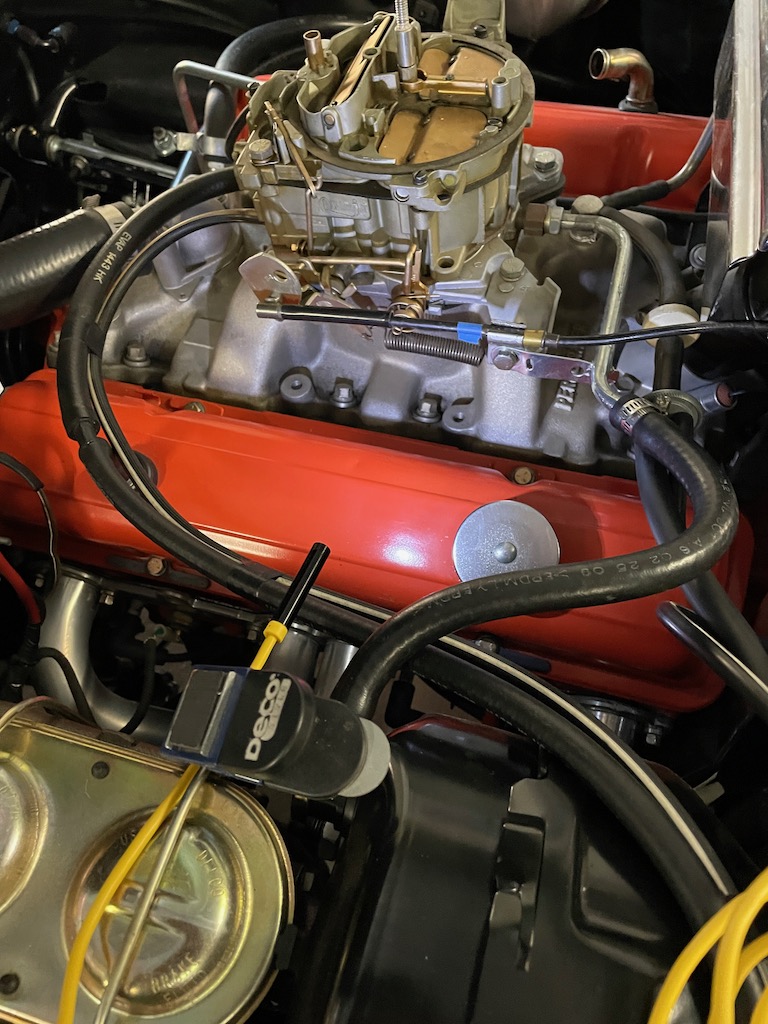
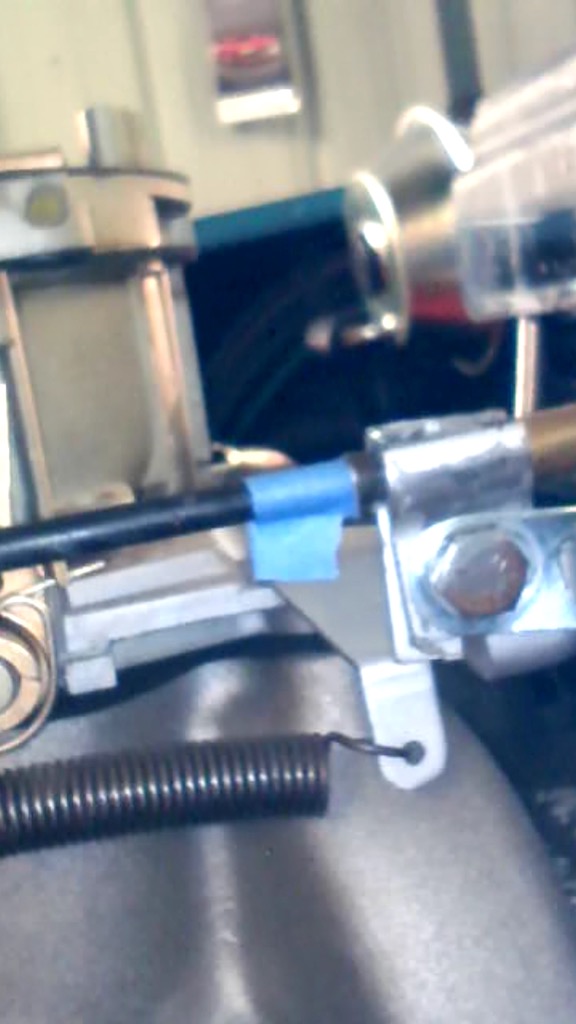
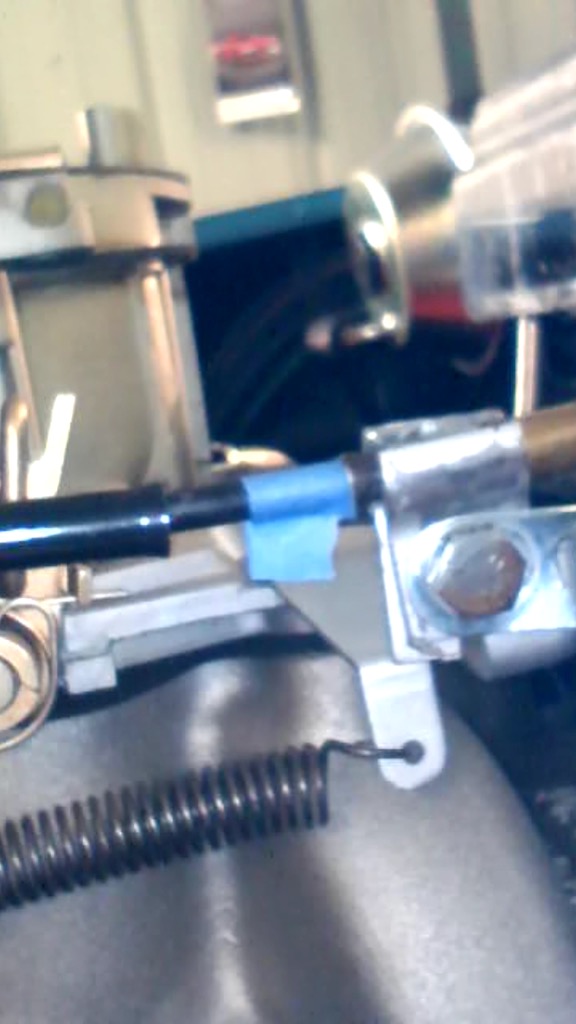
Was not happy with the TH400 Kickdown that required you to push the pedal through the floor.
So I anded up adjusting the cable and also removing the pedal for some minor bends and it now delivers 100% throttle when floored and kicks down the transmission a bit before that.
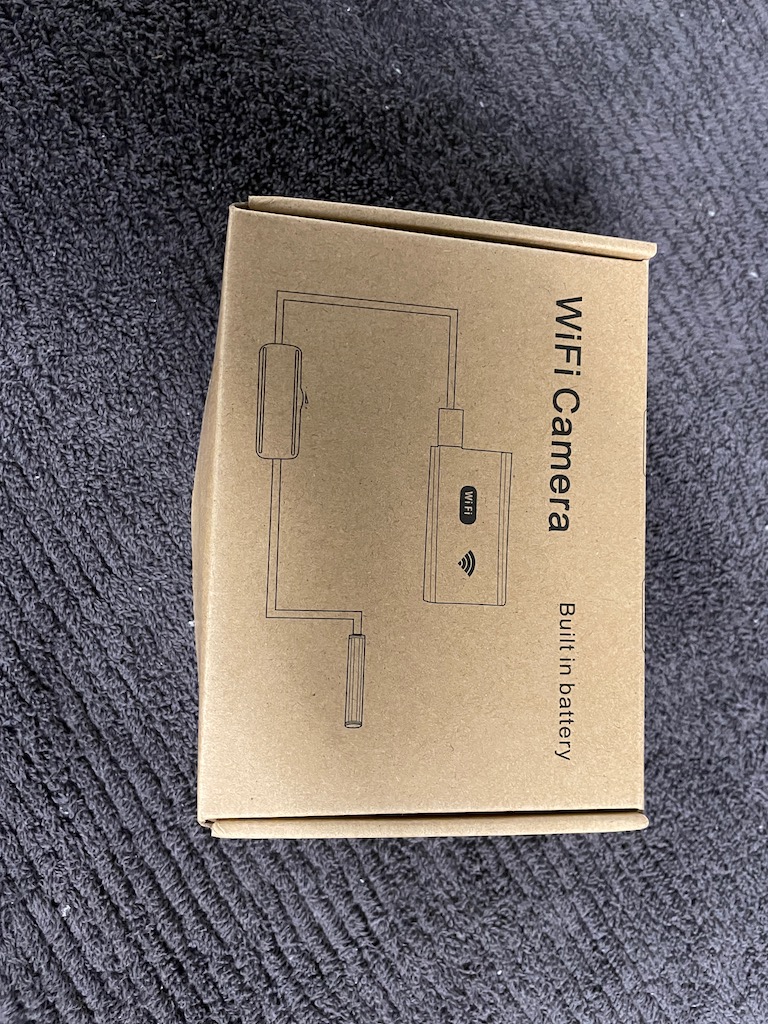
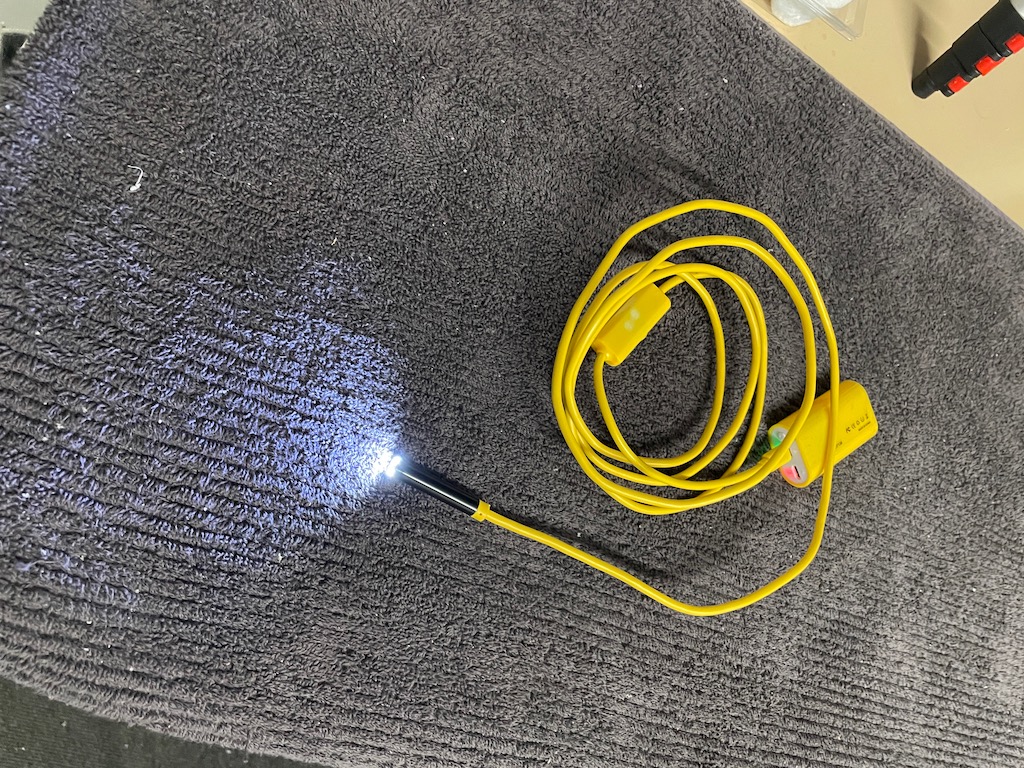
To make it more a 1 man job to adjust I purchased a small wifi camera from Aliexpress
Now I can view on my phone as I press the pedal.
Blue tape shows 100% throttle on carb
Trans kickdown.
Foot to floor but no longer need to squash carpet underlay etc.
Took the Vette for a good run this morning in 33 degree Celsius temp (90+ degree Fahrenheit) with lots of sitting at lights etc and the Arduino PWM fan controller worked great. Never got over about 40% of the fans max speed and the car was happy and staying cool.
Good test on one of the hottest days this summer here so far.
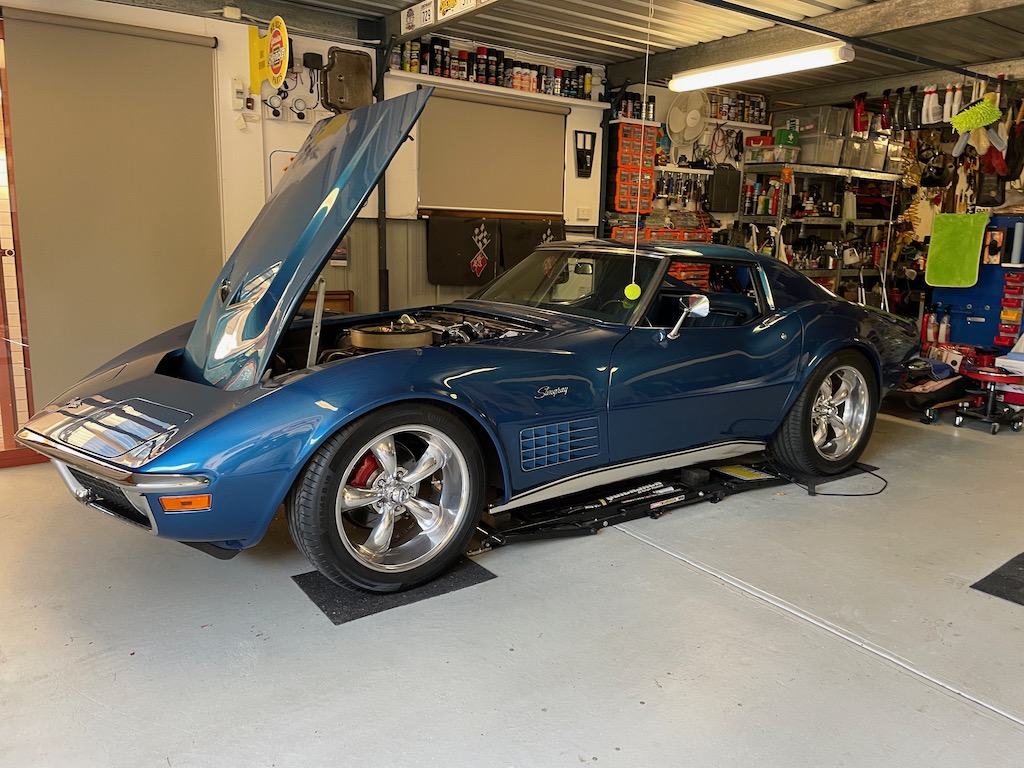
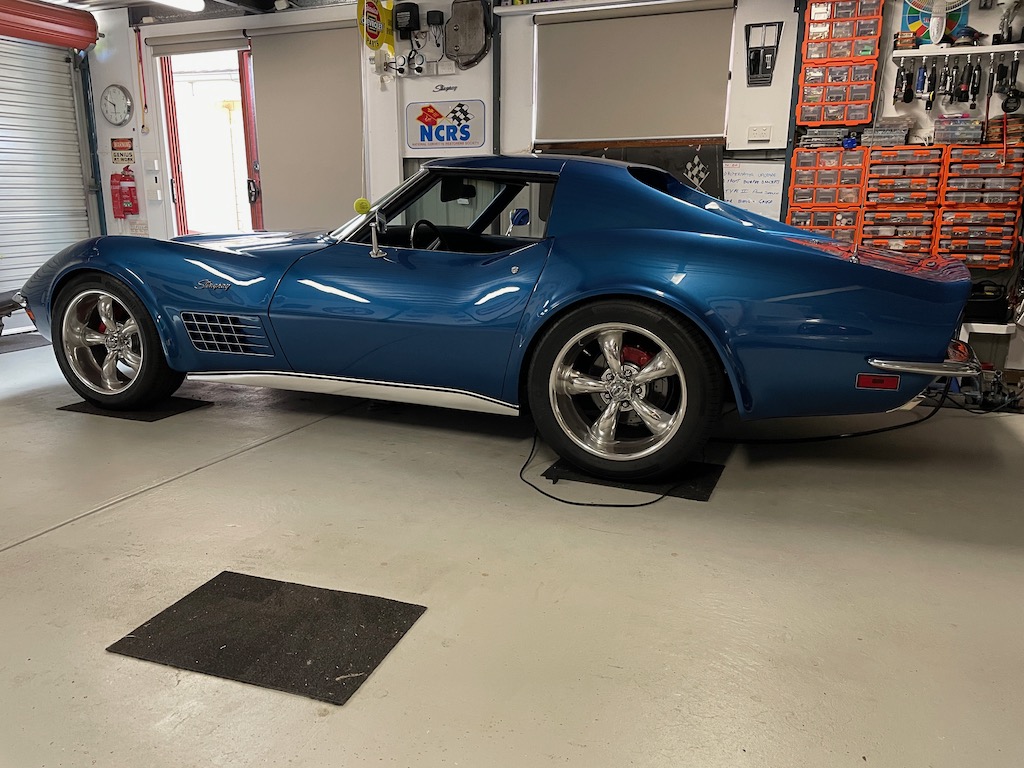
Also car felt very well balanced with the current ride heights and handled bumps, dips etc very well. Thanks for the feedback, I think I am now happy with how it sits (said that before I know).
Will get it on lift tomorrow and measure the available drop etc and if necessary talk to Dan at Vansteel re alternate length coilovers. However I don’t think I will need them based on very rough measurements.