


Interior Heat

Le Mans Master


Joined: Oct 2006
Posts: 6,842
Likes: 285
From: Palmdale CA
No, most or just about 95% of the Kapton for sale is the 'clear' film that's used industry wide for circuit boards, voice coils and other applications. It is not the 'aluminized' aerospace film, that I've been testing here.
Le Mans Master
Joined: Oct 2006
Posts: 6,842
Likes: 285
From: Palmdale CA
I should get Frequent Creeper Miles! After picking up the metal mockup at 4 PM, I musta spent the next three and a half hours, getting on it and off've it at what felt like a few hundred times. It's an old wood Mac Tool creeper, with the headrest. The other two Harbor Freight POS's will never be under my *** again! Between my hair getting caught in the rollers, or worse, having that hard roller, nip that soft flesh on the back of your upper arm (nothing pisses you off more, than getting a surprise hickey or love bite from your creeper)! Ok, forgive me, I'm beat.
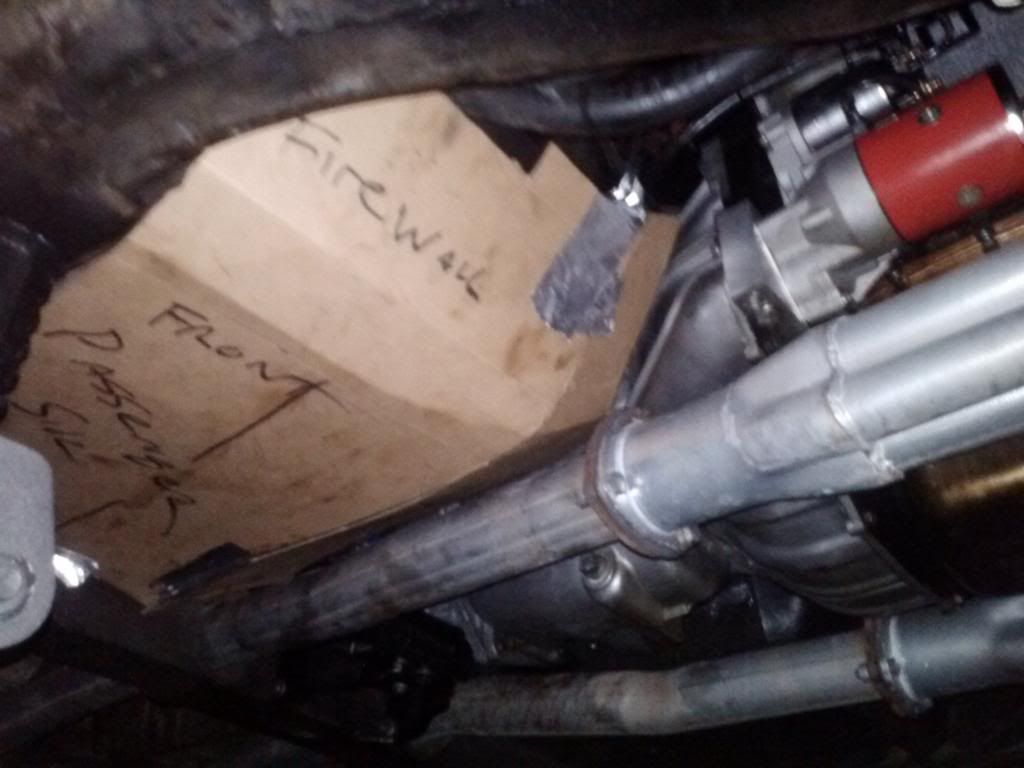
Almost there, but I will likely make a second metal proto for the passenger.side. The cardboard and foam got me sort of close, but now I'm studying cause-and-frigging effect, because I made a bunch of adjusments to the original. Cutting, bending, beating the crap out of it, with rubber and metal hammers and all because, a C3 footwell, compared to a perfect square, is more like an upside squished box in the rain. I was off a 1/4" on the upper tabs on the firewall and that had the effect of pulling the side of the 'box', hard against the trans tunnel, which in turn, skewed the box. Now I can correct for that. There were numerous other 'adjustments' and we're getting closer. Now I know why nobody made one of these (I'm sure somebody.made something)!
Almost there, but I will likely make a second metal proto for the passenger.side. The cardboard and foam got me sort of close, but now I'm studying cause-and-frigging effect, because I made a bunch of adjusments to the original. Cutting, bending, beating the crap out of it, with rubber and metal hammers and all because, a C3 footwell, compared to a perfect square, is more like an upside squished box in the rain. I was off a 1/4" on the upper tabs on the firewall and that had the effect of pulling the side of the 'box', hard against the trans tunnel, which in turn, skewed the box. Now I can correct for that. There were numerous other 'adjustments' and we're getting closer. Now I know why nobody made one of these (I'm sure somebody.made something)!

Safety Car


Joined: Mar 2007
Posts: 3,518
Likes: 37
Would be solved if someone made up a set of custom formed heat tiles just the same as the space shuttle to glue on. I got a 2X2 piece of that 1/4 inch thick at the gift shop in Cape Canaveral once and you can put a torch on one side and seems like no heat on the other side. Really light ceramic type stuff.
Le Mans Master
Joined: Oct 2006
Posts: 6,842
Likes: 285
From: Palmdale CA
This PM, test fit again, cause-and-effect, because it was surprising how many areas of interference I had! The smallest part of the footwell is the floor and the sides expand upwards from there! And none of them are the same!!! But I'm a stubborn (if not sore and tired) bastard and I'm gonna win this one.
Gotta hustle, it's already getting cooler here at night, and I'm betting this is the last weekend with the high temps that I can document how the heat shields are going to work on the C3.


Le Mans Master
Joined: Oct 2006
Posts: 6,842
Likes: 285
From: Palmdale CA
Almost there....
Mounted Pass. Mockup #1 and it's not far from being functional. Next, fix the Trans Tunnel binding in the rear of the shield that's still skewing it over and make just a few more final adjustments. Then, start measuring and building Passenger Mockup #2 tonight, for bending at the Sheet Metal Shop tommorow. Got a fresh sheet of T-5052 waiting to be mauled. Hopefully, I'll get a fully functioning ready to go, with #2...
Front View:

Side View: You can see where the trans tunnel is pushing it towards the inside. We're going to fix that tonight or die trying!

Mounted Pass. Mockup #1 and it's not far from being functional. Next, fix the Trans Tunnel binding in the rear of the shield that's still skewing it over and make just a few more final adjustments. Then, start measuring and building Passenger Mockup #2 tonight, for bending at the Sheet Metal Shop tommorow. Got a fresh sheet of T-5052 waiting to be mauled. Hopefully, I'll get a fully functioning ready to go, with #2...
Front View:
Side View: You can see where the trans tunnel is pushing it towards the inside. We're going to fix that tonight or die trying!
Corvette Stories
The Best of Corvette for Corvette Enthusiasts

Every 2027 Corvette Engine Explained
Joe Kucinski
Designer Imagines A Corvette That Looks More Like a Corvette Than the Corvette
Verdad Gallardo
10 Ugly Corvettes That We Still Kinda Love
Joe Kucinski
Top 10 Most Expensive Corvettes Ever Sold on Bring A Trailer
Brett Foote
10 Things Every Corvette Owner Needs (2026 Edition)
Michael S. Palmer
8 Most "Only Corvette Owners Understand" Quirks and Problems
Pouria Savadkouei
10 Reasons the C6 Z06 is Still A Performance Benchmark After 20 Years
Joe Kucinski
How Much Horsepower Every Corvette Engine "LOST" in 1972
Joe Kucinski
Top 10 DOs and DON'Ts for Protecting Your Convertible Top!
Michael S. PalmerRacer

Joined: Feb 2012
Posts: 462
Likes: 0
From: Virginia
I used to feel like the soles of my shoes were melting to the pedals. Here's a what I did that resolved my heat issues completely. Fixed any issues with my heat/ ac control system and made sure everything was functioning properly. Fortunately for me, I had my vette completely apart for a frame off, so it made things a bit easier to get to. This is the product I chose to use for insulation because I heard it works very well, is fire resistant, and most importantly, light weight. I purchased 200 sq. ft. and have plenty left over for other projects. http://www.lobucrod.com/
I started by insulating the entire interior front to back. I double layered the floor on both sides.
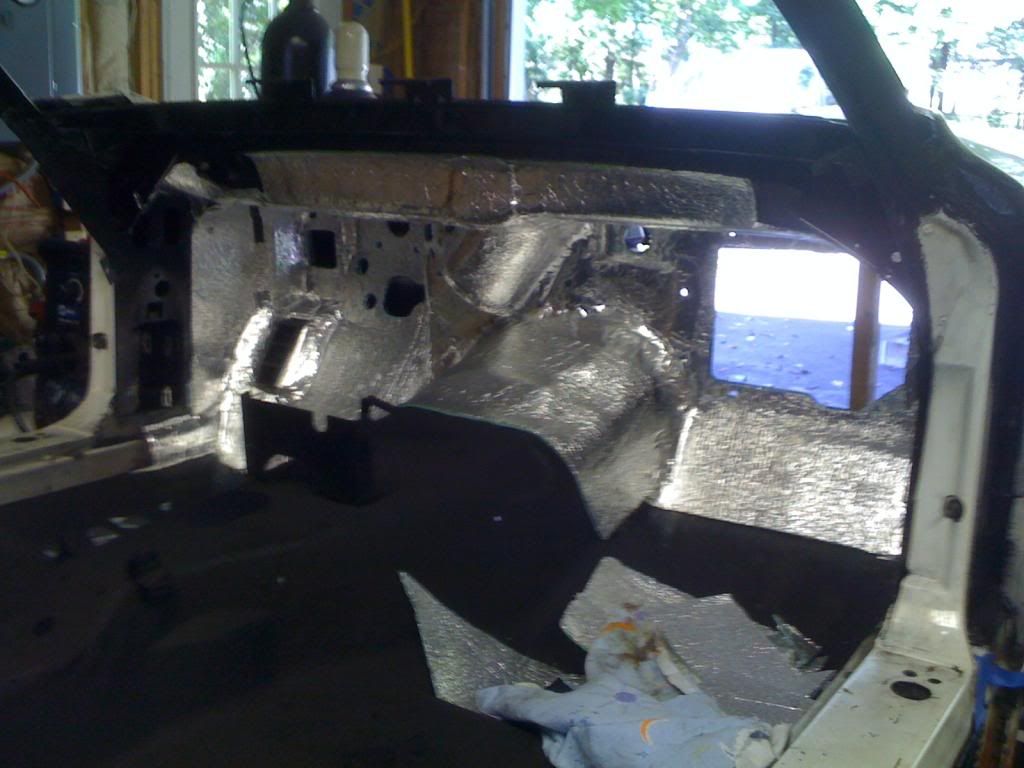
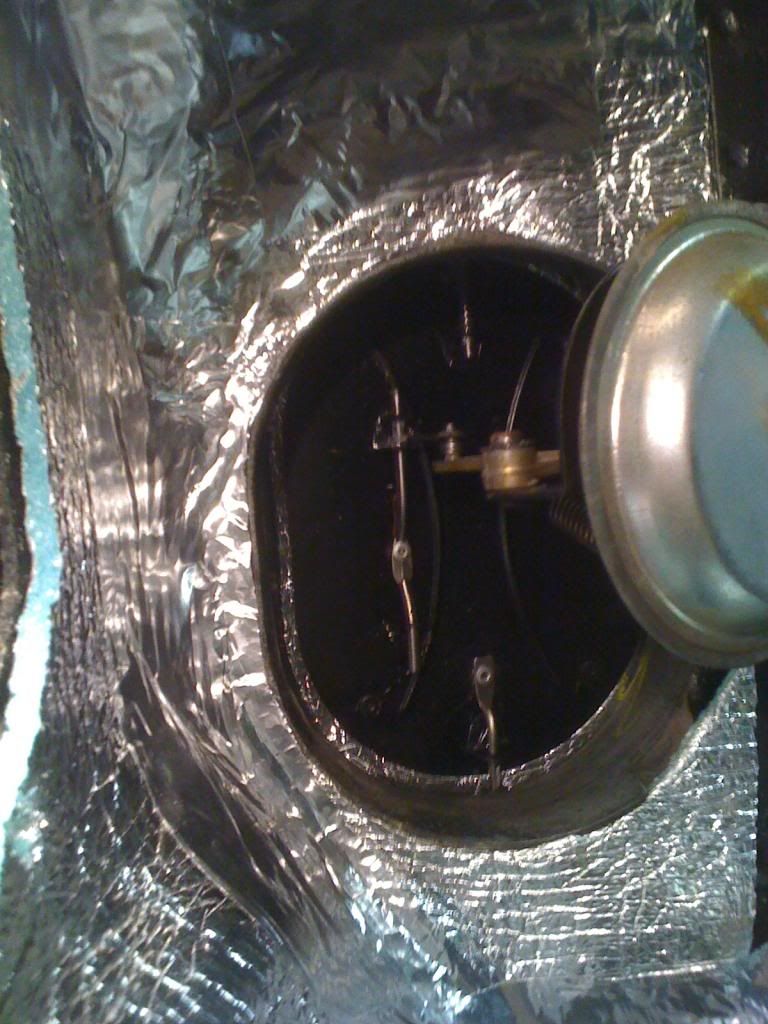
The vent door on the right kick panel is made up of 2 metal panels with a seal sandwiched in between, that seal was shot so I took it apart and sandwiched it with a piece of the insulation to act as the seal instead.
I had the heat/ac box out so I insulated the inside and outside firewall areas. I also made sure the box was totally sealed up.
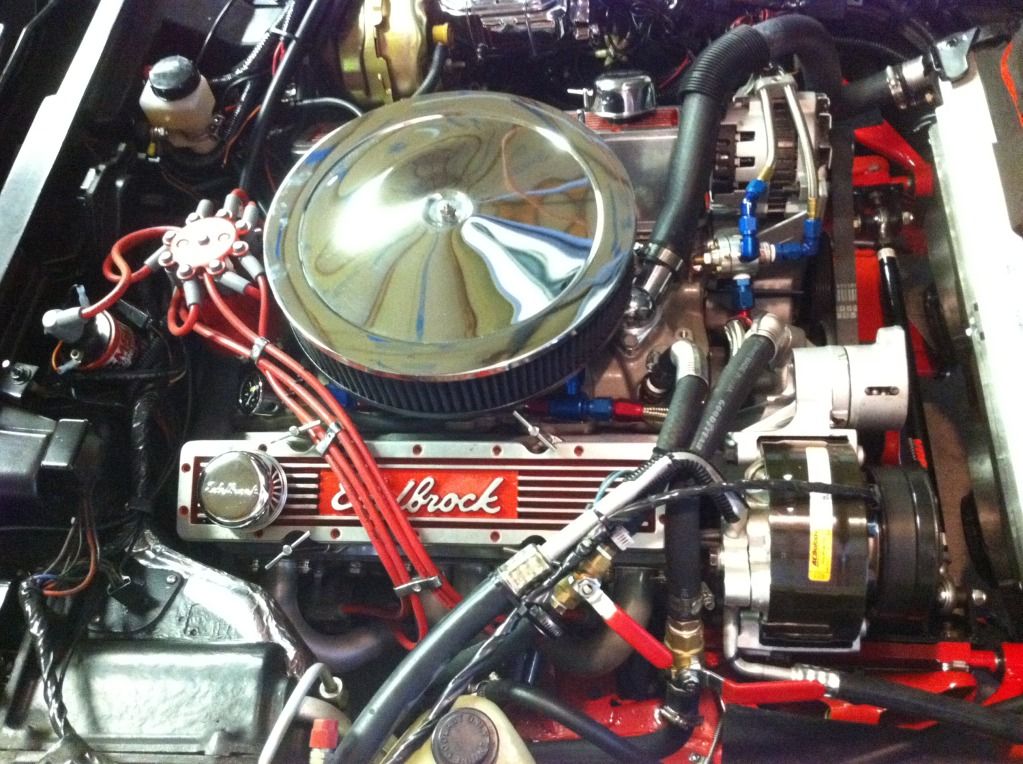
I added manual cut-off brass ball valves to both heater hoses to eliminate any transfer of heat to the heater core. Also, the headers are Jet-Hot coated inside and out.
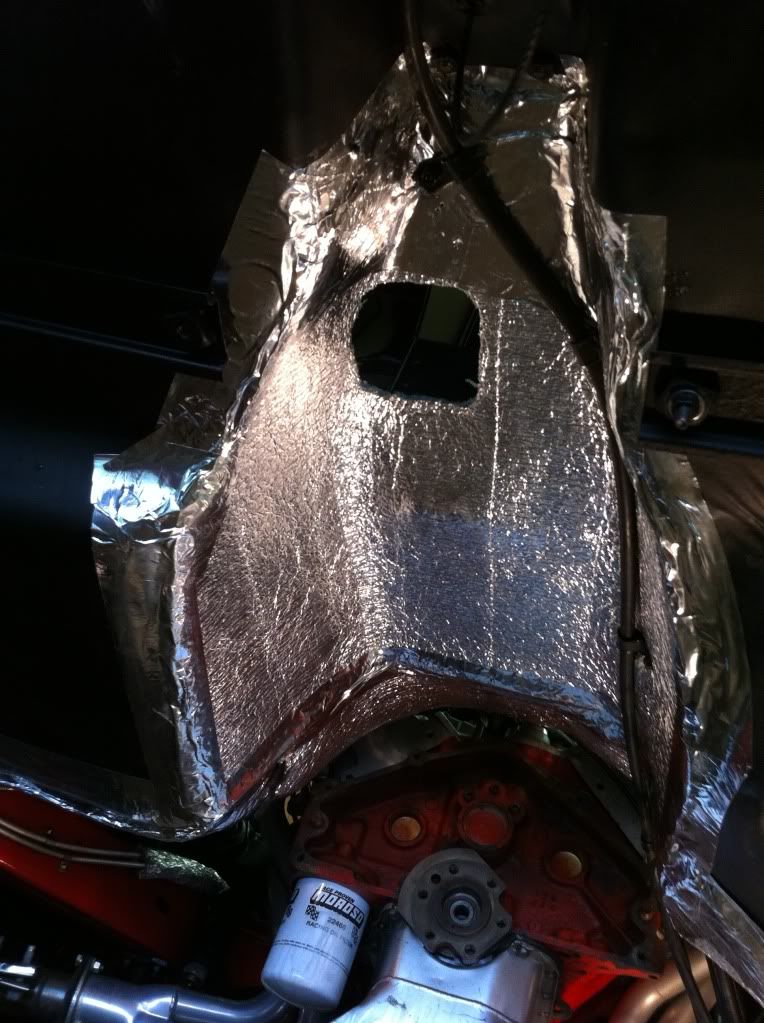
On the outside I insulated the forward firewall and floorboard foot well areas. I also insulated the tunnel area during my T56 trans swap.
I have also added cold air induction to the engine that is also thermal insulated, and have installed a Dewitt's aluminum radiator with dual Spal fans to keep the engine cool.

I started by insulating the entire interior front to back. I double layered the floor on both sides.

The vent door on the right kick panel is made up of 2 metal panels with a seal sandwiched in between, that seal was shot so I took it apart and sandwiched it with a piece of the insulation to act as the seal instead.

I had the heat/ac box out so I insulated the inside and outside firewall areas. I also made sure the box was totally sealed up.
I added manual cut-off brass ball valves to both heater hoses to eliminate any transfer of heat to the heater core. Also, the headers are Jet-Hot coated inside and out.

On the outside I insulated the forward firewall and floorboard foot well areas. I also insulated the tunnel area during my T56 trans swap.

I have also added cold air induction to the engine that is also thermal insulated, and have installed a Dewitt's aluminum radiator with dual Spal fans to keep the engine cool.

Le Mans Master
Joined: Oct 2006
Posts: 6,842
Likes: 285
From: Palmdale CA
Finished Mockup #1 tonight and learned some very interesting facts, the up front and in your face style of learning. The passenger side of the footwells on a C3 are longer and wider than the drivers side by a.considerable and most noticeable amount. That puts it closer to the exhaust pipe than the drivers side. Another factor is the wide radius of the lengthwise curve of the trans tunnel, that makes impossible for a sheet metal box to not extend outwards towards the exhaust. I had the shield totally flat against the bottom of the seatpan and trans tunnel and when a I reattached the exhaust, it laid right against and contacted the shield along the corner that stuck out from the radius of the curve. It's like putting a 90 degree angle on a 6" pipe. Not gonna work without surgery.
First, Mockup #1 passenger side will need to be sectioned lengthwise on the inside and a beveled surface will move the surface inward and away from the exhaust. It is truly a tight fit and this, while not impossible, delays the passenger side.
But the drivers side can be done this way, for at least two thirds the length of the floorboard, before some curvature starts to protrude at the rear of the tunnel. These cars are as swoopy inside and underneath, as they are outside! Tommorow, will be sourcing welding and working what dimension the bevel will be, and I will start fabbing the Driver's side heat shield.
Last edited by F22; Sep 11, 2013 at 02:36 AM.
Drifting


Joined: May 2005
Posts: 1,968
Likes: 44
From: East TN

http://www.homedepot.com/p/Frost-Kin...3#.UjBrsbwXh3Y
Le Mans Master
Joined: Oct 2006
Posts: 6,842
Likes: 285
From: Palmdale CA
The very first cardboard mockup I did, shows the bevel! I laid in bed last night and thought about it and remembered,the photo that had bend of the cardboard around the radius of the tunnel! That's what I'm going to have welded today (hopefully) or tommorow. Cool!

Le Mans Master
Joined: Oct 2006
Posts: 6,842
Likes: 285
From: Palmdale CA
Driver's side is going to have the final mockup and then, the pattern will be bent Friday. The passenger side remains a challenge. We may go to Fiberglass on both, but will have to cut down the sheetmetal considerably in the trans tunnel area on the fiberglass. There are too many oddball curves.
Lately, I've been picking people's brains and it has to be one of the really fun parts of this, so I called up my friend, Gene Deaver, retired and formerly of Deaver Marine. He built many a hull in the day and is a Legend in Drag Boats with many of his boats holding World Records. He built the Arfons jet boat that crashed at an estimated 400 mph!
The stories are worth the visit, but he was also very, very helpful and we'll be working together on Friday to get going on a mold. This Saturday and Sunday will be 99 degrees and I'm planning to test the metal mockups.
Last edited by F22; Sep 12, 2013 at 01:04 AM.

Pro

Joined: Nov 2003
Posts: 692
Likes: 1
From: Peabody Ma.
Your applying the Kapton film to aluminum, why not just apply it to the floor pan?
For all your effort at this point, You could have cleaned your floor pans and applied it to them!! Power washer does a great job!!
Or you could you just purchase the Zero clearance type insulation with the PSA adhesive all ready on it, and maybe apply the Kapton to that?
If you could do something like the above? It would eliminate the need to fab a shield, and it would take care of all the contours.
I think Mike80's insulation looks like a neater/cleaner job for fit and finish!!
Le Mans Master
Joined: Oct 2006
Posts: 6,842
Likes: 285
From: Palmdale CA
Your applying the Kapton film to aluminum, why not just apply it to the floor pan?
For all your effort at this point, You could have cleaned your floor pans and applied it to them!! Power washer does a great job!!
Or you could you just purchase the Zero clearance type insulation with the PSA adhesive all ready on it, and maybe apply the Kapton to that?
If you could do something like the above? It would eliminate the need to fab a shield, and it would take care of all the contours.
I think Mike80's insulation looks like a neater/cleaner job for fit and finish!!
For all your effort at this point, You could have cleaned your floor pans and applied it to them!! Power washer does a great job!!
Or you could you just purchase the Zero clearance type insulation with the PSA adhesive all ready on it, and maybe apply the Kapton to that?
If you could do something like the above? It would eliminate the need to fab a shield, and it would take care of all the contours.
I think Mike80's insulation looks like a neater/cleaner job for fit and finish!!
Thanks for your thoughts on this and I have to disagree on the Power Washer. I'm sure it does a great job removing grease and crud, heck, I've used it often at the shop, but there is a hard undercoating applied to these cars, over the fiberglass. And that won't remove with a Power Washer, nor would I entirely remove, with 100% certainty, all the grease and crud, that would be almost physically bonded to the undercoating.
Secondly, I think adhesive attached panels are a bad idea on the bottom of a car, that's doing 75 mph+. I believe in mechanical attachment and they are there, both front and back, to make this secure. I'd personally feel uncomfortable, having that little bit of doubt, wondering if after two years or three years, if that adhesive might work loose. Nuts, bolts and clamps, have a far lesser chance. To me, it's a safety issue.
Finally, I want this to be installable, without spending miserable hours under the car, with a power washer and a scraper. There will only need to be very minor mods to attach this, securely to the bottom of a C3 Corvette.
As far as looks, I'm sharing the prototyping of this and of course, there is a lot of on-the-fly adjustments to the sheet metal forms. They've been bent, beat on, mauled and cut up, until they're close. The final product in Fiberglass is going to look good! That's why I'm enlisting the help of my friend, Gene Deaver and he's an expert in Fiberglass.
Le Mans Master
Joined: Oct 2006
Posts: 6,842
Likes: 285
From: Palmdale CA
Update; Under the car this morning at 6 AM, finalizing the Driver's Side Mockup. Thank God, it's a lot easier than the passenger side. Dropped off the sheet metal at the shop, where it's going to be bent and then get it back tonight.
I'm on track to test this out this weekend!

I'm on track to test this out this weekend!

Le Mans Master
Joined: Oct 2006
Posts: 6,842
Likes: 285
From: Palmdale CA
PS: Bruce, You can get a really good look at the Factory Undercoating in this pic Imagine having to remove that decades hardened crud off the entire bottom of the floorpan, front of the firewall and inside the trans tunnel, with everything still in the car.

Last edited by F22; Sep 12, 2013 at 12:30 PM.

Team Owner


Joined: Jul 2004
Posts: 40,422
Likes: 792
From: Redondo Beach, California
I didn't want to read all the posts...my apologies if I'm repeating something.
The 1968 and 1969 cars had a very extensive underbody insulation system that was abandoned for 1970. You can buy all the parts for Corvette vendors and it's now all that expensive. I've bought the parts for my 70.
Secondly, since I've had the front interior parts removed on the 70, I've covered the entire front fire wall with extra insulation.
An easy way to get rid of heat is to get rid of the under body exhaust pipes. On my 68, I have the 69 factory side mount exhaust. With the stock underbody exhaust, the exhaust pipes...heated to 800-900 degrees F run only about 5 inches from your foot on the gas pedal. Of course, you've maybe a 5/16 inches of fiberglass, 3/8 inch of carpet and pad, to insulate your foot from the hot exhaust pipe. With the side mounts, this heat all disappears.
Pro
Joined: Nov 2003
Posts: 692
Likes: 1
From: Peabody Ma.
[QUOTE=F22;1584901967]
Thanks for your thoughts on this and I have to disagree on the Power Washer. I'm sure it does a great job removing grease and crud, heck, I've used it often at the shop, but there is a hard undercoating applied to these cars, over the fiberglass. And that won't remove with a Power Washer, nor would I entirely remove, with 100% certainty, all the grease and crud, that would be almost physically bonded to the undercoating.
Secondly, I think adhesive attached panels are a bad idea on the bottom of a car, that's doing 75 mph+. I believe in mechanical attachment and they are there, both front and back, to make this secure. I'd personally feel uncomfortable, having that little bit of doubt, wondering if after two years or three years, if that adhesive might work loose. Nuts, bolts and clamps, have a far lesser chance. To me, it's a safety issue.
Finally, I want this to be installable, without spending miserable hours under the car, with a power washer and a scraper. There will only need to be very minor mods to attach this, securely to the bottom of a C3 Corvette.

F22...Not sure what kind of pressure washer you are using? But you can clearly see from the pics I have added it WILL take it off! this was only a few minutes of work. I could do a better job with the big one with the heater!
Secondly what are going to use the attach the Kapton film to your "mechanically attached panel" ADHESIVE? is it going to be rated for any type heat? Whats to stop your Kapton from flying off at 75+ mph?
Wondering if after two years or three years, if that ADHESIVE might work loose.
You have all ready spent some time under your car test fitting your panels, less time would have been spent with a power washer!
Seems to me your design will use some type of ADHESIVE, and will create just as much of safety issue as you claim, maybe more!
The PSA adhesive on DEI tunnel shield is rated for 450*F, What if your adhesive cant withstand the heat,and catches fire? Now that's a safety issue!
PSA adhesive has been in the automotive industry for years! Its used every where! Most common place I can think is on radiator seals, right next to a high heat source. I replaced my radiator seals that use PSA adhesive about 7 yrs ago, Guess what they are still there!