When you click on links to various merchants on this site and make a purchase, this can result in this site earning a commission. Affiliate programs and affiliations include, but are not limited to, the eBay Partner Network.
Got installed all the trim and weatherstripping around the doors - and used all the good advices from other threads. The fasteners was cleaned and I used lots of 3M rope caulk to seal the tricky spots, sealed the trim screws and layed out to lines of rope caulk on the new reveal moldings and trim. I really hope that all my effort will prevent water leaks - but its winther in Denmark right now so I´m not taking the vette out for a test with the garden hose.
Next step is the radiator shroud. I planned to make a complete new aluminum shroud, but I´m running out of time if I want to be ready in the spring - and I dont think it will be worth the effort trying to make something better than the OEM - especially with all the bends and lines. Instead I´m installing a support frame in the lower part, which will both stiffen the shroud (when my vararam-kit is resting upon it) and I´m able to attach a new mesh that will actually look good
I need to find some new material for the shroud seal - as the OEM seals dont really fit anymore. But it seems you cant buy new ones (or I cant find them) - so I guess I´ll have to make some new using some other material I can buy locally (I think OEM´s are made by EPDM foam, but it seems hard to find in those sizes)
Your build looks great. I can't wait to see it finished, and I LOVE that wheel/tire setup.
Thought: It may be too late for this, but it would drive me bonkers having two different lights on the sides of the car. Can you graft in another set of the rear side marker lights from the quarter panels into the front fenders? You could always use the clear lens type and paint them translucent yellow.
Your build looks great. I can't wait to see it finished, and I LOVE that wheel/tire setup.
Thought: It may be too late for this, but it would drive me bonkers having two different lights on the sides of the car. Can you graft in another set of the rear side marker lights from the quarter panels into the front fenders? You could always use the clear lens type and paint them translucent yellow.
At this moment its too late to make such changes - the expensive paint job is completed
But - the clear rear markers is going out - some crystal red ones are already on their way, and will blend in very well with the red color. The front markers is black w/ clear lenses and has the LED strip mod from RadioFlyer - and they should fit very nice together with the turn signals in the fenders, which is required by Danish inspection
I´m working my way through mods to the radiator shroud, re-installing the Vararam kit. As written earlier I´ve reused the OEM shroud. I would have loved to make a custom one in aluminum, but comparing to the OEM it would be hard fabricating anything better - as it is a tight fit with the Vararam. Instead I´ve installed a support frame in the lower part of the shroud - made of thin stainless plate. I used some heavy outdoor glue (intended to seal and glue roof tiles) and then a few rivets - and its amazing how much stability it has given. As a side effect - the vararam and the shroud has to be installed at the same time, as the vararam used to slide in where the shroud would flex in the middle. I found some EPDM foam locally and made some layers to seal against the shroud. It really turned out to be nice and air tight. The mesh is also stainless. Right now its just mocked up to a test fit. Later it will be finished with some sort of trim around the edges and a small bracket to hold the two pieces together (unless I get them welded). The trim will have some sort of a "hook" that will catch the little plastik edge on the lower part of the fan house, and then it will be attached with a few screws in the new support frame. Nice, clean and easy to service
I´ve installed the SacCityCorvette "Fangs" too - and that has to be the most easy mod ever...- think it took 3 minutes and was plug & play. Seems to be good quality and a really good protection. Thumbs up for a good vendor
Previous owner had installed the DRM front brake duct kit, but the hoses where totally worn. I got some new hoses from DRM, but as many others have experienced the outer diameter of the duct is about the same size as the hose... I found some cheap plastic pipe (think its made for indoor air tubes) and made a little spacer that fits into the duct. It´s riveted and then mounted with some tape that vulcanize. Then it was piece of cake to mount the new hoses - and its easy to service and replace next time the hoses are worn out.
Next is the last wires and electric accessories - hope to be finished with all that within two weekends - and then I can start installing fenders, front fascia and hood
The helpful postal service delivered yet another box today - the new red rear marker light, that will replace the clear ones I thought would look good...- but they didn´t...
Ordered some other stuff too to go along (when living in Europe you really learn to consolidate your shopping in the US - as you don´t want to ship too often). Gene/Cultrag provided new shock mounting hardware - which apparently nobody offers as a kit. But Gene was kind to source all the individual parts for me I really think its a good thing to replace all the hardware, when replacing the 16 year old shock with new coil overs.
Also got a new green filter for the vararam - the old one is really torn and dirty - and some of the heavy duty 3M tape to mount the carravaggio spoiler.
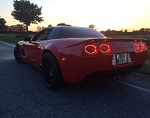
The new crystal red rear marker lights is installed...- thanks to those of you who recommended to swap out the clear ones. It made a huge difference to the look - and they do "blend in" with the red paint nicely.
I´ve almost finished the custom interior wirering and also made a new switch panel that fit in the ash tray bezel. The 4 switches controls
engine compartment light (prevents to drain battery at shows and long term work)
extra outlet for interior accessories (switched power)
exhaust plate light
front DLR LED strips "radioflyer-mod" (not allowed by Danish inspection)
I installed some connectors for easy service and removal of the panel. I still need to insulate the flat connectors mounted on the switches.
I installed a row of relay sockets that is powered directly from the battery (fused, of course ) Only one relay is mounted now, but all 4 will be used. It´s easy to expand in the future (if needed) and best of all it is totally separated from the OEM harness. The relays are powered by the switched outlet, where I installed a 3-wire connector to secure the 3 OEM wires, but only distributed the yellow switched power. It was a PITA to install the connector because of the very short wires - but now it´s done and easy to service. I installed a new large ground wire from the engine compartment, that all the non-OEM accessories can connect to.
Now the interior can be assembled and next step is the front end (fenders, fascia, hood, lights and all the dress up items).
Let us know if your engine temps go up with screens.
I will look into that, when I´m back on the road.
But as Rob02 says, I dont think it will affect the engine temps, as previous owner had installed the same kind of mesh like the one Rob02 has installed.
Its time for an update. All wires and switches in the interior are installed - included the new switch board in the *** tray (the four switches were not 100% lined up when taking the picture - but now they are). Inside I only need to install the plastic panels around the doors and the seats - but I dont want to finish that part before I´ve had the car outside and testet the weatherstrips with water - I guess its easier that way to see any leeks that needs to be resealed.
The hood, front fascia and fenders are installed. I still need to finish up some allignement - but its really nice to see how well (IMO) the black Z06-screens and the black custom front emblem fits the color scheme. It´s really a tight fit when installing both fog lights, Z06 screens and the vararam-kit - now I know, why the Z´s didn´t had the "fog light option"....



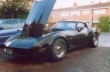

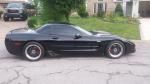



 I like red. Cleaner look.


 Wow, what a thread. Great JOB















 I found some cheap plastic pipe (think its made for indoor air tubes) and made a little spacer that fits into the duct. It´s riveted and then mounted with some tape that vulcanize. Then it was piece of cake to mount the new hoses - and its easy to service and replace next time the hoses are worn out.