C3 General General C3 Corvette Discussion not covered in Tech
Sponsored by:
Sponsored by:

1971 Journey

Thread Tools
 
Search this Thread
 
Old Jan 31, 2020 | 08:41 PM
  #1621  
CraigH's Avatar
CraigH
Thread Starter
Melting Slicks
15 Year Member
Liked
Loved
Community Favorite
 
Joined: Apr 2010
Posts: 2,795
Likes: 1,196
From: Canberra Australia
2025 C3 of the Year Finalist - Modified
Default

I rebuilt the speedo today.

This was the culprit for the odometer not working.


So the reassembly is fairly straight forward.

Fist fitted new lower drive shaft and pressed the end cap in place


Now the drive mechanism


Now fit the trip gauge adjust and ensure it is centered in the hole properly before tightening.


Now the tumblers with end clips. Ensure you align the locking pigtails onto the lower rails so all dials don't rotate.


Testing with a drill driving a spare cable.


Along the way I put a few drops of Labelle 108 oil on the cogs.

Also this page had good Information that helped.

https://www.jalopyjournal.com/forum/...ebuild.680356/

Last edited by CraigH; Apr 10, 2023 at 06:58 AM.
Reply
Old Jan 31, 2020 | 08:43 PM
  #1622  
CraigH's Avatar
CraigH
Thread Starter
Melting Slicks
15 Year Member
Liked
Loved
Community Favorite
 
Joined: Apr 2010
Posts: 2,795
Likes: 1,196
From: Canberra Australia
2025 C3 of the Year Finalist - Modified
Default

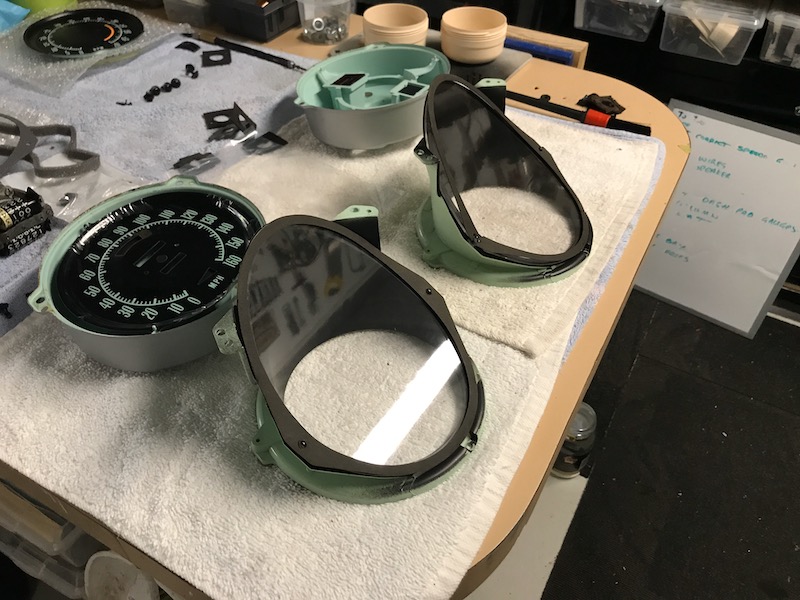
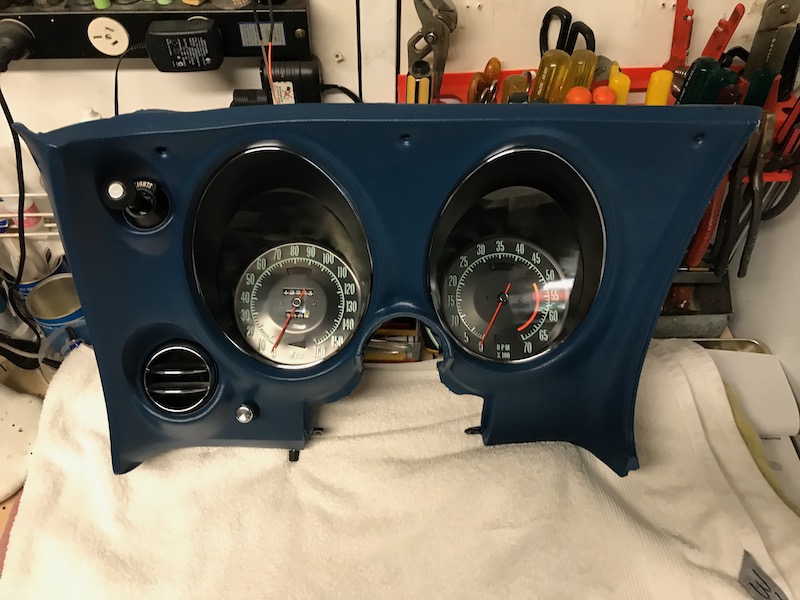
I am considering getting a couple of new faces for the gauges as the tacho redline area is fairly faded. Hopefully I won't have to pull it apart again so now is the time.
Reply
Old Feb 10, 2020 | 11:50 PM
  #1623  
CraigH's Avatar
CraigH
Thread Starter
Melting Slicks
15 Year Member
Liked
Loved
Community Favorite
 
Joined: Apr 2010
Posts: 2,795
Likes: 1,196
From: Canberra Australia
2025 C3 of the Year Finalist - Modified
Default

I finished off the drivers dash today with vinyl paint.


Last edited by CraigH; Apr 10, 2023 at 06:57 AM.
Reply
Old Feb 11, 2020 | 12:11 AM
  #1624  
caskiguy's Avatar
caskiguy
Le Mans Master
Supporting Lifetime Gold
Community Builder
Liked
Loved
Community Favorite
 
Joined: Nov 2016
Posts: 9,264
Likes: 951
From: Lake Tahoe, CA
Default

Originally Posted by CraigH
I finished off the drivers dash today with vinyl paint.


That looks amazing Craig ! Nice work.
Reply
Old Feb 11, 2020 | 01:47 AM
  #1625  
Primoz's Avatar
Primoz
Drifting
10 Year Member
Liked
Loved
Community Favorite
 
Joined: Jul 2012
Posts: 1,255
Likes: 297
From: Slovenia, EU
2017 C3 of Year Finalist
Default

Craig, lovely work and attention to detail. Which paint did you use? I know I asked you before but honestly I forgot.
Reply
Old Feb 11, 2020 | 01:57 AM
  #1626  
CraigH's Avatar
CraigH
Thread Starter
Melting Slicks
15 Year Member
Liked
Loved
Community Favorite
 
Joined: Apr 2010
Posts: 2,795
Likes: 1,196
From: Canberra Australia
2025 C3 of the Year Finalist - Modified
Default

Thanks guys, they are not perfect but probably will fit better than a new reproduction part.

I used this.


Vinyl paint as far as I can tell is just Satin paint with flex agents etc added.

Last edited by CraigH; Apr 10, 2023 at 06:57 AM.
Reply
Old Feb 17, 2020 | 01:09 AM
  #1627  
CraigH's Avatar
CraigH
Thread Starter
Melting Slicks
15 Year Member
Liked
Loved
Community Favorite
 
Joined: Apr 2010
Posts: 2,795
Likes: 1,196
From: Canberra Australia
2025 C3 of the Year Finalist - Modified
Default

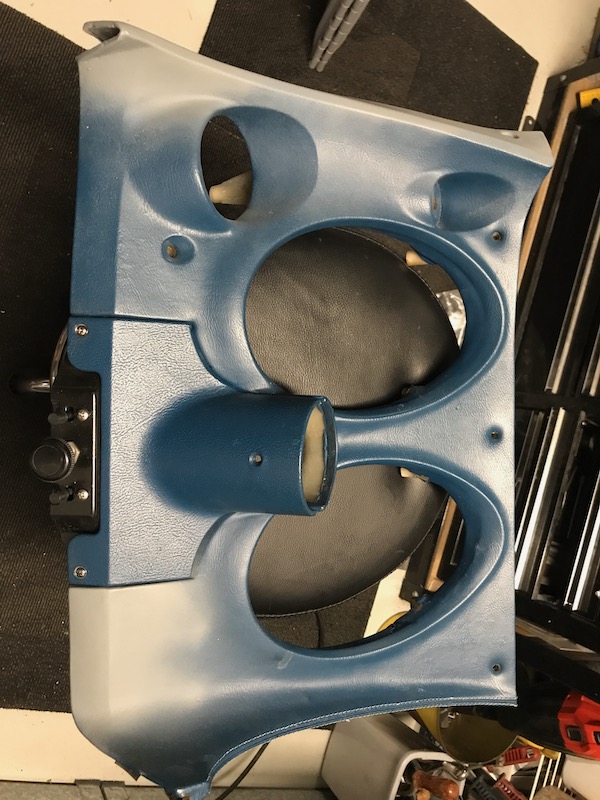
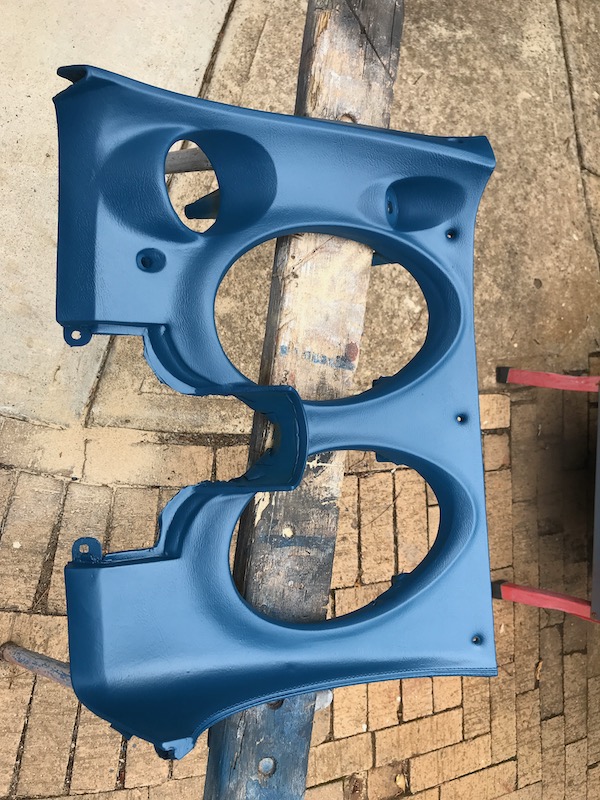
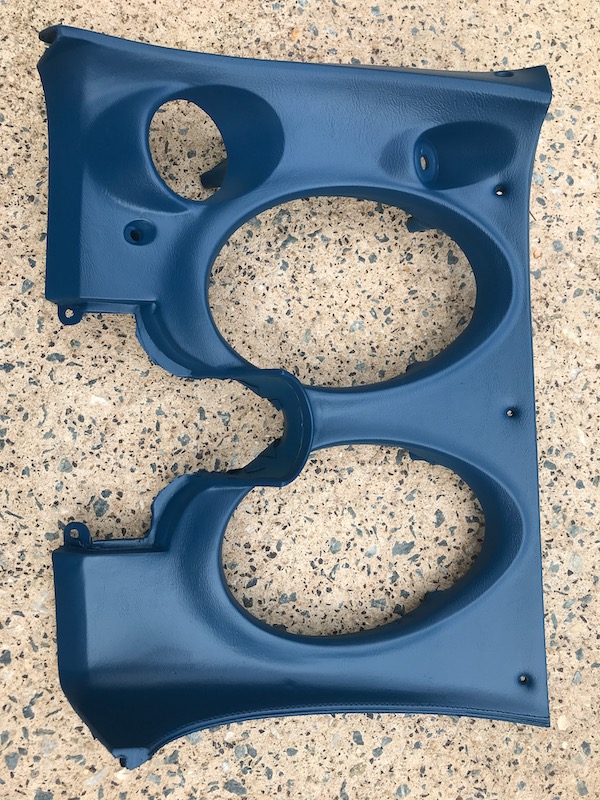
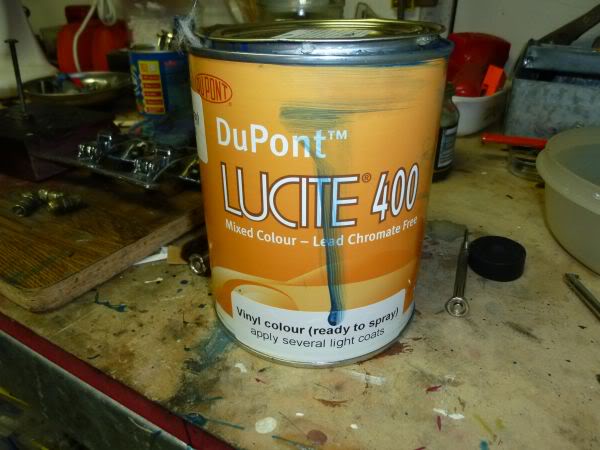
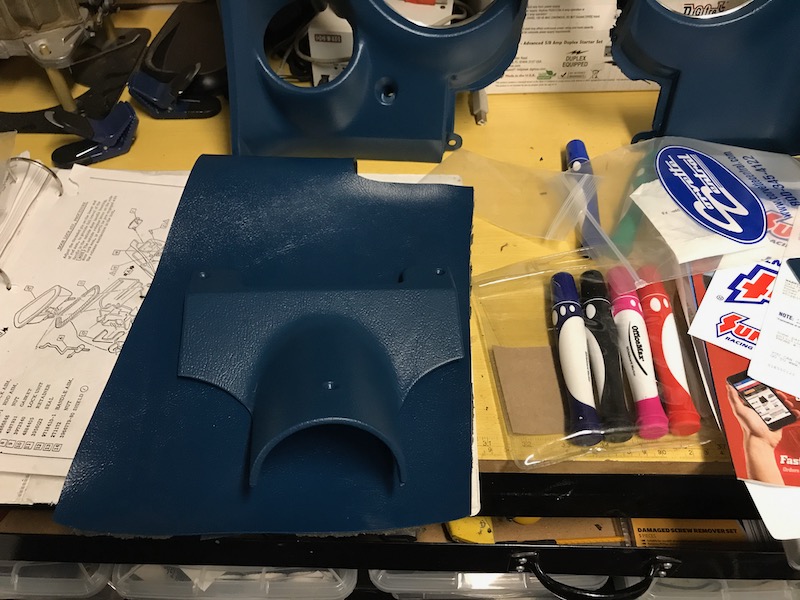
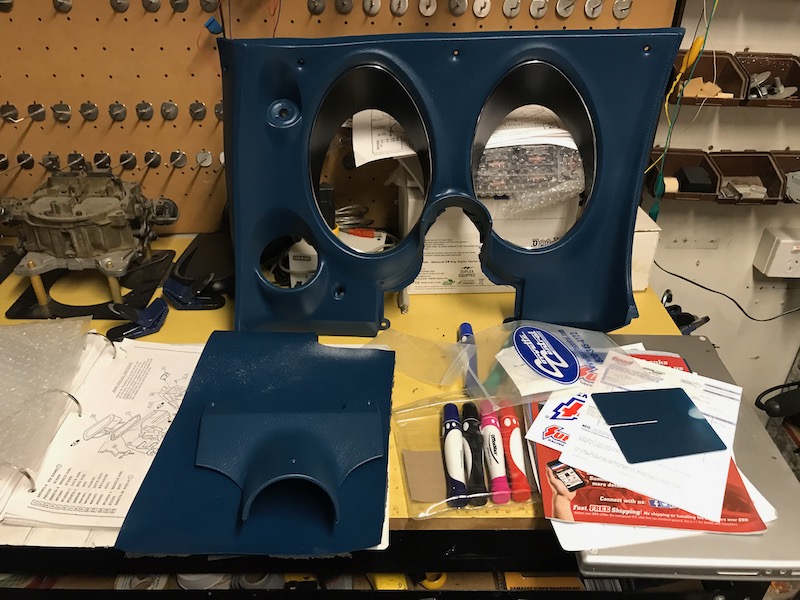
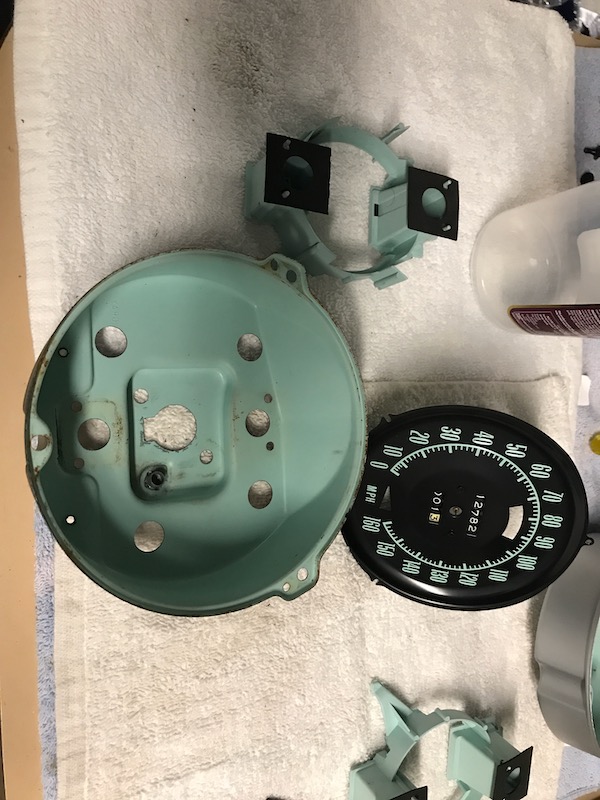
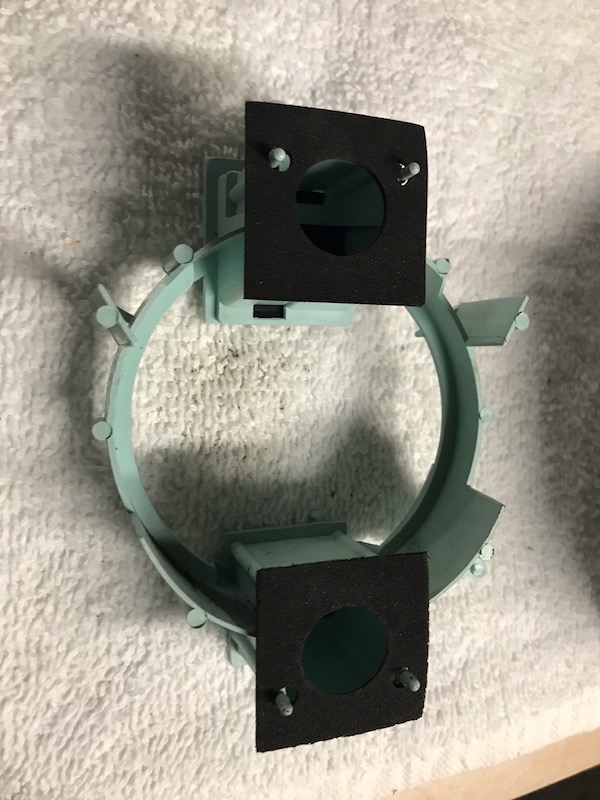
Was not 100% happy with the vinyl paint match so went to the local auto paint store and got a few tints and started playing. (Blue-Green, Blue-Red, Black)

End result is much closer. Also added a little more sheen to better match older vinyl parts.


Last edited by CraigH; Apr 10, 2023 at 06:57 AM.
Reply
Old Feb 17, 2020 | 01:10 AM
  #1628  
CraigH's Avatar
CraigH
Thread Starter
Melting Slicks
15 Year Member
Liked
Loved
Community Favorite
 
Joined: Apr 2010
Posts: 2,795
Likes: 1,196
From: Canberra Australia
2025 C3 of the Year Finalist - Modified
Default

Put the gas pedal assembly in and started tidying up the wiring.

Then plugged in the column so i could test it all.


Last edited by CraigH; Apr 10, 2023 at 06:57 AM.
Reply
Corvette Stories

The Best of Corvette for Corvette Enthusiasts

story-0

10 Ugly Corvettes That We Still Kinda Love

 Joe Kucinski
story-1

Top 10 Most Expensive Corvettes Ever Sold on Bring A Trailer

 Brett Foote
story-2

10 Things Every Corvette Owner Needs (2026 Edition)

 Michael S. Palmer
story-3

8 Most "Only Corvette Owners Understand" Quirks and Problems

 Pouria Savadkouei
story-4

10 Reasons the C6 Z06 is Still A Performance Benchmark After 20 Years

 Joe Kucinski
story-5

How Much Horsepower Every Corvette Engine "LOST" in 1972

 Joe Kucinski
story-6

Top 10 DOs and DON'Ts for Protecting Your Convertible Top!

 Michael S. Palmer
story-7

Top 10 Most Explosive Corvettes Ever Made: Power-to-Weight Ratio Ranked!

 Joe Kucinski
story-8

150 hp to 1,250 hp: Every Corvette Generation Compared by the Specs That Matter

 Joe Kucinski
story-9

8 Coolest Corvette Pace Cars (and Replicas) of All Time

 Verdad Gallardo
Old Feb 17, 2020 | 01:55 AM
  #1629  
wabco40's Avatar
wabco40
Racer
Supporting Gold
20 Year Member
All Eyes On Me
Photogenic
 
Joined: Jan 2005
Posts: 370
Likes: 77
From: Perth Western Australia
Default

Originally Posted by CraigH
Put the gas pedal assembly in and started tidying up the wiring.

Then plugged in the column so i could test it all.


Craig, now I know why you said the brake booster nuts where simple with extensions and a wrapped UJ. You don't have a clutch pedal and dash in the way


Reply
Old Feb 17, 2020 | 02:25 AM
  #1630  
CraigH's Avatar
CraigH
Thread Starter
Melting Slicks
15 Year Member
Liked
Loved
Community Favorite
 
Joined: Apr 2010
Posts: 2,795
Likes: 1,196
From: Canberra Australia
2025 C3 of the Year Finalist - Modified
Default

Originally Posted by wabco40
Craig, now I know why you said the brake booster nuts where simple with extensions and a wrapped UJ. You don't have a clutch pedal and dash in the way
Yes With the dash out it is all way easier Brad 😀. And a third pedal would also complicate things .\

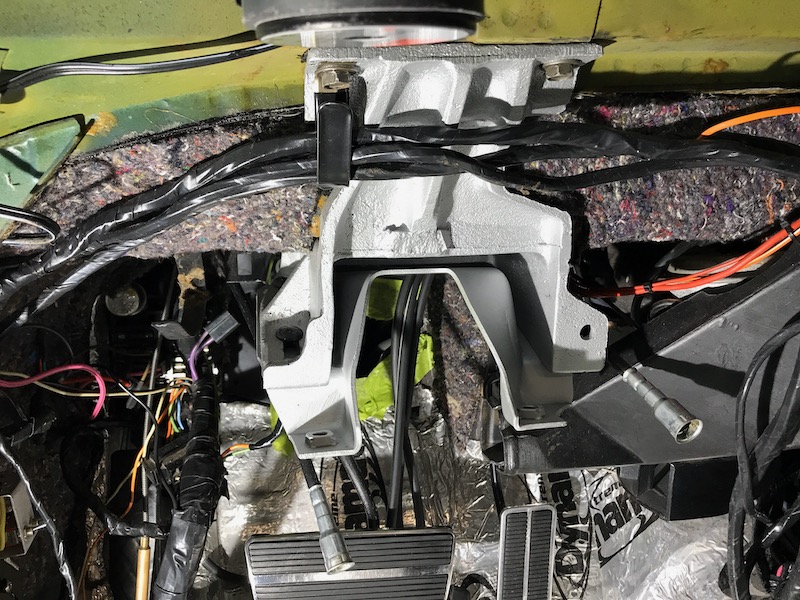
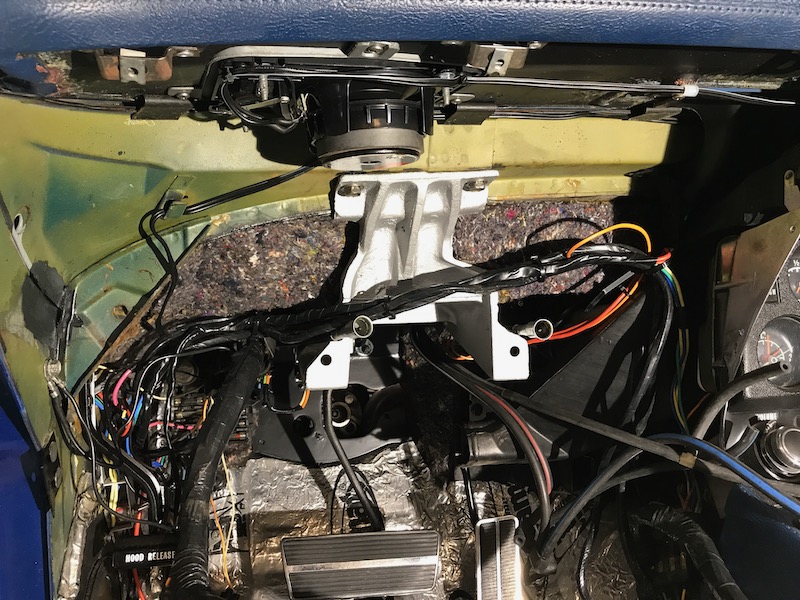
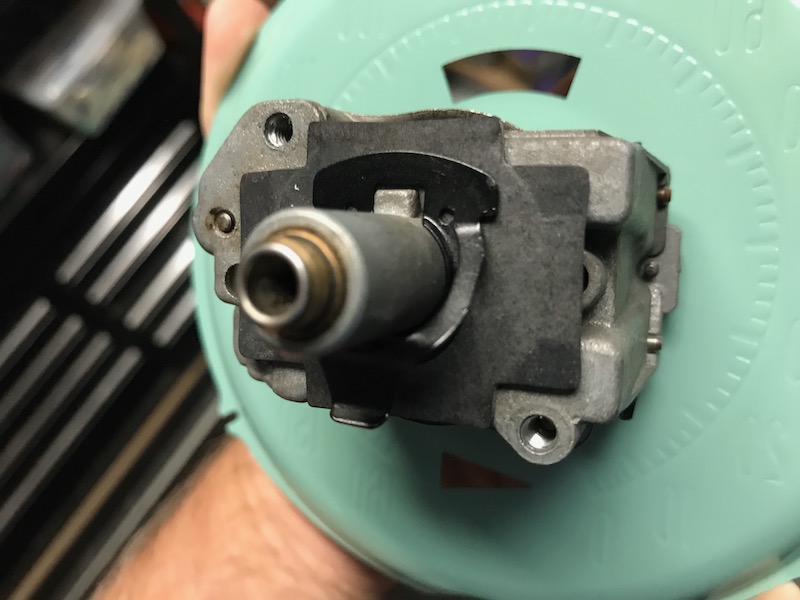
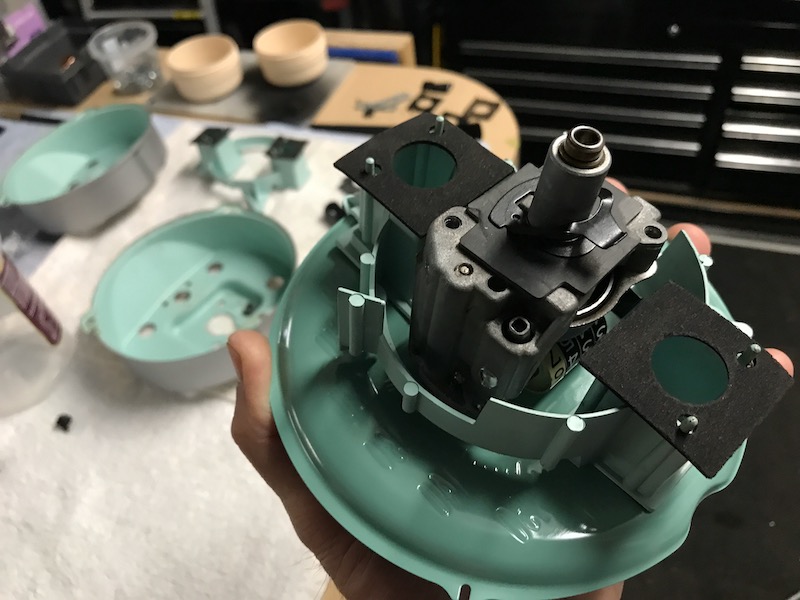
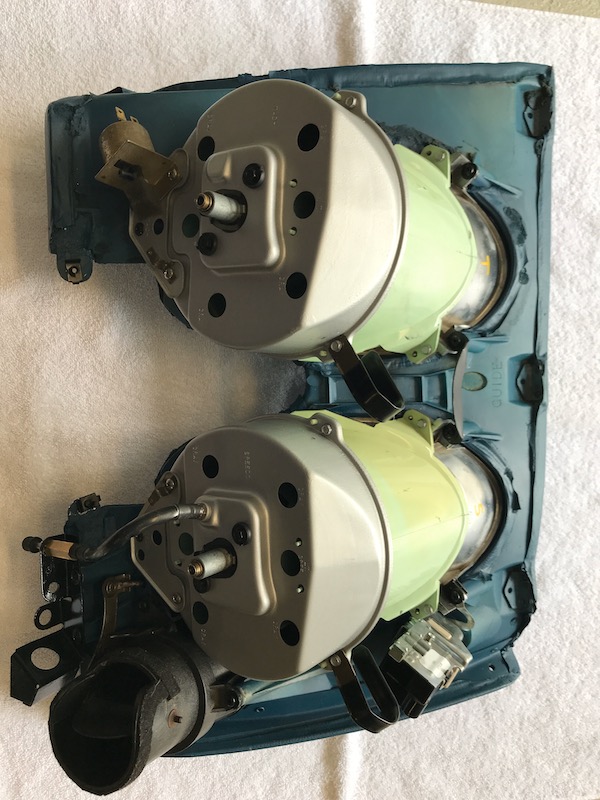
Take 2: I actually took out the booster with the dash disconnected but not out. However I got carried away as usual and decided to refurbish all the supports, gauges etc so it all came out.

Putting the new booster back was a bit harder as it had larger metric threaded bolts that made clearance even worse.

Last edited by CraigH; Feb 17, 2020 at 04:16 AM.
Reply
Old Feb 24, 2020 | 01:04 AM
  #1631  
CraigH's Avatar
CraigH
Thread Starter
Melting Slicks
15 Year Member
Liked
Loved
Community Favorite
 
Joined: Apr 2010
Posts: 2,795
Likes: 1,196
From: Canberra Australia
2025 C3 of the Year Finalist - Modified
Default

Dan at Vansteel has been very helpful.

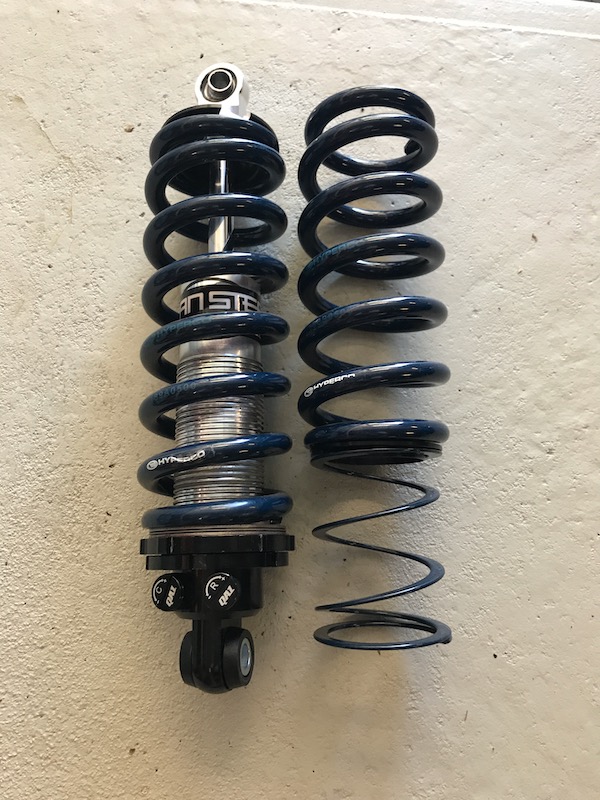
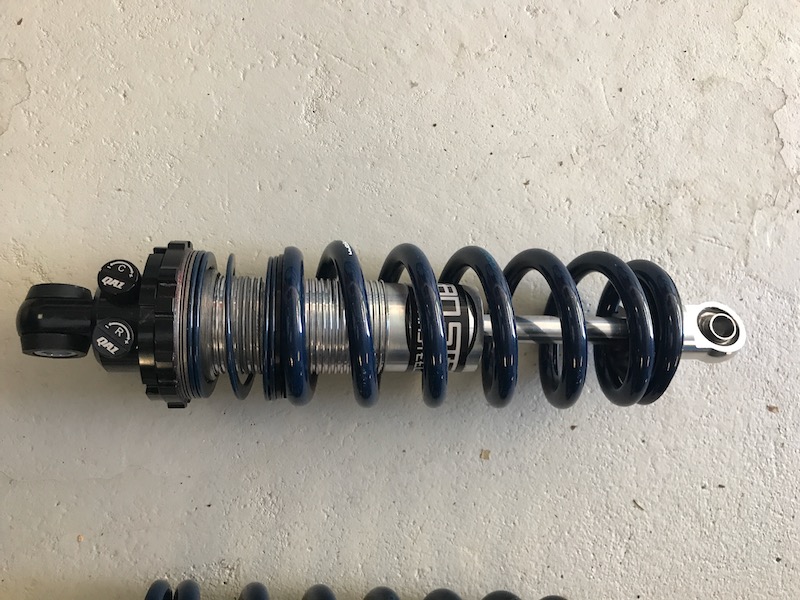
He supplied me some shorter replacement springs for me rear coilers and helper springs.

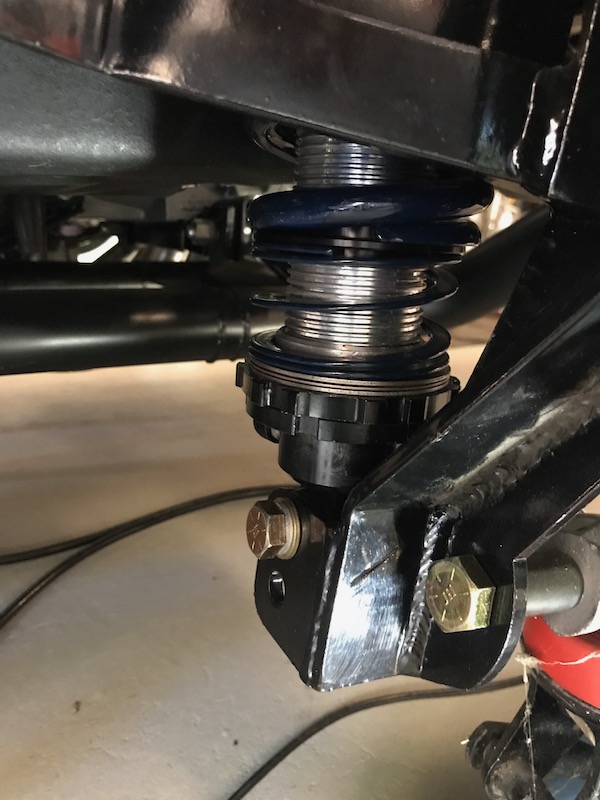
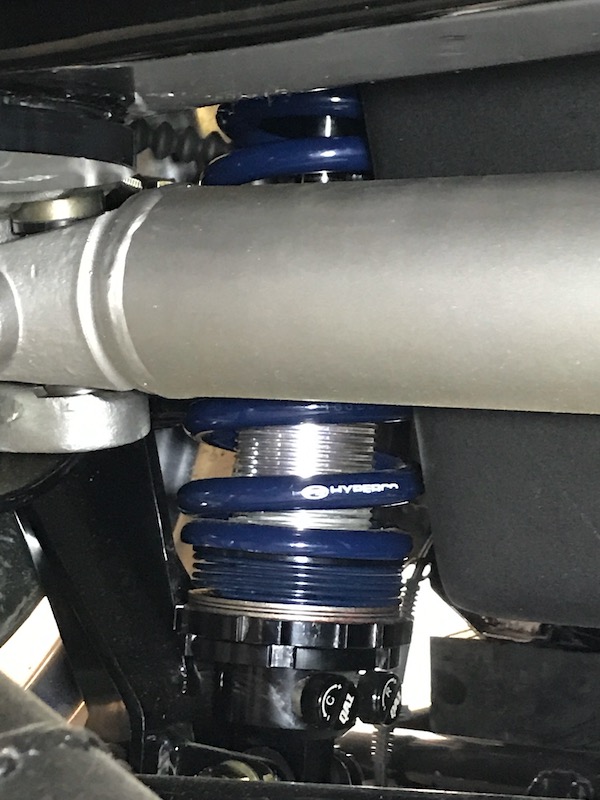
I was fairly happy with the height but wanted to avoid the spring not being captive on full suspension drop so we went with a set of helper springs and couplers together with new 8" Hypercoils.


When car is loaded helper spring is fully compressed.


Last edited by CraigH; Apr 10, 2023 at 06:57 AM.
Reply
Old Mar 2, 2020 | 12:36 AM
  #1632  
CraigH's Avatar
CraigH
Thread Starter
Melting Slicks
15 Year Member
Liked
Loved
Community Favorite
 
Joined: Apr 2010
Posts: 2,795
Likes: 1,196
From: Canberra Australia
2025 C3 of the Year Finalist - Modified
Default

I got some time today to start putting the speedo and tach back together and into the cluster.


First fit new glass, gaskets and bezels to dash pad.


Fit new faceplate to speedo mechanism.


Prepare the green plastic part that tunnels the blinker and headlight lights with new rubber pads.


Fit the rubber gasket at rear of speedo


Then the clip to hold the cables.


Lower the bucket over the speedo parts, there are aligning pins to help, and then add the two bolts that hold it all in place from the rear.


Test it all with a drill in reverse.


Last edited by CraigH; Apr 10, 2023 at 06:57 AM.
Reply
Old Mar 5, 2020 | 05:10 PM
  #1633  
CraigH's Avatar
CraigH
Thread Starter
Melting Slicks
15 Year Member
Liked
Loved
Community Favorite
 
Joined: Apr 2010
Posts: 2,795
Likes: 1,196
From: Canberra Australia
2025 C3 of the Year Finalist - Modified
Default

Drivers side dash is back together.


Now i need to trial fit it and do any adjusting.

Also considering Warm White LED's.

I will order some but not sure if i can use them for the brake, headlight etc warning and indicator lights or will they wash out too much.

Last edited by CraigH; Apr 10, 2023 at 06:56 AM.
Reply
Old Mar 6, 2020 | 04:57 PM
  #1634  
7T1vette's Avatar
7T1vette
Team Owner
15 Year Member
Community Builder
Community Influencer
Top Answer: 5
 
Joined: Jan 2006
Posts: 37,637
Likes: 3,118
From: Crossville TN
Default

Beautiful work. The color mis-match on your driver-side dash was because the first stuff you used was for a Bright Blue interior ('68-69). The color you needed was for Medium Blue (same as I have in mine). I was all set to tell you how impressed I was with the color match for Bright Blue....when you posted that the color wasn't correct. Your Medium Blue color appears to be 'spot-on'.

P.S. The Corvette Black Book does not show Bright Blue interior for '68. But I had one, and know better. It also labels the '71 blue interior as Dark Blue. It was not; it was Medium Blue. The Corvette Black Book is a very good document...but it's not completely correct.

Last edited by 7T1vette; Mar 6, 2020 at 05:01 PM.
Reply
Old Mar 6, 2020 | 05:55 PM
  #1635  
CraigH's Avatar
CraigH
Thread Starter
Melting Slicks
15 Year Member
Liked
Loved
Community Favorite
 
Joined: Apr 2010
Posts: 2,795
Likes: 1,196
From: Canberra Australia
2025 C3 of the Year Finalist - Modified
Default

Originally Posted by 7T1vette
Beautiful work. The color mis-match on your driver-side dash was because the first stuff you used was for a Bright Blue interior ('68-69). The color you needed was for Medium Blue (same as I have in mine). I was all set to tell you how impressed I was with the color match for Bright Blue....when you posted that the color wasn't correct. Your Medium Blue color appears to be 'spot-on'.

P.S. The Corvette Black Book does not show Bright Blue interior for '68. But I had one, and know better. It also labels the '71 blue interior as Dark Blue. It was not; it was Medium Blue. The Corvette Black Book is a very good document...but it's not completely correct.
Interesting info re “blues”. I thought Royal Blue was a name used as well.

The strange thing is that the paint i had was originally matched to the new panels i purchased for the interior B pillars. However when sprayed out a couple of years later it had lightened.
It had also been thinned a fair bit over that period when i used it so possibly the early ones had more pigment.
Either way it now matches both the old panels sprayed before and the dash so i am happy.
Reply
Old Apr 15, 2020 | 01:28 AM
  #1636  
CraigH's Avatar
CraigH
Thread Starter
Melting Slicks
15 Year Member
Liked
Loved
Community Favorite
 
Joined: Apr 2010
Posts: 2,795
Likes: 1,196
From: Canberra Australia
2025 C3 of the Year Finalist - Modified
Default

So I have been fairly "Corvette Slack" recently, the entire Covid-19 situation caused the cancellation of my Sons wedding in New Zealand and has for everyone caused life to change.
I have found I could not get motivated to work on the Vette so I decided to redo one of the bedrooms at home.

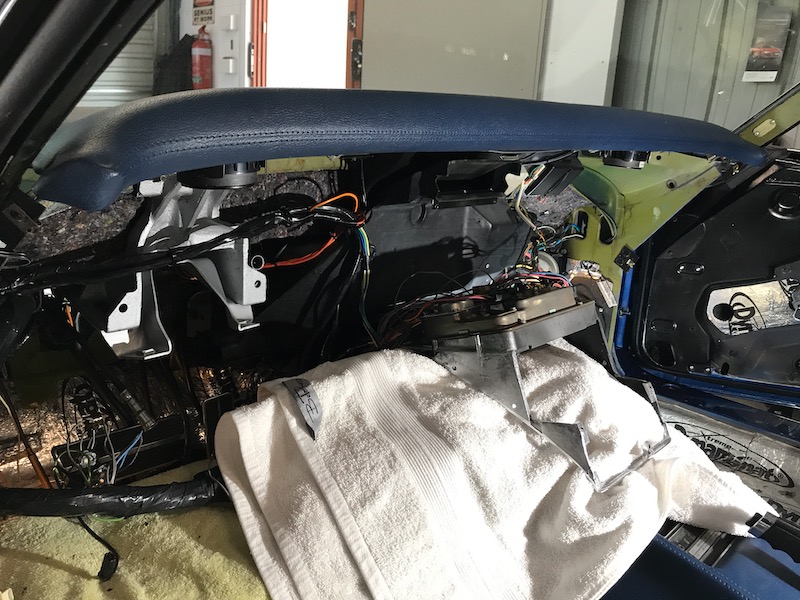
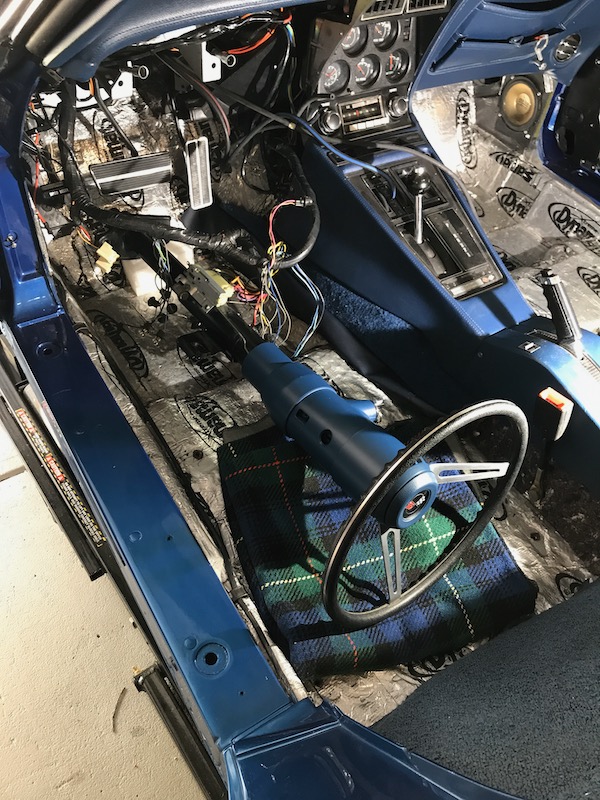
Now I have that done I am back and started to get the dash mounted back in the car.
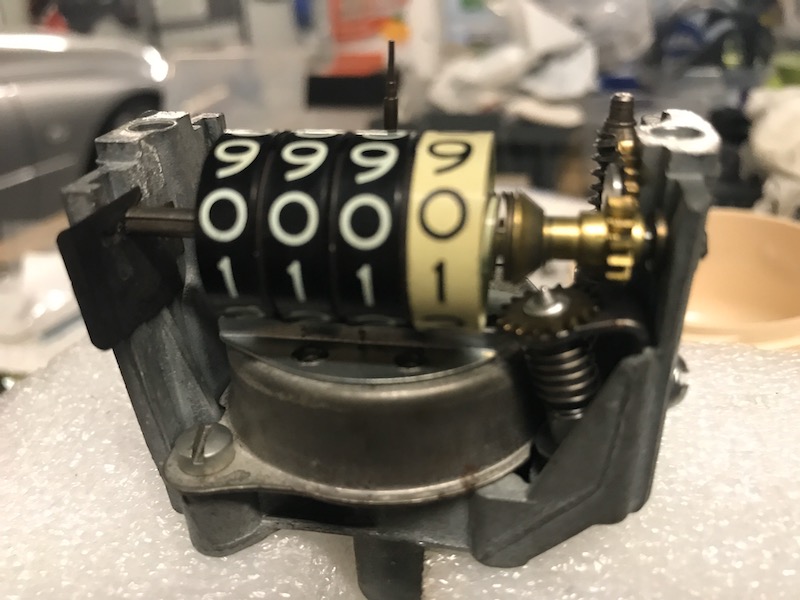
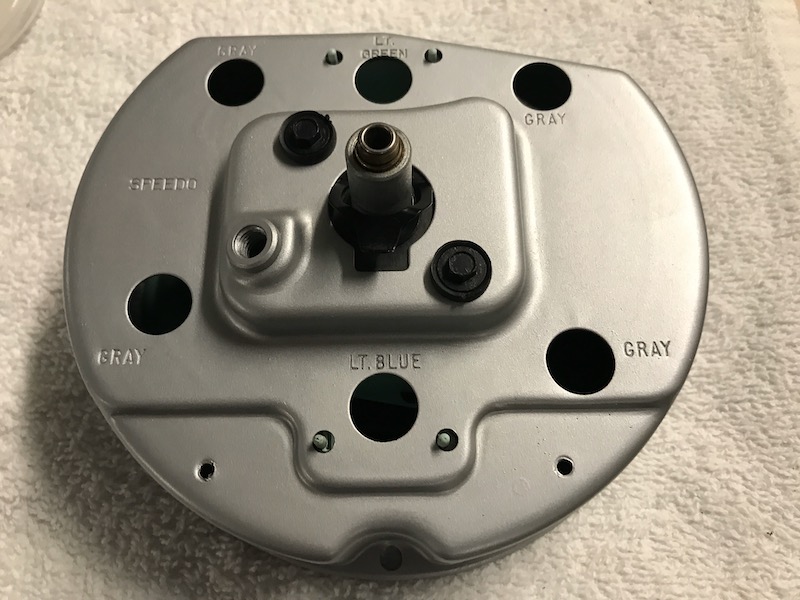
Working on the dash cluster and all the wires, cables etc is certainly a pain but I have now had it in and out a lot of times and have it down to a set process. Still a pain but better.

I found it easier to adjust it all by pulling the centre cluster and passenger dash so I could lift the dash pad while fitting and adjusting


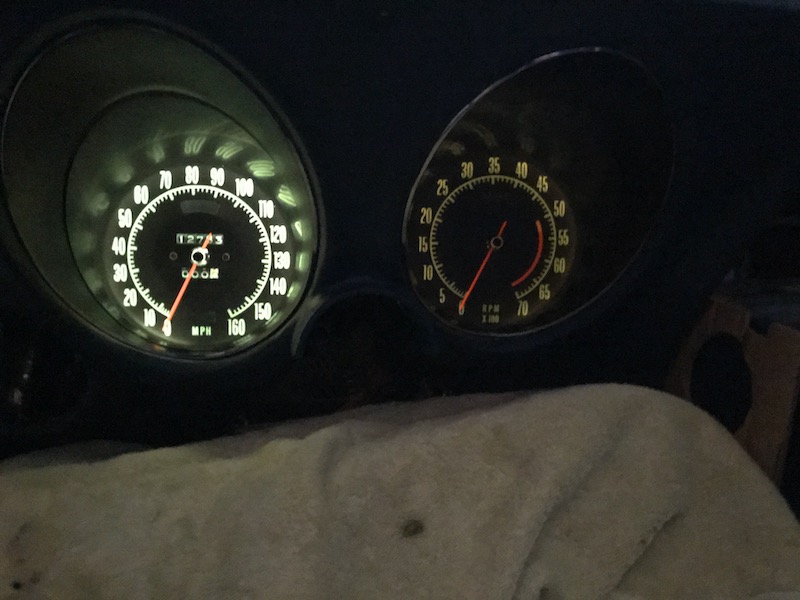
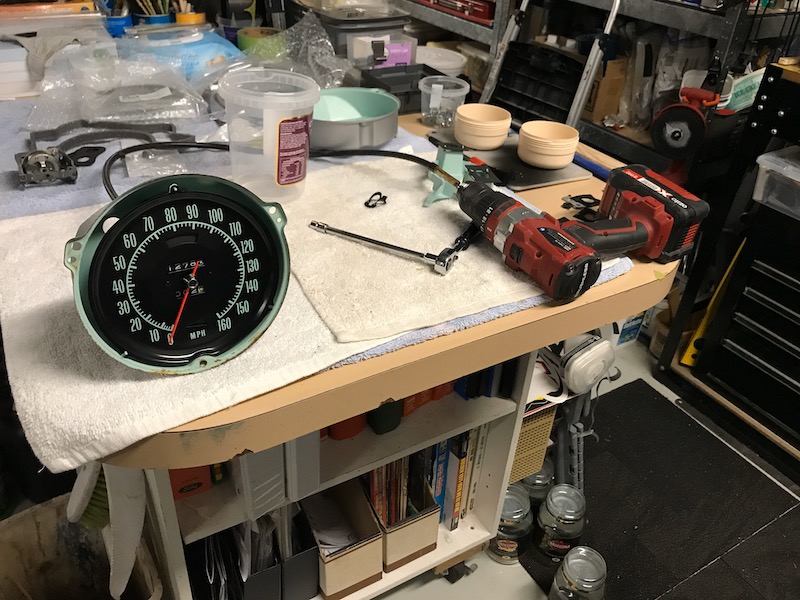
While it was out I have changed the cluster lights (not indicators, brake or high beam) to LED bulbs that have a single SMD LED in them. They produce a warm white but stronger than stock.


I will post a picture of bulbs later.

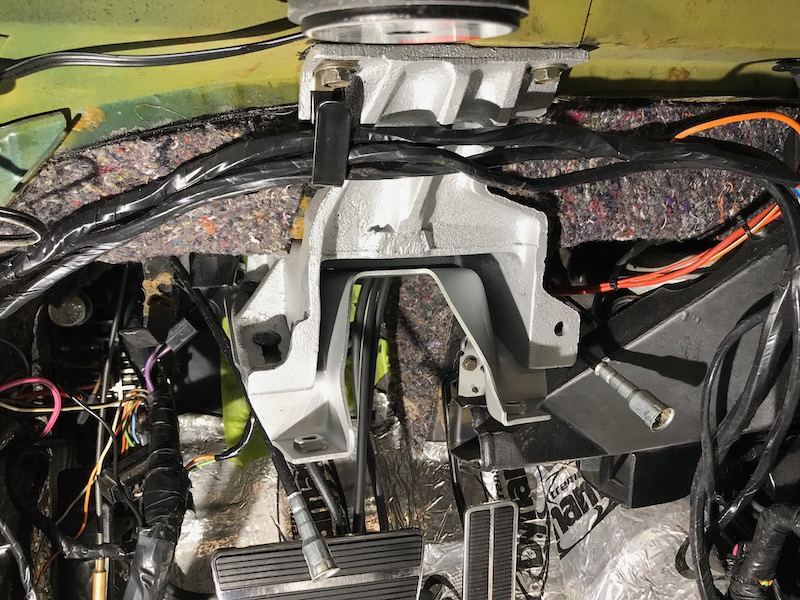
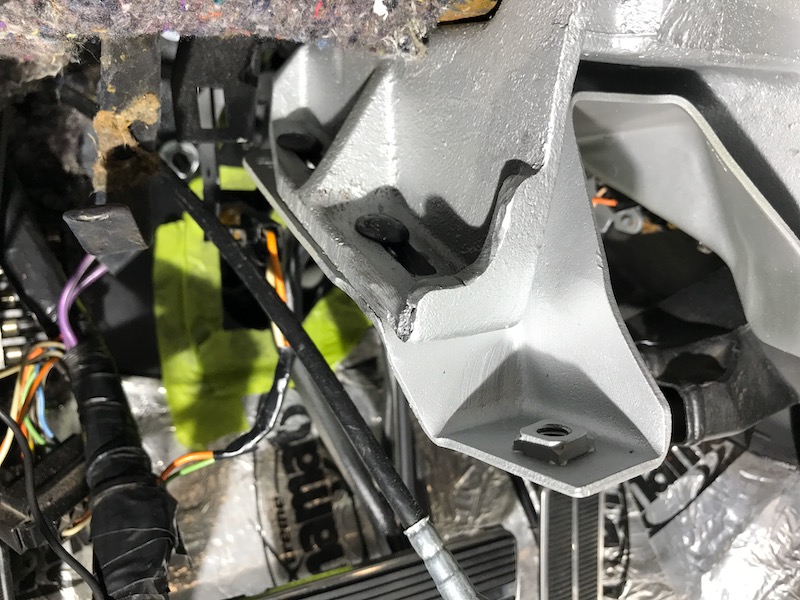
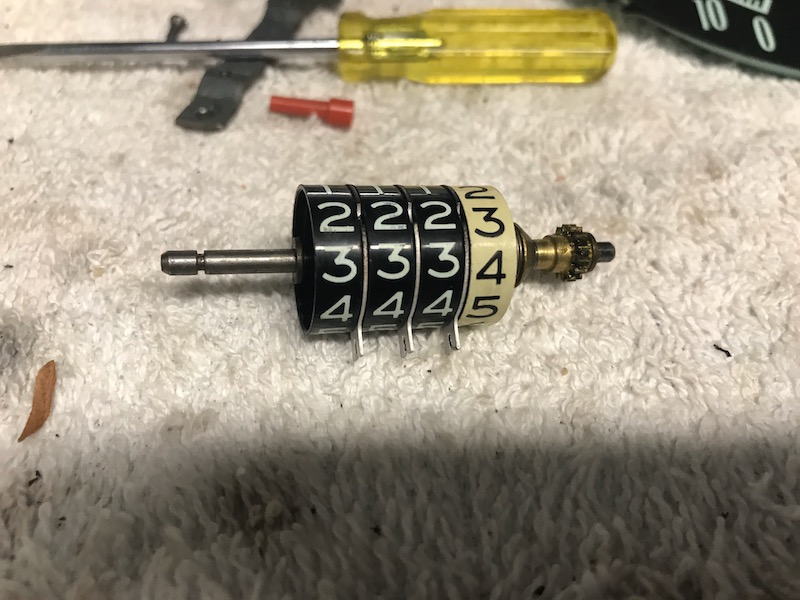
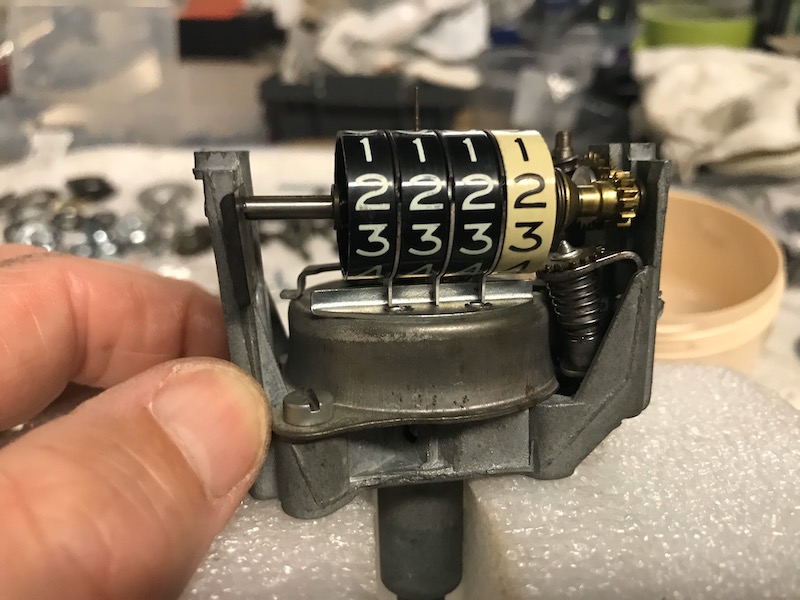
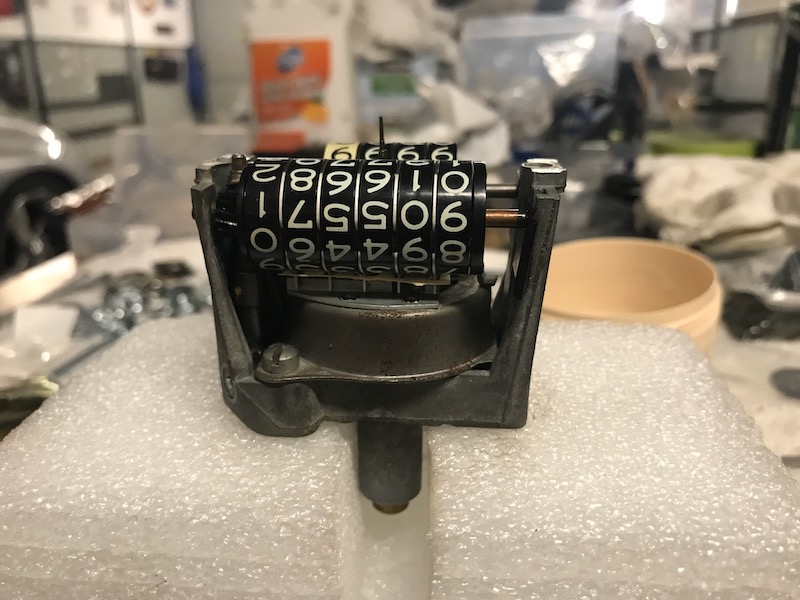
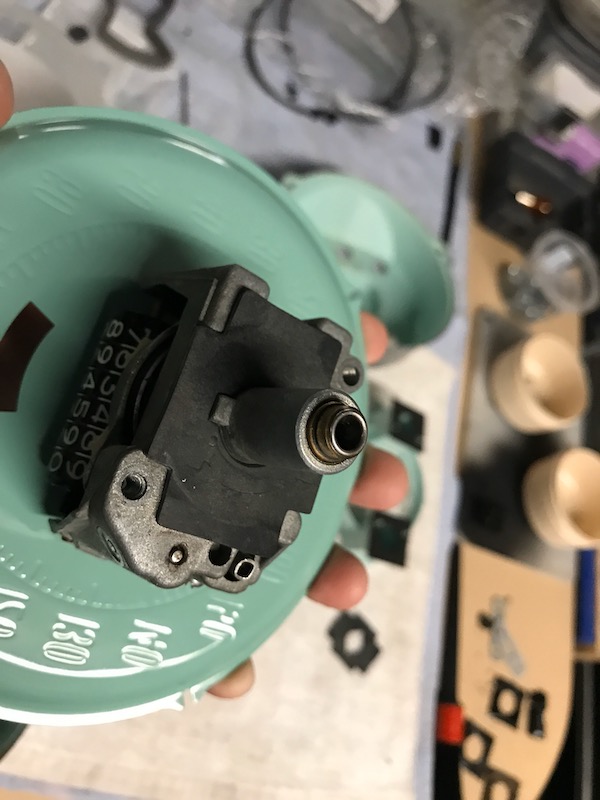
I did find once I had the cluster back in the trip adjuster is hard up against the column support.

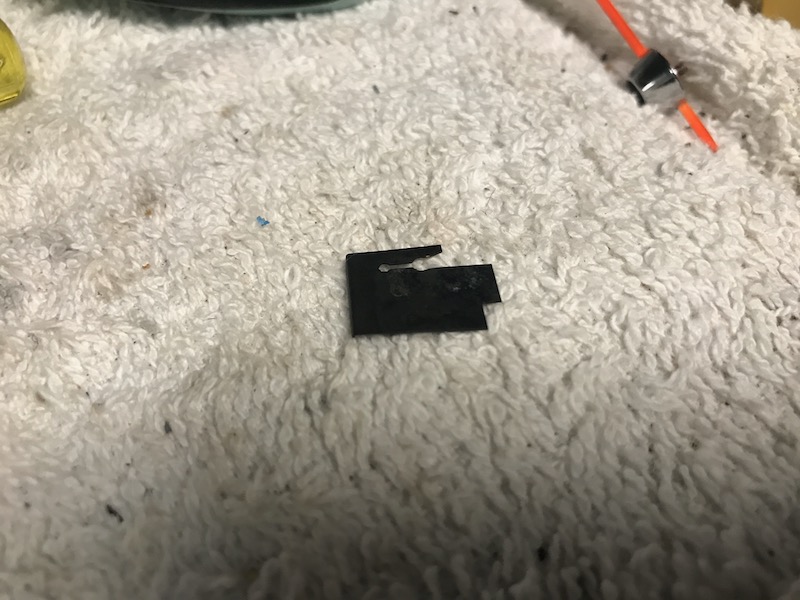
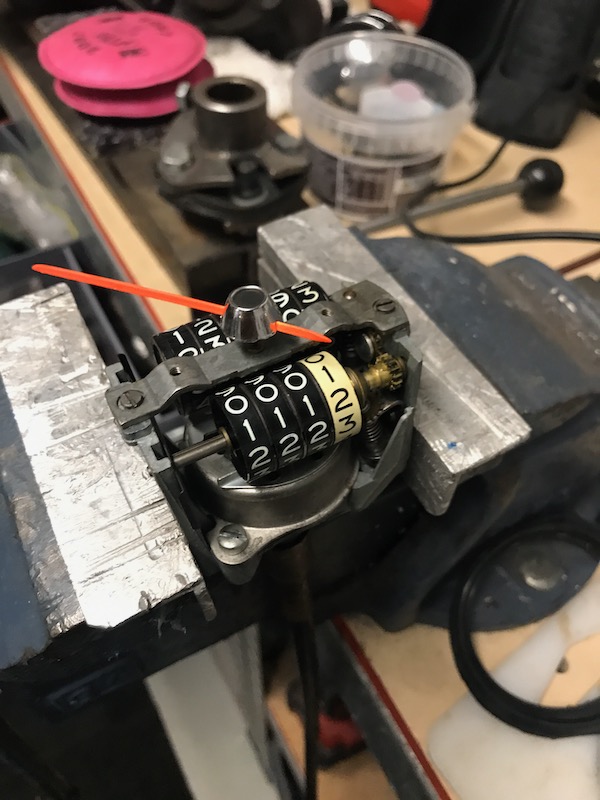
After a bit of searching I found this is normal but certainly not ideal. I saw "RiverRacer" mention in a post for 2011 that he would modify the support when he has the cluster fully out so I did just that


Removed a fair chunk of its ear and now the cable has a much better bend on it and fits more easily.

Last edited by CraigH; Apr 10, 2023 at 06:56 AM.
Reply
Old Apr 15, 2020 | 09:54 AM
  #1637  
BigBlock77's Avatar
BigBlock77
Instructor
15 Year Member
Liked
Loved
Community Favorite
 
Joined: Jul 2007
Posts: 200
Likes: 87
From: College Station Texas
Default

Thanks for the update. I'm about to dive into my rewiring project and general dash repair, so the detailed photos are just what the doctor ordered. Sorry to hear about your son's wedding, we're really into an unprecedented life experience in modern times. We're just praying it gets back to as close to normal as soon as possible. I'm trying to distract myself from it with my long dormant Corvette project.
Reply

Get notified of new replies

To 1971 Journey

Old Apr 15, 2020 | 11:00 AM
  #1638  
riverracer au's Avatar
riverracer au
Melting Slicks
15 Year Member
Photogenic
Photoriffic
Top Answer: 3
 
Joined: Oct 2010
Posts: 2,276
Likes: 337
From: "ɹǝpunuʍop", Adelaide, South Australia
Default

looking good as always, karnt wait to catch up again next year for the National Convention in Canberra.
really annoyed that our nationals, the 40th anniversary downunder, was cancelled, the South Australian club had so much planned.

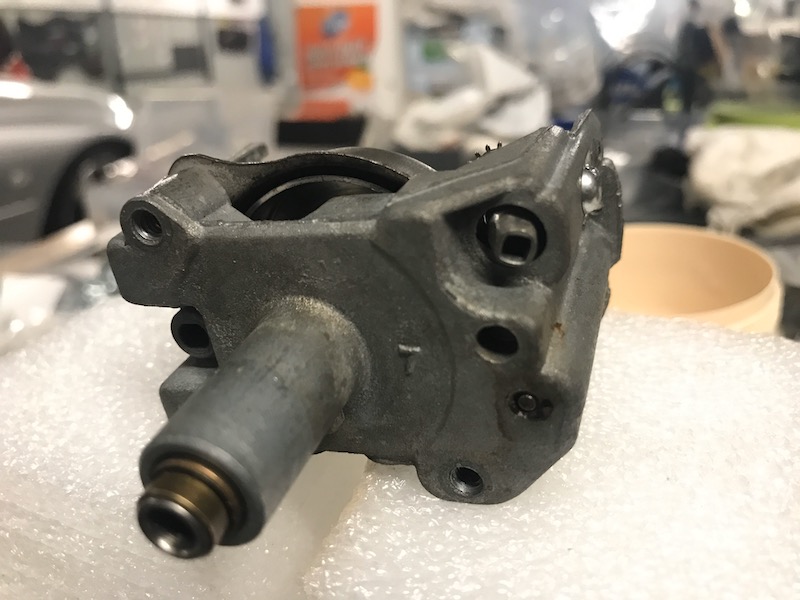
i have had the water pump off mine since mid march when they were canceled, haven't had the motivation to put it back on.......
Reply
Old Apr 15, 2020 | 11:08 AM
  #1639  
lars's Avatar
lars
Tech Contributor
Supporting Lifetime Gold
25 Year Member
Conversation Starter
Photogenic
Top Answer: 3
 
Joined: Aug 1999
Posts: 14,380
Likes: 6,391
From: At my Bar drinking and wrenching in Lafayette Colorado
Default

Hey Craig -
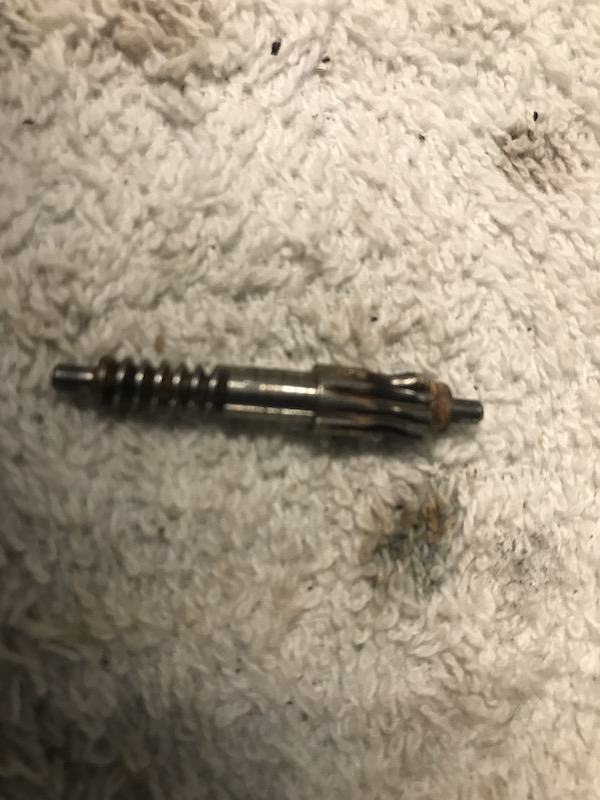
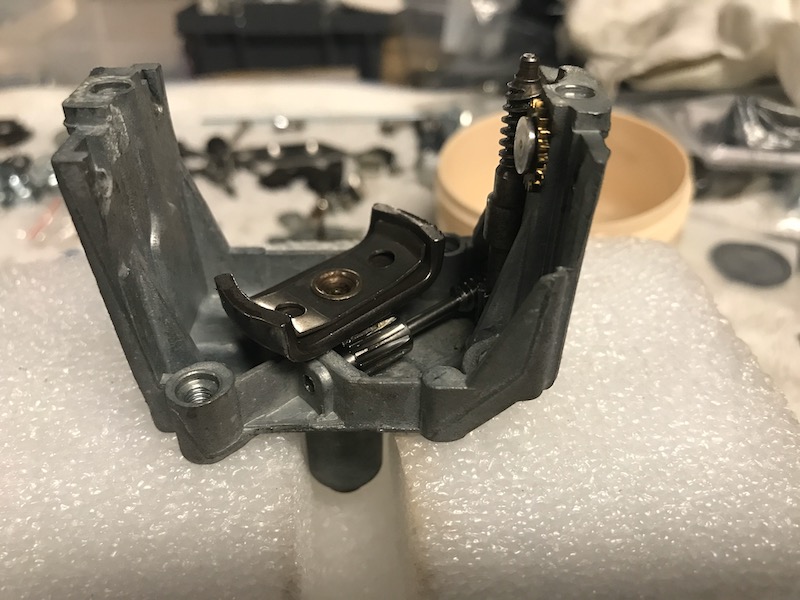
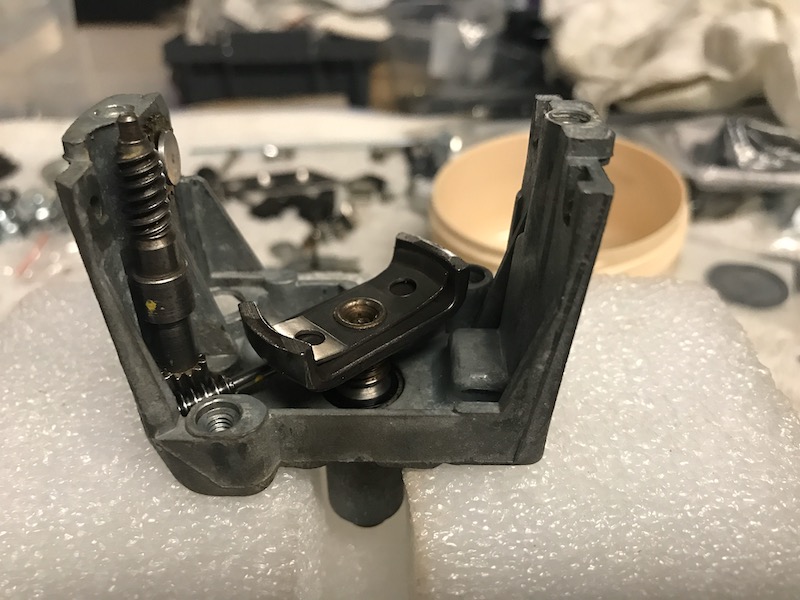
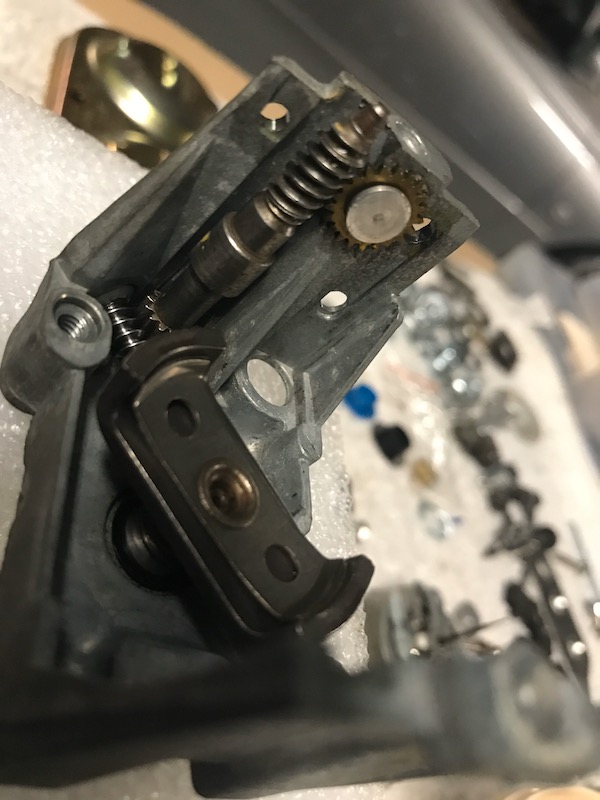
This is the first time I've looked through your incredible post and your admirable process. One note for you: 7 years ago, you posted up some photos of your carb and the way you cleaned it up and re-assembled it. If it's still in that configuration, you have a problem - it is not right. Might be a good idea to fix it when you get a chance.

Here is the photo you posted to show how you have the carb choke pulloff:


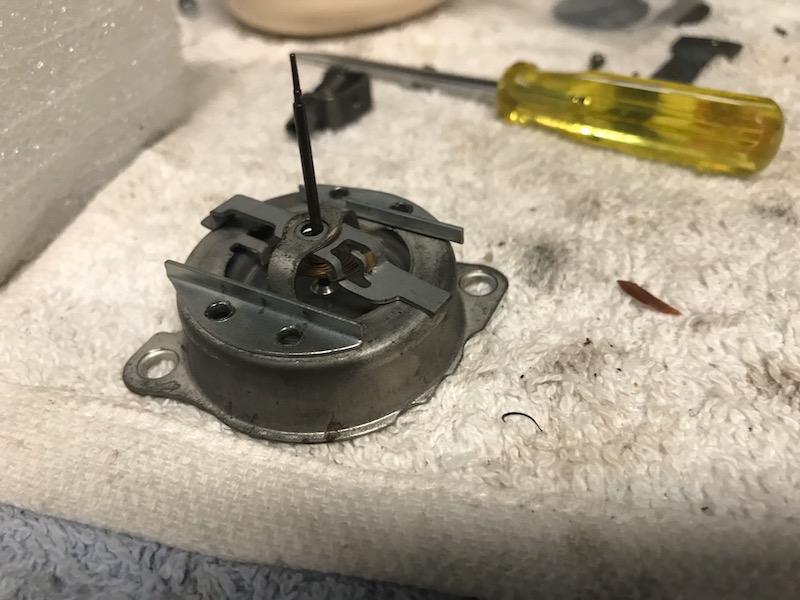
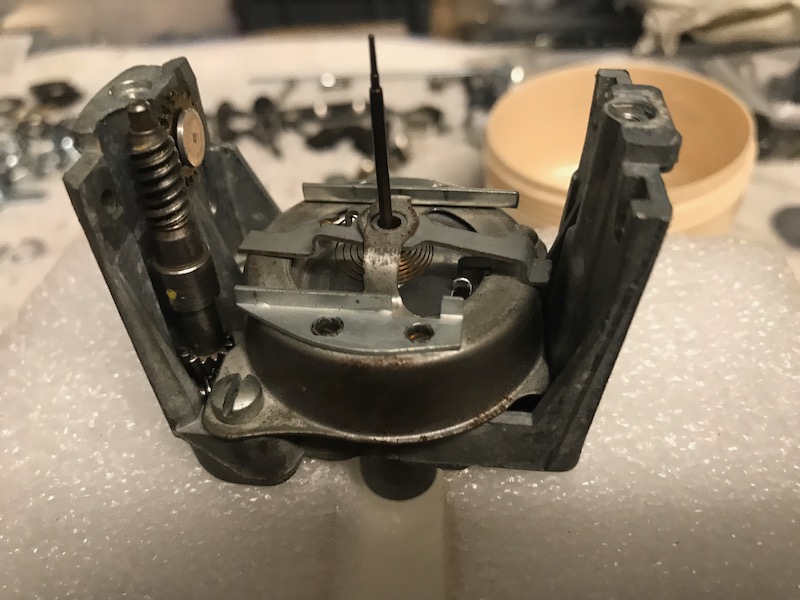
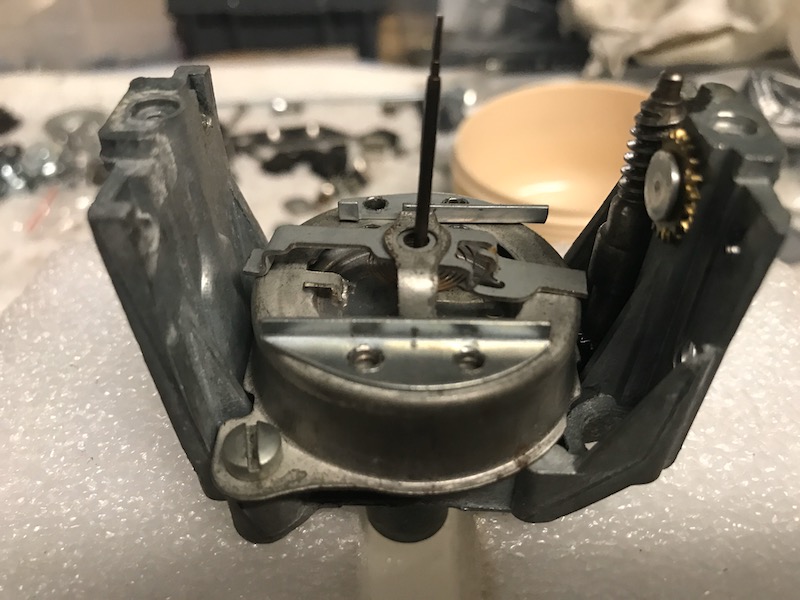
First, your carb is not a 1971 carb, or you do not have a 1971 choke system. The 1971 carb and system looks like this:


Your carb is a 1972 - 1974 vintage carb. It uses a spring wrapped around the choke pulloff arm to assist in correct choke operation. It also uses a unique secondary airvalve rod. Your carb is missing the pulloff arm spring and the second (short) pulloff connect rod. It should look like this:


Lars
Reply
Old Apr 15, 2020 | 05:44 PM
  #1640  
CraigH's Avatar
CraigH
Thread Starter
Melting Slicks
15 Year Member
Liked
Loved
Community Favorite
 
Joined: Apr 2010
Posts: 2,795
Likes: 1,196
From: Canberra Australia
2025 C3 of the Year Finalist - Modified
Default

Yes I can relate to your lack of motivation Alan. But I am getting it back.

With regard to the wiring detail BigBlock77 if you look at the AIM the routing of the harness is different between the years.

I am following the 71 model for the main harness that snakes over the gauges but I added an extra factory clip to the top bolts of the steering column support to hold the extra harnesses i have, including for power door locks, radiator fan control etc. each harness is wrapped as per factory but I wanted them held up out of the way not just hanging like factory.

This is not only neater but helps with getting the dash in and out more easily.
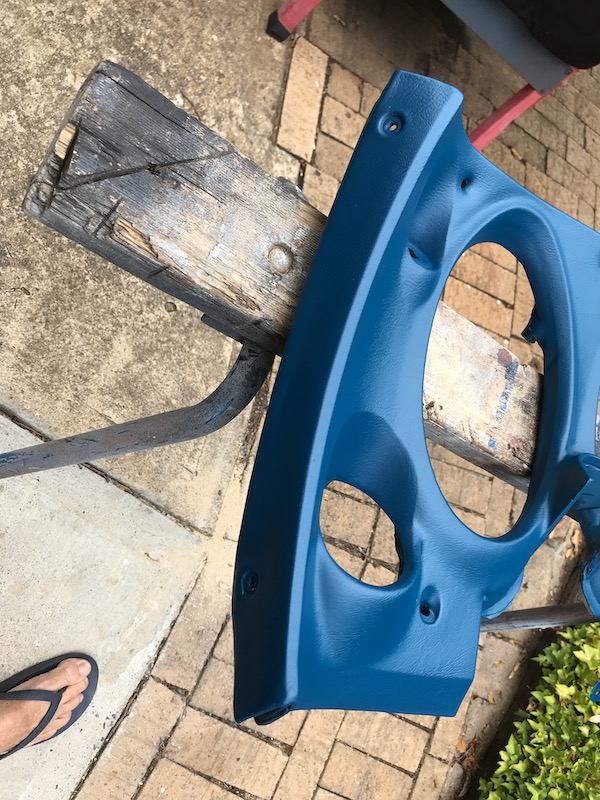
Last edited by CraigH; Apr 15, 2020 at 06:22 PM.
Reply


All times are GMT -4. The time now is 03:13 AM.

story-0
10 Ugly Corvettes That We Still Kinda Love

Slideshow: 10 ugly Corvettes that we still kinda love.

By Joe Kucinski | 2026-06-03 10:34:17


VIEW MORE
story-1
Top 10 Most Expensive Corvettes Ever Sold on Bring A Trailer

A lot of money has changed hands at the online auction house over the years.

By Brett Foote | 2026-06-03 10:21:50


VIEW MORE
story-2
10 Things Every Corvette Owner Needs (2026 Edition)

Slideshow: 10 great gifts Corvette enthusiasts actually want for Father's Day!

By Michael S. Palmer | 2026-06-03 15:43:40


VIEW MORE
story-3
8 Most "Only Corvette Owners Understand" Quirks and Problems

Slideshow: These are the quirks, annoyances, and oddly lovable problems that every Corvette owner eventually learns to live with.

By Pouria Savadkouei | 2026-05-28 09:31:39


VIEW MORE
story-4
10 Reasons the C6 Z06 is Still A Performance Benchmark After 20 Years

Slideshow: 10 reasons why the C6 Z06 is still a performance benchmark after 20 years.

By Joe Kucinski | 2026-05-27 17:20:09


VIEW MORE
story-5
How Much Horsepower Every Corvette Engine "LOST" in 1972

Slideshow: How much horsepower every Corvette engine lost in 1972.

By Joe Kucinski | 2026-05-27 16:54:53


VIEW MORE
story-6
Top 10 DOs and DON'Ts for Protecting Your Convertible Top!

Slideshow: How to Protect A Convertible Top: 10 DOs & DON'Ts

By Michael S. Palmer | 2026-04-03 00:00:00


VIEW MORE
story-7
Top 10 Most Explosive Corvettes Ever Made: Power-to-Weight Ratio Ranked!

Slideshow: The 10 most explosive Corvettes ever built based on power-to-weight ratio.

By Joe Kucinski | 2026-05-20 07:23:03


VIEW MORE
story-8
150 hp to 1,250 hp: Every Corvette Generation Compared by the Specs That Matter

Slideshow: From C1 to C8 we compare every Corvette generation by the numbers.

By Joe Kucinski | 2026-05-12 16:54:12


VIEW MORE
story-9
8 Coolest Corvette Pace Cars (and Replicas) of All Time

Slideshow: Some Corvette pace cars became collectible legends, while others perfectly captured the look and attitude of their era.

By Verdad Gallardo | 2026-05-11 09:50:51


VIEW MORE