When you click on links to various merchants on this site and make a purchase, this can result in this site earning a commission. Affiliate programs and affiliations include, but are not limited to, the eBay Partner Network.
Back in the 70’s I bought a new Sanger flat bottom drag boat.
The first time I put it on the water I noticed a growling sound during easy acceleration.
I spent the whole first season trying to find the source of it.
During the winter I was changing the phenolic strut bushings and noticed the front bushing had a weird wear pattern, so I pulled the propeller shaft and took it to the shop.
They found the shaft was not perfectly true and gave me a new one.
Once installed the growling went away.
Could you have a driveshaft or half shaft that’s out of balance?
Soooo I was experiencing some electrical issues at high speed. Starting at 80+ MPH both turn signal dash lights and the high beam dash light would come on. It turns out there were three failing grounds - well, two actually disconnected.
Looky here.
I’ll bet this goes here
This was the alternator ground wire, cut short and taped up.
Soooo I was experiencing some electrical issues at high speed. Starting at 80+ MPH both turn signal dash lights and the high beam dash light would come on. It turns out there were three failing grounds - well, two actually disconnected.
Looky here.
I’ll bet this goes here
This was the alternator ground wire, cut short and taped up.
There are other issues such as no power to the cigarette lighter and door ajar light randomly coming on. Those are lesser issues as they don’t occur on the fringes and are easier to trace down.
Another mechanical gremlin that is super annoying is an odd rattling/grinding sound that comes and goes at 60 mph. You can’t really recreate these dynamic conditions on four jack-stands. Tomorrow the car goes up and I’ll poke around there. I’m suspected exhaust.
Picked this up from Amazon. ‘been working on classic cars for over 20 years. Why didn’t I get this earlier ?
I tried it yesterday and it quickly solved a problem I was dealing with: no power to the cigarette lighter which I was convinced I wired correctly.
It immediately confirmed the ground was good. After some poking, the device informed me power was there but having a tough time getting through. It turns out there was surface corrosion inside the cigarette lighter pot.
It hooks to the battery and the tip picks up grounds and live voltages. It also tests diodes and resistance. Continuity of course. The feature I think is cool is you can send 5 amps (IIRC) of power to an accessory. Continuity is one thing, operational is another.
It hooks to the battery and the tip picks up grounds and live voltages. It also tests diodes and resistance. Continuity of course. The feature I think is cool is you can send 5 amps (IIRC) of power to an accessory. Continuity is one thing, operational is another.
That is cool.
I can see where it would be very handy.
I know, it’s not all that clear - but more visible in person.
The plan is to rebuild on Friday. In the meantime, as the new bearings are here, I can check the previous set up’s clearance and the Timken part numbers are the same.
After reading your more recent posts it made me want to give my own trailing arms a quick look.
I tried to rebuild them myself, including the wheel bearing, but I may have ran into a similar issue with it seeming to loosen up after some use. I used the set-up tool and got the end-play to 0.002, packed it all up, seemed at 0.000 end-play once full of grease, went for a drive, and now it looks loose again.
I redid the job with new bearings and seals, and the same damn thing happened.
Clearly I'm doing something wrong here.
oy
After reading your more recent posts it made me want to give my own trailing arms a quick look.
I tried to rebuild them myself, including the wheel bearing, but I may have ran into a similar issue with it seeming to loosen up after some use. I used the set-up tool and got the end-play to 0.002, packed it all up, seemed at 0.000 end-play once full of grease, went for a drive, and now it looks loose again.
I redid the job with new bearings and seals, and the same damn thing happened.
Clearly I'm doing something wrong here.
oy
Reach out to GTR1999, Gary Ramadei, he is always ready to help someone.
What do they not like? I am about to do that in my garage for some winter projects, don’t want to ruin anything!
There is a lot of weight hanging in front of the forward jacking points on the frame.
If you plan to have it up on jack stands for an extended period of time, make sure you support the front of the frame with jack stands around the area as near the motor mounts as possible or just forward of the engine.
It also doesn’t hurt to place a floor jack under the rear differential to support it’s weight and if possible place a couple of jack stands at the rear points of the frame.
Depending on what you plan on doing over the winter, you might even consider building or purchasing 12” tall blocks to place under all four tires so the car is elevated but sitting on all four tires.
This is what I did and was able to completely disassemble the entire car on these blocks.
Safe and sturdy
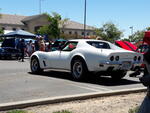
I had said that, for 2022, I just wanted to drive my 1969 Corvette. I had done so much work over the past years that I felt it was time to take a break from big projects and enjoy the fruits of my labor.
Well, I was only half successful. I took the corvette out on multiple “rallies”. Essentially social events in Belgium whereby vintage cars drive around all day honking and waving at each other as we get hopelessly lost in the countryside. In fact I will be doing one last one the weekend after next. The problem was… the nagging details prevented me from replacing and enjoying the ride. My nature and my fault I guess - I suppose something will always be bothering me. Most people are immune to this and can ignore light exhaust rattles on the crossmember, or small power steering leaks, etc. So yes… I could not fully enjoy it.
The two worst offenders were the T5 and the frame.
For the T5, don’t get me wrong – I love it to death. Yet I find myself constantly worrying about it and babying it. (REM: It is a WC that I sourced it from a Camaro.) It also has a small, but tremendously annoying, whine that comes and goes in 5th gear. I am suspecting the synchronizing ring; so nothing serious. However, I do think it is time has come to rebuild it with G-Force parts. I know, I know – I will get lots of flak for this decision. I have many reasons for sticking with the T5 that I will not go into here. I fully understand all the implications and have carefully thought it through. Suffice it to say the T5 will never see track time, sticky tires nor will it ever be abused.
For the frame, there is small amount of rust in the rear driver’s side corner of the frame. Some fool plugged the drain hole which led to inevitable consequences. A buddy had welded some fresh metal on the accessible bits, but we were not able to reach inner and upper sides. As far as I know there is no rust elsewhere. (Yeah, right!) Yet this known and controlled rust patch is enough to seriously bother me. Maybe I can gusset the frame while I am at it.
Anyway – I have decided that it is time to pull the body off… and to learn how to weld.
And this no doubt will be a big can of: “while I am at it…” I expect the car to be off the road until 2024.
I’m waiting for the body shop to get me in and hope that I can get mine back on the road by the end of this year or beginning of 2024 at the latest.
Its been fun so far and I’m sure you will enjoy it.
Take photos of everything before you remove the body/bag and tag all parts. It's an "All In" effort for sure but you'll love it !
Good luck
Coincidentally, this is exactly the method I was planning to use but with an a frame made out of tropical wood and possibly using two chain hoists. @caskiguy do you have a side shot of the above ? It would help me get an idea of the center of gravity (necessity of two hoists) and the straps harming the body potential and how you handled it.
I am definitely going to bag and tag and snap everything. I am very much looking forward to the access I’ll get. I plan to weld and Por-15 the frame. Possibly replace the brake lines. Probably lots and lots of other “while I’m at its”.
I moved a few things out of my garage. A wood chipper and a vintage motorbike.
Eyeballing and measuring, it seems I have enough space to have lift the frame off the body and have them both side by side.
The plan will be to lift the car off the body IN the garage. I can’t quite risk getting in other proprietors’ way. The frame should be easy enough to roll back out. The body will require the fabrication of a dolly.
However - we need to start with a BIIIG clean up. It needs to be much more tidy in here.
Last edited by DorianC3; Mar 28, 2023 at 08:46 AM.
Driver’s side. Looking straight up. These are the holes that I want to address. Note that the bottom was covered with filler. I do think this was from drain holes that were plugged.