


Leak Checks
Heel & Toe

Joined: Mar 2010
Posts: 17
Likes: 0
From: San Antonio Tx
Hey Guys, I'm sure this has been posted or something similar, and I've also posted in a separate thread on here, but figured I'd post here as well.
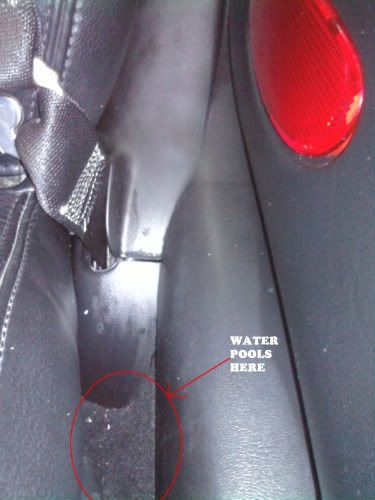
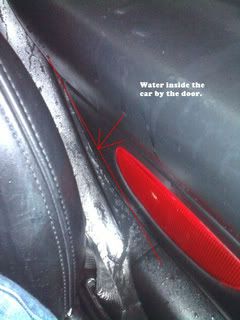
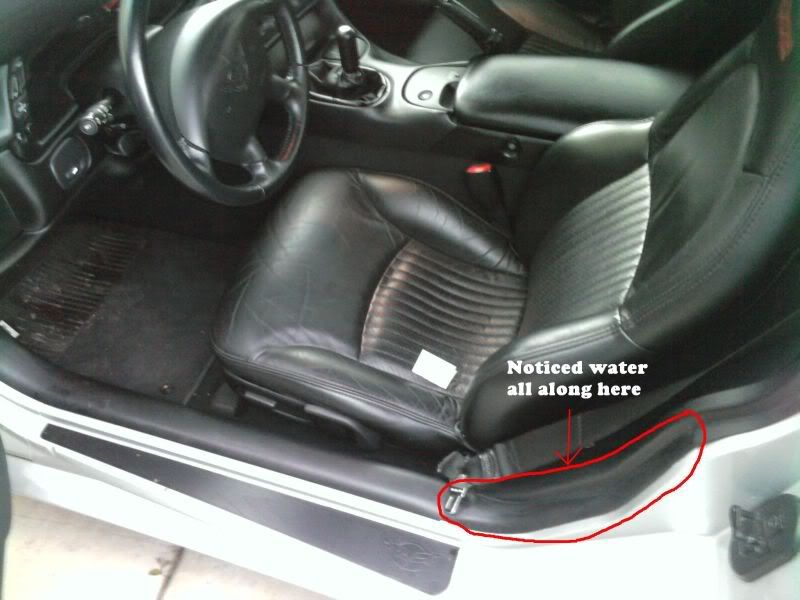
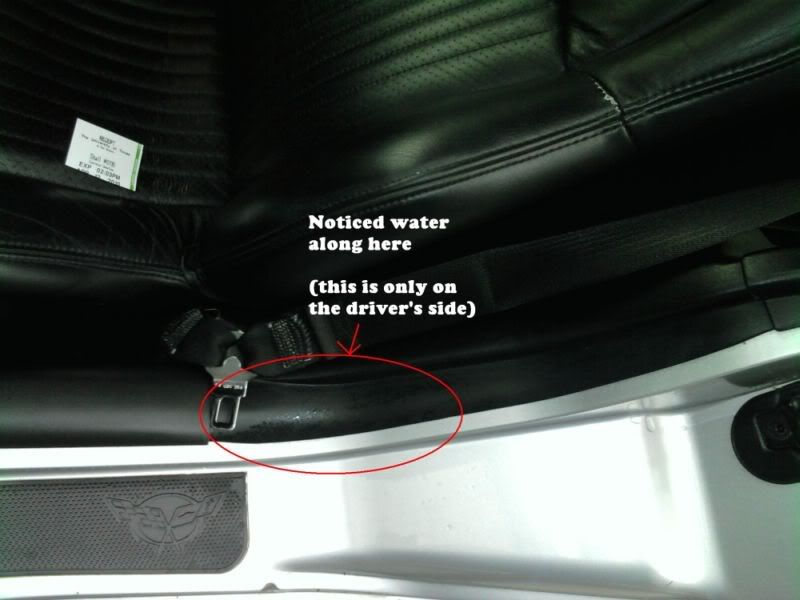
I had noticed slight dampness and leaks before and adjusted the driver's side window, but after several days of heavy rain I discovered this on both driver and passenger's sides of the car. Under the driver side floor mat was totally soaked. How do I fix this annoyance?
This is an 03, Z06 by the way
 (Ok I lied it's on both sides)
I had noticed slight dampness and leaks before and adjusted the driver's side window, but after several days of heavy rain I discovered this on both driver and passenger's sides of the car. Under the driver side floor mat was totally soaked. How do I fix this annoyance?
This is an 03, Z06 by the way
(Ok I lied it's on both sides)

Thread Starter
Tech Contributor


Joined: Dec 1999
Posts: 32,910
Likes: 2,402
From: Anthony TX
CI 6,7,8,9,11 Vet
St. Jude Donor '08
Your best bet is to remove all the plastic coverings and then get in the car and have someone wet the sar down. If theres a leak, you will be able to better see it and where its coming from. I had my passengers side GUTTED to find mine.
You may even need to remove the carpet.
BC
You may even need to remove the carpet.
BC
Heel & Toe
Joined: Mar 2010
Posts: 17
Likes: 0
From: San Antonio Tx
My free time seems limited these days. Think it's something the dealer would be able to fix easily? Or do you think the dealership would be too focused on just trying to get an insane amount of money?

Race Director


Joined: Aug 1999
Posts: 11,119
Likes: 672
From: SE Pennsylvania
St. Jude Donor '03 thru '26
Oldtimer
I can't say thanks enough Bill. You did a really excellant write up on a common Corvette problem. I even had 'Ground problems' 35 years ago with my first Corvette, a 1959 which has the same kind of a problem as you experienced. So grounds are a problem that flourish with Corvettes. Thank you agine for your excellant work. 
Jim Ward
Jim Ward
Melting Slicks


Joined: Jun 2009
Posts: 2,915
Likes: 10
From: Jesuit Bend Louisiana
Thanks Bill for this write up. My 2004 that is garage kept, never driven in the rain and pampered beyond belief was chocka-block full with dried leaves and other debris in the 3 "udders" on the driver's side. I then removed the battery and took out the "anaconda" udder and it too had some debris in it. I will make this park of my yearly PM on this car.
The AV Evapaorator udder I could not get to from the top side so I'll bring the car to one of the service pits nearby and give the guy $10 so I can inspect it.......but I'm not to worried as I do get "dripage" when I run my AC.
Thanks Again Bill Curlee, you are the man!!
The AV Evapaorator udder I could not get to from the top side so I'll bring the car to one of the service pits nearby and give the guy $10 so I can inspect it.......but I'm not to worried as I do get "dripage" when I run my AC.
Thanks Again Bill Curlee, you are the man!!

Racer
Joined: Aug 2009
Posts: 393
Likes: 1
From: Maynardville TN
Racer


Joined: Jul 2010
Posts: 404
Likes: 6
From: Amarillo Texas
1st vette, 1st road trip, passenger floorboard flooded. Been reading up on the leak fixes. Pretty sure mine is the AC drain that you can't get to. Milked the udders and on the very rear one, you know the one you think is not there, I got a 5/16 or 3/8 nut out of it. Not sure what to make of that. The rear one was the most trashy of the three.
As to the black anaconda hose I think I saw where Bill said to just unhook it and shove water through it with a garden hose and do not remove it from its position?
I think I had a finger on the AC drain 90 degree hose but not sure. I guessing putting it back on from the top would be harder than removing it. Is it really easy from under the car? Anyone?
Thought I would just raise the car up last night and then read the jacking the car up thread and now I'm almost afraid to even try and raise the car at all. If you raise the car with a hockey puck enough to get under (with jack stand support) to take the AC drain hose off for cleaning will the car break?
That got me looking at 4 post lifts. Gonna be a damn expensive drain cleaning. Worse than calling a plumber!
If someone could just weigh in on the Anaconda flush I sure would appreciate it.
Last edited by mophead; Jul 21, 2010 at 12:06 PM.
Corvette Stories
The Best of Corvette for Corvette Enthusiasts

Top 10 Most Expensive Corvettes Ever Sold on Bring A Trailer
Brett Foote
10 Things Every Corvette Owner Needs (2026 Edition)
Michael S. Palmer
8 Most "Only Corvette Owners Understand" Quirks and Problems
Pouria Savadkouei
10 Reasons the C6 Z06 is Still A Performance Benchmark After 20 Years
Joe Kucinski
How Much Horsepower Every Corvette Engine "LOST" in 1972
Joe Kucinski
Top 10 DOs and DON'Ts for Protecting Your Convertible Top!
Michael S. Palmer
Top 10 Most Explosive Corvettes Ever Made: Power-to-Weight Ratio Ranked!
Joe Kucinski
150 hp to 1,250 hp: Every Corvette Generation Compared by the Specs That Matter
Joe Kucinski
8 Coolest Corvette Pace Cars (and Replicas) of All Time
Verdad Gallardo
Thread Starter
Tech Contributor
Joined: Dec 1999
Posts: 32,910
Likes: 2,402
From: Anthony TX
CI 6,7,8,9,11 Vet
St. Jude Donor '08
1st vette, 1st road trip, passenger floorboard flooded. Been reading up on the leak fixes. Pretty sure mine is the AC drain that you can't get to. Milked the udders and on the very rear one, you know the one you think is not there, I got a 5/16 or 3/8 nut out of it. Not sure what to make of that. The rear one was the most trashy of the three.
As to the black anaconda hose I think I saw where Bill said to just unhook it and shove water through it with a garden hose and do not remove it from its position?
I think I had a finger on the AC drain 90 degree hose but not sure. I guessing putting it back on from the top would be harder than removing it. Is it really easy from under the car? Anyone?
Thought I would just raise the car up last night and then read the jacking the car up thread and now I'm almost afraid to even try and raise the car at all. If you raise the car with a hockey puck enough to get under (with jack stand support) to take the AC drain hose off for cleaning will the car break?
That got me looking at 4 post lifts. Gonna be a damn expensive drain cleaning. Worse than calling a plumber!
If someone could just weigh in on the Anaconda flush I sure would appreciate it.
As to the black anaconda hose I think I saw where Bill said to just unhook it and shove water through it with a garden hose and do not remove it from its position?
I think I had a finger on the AC drain 90 degree hose but not sure. I guessing putting it back on from the top would be harder than removing it. Is it really easy from under the car? Anyone?
Thought I would just raise the car up last night and then read the jacking the car up thread and now I'm almost afraid to even try and raise the car at all. If you raise the car with a hockey puck enough to get under (with jack stand support) to take the AC drain hose off for cleaning will the car break?
That got me looking at 4 post lifts. Gonna be a damn expensive drain cleaning. Worse than calling a plumber!
If someone could just weigh in on the Anaconda flush I sure would appreciate it.

Navigator
Joined: Aug 2008
Posts: 9
Likes: 0
i have a 2000 convertible which leaks at the rear of the floor on both sides. i have cleaned the drains in the front and do not get water in the front of the floor. any idea where this leaks?
Last edited by vett2ooo; Aug 14, 2010 at 09:31 PM. Reason: extra word

Safety Car


Joined: Jun 2000
Posts: 4,247
Likes: 0
Cruise-In II Veteran
Just another big thanks to Bill for his remarkable contributions to this thread. I just replaced my blower motor due to the backup from the AC bladder and didn't want the same thing to happen again.
Haven't been on Corvette Forum in years because my baby just sits and never gives me problems. (Only driven about 500 miles each of the last 4 years) I used to be a freak enthusiast and started modding my 00 vert as soon as it was delivered to me in April, 2000. But it sure is nice to know this site is still here. Does Tony still own this site?
Jim

Intermediate
Joined: Sep 2010
Posts: 39
Likes: 3
thanks
Thread Starter
Tech Contributor
Joined: Dec 1999
Posts: 32,910
Likes: 2,402
From: Anthony TX
CI 6,7,8,9,11 Vet
St. Jude Donor '08
The 90 deg rubber fitting pulls off the plastic fitting:
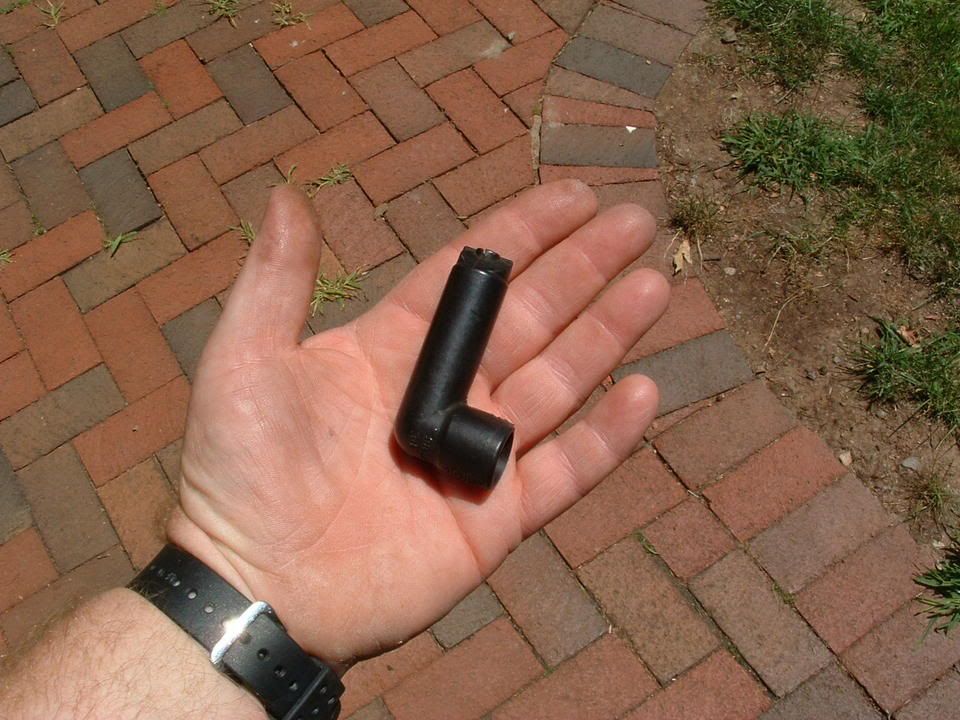
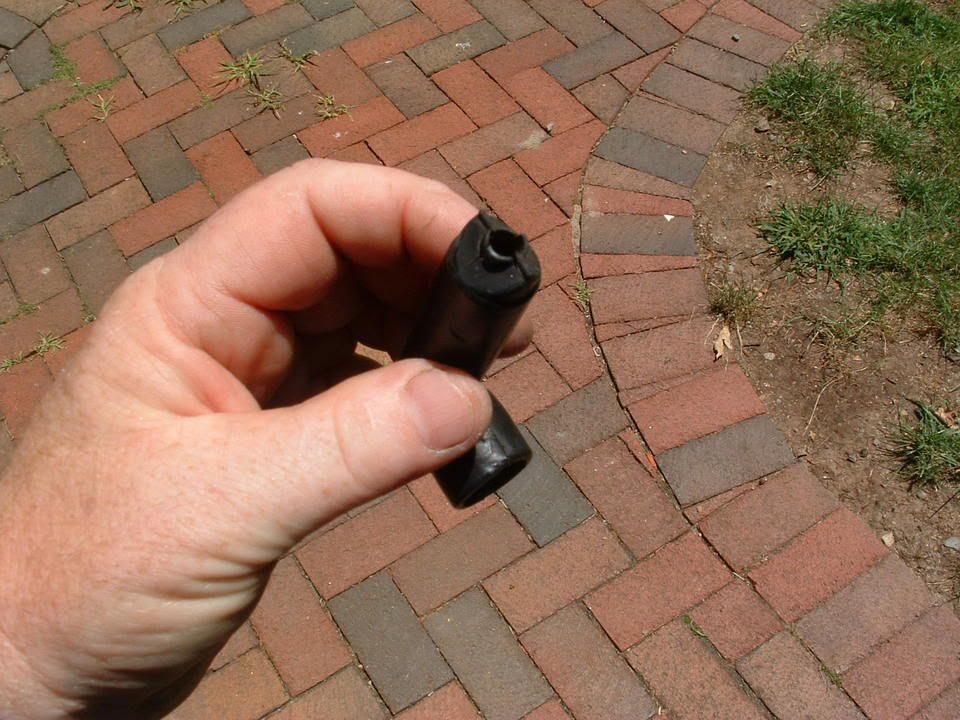
Just remove it and see if you can feed a modified long thin tie-wrap into the hole. I cut backward facing teeth into a tiewap shoved it into the drain hole and pulled out the crud that was blocking the hole. You can also use compressed air and dry to dislodge the crap BUT,,,, this just moves it back into the air box for future issues. If you use air, remove the fan motor and see if you can use your hand and retrieve the trash.slime.
BC
Intermediate
Joined: Sep 2010
Posts: 39
Likes: 3
thanks for the info Bill. i finally did get the rubber fitting off (had to push a wire bundle up out of the way) but the modified tie-wrap nor the shop vac got anything! i think its clear... so why else would water come out of the passenger side footwell vent when the AC is on? is there a bad seal somewhere maybe? this has nothing to do with the 3 drain utters i read about, does it? it's a 2000 hardtop. thanks
Thread Starter
Tech Contributor
Joined: Dec 1999
Posts: 32,910
Likes: 2,402
From: Anthony TX
CI 6,7,8,9,11 Vet
St. Jude Donor '08
The water/condensation drains out a small drain hole and thru that drain pipe. If it clogged,,,,,,,, its GOING to drain into the foot well .. No doubt about it.

Melting Slicks
Joined: Jul 2007
Posts: 2,939
Likes: 7
From: Simpsonville SC
St. Jude Donor '09-'10
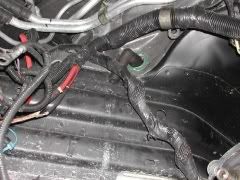
You are correct! I was getting a lot of water in my passenger compartment. I have removed the carpet a few days ago. Today, when checking for leaks, I found this hose looking exactly like your picture: DISCONNECTED! 
Intermediate
Joined: Jan 2010
Posts: 38
Likes: 0
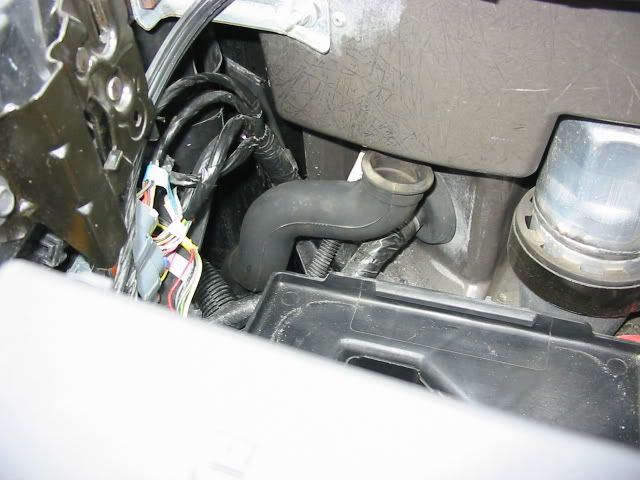
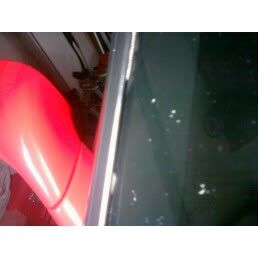
I have an 03 z06, When it rains I get water leaking by the A pillars. I haven't removed the interior and leak tested it yet, but when I was doing a visual inspection and making sure my drains were clean. I found the seal behind window moulding has like an 1.5-2" section missing. I just want to make sure that seal is sapost to keep water out and this maybe my issue. Here is a pic
Also my trunk gets some dampness in 3 storage areas. I poured water in the channel and it drained so i think the drains aren't clogged. Anybody have any experience with a trunk leak?
Also my trunk gets some dampness in 3 storage areas. I poured water in the channel and it drained so i think the drains aren't clogged. Anybody have any experience with a trunk leak?

Race Director
Joined: Dec 2002
Posts: 10,233
Likes: 21
From: Baltimore suburbs Maryland
Ok this one's got my stumped  . I know where the leak is coming from, my problem is, I haven't been able to stop it. Long story short we had a ton of rain yesterday in the Mid-Atl region, I was working on my house today went to grab something and found the carpets soaked. I pulled out both seats, propped the carpets and let it dry (goodthing the humidity was 50% today).
I've pinpointed the leak to where the rear of the targatop where it meets the B pillar. The kicker is, I've already replaced the "halo" weather stripping just a few weeks ago. It looks like it seals but when I hit it with the hose, it leaks. I then started playing with the adjustment of the top, making it tighter etc, it was wierd, sometimes I got one side to seal but then the other side will leak. Other times both sides would leak. Ugh. Any other tricks besides keep playing with the adjustment of the top?
I got sick of adjusting the receptacles (the things that look like cones that take the "*****" on the back of the targa top), putting the top back on, hosing it down, going into the car, looking only to find a leak. Wiping it back up, repeating the process. Probably spent 3 hours doing this
I should mention this was the clear top which is a relatively new one (bought from another, newer car). I have not yet tried the body colored top which I have at a different location. Soooo, any tips for a leak where the back of the targa top meets the B pillar on already replaced weather stripping? I will post pics tomorrow but hope someone will see this in the meantime...
. I know where the leak is coming from, my problem is, I haven't been able to stop it. Long story short we had a ton of rain yesterday in the Mid-Atl region, I was working on my house today went to grab something and found the carpets soaked. I pulled out both seats, propped the carpets and let it dry (goodthing the humidity was 50% today).I've pinpointed the leak to where the rear of the targatop where it meets the B pillar. The kicker is, I've already replaced the "halo" weather stripping just a few weeks ago. It looks like it seals but when I hit it with the hose, it leaks. I then started playing with the adjustment of the top, making it tighter etc, it was wierd, sometimes I got one side to seal but then the other side will leak. Other times both sides would leak. Ugh. Any other tricks besides keep playing with the adjustment of the top?
I got sick of adjusting the receptacles (the things that look like cones that take the "*****" on the back of the targa top), putting the top back on, hosing it down, going into the car, looking only to find a leak. Wiping it back up, repeating the process. Probably spent 3 hours doing this
I should mention this was the clear top which is a relatively new one (bought from another, newer car). I have not yet tried the body colored top which I have at a different location. Soooo, any tips for a leak where the back of the targa top meets the B pillar on already replaced weather stripping? I will post pics tomorrow but hope someone will see this in the meantime...
Thread Starter
Tech Contributor
Joined: Dec 1999
Posts: 32,910
Likes: 2,402
From: Anthony TX
CI 6,7,8,9,11 Vet
St. Jude Donor '08
Have you tried to adjust the top by adjusting the hold downs?? Heres the service manual procedure:
Roof Lift Off Panel Adjustment
Perform one or more of the following five adjustment procedures to properly align the roof lift off panel.
To adjust the front striker for up down roof alignment perform the following steps:
Remove the windshield upper garnish molding. Refer to Windshield Upper Garnish Molding Replacement in Interior Trim.
For major up down roof adjustment loosen the striker bolts and reposition the latch striker up or down.
For minor up or down roof adjustment loosen the striker outboard bolt and slightly loosen the inboard bolt, pivot the striker on the inboard bolt in 2 mm (0.08 in) increments up or down.
Notice
Use the correct fastener in the correct location. Replacement fasteners must be the correct part number for that application. Fasteners requiring replacement or fasteners requiring the use of thread locking compound or sealant are identified in the service procedure. Do not use paints, lubricants, or corrosion inhibitors on fasteners or fastener joint surfaces unless specified. These coatings affect fastener torque and joint clamping force and may damage the fastener. Use the correct tightening sequence and specifications when installing fasteners in order to avoid damage to parts and systems.
Tighten the striker bolts. Tighten
Tighten the roof front latch handle striker bolts to 10 N�m (89 lb in).
When the striker is properly adjusted the handle will snap closed.
Install the windshield upper garnish molding. Refer to Windshield Upper Garnish Molding Replacement in Interior Trim.
To adjust the front latch handle forward or rearward perform the following steps:
Loosen the latch handle bolts.
Position the latch handle forward or rearward. Maintain a minimum of 2 mm (0.08 in) clearance between latch handle and the latch striker to avoid squeaks and rattles.
Assure the latch handle base is parallel to the striker to provide clearance to the sunshade mirror door.
Tighten the latch handle bolts. Tighten
Tighten the roof front latch handle bolts to 13 N�m (10 lb ft).
For major rear latch adjustment adjust the rear latch striker performing the following steps:
Remove the roof lift off panel.
Remove the roof bow center interior trim panel. Refer to Trim Panel Replacement - Rear Roof Bow in Interior Trim.
Loosen the rear latch striker attaching bolts.
Adjust the position of the latch striker forward or rearward for major adjustment.
Tighten the striker attaching bolts. Tighten
Tighten the roof rear striker bolts to 10 N�m (89 lb in).
Install the roof lift off panel.
For minor rear latch adjustment, adjust the latch handle hook one turn at a time to achieve moderate pressure to the latch as follows.
Remove the roof lift off panel.
Loosen the set screw locking the latch hook.
Turn the hook in to tighten or out to loosen.
Tighten the set screw.
Install the roof panel.
To adjust the rear locator perform the following steps:
With the roof installed on the vehicle loosen the locator mounting bolts.
Reposition the locator.
Tighten the mounting bolts. Tighten
Tighten the roof rear locator to locator bracket bolts to 10 N�m (89 lb in).
--------------------------------------------------------------------------------
Document ID# 815143
2002 Chevrolet Corvette
Send me your e-mail address and I will send you the procedure and you will be able to receive the pictures..
BC