When you click on links to various merchants on this site and make a purchase, this can result in this site earning a commission. Affiliate programs and affiliations include, but are not limited to, the eBay Partner Network.
I'd have been done the exhaust bezel flanges a week or two earlier but I was busy grinding steel for quite a while. My husband replaced our two post hoist with a scissors lift hoist. It was so long it was taking up too much work space in our small garage so he used the oxy-acetylene cutting torch to take 2 feet off the front and two feet off the back. This left some rough metal that needed to be ground off. He did the back and I offered to do the front. He said "If you want to". I got a kick out of that as it wasn't that I wanted to do it (I didn't) it was that I wanted to take some of the burden off of him.
Here's one side of the rough cuts I started grinding on:
Some of those ridges were over 1/4" thick and 1/2" wide so it was pretty slow going. My husband always says body work isn't a hobby for people into instant gratification. While body work can be pretty slow going this grinding started to get to me by the time I was on the second side - soooo tedious! It took me around 10-15 hours to get both sides ground down. I'm surprised hubby didn't jump at my offer to grind down the front side
Hi P,
"My husband always says body work isn't a hobby for people into instant gratification".
Isn't this REALLY TRUE about working on old cars in general????
Often when I was in the middle of mine I'd have to come up with some small job that I knew I could finish so I'd have at least some sense of accomplishment at day's end.
Sometimes it was just stripping and repainting a bracket or stripping and plating a few fasteners�. there were ALWAYS bags of fatsteners waiting to be done!
Regards,
Alan
YEAH...I KNOW what that took to get the welds ground off and looking like that....BOY...do I know.
GOOD JOB!!!!
DUB
LOL, halfway through part of me was saying "I really shouldn't have offered to do this" but the other part of me really wanted to lighten his load a bit.
Originally Posted by Alan 71
Hi P,
"My husband always says body work isn't a hobby for people into instant gratification".
Isn't this REALLY TRUE about working on old cars in general????
Often when I was in the middle of mine I'd have to come up with some small job that I knew I could finish so I'd have at least some sense of accomplishment at day's end.
Sometimes it was just stripping and repainting a bracket or stripping and plating a few fasteners�. there were ALWAYS bags of fatsteners waiting to be done!
Regards,
Alan
Yes, that's true! That's one thing I discovered about working on cars, its easy to get discouraged by the magnitude of the job so it helps to do as you say, get a small job done so you have a sense of accomplishment that helps keep you going.
2025 C3 ('68-'73) of the Year Finalist - Unmodified
2024 C3 of the Year Finalist - Unmodified
2023 C3 of the Year Finalist - Unmodified
Originally Posted by Priya
When I was looking for a C3 in 2009 I initially started looking for a 68 or 69 but after looking at a lot of ads I decided I really disliked the early C3 interior and started looking at 78/79s instead because I really like the interior in those. I wanted a loaded C3 with oyster or silver interior, 4 speed, and L82. I found a car that met those criteria and although it had a brown exterior I disliked I decided to buy the really nice 79 below planning on painting it a colour that better appealed to me.
After a few years I decided what I would have preferred was a chrome bumper car with a late C3 interior. And after having the oyster interior I decided I'd really have rather had the silver interior. So I decided the thing to do was to either buy a 68 or 79 and put a late C3 interior in it or convert my 79 to chrome bumpers and change the interior to silver.
I did some cost estimates as you can see on page two of the thread below asking for input and it looks quite a bit cheaper to convert my 79 to chrome bumpers than to sell it, buy a project car 68 or 69 and put the late C3 interior in it. My husband had the final say as he was strongly opposed to trying to put the late C3 interior in a 68/69 due to concerns over possibly missing brackets/braces/other structures the 79 interior would need and the 68/69 not have.
I bought a pretty nice 79 and paid $12000 for it. I've got a Keisler 5 speed for it that's been waiting to go in for a couple of years now and I'm collecting parts to convert the L82 to a Vortec head/Tuned Port Injection motor. In retrospect I'd have been a lot farther along to have bought a project car needing motor, trans, interior, and paint as I'll now be redoing all those in a pretty nice car to begin with. But of course hindsight is 20-20.
I'm going to replace the steering wheel, door panels and interior door pulls with new pace car pieces. The carpet is in good shape, not quite like new, but pretty close so I'm going to leave that. I want cloth seats and had a 77 Thunderbird with really nice silver cloth seats so I bought 3 yards of sliver seat fabric for a 77 Thunderbird and will have seat covers made from that. The rest of the interior I will dye silver.
Here's the car I'll be starting with:
*** WOW *** How the heck do you keep that interior so sweet with all that mud outside ??? jeeeesh.............
You have a sharp car to start with! I believe once the rear modification is complete all the work/learning will pay off. That's my attitude (minus the PTSD set-backs).
So, I thought I had made a bit of progress but it turns out to be a bit of "two steps forward, two steps back" kind of thing. I did what I thought was the final bit of fiberglassing in of the exhaust filler panel to the tail light panel. First "V"'d out the join between the two to feather the two together:
There was some kind of white filler around the rubber license plate bumper on the exhaust filler panel. It was cracked so I took it out. I had to scratch my head on what could have happened there that required filler as the backside of the panel was okay with no breaks or anything. Hard to imagine how it could have been damaged just on the surface of the panel.
Next layered in the fiberglass mat and resin:
I wanted enough time to lay in all the resin and mat before it started to harden so I went light on the hardener. Turned out to be way too light and it took about 10 hours with a heat gun over the course of a week to get it to harden up, lol.
And here it is after sanding down
And that's where I went wrong. When I first screwed together the exhaust filler panel and the tail light panel, the area where the two joined at the license plate area didn't come together. As you can see in the picture immediately above, the cut "V" line I made is how the two panels came together originally. Unfortunately the tail light panel "tongue" part of the V was raised 1/2 inch or more above the grove part of the V on the exhaust filler panel. When I applied the first fiberglass between the two, I screwed them together and then when I came to the license plate area I used a vice grip to clamp the "V" area together not realizing at the time that this pulled the bottom of the exhaust filler panel up and out of ideal alignment with the tail light panel - d'oh! (In the picture above the "V" area at the license plate panel is a cut I made after glassing everything together to see if it would release the tension and allow the tail light panel and exhaust filler panel to relax and go back into proper alignment - it didn't work.
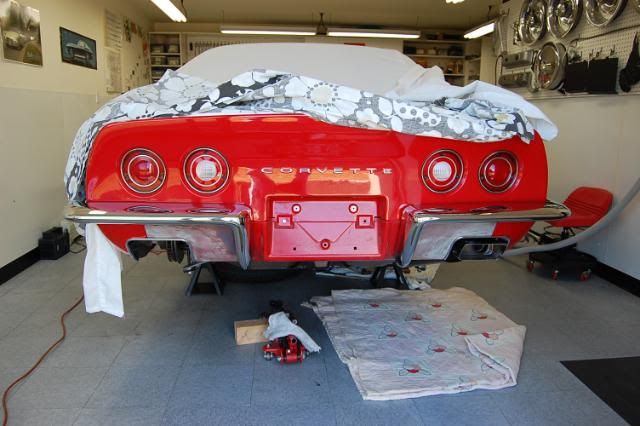
So, the result is now the license plate bezel fits tight at the top and bottom of the bezel but there is an unacceptably big gap between the bezel and the area where the tail light panel and the exhaust filler panel join:
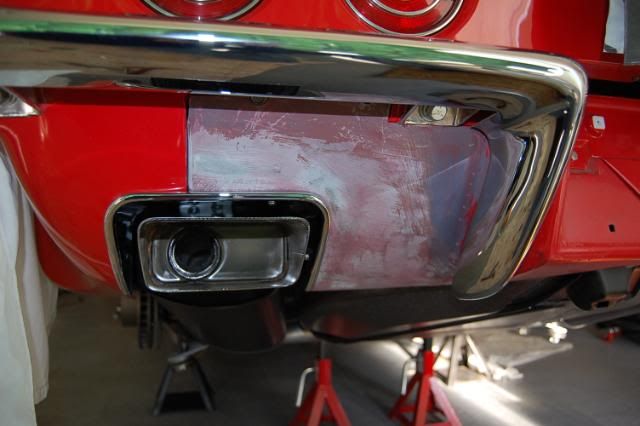
So, I'm going to have to shave down the lower part of the raised area around the license plate on the exhaust filler panel where the yellow line is above to get a better fit on the license plate bezel. I've laid in the fiberglass in the back of the exhaust filler panel to allow room to shave it down. Needless to say I'm disappointed I have to do all this extra shaping on the exhaust filler panel to better fit the license plate bezel and its going to have to be pretty precise to look all right.
Nice detail Priya.
I just got the upper and lower pieces that my friend David Howard found for me at Carlisle. My friend Bill Van Orman trucked them back to Athens for me.
I am following your project closely as I get ready to do the same thing.
Hi P,
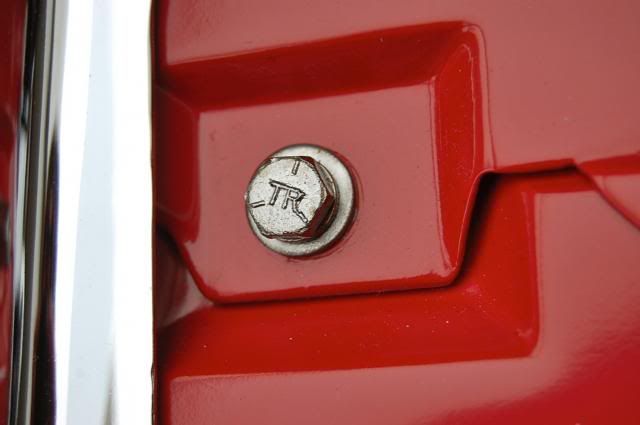
Not that it helps you but, when the valance is bolted in place you can play with the upper bolts and the 2 bolts on each side of the valance, and the 4 bolts on the bezel, which allows you to 'tip' the angle of the valance a bit to help with the fit of the license plate bezel.
I'm not sure whats's going on with the white material in the valance. I see it on other valance panels too?
Looking good!
Regards,
Alan
Here you can see a little gap created by tipping the valance.
It crossed my mind that it might push something out of place when I had to force the two panels together at the license plate area. I thought of test fitting the license plate bezel but the vice grip holding the two panels together was in the way and unfortunately I thought "ah, it'll be fine".
Hi P,
When I switched back to under car exhaust I actually put the valance bolts in place loosely and then installed the license bezel 'snuggly', and then gradual tightened the valance bolts.
About half way through I installed the exhaust bezels to make sure they fit pretty well, and then finally tightened everything completely.
With the cast parts and flexible fiberglass a good fit can be a bit tricky.
Regards,
Alan
I'm hoping you've test fit the exhaust bezels? I actually had more problems with those than the license bezel.
The 'lip' is quite narrow so the opening in the fiberglass needs to be just about perfect or you see small parts of it, especially in the corners.
Like most things I do it took several tries so the valance was on and off several times to do a little fiberglass massage and then off one last time to paint. I must have dropped the muffler 6 times before the exhaust tip was were I wanted it in the bezel. And the tip needed to be slid off the muffler to get at the bezel screws each time.